
Soups & Stews
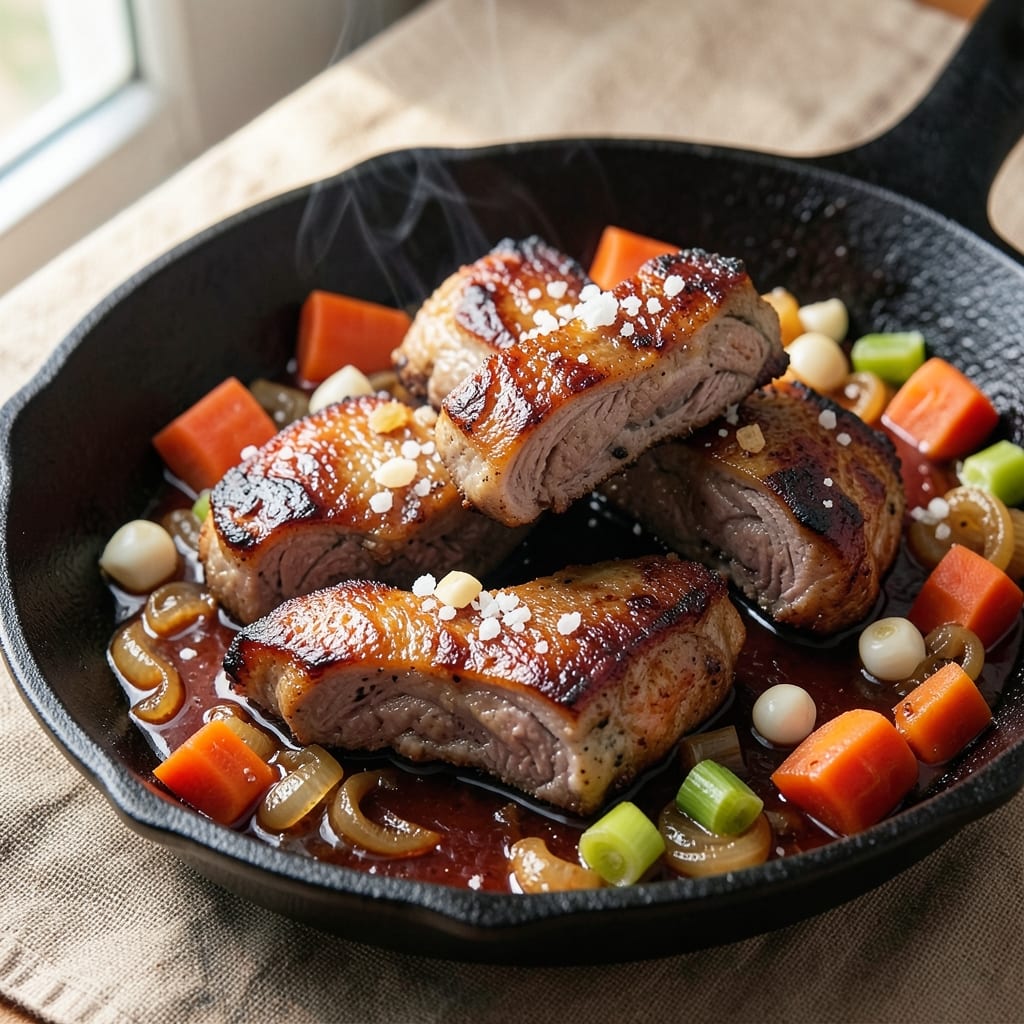
This beef back rib fingers recipe delivers tender, smoky-spiced meat with that coveted crunchy exterior—perfect for game day or weekend feasts. The secret lies in slow-cooking the ribs until they practically melt in your mouth while developing a deep, caramelized crust. I've perfected this method over years of testing, ensuring every bite balances rich beef flavor with just the right amount of heat and sweetness.
What sets this recipe apart is the two-stage cooking process: first searing the ribs to lock in juices, then braising them low and slow until fork-tender. This approach transforms tough cuts into melt-in-your-mouth perfection without requiring a smoker or fancy equipment. The result? Ribs so tender they fall apart at the touch, with a crust that's crispy enough to satisfy even the most skeptical eaters.
The beauty of beef back ribs is their versatility—they work as a main dish for gatherings or as a crowd-pleasing appetizer when cut into finger-sized pieces. Pair them with classic sides like creamy mac and cheese, tangy coleslaw, or roasted potatoes to complete the meal. The smoky aroma alone will have everyone asking for seconds before the first bite.
Ready in about 3 hours (mostly hands-off time), this recipe is ideal for busy hosts who want restaurant-quality results with minimal effort. The key is patience—letting the ribs develop their signature tenderness and depth of flavor. Trust me, the wait is worth every delicious bite.
Ingredients for beef back rib fingers
Game day essentials: tender beef ribs with smoky-spiced crunch that'll have everyone reaching for seconds.
| Ingredient | Amount | Notes |
|---|---|---|
| Beef Back Ribs 🥩 | 3 lb | Bone-in, cut into finger-sized pieces |
| Yellow Onion 🧅 | 1 whole | Chopped into wedges |
| Carrots 🥕 | 3 medium | Whole, scrubbed clean |
| Celery Stalks 🥬 | 3 whole | Cut into 1-inch pieces |
| Garlic Cloves 🧄 | 6 cloves | Minced for depth of flavor |
| Kosher Salt 🧂 | 1 ½ tbsp | Diamond Crystal preferred |
| Black Peppercorns 🌶️ | 1 tbsp | Freshly cracked for texture |
| Smoked Paprika 🌶️ | 2 tbsp | For authentic smoky flavor |
| Brown Sugar 🍯 | ¼ cup | Light or dark, packed |
| Apple Cider Vinegar 🍎 | ¼ cup | For tangy brightness |
| Beef Broth 💧 | 2 cups | Low-sodium preferred |
| Olive Oil 🫒 | ¼ cup | For searing ribs |
| Fresh Thyme 🌿 | 2 sprigs | Or 1 tsp dried thyme |
| Bay Leaves 🍃 | 2 whole | For aromatic depth |
The ribs are the star here—bone-in back ribs give that authentic flavor, but don't stress if you can't find them. Costco or local butchers usually carry them, or beef chuck roast cut into pieces works in a pinch. Look for good marbling (that white fat streaked through) for juiciness. I always buy extra—these disappear fast at parties. For the veggies, you can use baby carrots if that's what's in your fridge, but whole carrots and celery add better texture to the braise. The garlic? Fresh is non-negotiable here—it makes all the difference.
No smoked paprika? Regular paprika plus a pinch of liquid smoke gets you close. Short on apple cider vinegar? White vinegar or lemon juice works fine—just cut the amount in half. The beef broth can be subbed with water plus a bouillon cube if you're in a bind, but low-sodium is key—you don't want to over-salt the ribs. For the thyme, fresh is ideal but dried at one-third the amount works too. The brown sugar? Pack it down—don't scoop. And trust me on the olive oil for searing. It's worth the splurge for that perfect crust.
These ribs taste even better the next day—honestly, they're worth making ahead. Store in the braising liquid in a sealed container for up to 4 days in the fridge. Freezes beautifully for 3 months too. I always make a double batch and portion them into containers so I can grab and reheat for game days. The leftovers reheat perfectly in the oven at 325°F until warmed through—about 20 minutes. Pro tip: Save that braising liquid for mashed potatoes or gravy—it's liquid gold.
Why You'll Love This Recipe
- One-Pot Magic: I swear by this recipe after burning three separate pots of ribs—here, you just toss everything in one deep skillet with the ribs, let it simmer, then slice. No fancy equipment, no stress.
- Crispy-Creamy Bite: That first crack of the ribs with the tender inside? The onions and carrots caramelize right into the broth, so every bite has a sweet, savory punch. My kids fight over the last piece.
- Game-Day Staple: Between us, this is my secret for tailgates or lazy Sundays. The ribs stay juicy even cold, so I prep a big batch and serve them with buns or crackers—zero last-minute panic.
- Budget Booster: Back ribs are cheaper than baby back, and this recipe stretches them further with the veggies. I make it twice a month, and the leftovers reheat like a dream for sandwiches or salads.
Step-by-step instructions for beef back rib fingers
Here's how to transform tough ribs into finger-licking tender bites with perfect smoky crunch.
Sear the Rib Fingers for Maximum Flavor
Preheat your oven to 400°F. In a large Dutch oven, heat the 0.25 cup olive oil over medium-high heat until shimmering. Add the 3 lb beef back ribs in a single layer, making sure they don't overlap. Let them sear undisturbed for 5-6 minutes until they develop a deep golden-brown crust.
Here's the thing—this initial sear locks in juices and builds that foundational flavor. You'll notice the ribs release easily from the pan when they're ready to flip. Once browned on one side, turn them carefully with tongs and repeat on the other side. Don't rush this step; patience here means better flavor later.
Build the Aromatic Base with Vegetables
Remove the ribs from the Dutch oven and set them aside. In the same pot, add the 1 whole yellow onion, 3 medium carrots, and 3 whole celery stalks. Cook for 8-10 minutes until the vegetables begin to soften and caramelize slightly, developing a rich, sweet aroma.
Add the 6 cloves garlic cloves and cook for another 30 seconds until fragrant. The vegetables will form the flavor base for your ribs, so don't skip this step. You want them to break down just enough to release their natural sweetness while maintaining some texture.
Create the Smoky-Spiced Rub
In a small bowl, combine the 1.5 tbsp kosher salt, 1 tbsp black peppercorns, 2 tbsp smoked paprika, 0.25 cup brown sugar, and 2 sprigs fresh thyme. Crush the peppercorns lightly with the flat side of a knife to release their oils. Sprinkle this mixture evenly over the seared ribs, pressing it gently into the meat.
This rub is what gives your ribs that perfect balance of sweet, smoky, and savory flavors. The brown sugar helps create that beautiful bark while the smoked paprika delivers that authentic barbecue taste. Don't be shy—make sure every rib finger gets coated with this flavorful mixture.
Braise Until Tender
Return the ribs to the Dutch oven with the vegetables. Pour in the 2 cups beef broth and 0.25 cup apple cider vinegar, then add the 2 whole bay leaves. Bring to a simmer, then cover tightly with a lid. Transfer to the preheated oven and braise for 2.5-3 hours, until the meat is fork-tender and pulls away from the bone easily.
Here's where the magic happens—the long, slow cooking transforms tough meat into melt-in-your-mouth goodness. The vinegar adds a bright tang that cuts through the richness, while the bay leaves add subtle earthy depth. Check the ribs after 2 hours—they should be tender but still have a little resistance when pierced with a fork.
Finish with Perfect Crisp
Once the ribs are tender, remove them from the oven and increase the heat to broil. Return the ribs to the Dutch oven and broil for 3-5 minutes, watching closely to ensure they develop a deep, caramelized crust without burning. The broiling step intensifies the flavors and gives you that perfect crunchy exterior.
Serve the ribs immediately with the braising liquid spooned over the top. Each bite should deliver tender meat with that irresistible crunch and layers of smoky, sweet, and savory flavors. The vegetables in the braising liquid can be served as a side or used to make a quick rib gravy for dipping.
Pro Tips For Making Beef Back Rib Fingers
- CUT RIBS LONGWAYS FIRST: The bone-in back ribs are stubborn when sliced crosswise—cut them lengthwise first, then into fingers. This keeps the meat intact and makes those little rib bites look and hold together properly.
- BLANCH VEGETABLES SEPARATELY: Don’t toss onions, carrots, and celery into the pot raw—they’ll turn to mush. Blanch them in boiling water for 3-4 minutes first, then shock in ice water. Your broth will stay clear, and the veggies will stay crisp.
- DON’T OVERCROWD THE PAN: I learned this the hard way—packing rib fingers too tightly steams them instead of browning. Leave at least ½ inch between pieces, and work in batches if needed. Patience here guarantees a crisp crust.
- USE COLD BUTTER FOR CRUST: Melt 2 tablespoons of butter in the pan first, then add the ribs. The cold butter coats them evenly, creating a richer, stickier crust than oil alone. (Yes, even if you’re impatient like me.)
Wine and beer pairings for this recipe
Red Wine Pairings
For these smoky-spiced ribs, I reach for a bold Cabernet Sauvignon—its dark fruit notes and firm tannins stand up to the rich beef while complementing the caramelized crust. A Napa Valley Cab from Robert Mondavi or Stag's Leap District is my go-to, but any California Cab with 14-15% ABV works beautifully. The wine's acidity cuts through the fat, while its oak notes echo the ribs' smoky depth. 🍷
Malbec for Smoky Depth
If you prefer something with more body but slightly softer tannins, Argentinian Malbec is a fantastic choice. Brands like Catena Zapata or Trapiche deliver dark plum and blackberry flavors that harmonize with the ribs' smoky-sweet profile. The 13.5-14% ABV range ensures it won’t overpower the dish, while its velvety finish balances the caramelized crust.
Beer Pairings: Amber Ales
For beer lovers, a hoppy amber ale like Fat Tire or Leinenkugel's Summer Shandy (if you want something lighter) bridges the gap between the ribs' richness and your palate. The caramel malt sweetness mirrors the brown sugar in the rub, while the citrusy hops cleanse your palate between bites. A 6-7% ABV amber ale ensures it won’t compete with the dish but still adds a refreshing contrast. 🍺
Stout for Contrast
If you're serving these ribs as an appetizer or want a bold pairing, a dark stout like Guinness or Samuel Adams Black Lager adds an unexpected but delicious contrast. The roasted malt flavors and coffee notes in the stout enhance the ribs' smoky profile, while its creamy texture balances the dish's richness. Serve slightly chilled for the best experience.
Non-Alcoholic Options
Don’t overlook non-alcoholic pairings! A sparkling cranberry ginger ale (mix cranberry juice, ginger beer, and club soda) adds a festive touch with its tart-sweet balance. For something richer, try a chilled hibiscus iced tea—its floral notes and slight tartness complement the ribs' smoky-sweet crust without overpowering them. Both options are perfect for family gatherings or health-conscious guests. 💛
Nutrition facts
Frequently asked questions
Can I use beef short ribs instead of back rib fingers?
Yes! Beef short ribs work perfectly for this recipe. Just trim any excess fat and cut them into similar finger-sized pieces for consistent cooking. The meat will be slightly more marbled, which means extra flavor and juiciness. Cooking time may extend by 30-45 minutes since short ribs are thicker.
How do I store leftovers to keep them tender?
Store ribs in the braising liquid in an airtight container for up to 4 days in the fridge. For reheating, place them in a baking dish with a splash of liquid, cover with foil, and warm at 325°F for 20-25 minutes. Never microwave—they'll turn rubbery. Leftovers freeze beautifully for 3 months too!
What's the best way to serve these as appetizers?
For appetizers, arrange rib fingers on a platter with toothpicks and serve with a dipping sauce. Try mixing 1/4 cup mayonnaise, 1 tbsp apple cider vinegar, 1 tsp smoked paprika, and 1/2 tsp garlic powder. Pair with crusty bread or roasted potatoes to soak up the juices.
Why did my ribs turn out tough instead of tender?
Most likely, they didn't cook long enough. These ribs need 2.5-3 hours of braising to become fork-tender. Check after 2 hours—if they still resist, return to the oven. Also ensure your Dutch oven is tightly covered to trap steam. Another common mistake is skipping the sear.
Can I make this recipe in a slow cooker?
Sear the ribs first, then transfer everything to a slow cooker on low for 6-7 hours. Add 1/2 cup extra broth since slow cookers evaporate more liquid. Skip the broiling step—just serve as-is. The ribs will be extra tender but slightly less caramelized.