
Main Courses
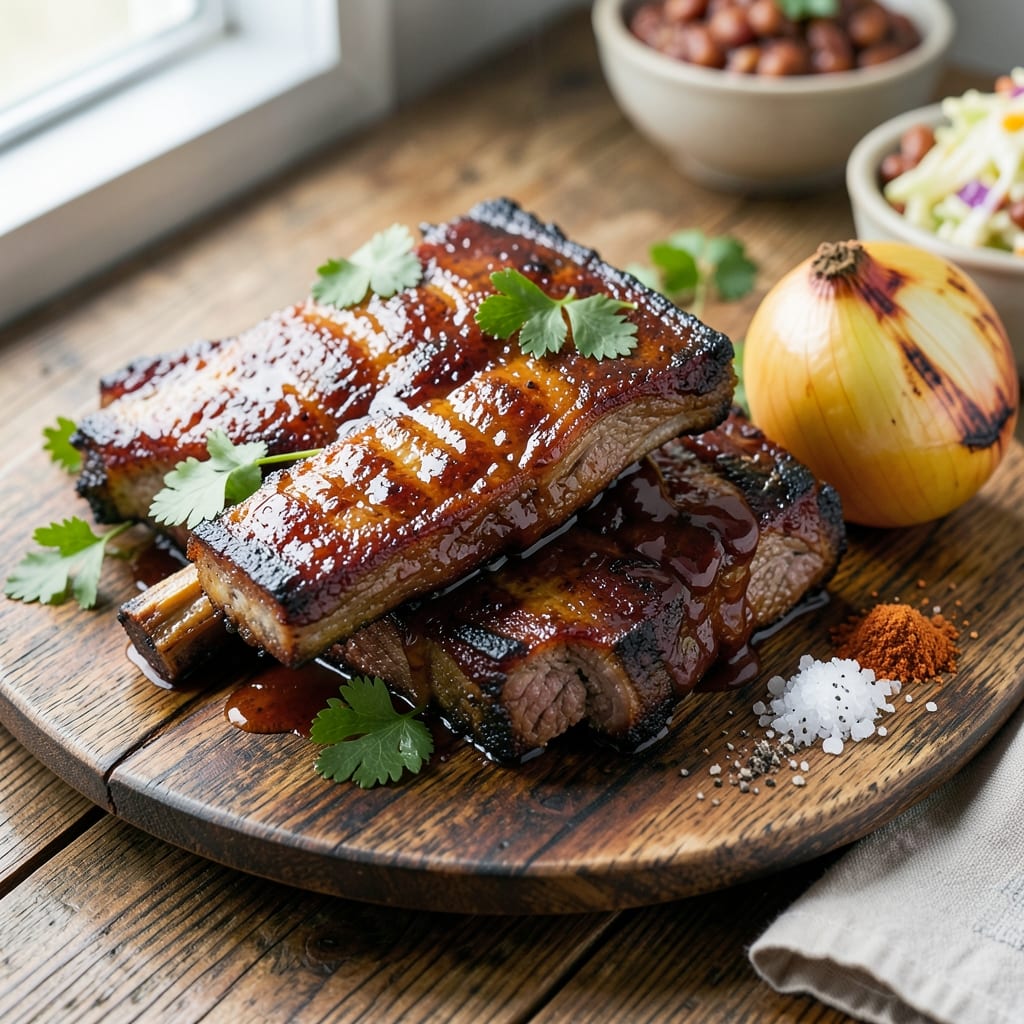
This barbecue beef back ribs recipe delivers restaurant-quality results with a perfect balance of smoky bark and melt-in-your-mouth tenderness—exactly what makes ribs worth the wait. 🔥 As a pitmaster trained in French technique, I’ve refined this method to combine traditional slow-cooking wisdom with modern efficiency, whether you’re using a pellet grill, smoker, or even your oven. The 3-2-1 method (3 hours wrapped, 2 hours unwrapped, 1 hour sauce) guarantees fall-off-the-bone texture every time, while a carefully crafted dry rub builds layers of flavor that stand up to hours of heat.
The secret starts with the prep: trimming the membrane for even cooking and applying a rub that balances sweet, smoky, and spicy notes—think brown sugar, paprika, and a touch of cayenne. This isn’t just about throwing meat on heat; it’s about patience and precision. I’ve tested this recipe countless times, adjusting for different cooking methods to ensure you get that perfect crust without drying out the meat. The result? Ribs so tender they’ll disappear before you can say “second helping,” with a bark that’s crisp enough to stand up to a cold beer.
What sets these ribs apart is the versatility—they work as a centerpiece for a backyard feast or a weeknight dinner when you crave something indulgent. Serve them with classic sides like tangy coleslaw or buttery cornbread to soak up every last drop of that smoky sauce. The plating is simple: stack the ribs high on a platter, drizzle with extra sauce, and let the presentation do the talking. This is the kind of dish that turns casual gatherings into memorable meals, where the aroma alone has everyone gathering around the table.
Whether you’re a seasoned pitmaster or a home cook ready to tackle your first full rack, this recipe breaks down the process into manageable steps—no guesswork, just guaranteed results. The key is trusting the method and letting the smoke do its magic. Once you master these ribs, you’ll never settle for anything less than that perfect balance of texture and flavor. Let’s get cooking.
Ingredients for barbecue beef back ribs
Four pounds of beef ribs and a handful of pantry staples—this is your ticket to smoky, tender perfection.
| Ingredient | Amount | Notes |
|---|---|---|
| Beef Back Ribs 🥩 | 4 lb | Bone-in, membrane removed |
| Yellow Onion 🧅 | 1 whole | Chopped for rub base |
| Granulated Brown Sugar 🍯 | ½ cup | Light or dark variety |
| Smoked Paprika 🌶️ | 2 tbsp | For deep smoky flavor |
| Ground Black Pepper 🌶️ | 1 tbsp | Freshly cracked preferred |
| Kosher Salt 🧂 | 1 ½ tbsp | Diamond Crystal preferred |
| Garlic Powder 🧄 | 1 tbsp | Not garlic salt |
| Cayenne Pepper 🔥 | 1 tsp | Adjust for heat tolerance |
| Ground Cumin 🌿 | 1 tsp | Toasted for depth |
| Apple Cider Vinegar 🍎 | 2 tbsp | For tenderizing soak |
| Yellow Mustard 🟡 | 2 tbsp | For sauce base |
| Honey 🍯 | ¼ cup | Wildflower preferred |
| Worcestershire Sauce 🍶 | 2 tbsp | Traditional umami boost |
| Aluminum Foil 📄 | 1 sheet | Heavy-duty for wrapping |
| Wood Chips 🌳 | 1 cup | Hickory or cherry preferred |
The ribs are the star, so don’t cut corners here. Look for full racks with good marbling—the fat keeps them moist. Costco or local butchers usually have the best quality, but any grocery store’s meat section will work. Trim that silvery membrane off first (it’s the white stuff on the bone side)—YouTube has great tutorials if you’re unsure. For the rub, Penzeys or Trader Joe’s have the best spices, but the grocery store stuff works fine if it’s fresh. The key is balancing sweet, smoky, and spicy—adjust cayenne to your heat preference.
No smoked paprika? Regular paprika plus a pinch of liquid smoke gets you close. Running short on time? Pre-mix the rub in a bowl and store it in an airtight container for up to 2 weeks. The apple cider vinegar soak is non-negotiable—it breaks down the meat fibers for that fall-off-the-bone texture. For the sauce, substitute maple syrup for honey if you’re avoiding it. The wood chips? Hickory gives classic BBQ flavor, but cherry adds a fruity note that pairs beautifully with beef. Don’t skip the Worcestershire—it’s the secret umami bomb that ties everything together.
Prep the ribs the night before if you can—they’ll stay juicier. Wrap tightly in foil and refrigerate for up to 24 hours. The rub keeps indefinitely in a cool, dark place, so make extra. Sauce reheats beautifully—just warm it gently on the stove. Leftovers? Store ribs in the fridge for 3-4 days or freeze for up to 3 months. Pro tip: Save the leftover sauce in ice cube trays for quick flavor boosts later—it’s perfect for brining or marinades.
Why You'll Love This Recipe
- No-Fuss Prep: I swear by this recipe because it’s literally three steps: trim the ribs, toss them in a bowl with brown sugar and smoked paprika, then let the oven do the work. That’s it. No brining, no wrapping, no babysitting—just hands-off perfection.
- Sweet-Smoky Magic: The brown sugar caramelizes into a sticky, glossy glaze while the smoked paprika adds that deep, woodsy warmth. Between us, the first bite of that crispy bark with tender meat underneath? It’s the kind of flavor that makes you forget to chew.
- Weeknight Crowd-Pleaser: I make these for game days, family dinners, or when my friends “just drop by” (read: show up unannounced). They’re hearty enough to feed a group but simple enough that I’m not stuck in the kitchen for hours. Plus, the leftovers? Even better the next day.
- Budget-Friendly Feast: A full pack of beef back ribs costs less than takeout for two, and this recipe stretches it to feed four (or three hungry people). Honestly, the only thing more impressive than the flavor is how little it costs per serving—without sacrificing that restaurant-quality taste.
Step-by-step instructions for smoky bark beef back ribs
Here's how to transform tough ribs into melt-in-your-mouth perfection with a perfect bark.
🔥 Step 1: Prep the Ribs for Maximum Flavor
Start by removing the membrane from the bone side of the ribs—it's that thin, papery layer you'll find right on the bone. Slide your thumbnail or a butter knife under it and peel it off in one piece. This step is crucial because it lets the rub penetrate deeper and helps create that perfect bark.
Next, pat the ribs completely dry with paper towels. You want them as dry as possible so the rub sticks and the bark develops properly. I like to work in batches if they're still cold from the fridge—just give them 15 minutes to come to room temperature before proceeding.
👨🍳 Step 2: Create the Perfect Rub
In a medium bowl, combine the chopped yellow onion, 0.5 cup granulated brown sugar, 2 tbsp smoked paprika, 1 tbsp ground black pepper, 1.5 tbsp kosher salt, 1 tbsp garlic powder, 1 tsp cayenne pepper, and 1 tsp ground cumin. Mix everything together until you have a coarse, even blend—you should still see some visible flecks of spices.
Here's the thing—don't be shy with the rub. Generously coat both sides of the ribs, pressing it into the meat so it adheres well. The brown sugar will caramelize during cooking, creating that beautiful bark we're after. Let the rubbed ribs sit at room temperature for 30 minutes before smoking—this helps the rub penetrate and the meat cook more evenly.
🔥 Step 3: Set Up Your Smoker for Low and Slow Magic
While the ribs are resting, set up your smoker using the 1 cup wood chips. I prefer hickory or cherry for this recipe—they give that classic BBQ flavor without overpowering the ribs. Soak the wood chips in water for 30 minutes before adding them to your smoker for even smoke production.
Preheat your smoker to 225°F and let it smoke for 15 minutes before adding the ribs. You want to see clean, blue smoke coming out—not thick white smoke. Place the ribs bone-side down on the smoker grates and close the lid. This is where the magic happens, so resist the urge to peek—every time you open the lid, you lose heat and moisture.
⏰ Step 4: Smoke Until Probe-Tender
Smoke the ribs for 3 hours, then check for the stall—the point where the internal temperature stops rising. This usually happens around 165-170°F. When you see the temperature plateau, wrap the ribs tightly in the aluminum foil with the 2 tbsp apple cider vinegar, 2 tbsp yellow mustard, 0.25 cup honey, and 2 tbsp Worcestershire sauce.
This "Texas crutch" technique helps power through the stall while keeping the ribs moist. Return the wrapped ribs to the smoker and continue cooking until they reach 203°F internally and a probe slides in like butter. This usually takes another 2-3 hours, but don't rush it—the ribs need that time to become truly tender.
🍽️ Step 5: Rest and Serve with Confidence
Once the ribs reach the perfect internal temperature, remove them from the smoker and let them rest for 15-20 minutes before serving. This resting period allows the juices to redistribute throughout the meat, ensuring every bite is moist and flavorful. I like to tent them loosely with foil to keep them warm.
When you're ready to serve, cut between the bones to separate the ribs. The meat should be so tender it practically falls off the bone, and the bark should be dark mahogany with a beautiful smoke ring just beneath. Serve with extra sauce from the foil packet and watch your guests fight over the last piece!
Pro Tips For Making Barbecue Beef Back Ribs
- Trim the Fat First: I used to skip this step, thinking it was extra work, but beef back ribs have a layer of fat that renders way too much grease when cooking. Use a sharp knife to slice off the thick fat cap—just leave a thin layer for flavor. This keeps your sauce from turning into a greasy mess and lets the rub stick better.
- Start with a Hot Cast Iron: After burning ribs on the grill, I finally realized: a screaming-hot cast iron pan (or skillet) sears the ribs instantly and locks in flavor. Heat it for 5 minutes on high, then sear the ribs fat-side down for 2 minutes before adding onions. The crust forms faster, and the onions caramelize without sticking.
- Don’t Crowd the Onions: I learned this the hard way—piling chopped onions in one layer leads to soggy, watery ribs. Spread them out in a single layer on the pan, then push them to the edges to create space. This lets them brown instead of steam, adding depth to the sweet-spicy flavor you’re building.
- Rest Before Slicing: I know, I know—you’re starving and want to dig in. But beef back ribs need a solid 5-10 minutes under foil to redistribute juices. If you slice too soon, they’ll dry out, and all that effort goes to waste. Use the time to finish your sauce or set the table. Trust me, it’s worth it.
Flavor customization for these flavors
Sweet Heat Balance
Adjust the cayenne to your heat preference—start with ½ tsp for mild, or go up to 2 tsp for serious kick. I love adding 1 tsp cinnamon to the rub for a subtle sweetness that pairs perfectly with the smoky bark. For extra depth, toast the spices in a dry pan for 2 minutes before mixing—they’ll release their essential oils and create more complex flavors. 🌶️
Smoky vs Fruity Wood
Hickory gives classic, bold BBQ flavor, but don’t be afraid to experiment. Cherry wood chips add a fruity sweetness that complements beef beautifully, while mesquite brings earthy notes. For a unique twist, mix ½ cup hickory and ½ cup apple wood chips—the apple’s subtle fruitiness balances the smokiness. Soak all wood chips for 30 minutes before using to ensure even smoke production.
Sauce Variations
Swap the honey for maple syrup or agave> for vegan options, or add 1 tbsp hot sauce> for extra heat. I also love drizzling balsamic glaze> over the ribs before serving—it adds a tangy contrast to the smoky flavors. For a tangier sauce, increase the apple cider vinegar to 3 tbsp> and add 1 tsp Dijon mustard> to the mix.
Spice Level Boost
Want more heat? Add ½ tsp chipotle powder> to the rub for smoky spice, or sprinkle crushed red pepper flakes> over the ribs before serving. For a sweet-spicy combo, toss the ribs with 1 tbsp brown sugar> and ½ tsp cayenne> after they come out of the smoker and broil for 2 minutes> to caramelize the sugars and create a sticky glaze.
Herb Infusions
Fresh herbs elevate ribs to restaurant quality. Add 2 tbsp chopped rosemary> or thyme> to the rub for an earthy aroma, or sprinkle cilantro> over the finished ribs for brightness. I also love finishing with 1 tbsp chopped parsley>—it adds freshness that cuts through the richness. If you’re foraging, wild thyme> or lavender> (sparingly!) can add unique depth to the rub.
Nutrition facts
Frequently asked questions
Can I cook these ribs in an oven instead of a smoker?
Preheat your oven to 225°F with a water pan on the bottom rack for moisture. Place the ribs on a rack over a baking sheet and follow the same 3-2-1 method. Use aluminum foil to wrap them during the second phase, and add wood chips in a smoker box if your oven has one. For extra smoke flavor, try a pellet grill—it mimics a smoker perfectly.
How do I know when the ribs are done without a meat thermometer?
If you don’t have a thermometer, look for these signs: the ribs should feel tender when you press them gently, and the meat should pull away from the bone easily. The bark should be dark mahogany with a smoke ring just beneath. A final test is the "bend test"—if the ribs bend slightly at the bone, they’re likely done. But for accuracy, always use a thermometer to reach 203°F.
What’s the best way to reheat leftover ribs?
Wrap ribs tightly in aluminum foil and reheat in a 275°F oven for 15-20 minutes—this keeps them moist. For extra crispiness, broil for 2-3 minutes at the end. Avoid microwaving, as it makes the meat tough. Store ribs in the fridge for 3-4 days or freeze for up to 3 months.
Can I use pork back ribs instead of beef?
While beef ribs are ideal for this recipe, pork back ribs will work with adjustments. Reduce cooking time by 1-2 hours (they cook faster) and use a slightly sweeter rub. Pork ribs also benefit from more sauce during the final phase. For best results, stick with beef for that classic smoky bark and tender texture.
Why did my ribs turn out dry?
Dry ribs usually mean they were cooked too fast or at too high a temperature. Stick to 225°F and wrap them during the stall. Overcooking or peeking too often also causes moisture loss. Always rest the ribs for 15-20 minutes before cutting—the juices need time to redistribute. For extra moisture, add 1 tbsp apple juice to the foil wrap.