
Soups & Stews
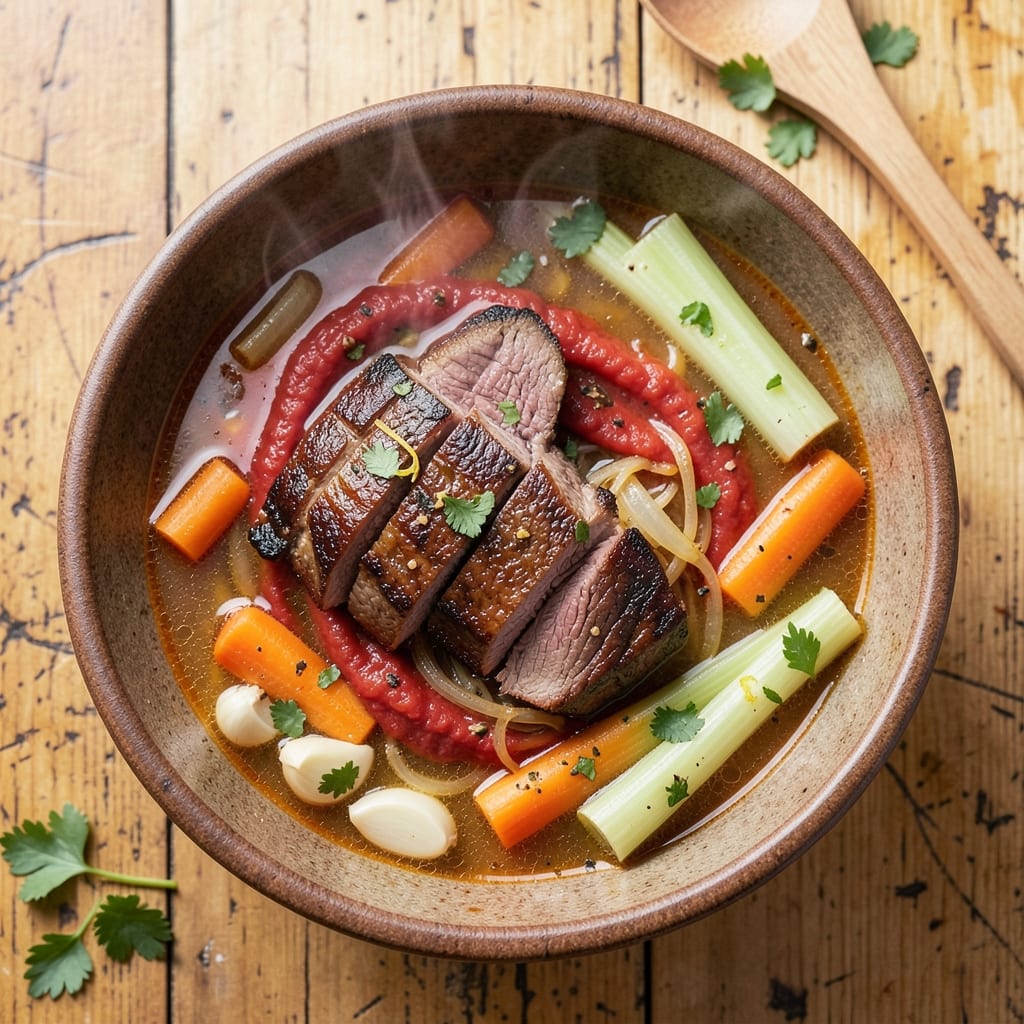
This basic beef soup recipe transforms simple ingredients into a comforting bowl of homestyle warmth that simmers with deep, savory richness. The secret lies in slow cooking—letting beef and vegetables tenderize while flavors meld into a fragrant, hearty broth that tastes like home. I’ve perfected this version over years of testing, ensuring every spoonful delivers that perfect balance of meaty depth and vegetable sweetness without unnecessary complexity.
The beauty of this soup is its foolproof simplicity: just a few quality ingredients (tender beef, root vegetables, and aromatic herbs) simmered together for hours until the broth becomes velvety and the beef falls apart. No fancy techniques required—just patience and the right seasoning. The result is a restaurant-quality bowl that’s easy to customize with noodles, crusty bread, or fresh herbs, depending on your preference.
What makes this recipe truly special is its versatility—it’s equally satisfying as a light lunch or a filling dinner, and leftovers only improve overnight as flavors deepen. The broth is rich enough to stand alone but balanced enough to let the natural tastes of the beef and vegetables shine through. Each bite offers a perfect harmony of textures: tender meat, soft vegetables, and a smooth, aromatic broth that warms you from the inside out.
Ready in about 2 hours (mostly hands-off simmering time), this soup is perfect for busy weeknights or cozy weekends. The key is low-and-slow cooking, which transforms tougher cuts of beef into melt-in-your-mouth tenderness while infusing the broth with layers of flavor. Whether you’re feeding a family or meal prepping for the week, this recipe delivers comfort in every bowl.
Ingredients for basic beef soup
Six simple ingredients transform into restaurant-quality beef soup with homestyle warmth.
| Ingredient | Amount | Notes |
|---|---|---|
| Chuck Roast 🥩 | 2 lb | Tough cut for maximum tenderness |
| Yellow Onions 🧅 | 2 whole | Medium size, roughly chopped |
| Carrots 🥕 | 4 medium | Peeled, cut into 1-inch chunks |
| Celery Stalks 🧆 | 4 whole | Trimmed, cut into 1-inch pieces |
| Garlic Cloves 🧄 | 6 cloves | Peeled, smashed for deep flavor |
| Tomato Paste 🍅 | 2 tbsp | For rich, concentrated flavor |
| Beef Broth 💧 | 6 cups | Low-sodium preferred for balance |
| Red Wine 🍷 | 1 cup | Dry variety like Cabernet |
| Fresh Thyme 🌿 | 2 sprigs | Or 1 tsp dried thyme |
| Fresh Bay Leaves 🍃 | 2 whole | For aromatic depth |
| Olive Oil 🫒 | 2 tbsp | Extra-virgin for richness |
| Salt 🧂 | 1 ½ tsp | Diamond Crystal preferred |
| Black Peppercorns 🌶️ | 1 tsp | Freshly cracked for texture |
| Parsley 🌿 | ¼ cup | Fresh, chopped for garnish |
The chuck roast is non-negotiable—its fat and connective tissue create that melt-in-your-mouth tenderness and rich broth. Costco sells it pre-cut for convenience, but if buying whole, look for good marbling. The Kroger brand chuck roast is my go-to when I'm not buying bulk. Carrots and celery should be fresh and crisp—organic from the farmers market has the best flavor. For the tomato paste, Muir Glen is my favorite—it's concentrated and never bitter. The red wine adds depth without overpowering; Cabernet Sauvignon works perfectly.
No red wine? Beef broth with a splash of balsamic vinegar works in a pinch. Fresh thyme is ideal, but dried works at one-third the amount—just make sure it's labeled as culinary thyme, not ornamental. The tomato paste can be substituted with 1 cup crushed tomatoes if you prefer, though it'll be less concentrated. For the carrots, baby carrots work fine, but whole carrots give you more control over size. The beef broth should be low-sodium—Swanson or Pacific Foods are reliable brands that won't overpower your seasoning.
This soup gets better with time—3-4 days in the fridge is ideal for maximum flavor development. Portion into containers for easy lunches, and freeze portions for up to 3 months. The broth reduces as it cools, so add a splash of water or broth when reheating. Fresh parsley should be added just before serving to keep its bright color and flavor. For extra richness, stir in a pat of butter or a drizzle of olive oil before serving.
Why You'll Love This Recipe
- One-Pot Magic: I swear by this—just dump everything in a pot, let it simmer, and walk away. No fancy techniques, no last-minute grocery runs. The chuck roast practically melts into tender chunks while you’re still chopping the onions (and yes, I’ve burned the toast while waiting).
- Garlic Bomb Depth: That first bite? The garlic cloves and onions caramelize into something rich and savory, while the carrots and celery add just enough sweetness to balance it. It’s the kind of flavor that makes you want to take a third bowl, even when you’re full.
- Lunchbox Hero: Between us, this soup is my go-to for meal prep. Tastes even better the next day—throw it in jars, and you’ve got hearty lunches for the week. My kids (who usually turn their noses up at veggies) fight over the carrots in theirs.
- Budget Powerhouse: A single chuck roast feeds my family for days, and the rest of the ingredients? Pantry staples. I’m talking $15 for six servings, and it still feels like a restaurant-worthy meal. Not the prettiest, but the taste makes up for it every time.
Step-by-step instructions for homestyle beef soup
Transform tough chuck roast into melt-in-your-mouth perfection with this foolproof simmering method.
Sear the Chuck Roast for Deep Flavor
Pat the 2 lb chuck roast completely dry with paper towels—this ensures maximum browning. Heat 2 tablespoons olive oil in a large Dutch oven over medium-high heat until shimmering. Add the roast and sear on all sides for 8-10 minutes total, turning occasionally, until it develops a deep golden-brown crust. This caramelized exterior locks in juices and builds the soup's rich foundation.
While the roast sears, remove it from the pot and set aside. The same Dutch oven will become your flavor vessel throughout the cooking process, so don't scrape away those precious browned bits—they're packed with umami goodness that will dissolve into the broth later.
Build the Aromatic Vegetable Base
In the same Dutch oven, add 2 whole yellow onions, 4 medium carrots, and 4 whole celery stalks, all cut into 1-inch chunks as specified. Cook over medium heat for 8-10 minutes, stirring occasionally, until the vegetables soften and their edges begin to lightly brown. This process, called sweating, develops their natural sugars and prepares them to absorb the soup's flavors.
Add the 6 cloves garlic cloves (peeled and smashed) and 2 tablespoons tomato paste, stirring to coat everything evenly. Cook for another 2 minutes until the garlic becomes fragrant and the tomato paste darkens slightly. This step creates the flavor bridge between the roast and the broth that will follow.
Deglaze and Simmer with Wine and Broth
Pour in the 1 cup red wine and scrape up all the browned bits from the bottom of the pot with a wooden spoon. Let the wine simmer for 3-4 minutes until it reduces by half and its alcohol aroma dissipates. This deglazing step captures all the caramelized flavors that would otherwise stick to the pot.
Add the 6 cups beef broth, returning the seared chuck roast to the pot. Bring to a gentle boil, then reduce heat to low, insert 2 sprigs fresh thyme and 2 whole bay leaves, cover partially, and simmer for 1 hour 30 minutes. The roast should be fork-tender when pierced, and the broth should develop a rich, ruby-red color with visible vegetable pieces.
Season and Finish to Perfection
Remove the chuck roast from the pot and let it rest on a cutting board for 10 minutes. Strain the broth through a fine-mesh sieve into a clean pot to remove any herb stems and vegetable debris. Return the broth to the Dutch oven and add the 1.5 teaspoons salt and 1 teaspoon cracked black peppercorns, stirring well to combine.
Shred the rested chuck roast with two forks directly in the pot, discarding any large fat pieces. Return the shredded meat to the broth and simmer for an additional 10 minutes to allow the flavors to meld completely. The soup should be rich, hearty, and perfectly seasoned—each bite should deliver tender beef, sweet vegetables, and deep umami notes.
Garnish and Serve Warm
Ladle the hot soup into bowls and garnish each serving with ¼ cup chopped parsley. The bright green parsley provides a fresh contrast to the deep, savory flavors of the beef and vegetables. Serve immediately with crusty bread to soak up every last drop of that flavorful broth.
This soup tastes even better the next day as the flavors continue to develop, but if you can't wait, enjoy it fresh from the pot where every spoonful delivers that perfect balance of tender beef, aromatic vegetables, and richly seasoned broth.
Pro Tips For Making Basic Beef Soup
- Brown the Chuck Roast: Don’t just toss it in the pot raw—sear the chuck roast in batches over medium-high heat until it’s deep brown on all sides. The crust locks in flavor and prevents the soup from tasting like boiled meat. (Yes, it’ll take 10-15 minutes, but it’s worth it.)
- Cut Carrots and Celery Evenly: Rough chopping works, but for consistent cooking, slice carrots into ½-inch rounds and celery into ¼-inch pieces. Uneven sizes mean some veggies stay crunchy while others turn to mush—no one wants that.
- Don’t Rush the Searing: I used to rush the onion and garlic step, but crowding the pan steams them instead of caramelizing. Cook onions in a single layer for 8-10 minutes until soft and golden, then add garlic only in the last 30 seconds—burnt garlic ruins everything.
- Use a Splatter Screen: Chuck roast releases fat and liquid like a firehose when it hits the pan. A cheap splatter screen keeps your stove clean and your kitchen from looking like a war zone. (Trust me, you’ll thank me later when you’re not scrubbing grease off cabinets.)
Serving suggestions for this recipe
Classic Bread Pairings
Serve this beef soup with a warm, crusty loaf that soaks up every last drop of rich broth. I love using sourdough from my local bakery—its tangy crumb contrasts beautifully with the soup's savory depth. For a lighter option, try baguette slices toasted with garlic butter. The key is freshness: bake the bread just before serving so it stays crisp and absorbs the broth perfectly. 🥖
Noodle Additions
Add egg noodles (about ½ cup dry per serving) during the final 15 minutes of simmering for a heartier meal. I prefer fresh pasta for its chewy texture, but dried works too. For extra indulgence, stir in ½ cup small pasta shells—they trap the beef and vegetables beautifully.
Topping Ideas
Finish each bowl with a pat of butter or a drizzle of olive oil for added richness. A sprinkle of grated Parmesan cheese (about 1 tbsp per bowl) adds a salty, umami boost. For freshness, try chopped chives or thinly sliced scallions—they brighten the dish without overpowering. Trust me, these toppings elevate the soup to restaurant-quality. 🌟
Side Dish Balance
Pair your soup with a simple green salad dressed with lemon vinaigrette to cut through the richness. I toss mixed greens with sliced radishes and toasted walnuts for crunch. Alternatively, serve with roasted potatoes—toss 1 lb baby potatoes with olive oil, rosemary, and salt, then roast at 400°F for 30 minutes. The crispy edges contrast perfectly with the soup's smooth broth.
Dipping Sauces
Offer a small bowl of garlic aioli or horseradish cream for dipping bread. For the aioli, mix ¼ cup mayonnaise with 1 minced garlic clove, 1 tsp lemon juice, and a pinch of salt. For the horseradish cream, blend ¼ cup sour cream with 1 tbsp prepared horseradish and a squeeze of lemon. These sauces add a creamy, tangy contrast that guests will love. 💛
Presentation Tips
Use deep, rustic bowls to showcase the soup's rich layers. Garnish with a sprig of thyme or a bay leaf for an elegant touch. For family-style serving, use a large tureen and let everyone ladle their own portions. Add a small bowl of extra broth on the table for those who want seconds—it's always a crowd-pleaser.
Nutrition facts
Frequently asked questions about homestyle beef soup
Can I use a different cut of beef for this recipe?
While chuck roast is ideal for its fat and connective tissue, you can substitute with brisket or short ribs for extra richness. Avoid lean cuts like sirloin—they won't develop the same tender texture. If using brisket, increase cooking time to 2-2.5 hours for maximum tenderness.
How do I make this soup in a slow cooker?
Transfer the seared roast and vegetables to a slow cooker, then add the wine, broth, and herbs. Cook on low for 8 hours or high for 5-6 hours until the beef is fork-tender. Shred the meat and finish with parsley as directed. The slow cooker method is perfect for hands-off prep!
Why does my soup taste bland after simmering?
Bland flavor usually means insufficient seasoning or insufficient time for flavors to develop. Always taste and adjust salt before serving, and consider adding a pinch of MSG or a splash of soy sauce for umami depth. For extra richness, simmer uncovered for the last 15 minutes to reduce the broth slightly.
Can I make this soup ahead of time?
This soup tastes even better the next day as flavors meld. Store in an airtight container in the fridge for up to 4 days or freeze for 3 months. Reheat gently on the stove, adding a splash of water or broth if the soup thickens too much. The broth will reduce as it cools, so expect it to be slightly thicker when reheated.
What vegetables can I add for extra nutrition?
Try adding 1 cup diced potatoes (simmer for 30 minutes before serving) or ½ cup chopped kale (add in the last 10 minutes). For heartier meals, stir in ½ cup corn kernels or ½ cup chopped mushrooms during the final 20 minutes of cooking. Just be mindful of cooking times—some vegetables like potatoes need more time than others.