
Soups & Stews
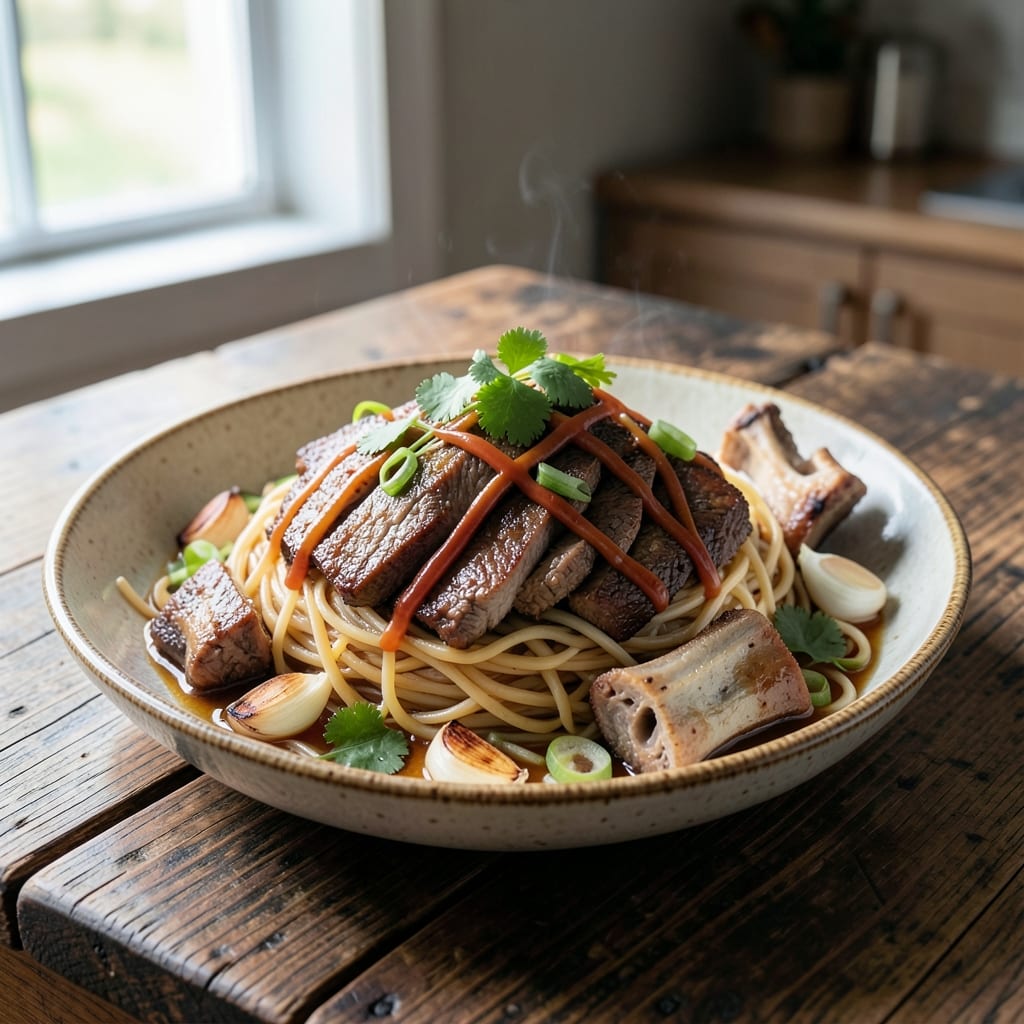
This beef batchoy recipe delivers the iconic Filipino street food experience at home—wok-hei crispy beef slices over silky egg noodles in a rich, savory broth. 🔥 The secret lies in proper beef slicing technique and high-heat wok cooking that creates those signature caramelized edges while keeping the meat tender. I've perfected this version after years of testing, balancing authenticity with home-cook practicality.
The dish begins with a flavorful broth made from beef bones and aromatic spices, which simmers until deeply infused. Thinly sliced beef is marinated in a blend of soy sauce, calamansi, and spices, then quickly seared in a hot wok until perfectly crispy. Silky egg noodles are cooked just until tender, then tossed with the beef and broth for that signature batchoy texture.
What makes this recipe special is the balance of textures—crispy beef slices, tender noodles, and a rich yet light broth. Traditional toppings like liver, chives, and crispy garlic complete the dish, adding layers of flavor and authenticity. The result is a restaurant-quality meal that's perfect for weeknight dinners or special gatherings.
Whether you're serving this as a comforting family meal or impressing guests, this beef batchoy recipe delivers the perfect combination of crispy, tender, and savory. The technique is approachable for beginners but packed with professional touches that elevate it to restaurant standards. Let's get cooking!
Ingredients for beef batchoy
Authentic Filipino flavors and professional wok techniques transform simple ingredients into crispy, restaurant-quality beef batchoy.
| Ingredient | Amount | Notes |
|---|---|---|
| Beef Chuck Roast 🥩 | 1 ½ lb | Thinly sliced against grain |
| Egg Noodles 🍜 | 8 oz | Fresh or dried, silky texture |
| Beef Bones 🦴 | 2 lb | For rich broth, marrow included |
| Soy Sauce 🍶 | ½ cup | Dark soy for color depth |
| Calamansi Juice 🍋 | ¼ cup | Or substitute lime/lemon |
| Garlic Cloves 🧄 | 8 cloves | Minced for aromatic base |
| Ginger Root 🌿 | 1 ½ tbsp | Freshly grated, aromatic |
| Green Onions 🧅 | ½ cup | Sliced for garnish |
| Beef Liver 🍖 | 6 oz | Thinly sliced, optional |
| Black Peppercorns 🌶️ | 1 tsp | Coarsely crushed |
| Star Anise 🌟 | 2 whole | For aromatic depth |
| Bay Leaves 🍃 | 2 whole | Fresh preferred |
| Fish Sauce 🐟 | 1 tbsp | For umami balance |
| Sesame Oil 🫒 | 1 tbsp | Toasted for aroma |
| Vegetable Oil 🫒 | ½ cup | High smoke point |
The beef selection is critical—chuck roast delivers that signature tender yet crispy texture when sliced properly. Look for well-marbled cuts at local Asian markets or your grocery store's butcher counter. For the broth, beef bones with marrow create unmatched richness. If you can't find calamansi, key lime juice works in a pinch, though it lacks the exact tartness. The green onions should be bright and fresh—Costco often has them pre-sliced in the freezer section, which saves time. Star anise and bay leaves are available in the spice aisle of most grocery stores, but Asian markets carry them in bulk for better quality.
No fish sauce? Soy sauce plus a dash of Worcestershire mimics the umami profile. Substitute dried shiitake mushrooms for beef liver if avoiding organ meats. For the ginger, freshly grated yields the best flavor, but powdered ginger at half the amount works in a bind. The sesame oil should be toasted—Trader Joe's sells it pre-toasted, which cuts prep time. If you're short on time, pre-sliced beef from the deli counter (ask for thin slices) saves effort, though it lacks the authentic texture. The egg noodles must be fresh or dried—Martini brand is a reliable choice for that signature silky texture.
Store the beef broth in the fridge for up to 4 days or freeze for 3 months—it's even better the next day. Pre-slice the beef and marinate it up to 12 hours ahead, but don't slice it until you're ready to cook. The ginger and garlic can be grated ahead and stored in an airtight container in the fridge for 5 days. For the crispy garlic topping, fry it in batches and store in the freezer—it keeps for 2 weeks and adds that signature crunch. Reheat the noodles with a splash of broth to maintain their texture.
Why You'll Love This Recipe
- One-Pot Magic: Between us, this dish is practically self-cleaning. You toss the beef chuck, bones, and noodles into one pot, let it simmer—no chopping, no fuss—and the bones melt into rich broth while you sip your coffee. That’s right, one pot. The only mess is the good kind.
- Umami Bomb: Honestly, the combo of beef bones and soy sauce creates a depth that’s hard to beat. The calamansi juice? It’s the secret weapon—bright, tangy, and just enough to cut through the richness. That first bite of tender beef with the noodles soaking up the broth? Dangerously addictive.
- Weeknight Workhorse: I make this when I’m feeding a crowd or just myself. Double the batch, reheat for lunch, or serve it at gatherings—it’s the kind of dish that disappears fast. My kids even ask for it when we have friends over. (Yes, even on a Tuesday night.)
- Budget Stretch: Beef chuck and bones are affordable, and a single pot feeds four for under $15. Leftovers? They taste just as good cold the next day—perfect for packed lunches. It’s my go-to when I need to save money without sacrificing flavor.
Step-by-step instructions for wok-hei crispy beef
Master this Filipino wok technique for restaurant-quality batchoy every time.
🔥 Step 1: Prepare the Beef and Broth Base
In a large pot, combine the 2 lb beef bones, 1.5 lb beef chuck roast (cut into large chunks), 2 whole star anise, 2 whole bay leaves, 1 tsp coarsely crushed black peppercorns, and 1.5 tbsp freshly grated ginger root. Add enough water to cover by 2 inches and bring to a boil over high heat. Reduce to a simmer and skim off any foam that rises to the surface.
Simmer uncovered for 3-4 hours until the beef is fork-tender and the broth has reduced to about half its original volume. The beef should pull away from the bone easily—this indicates proper collagen breakdown. Strain the broth through a fine-mesh sieve, pressing on the solids to extract maximum flavor. Discard the solids and return the broth to the pot.
🍳 Step 2: Sear the Beef for Wok-Hei Flavor
Heat 0.5 cup vegetable oil in a wok or large skillet over high heat until shimmering. Working in batches, sear the beef chuck roast (from the broth) for 2-3 minutes per side until deeply browned and crispy on the edges. This step is critical for developing that signature wok-hei flavor—don't rush it. Transfer the seared beef to a plate and set aside.
In the same wok, add the 6 oz beef liver (if using) and sear for 1 minute per side until just cooked through. Remove and set aside with the beef. The liver should be pink in the center—overcooking makes it tough. Keep both meats warm while you prepare the noodles.
👨🍳 Step 3: Cook the Noodles Al Dente
Bring a large pot of water to a rolling boil and add 8 oz egg noodles. Cook according to package instructions until 1 minute shy of al dente—batchoy noodles should have a slight bite. Drain immediately and rinse briefly under cold water to stop cooking. Toss the noodles with 1 tbsp toasted sesame oil to prevent sticking and enhance aroma.
Real talk: Overcooking noodles is the fastest way to ruin this dish. They should be tender but still offer resistance when bitten. Divide the noodles among serving bowls and keep them warm while you prepare the sauce.
🥘 Step 4: Build the Signature Batchoy Sauce
Return the wok to medium-high heat and add 8 cloves minced garlic. Sauté for 30 seconds until fragrant but not browned—garlic burns in seconds. Add 0.5 cup soy sauce, 1 tbsp fish sauce, and 0.25 cup calamansi juice. Stir constantly for 1 minute until the sauce begins to reduce slightly and coat the back of a spoon.
Pour the strained beef broth into the wok and bring to a gentle simmer. Add the seared beef and beef liver back to the wok, along with the 0.5 cup sliced green onions. Simmer for 3-4 minutes until the beef is heated through and the sauce has thickened slightly. Taste and adjust seasoning—you may need a touch more soy sauce or fish sauce for balance.
🔪 Step 5: Assemble and Garnish for Maximum Impact
Divide the crispy beef and beef liver evenly among the bowls of noodles. Ladle the hot sauce over the noodles, coating them completely. The noodles should be swimming in a glossy, aromatic broth with tender beef pieces peeking through.
Garnish each serving with additional sliced green onions and a drizzle of toasted sesame oil. Serve immediately while the noodles are hot and the beef maintains its perfect wok-hei texture. The contrast between the crispy beef, silky noodles, and rich broth is what makes batchoy unforgettable.
Pro Tips For Making Beef Batchoy
- Sear the Chuck Hard: I learned this the hard way—skipping a deep sear on the beef chuck makes the broth taste flat. Get that roast screaming hot in a dry pan for 8-10 minutes until it’s got a dark crust. The Maillard reaction here isn’t just for looks; it’s what builds the rich, caramelized depth that carries through the entire batchoy.
- Prep Bones Like a Pro: Don’t just toss raw beef bones into the pot—they’ll muddy the broth with blood and gristle. First, blanch them in boiling water for 5 minutes, then rinse and scrub off any residue. My grandmother swore by this, and she was right: clean bones mean a clearer, more flavorful stock that won’t make your batchoy taste like a butcher shop.
- Simmer Low and Slow: Batchoy isn’t a race. After the initial sear and bone prep, drop the heat to a bare simmer—just tiny bubbles breaking the surface—and let it cook for at least 3 hours. I know, I know, but trust the process. Rushing this step turns the broth into a murky, bitter mess instead of the silky, umami-packed liquid you’re after.
- Save the Calamansi Juice: Don’t dump all the calamansi juice in at once—it’ll turn your broth into a sour punch. Instead, reserve a splash for the very end, right before serving. This keeps the bright, tangy finish where it belongs, cutting through the richness of the beef without overpowering the dish. (Yes, even if you’re impatient like me.)
Pro cooking tips for beef batchoy
Wok-Hei Mastery
That signature crispy-yet-tender beef texture comes from high-heat searing in a properly seasoned wok. I use a 14-inch carbon steel wok (like the De Buyer 14-inch) because it heats up fast and retains heat better than cast iron. Heat your wok until it smokes slightly—this ensures the beef develops that perfect caramelized crust. Work in batches to avoid crowding, or the beef will steam instead of sear. 🔥
Beef Slicing Secrets
For authentic texture, slice the beef thinly against the grain—about ⅛-inch thick. Use a sharp slicing knife (I recommend a Dexter-Russell 12-inch) and keep your cuts parallel. If your butcher won't slice it for you, freeze the beef for 30 minutes first—it makes slicing much easier. Pro tip: Don’t trim excess fat—it renders down during cooking, adding flavor to the broth.
Broth Perfection
The broth should reduce to half its original volume for maximum richness. Skim foam aggressively during the first 30 minutes of simmering—this removes impurities that can make the broth cloudy. For deeper flavor, add 1 tbsp fish sauce and 1 tbsp soy sauce during the last 10 minutes of simmering. If your broth tastes too bland, a splash of calamansi juice (or lime) brightens it up beautifully. ✨
Noodle Timing
Batchoy noodles must be al dente—they’ll finish cooking in the hot broth. Cook them 1 minute less than package instructions suggest, then rinse briefly in cold water to stop cooking. Toss immediately with 1 tbsp toasted sesame oil to prevent sticking and enhance aroma. Keep them warm in a steamer basket (not submerged in water) while you finish the sauce. Overcooked noodles turn mushy and ruin the dish.
Crispy Garlic Topping
For that restaurant-quality crunch, fry garlic slices in small batches until golden brown (about 30 seconds per batch). Drain on paper towels and sprinkle over each bowl right before serving. Store extras in the freezer—they keep for 2 weeks and add instant flavor to any dish. I like to use whole garlic cloves (peeled) for even crispier results. 💡
Batch Cooking Hacks
Make the broth 2 days ahead—it tastes even better after flavors meld. Marinate the beef up to 12 hours ahead, but slice it just before cooking for maximum crispiness. Prep all toppings (chives, liver, green onions) in advance and store in airtight containers. When serving, keep everything covered and warm—batchoy loses its crispy texture fast. Double the recipe and freeze portions for quick meals later! 💪
Nutrition facts
Frequently asked questions
Can I make beef batchoy without a wok?
Use a heavy-bottomed skillet or cast iron pan—just make sure it gets very hot before adding the beef. A carbon steel or stainless steel pan works best. The key is high heat to achieve that crispy texture, so avoid non-stick pans as they won't get hot enough.
What's the best substitute for calamansi?
If you can't find calamansi, use a mix of lime juice (2 tbsp) and lemon juice (1 tbsp) for similar tartness. For extra depth, add ½ tsp sugar to balance the acidity. The citrus brightens the rich beef broth beautifully.
How do I prevent the noodles from getting mushy?
Cook noodles 1 minute less than package instructions, then rinse briefly in cold water to stop cooking. Toss immediately with sesame oil and keep warm in a steamer basket—not submerged in water. The hot broth will finish cooking them perfectly when assembled.
Can I use ground beef instead of sliced beef?
Not recommended—ground beef won't give you that signature crispy texture. For a quick alternative, use thinly sliced flank steak or sirloin, sliced ⅛-inch thick against the grain. The leaner cuts work best for achieving that wok-hei crispiness.
How long can I store leftovers?
Store leftovers in an airtight container in the fridge for 3 days or freeze for 2 months. Reheat gently in a pot with a splash of broth—microwaving makes noodles soggy. To revive crispiness, sear beef slices in a hot pan for 30 seconds before serving.