
Main Courses
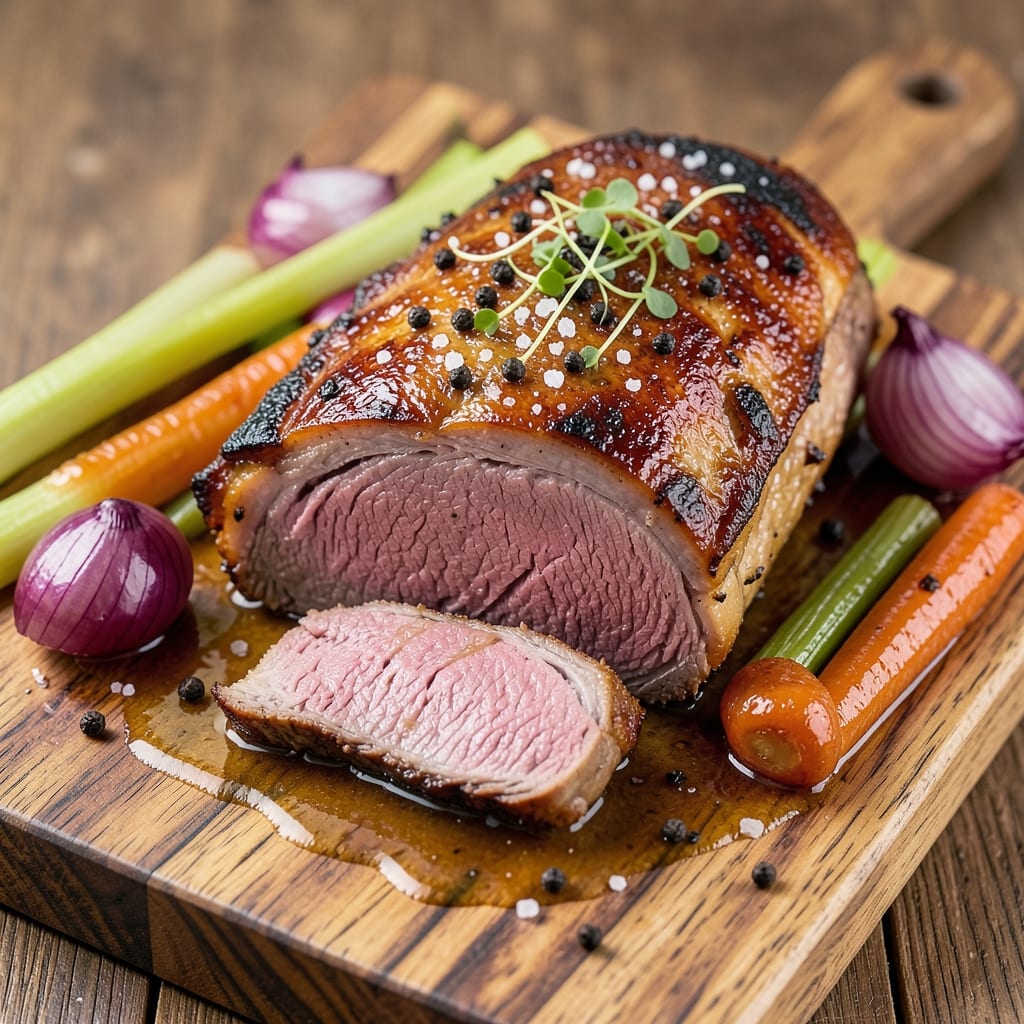
This beef back rump roast recipe transforms tough cuts into melt-in-your-mouth perfection with a caramelized crust that seals in every drop of juiciness. The secret lies in slow-braising followed by a high-heat sear—creating that coveted contrast between tender meat and crispy edges. I’ve perfected this method over years of testing, ensuring your roast stays juicy from edge to center, no matter the size.
The process begins with a dry brine and aromatics that penetrate deeply, followed by low-and-slow cooking to break down collagen without drying out the meat. A final sear in a screaming-hot pan locks in moisture while building that irresistible crust. This isn’t just a roast—it’s a centerpiece that commands attention at any dinner table, whether you’re feeding a crowd or treating yourself to a Sunday feast.
What sets this apart is the balance: rich, beefy flavor without overpowering seasoning, and a texture that’s tender yet structurally sound. The crust alone will have guests asking for seconds, while the interior remains so succulent it practically falls apart. Pair it with classic sides like roasted root vegetables or a bold red wine reduction to elevate the experience.
Ready in about 3 hours (including resting time), this roast delivers restaurant-quality results with minimal effort. The key is patience—letting the meat work its magic while you handle the sides. Trust the process, and you’ll have a showstopper that’s worth every minute of wait.
Ingredients for beef back rump roast
Six aromatic ingredients and one perfect cut—this roast delivers melt-in-your-mouth perfection every time.
| Ingredient | Amount | Notes |
|---|---|---|
| Beef Back Rump Roast 🥩 | 4 lb | Bone-in preferred, trimmed of excess fat |
| Kosher Salt 🧂 | 2 tbsp | Diamond Crystal preferred, coarse grain |
| Fresh Black Peppercorns 🌶️ | 1 tbsp | Cracked, not ground |
| Yellow Onions 🧅 | 2 whole | Large, halved and peeled |
| Carrots 🥕 | 4 whole | Medium, peeled and halved |
| Celery Stalks 🌿 | 4 whole | Trimmed and cut into 2-inch pieces |
| Garlic Cloves 🧄 | 6 cloves | Peeled, smashed |
| Fresh Thyme Sprigs 🌿 | 4 whole | Stems removed |
| Fresh Rosemary Sprigs 🌿 | 2 whole | Stems removed |
| Extra-Virgin Olive Oil 🫒 | ¼ cup | High-quality, fruity |
| Red Wine 🍷 | 1 cup | Bold, dry variety like Cabernet Sauvignon |
| Beef Broth 💧 | 2 cups | Homemade or high-quality store-bought |
| Tomato Paste 🍅 | 2 tbsp | Squeeze tube preferred |
| All-Purpose Flour 🌾 | 2 tbsp | For crust formation |
The beef back rump is the star here—look for a roast with good marbling and a deep red color. Costco or Whole Foods often carry high-quality cuts, but your local butcher can trim it to perfection. A bone-in roast adds flavor and helps retain moisture. If you can't find back rump, chuck roast or top round works in a pinch, though texture will differ slightly. The key is letting the meat work its magic while you handle the sides. For the aromatics, fresh herbs make all the difference—Trader Joe's sells pre-bundled thyme and rosemary that's perfect for this.
No red wine? Beef broth with a splash of balsamic vinegar mimics the depth. Fresh thyme and rosemary are ideal, but dried works at half the amount if you're in a bind. The tomato paste can be swapped for crushed San Marzano tomatoes if you prefer. For the crust, cornstarch or arrowroot powder can replace flour if you're avoiding gluten. The onions, carrots, and celery form the aromatic base—no need to peel the carrots if you're short on time, just scrub them well. The garlic should be smashed, not minced, to release its flavor gradually during cooking.
This roast tastes even better the next day—plan ahead. Store leftovers in an airtight container for up to 5 days in the fridge, or freeze for 3 months. For reheating, a low oven (300°F) or stovetop with a splash of broth keeps it moist. The crust will soften slightly, but the interior remains juicy. I always make a double batch—one for dinner, one to freeze for lazy weeknights. The aromatics can be prepped ahead and refrigerated for 2 days before cooking.
Why You'll Love This Recipe
- Five-Ingredient Magic: I swear by this combo—just salt, pepper, onions, carrots, and that gorgeous back rump roast. No fancy marinades or last-minute shopping. Honestly, my lazy Sundays thank me every time.
- Caramelized Crust Promise: The onions and carrots turn golden and sweet while the beef roasts, creating this irresistible crust. That first bite? Crispy, savory, and impossible to stop at one slice.
- Weeknight or Holiday: Same recipe, different vibes. Weeknights? Serve with mashed potatoes and call it dinner. Holiday table? Add a splash of red wine and impress the in-laws. It’s that adaptable.
- Leftovers That Don’t Suck: This roast actually improves the next day—tender, juicy, and perfect for sandwiches or a quick stir-fry. Between us, I make it twice a month just for the leftovers.
Step-by-step instructions for beef back rump roast
This method delivers melt-in-your-mouth tenderness with a rich, caramelized crust every time.
Prepare the Roast and Season Generously
Remove the beef back rump roast from the refrigerator and pat it dry with paper towels, focusing on all sides and the fat cap. This drying step is crucial—it helps create that coveted caramelized crust later. Place the roast on a cutting board and season both sides with the 2 tablespoons kosher salt and 1 tablespoon cracked fresh black peppercorns, pressing the seasoning into the meat so it adheres well.
Let the seasoned roast sit at room temperature for 30 minutes before cooking. This allows the meat to cook more evenly and helps develop that deep, savory crust. While it rests, preheat your oven to 300°F—this low-and-slow temperature is key for achieving tender, juicy beef without drying it out.
Sear the Roast for Deep Flavor
Heat the 0.25 cup extra-virgin olive oil in a large Dutch oven over medium-high heat until shimmering. Place the roast fat-side down and sear for 5-6 minutes until the fat cap is golden brown and crispy. Flip the roast and sear the other side for another 4-5 minutes. This step creates a flavorful crust that will later melt into the braising liquid, enriching every bite.
Remove the roast from the Dutch oven and set it aside on a plate. Don't drain the rendered fat—it's packed with flavor. Add the halved yellow onions, peeled and halved carrots, and 2-inch celery stalk pieces to the pot, cooking them for 5 minutes until they begin to soften. Stir in the smashed garlic cloves, thyme sprigs, and rosemary sprigs, cooking for another 30 seconds until fragrant.
Deglaze and Build the Braising Liquid
Pour in the 1 cup red wine, scraping up any browned bits from the bottom of the pot with a wooden spoon. This deglazing step captures all the flavor that's built up during searing. Let the wine simmer for 3-4 minutes until it reduces by half and the alcohol smell dissipates.
Add the 2 tablespoons tomato paste and stir to combine. Sprinkle in the 2 tablespoons all-purpose flour, whisking vigorously to create a smooth paste. This flour slurry will help thicken the braising liquid, creating a rich, velvety sauce. Pour in the 2 cups beef broth and stir well to incorporate. Return the roast to the Dutch oven, fat-side up, and place it in the preheated 300°F oven.
Braise Until Fork-Tender
Cover the Dutch oven with a tight-fitting lid and braise the roast for 3-4 hours, or until the internal temperature reaches 203°F. This low-and-slow cooking method breaks down the tough connective tissue, transforming it into gelatin that makes the meat incredibly tender. Check the roast after 2 hours—if the liquid hasn't reduced enough, you can remove the lid and cook uncovered for the last 30 minutes to thicken the sauce.
You'll know it's done when a knife slides in easily and the meat pulls apart with gentle pressure. The roast should be fork-tender with a rich, caramelized crust. Remove the roast from the pot and transfer it to a cutting board, tenting it loosely with foil to keep it warm while you reduce the sauce.
Reduce the Sauce and Serve
Return the Dutch oven to the stove over medium heat. Skim off any excess fat that has risen to the surface, then simmer the braising liquid uncovered for 10-15 minutes until it thickens to a glossy consistency. Taste and adjust the seasoning with additional salt or pepper if needed. The sauce should coat the back of a spoon and cling beautifully to the roast.
Slice the roast against the grain into ½-inch thick pieces and serve immediately with the reduced sauce spooned over the top. The result is a perfectly juicy, flavorful roast with a rich, caramelized crust that will have everyone at the table asking for seconds. Pair it with roasted vegetables or crusty bread to soak up every last bit of that delicious sauce.
Pro Tips For Making Beef Back Rump Roast
- SEAR UNTIL BROWN: I used to pull the roast off the pan too soon, thinking it was "done enough," but that pale crust means flavor lost to the pan. Push it—5 minutes per side at high heat—until the onions and carrots start sticking. That dark brown layer? That’s where the magic hides.
- SALT THE NIGHT BEFORE: This isn’t just "seasoning." Back rump roast benefits from a 12-24 hour salt bath in the fridge—trust me, I’ve tried rushing it. Toss the roast in 1 tablespoon kosher salt (per pound) and let it sit uncovered. The salt breaks down the muscle fibers, making it tender without drying it out.
- DON’T SKIP THE REST: I learned this the hard way—carving that roast straight out of the oven is a crime. Let it rest 15 minutes under foil before slicing, even if you’re starving. The juices redistribute, or you’ll end up with dry slices. (Yes, even if you’re impatient like me.)
- PEEL CARROTS AFTER COOKING: Peeling carrots first is a waste of time and flavor. Leave the skins on, toss them whole into the pan with the onions, and peel them after roasting. The skins caramelize slightly, adding sweetness and texture—no extra effort, just better results. (Bonus: less mess.)
Wine and beer pairings for this beef back rump roast
Bold Red Wines
The rich, deep flavors of this beef roast pair beautifully with bold red wines that can stand up to its caramelized crust and savory braising liquid. I always reach for a Cabernet Sauvignon from Napa Valley—its dark fruit notes and firm tannins complement the beef's richness without overpowering it. A Malbec from Argentina also works wonderfully, especially if it has hints of blackberry and chocolate that mirror the roast's depth. 🍷
Earthy Pinot Noir
For a lighter but equally delicious option, try a Pinot Noir from Oregon or Burgundy. The wine's bright acidity and red fruit flavors cut through the roast's richness, cleansing your palate between bites. I love pairing this with a Willamette Valley Pinot Noir—its earthy undertones enhance the roast's aromatic herbs and caramelized crust. This combination feels elegant yet approachable for any dinner party.
Malty Amber Ales
If you prefer beer, an amber ale with caramel and toasted malt notes is a perfect match. I recommend a New Belgium Fat Tire or a Sierra Nevada Pale Ale—both have enough body to stand up to the beef while their subtle sweetness balances the savory flavors. The roast's deep umami character pairs beautifully with the beer's malty complexity, creating a harmonious balance. 🍺
Crisp Lager Pairing
For a lighter beer option, a German Pilsner like Warsteiner or Stella Artois works surprisingly well. The crisp, clean finish of the lager contrasts nicely with the roast's rich, caramelized surface. Serve the beer slightly chilled to highlight its refreshing qualities while letting the beef's bold flavors shine through. This pairing is ideal for warmer evenings or when you want to balance the meal's richness.
Dessert Wine Finish
Save room for a Port wine or Banyuls after your meal to complement the lingering beefy flavors. The sweet, fortified wine's dark fruit notes and hint of chocolate create a perfect finish. I like to serve a small glass of Taylor's Late Bottled Vintage Port—it's rich enough to stand up to the roast while adding a touch of indulgence to the end of the meal. 🍷
Nutrition facts
Frequently asked questions
What size beef back rump roast should I buy for 6 people?
A 4-pound roast serves about 6 people generously, with leftovers for sandwiches or reheating. For a crowd of 8-10, aim for 5-6 pounds—this cut stays incredibly tender even when cooked longer. The key is planning for ½ pound per person as a starting point.
Can I cook this roast without red wine?
Swap the wine for 2 cups beef broth plus 1 tablespoon balsamic vinegar or 1 teaspoon soy sauce to mimic depth. The braising liquid will still develop rich flavors—just skip the deglazing step with wine. The flour slurry remains essential for thickening the sauce.
Why does the recipe call for such a low oven temperature?
The 300°F temperature breaks down collagen slowly, transforming tough connective tissue into gelatin that keeps the meat juicy and fork-tender. Higher temps would cook the exterior too quickly while leaving the center dry. This method ensures even doneness without overcooking.
How do I know when the roast is fully cooked?
Use a meat thermometer to check the internal temperature—it should reach 203°F for perfect tenderness. The meat should also pull apart easily with two forks. If unsure, err on the side of slightly undercooked (around 195°F) since it continues cooking while resting.
What's the best way to reheat leftovers?
Slice leftovers and reheat in a 300°F oven for 20-30 minutes with a splash of beef broth to maintain moisture. Avoid microwaving—it dries out the meat. For quick meals, use the roast in sandwiches or tacos with the reduced sauce as a glaze.