
Main Courses
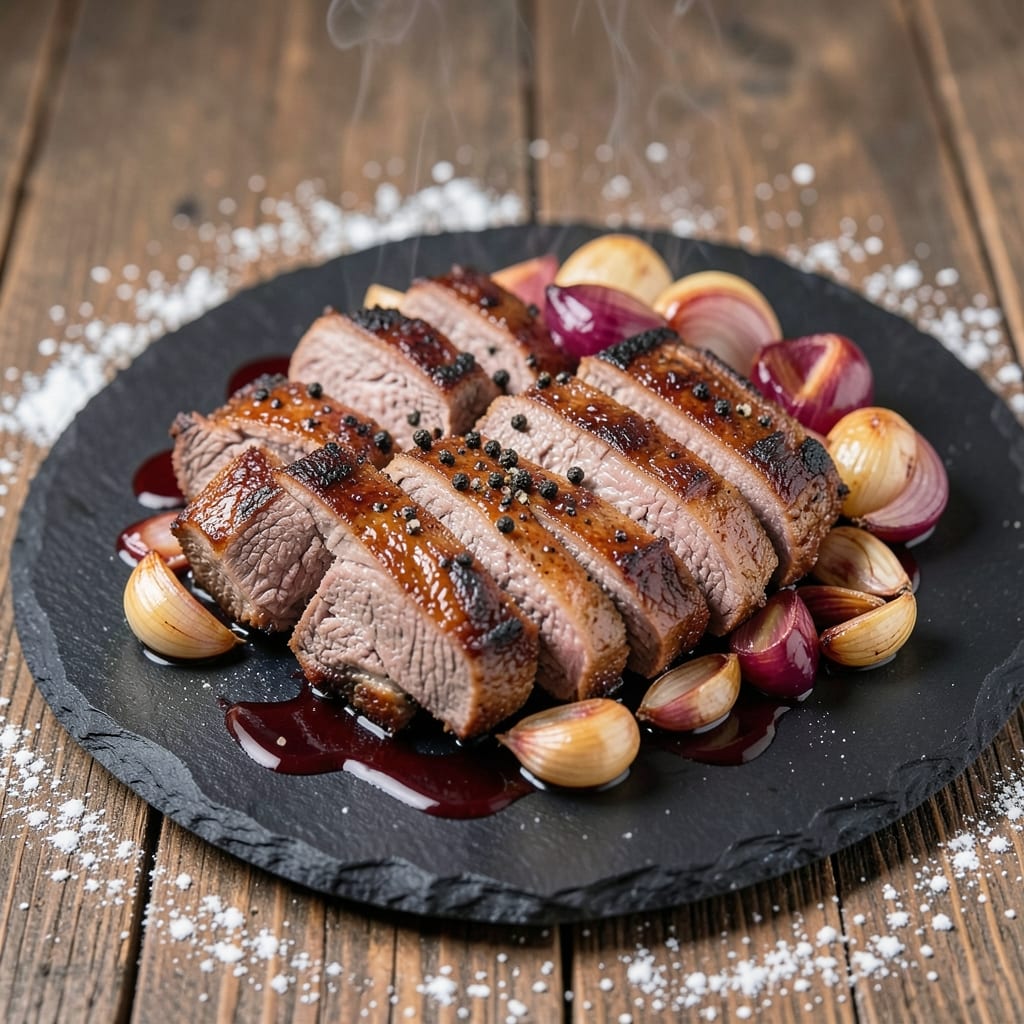
Baron beef roast delivers the kind of slow-braised richness that transforms tough cuts into melt-in-your-mouth perfection. This traditional British classic relies on a deep umami crust developed through careful browning and hours of gentle roasting at 300°F, creating a dish that's equally impressive for Sunday dinners and special occasions.
The secret lies in the method: searing the beef until deeply caramelized before slow-roasting it with aromatics and herbs. This creates layers of flavor that penetrate the meat, while the resulting gravy—thickened with the pan drippings—adds another dimension of savory depth. The result is beef that's tender enough to fall apart yet retains enough structure to hold its shape.
What makes this recipe work is its balance of patience and precision. The slow cooking process ensures maximum tenderness, while the rich gravy ties everything together into a cohesive, restaurant-quality meal. Serve with classic sides like roasted potatoes or Yorkshire pudding for the full experience.
Perfect for feeding a crowd or meal prepping ahead, this roast stays flavorful even reheated. The technique is straightforward once mastered, and the results are undeniably satisfying. Let's get started on creating this timeless centerpiece for your table.
Ingredients for baron beef roast
Sixteen ingredients deliver the deep umami crust and tender beef at the heart of this British classic.
| Ingredient | Amount | Notes |
|---|---|---|
| Chuck Roast Beef 🥩 | 4 lb | Well-marbled, 2-3 inches thick |
| All-Purpose Flour 🌾 | ¼ cup | For dredging beef slices |
| Kosher Salt 🧂 | 2 tbsp | Diamond Crystal preferred |
| Fresh Black Peppercorns 🌶️ | 1 tbsp | Coarsely cracked |
| Yellow Onions 🧅 | 2 whole | Peeled, halved lengthwise |
| Garlic Cloves 🧄 | 6 cloves | Smashed but not minced |
| Fresh Thyme Sprigs 🌿 | 4 whole | Stems removed |
| Fresh Rosemary Sprigs 🌿 | 2 whole | Needles only |
| Beef Stock 🥄 | 2 cups | Homemade or high-quality |
| Dry Red Wine 🍷 | 1 cup | Bold Cabernet Sauvignon |
| Tomato Paste 🍅 | 2 tbsp | San Marzano preferred |
| Unsalted Butter 🧈 | ½ cup | Cold, cubed |
| Extra-Virgin Olive Oil 🫒 | 2 tbsp | For searing |
| Fresh Parsley 🌿 | ¼ cup | Chopped, for garnish |
The chuck roast is non-negotiable here—look for well-marbled cuts with visible fat between the muscles. Whole Foods and Dartmouth Farms carry excellent options, but any reputable butcher will have it. Avoid lean cuts; the fat renders down to create that signature crust. If you can't find a 4-pound roast, two 2-pound pieces work perfectly. For the aromatics, fresh thyme and rosemary are essential—dried herbs won't provide the same depth of flavor, though they can be used at half the quantity in a pinch. The beef stock should be homemade if possible, but Kitchen Basics or Pacific Foods brands are reliable store-bought alternatives.
No red wine? Substitute with additional beef stock plus 1 tbsp balsamic vinegar—the acidity helps develop the crust. The tomato paste can be omitted entirely if you prefer, but it adds a subtle sweetness that balances the richness. For the butter, Plugrá or Land O'Lakes are excellent choices, but any high-quality unsalted butter will work. If you're short on time, pre-slice the onions and garlic before starting—it saves 10 minutes during the searing process. The flour is purely for dredging the sliced beef before browning; don't skip this step as it creates the initial crust that locks in juices during roasting.
The roast reheats beautifully—cover with foil and warm in a 300°F oven for 30-45 minutes. For meal prep, portion the gravy separately and reheat it on the stovetop over medium heat. The beef and gravy keep 4-5 days in the fridge when stored in airtight containers, while the sliced roast freezes for up to 3 months. I always make a double batch of gravy—it disappears faster than the beef. Store any leftovers in shallow containers to cool quickly, preventing bacterial growth. The herbs can be prepped ahead and refrigerated in a sealed container for up to 3 days before use.
Why You'll Love This Recipe
- One-Pan Magic: I swear by this recipe because it’s that simple—just flour, salt, pepper, and onions to build flavor while the beef slow-cooks. No fancy gadgets, no last-minute scrambling. Honestly, the hardest part is waiting for it to finish.
- Deep, Caramelized Richness: That flour crust turns golden and crispy while the inside stays tender—like a hug from a Sunday dinner. The onions melt into sweet, jammy layers that make every bite worth it. (Yes, even on a Tuesday night.)
- Leftovers That Don’t Suck: This roast tastes better the next day, especially shredded into tacos or sandwiches. I make it on Sunday and feed the family for three meals without a second thought. Budget win, flavor win.
- Budget Beef, Big Impact: Chuck roast is affordable, and this recipe stretches it into multiple meals without sacrificing taste. Between us, it’s my go-to for feeding a crowd without breaking the bank. The salt and pepper do all the heavy lifting.
Step-by-step instructions for slow-braised baron beef roast
Transform tough chuck roast into tender, restaurant-quality beef with this precise braising technique.
Prepare and Sear the Chuck Roast
Pat the 4 lb chuck roast beef dry with paper towels—this ensures maximum browning. Place it on a cutting board and slice it horizontally into 6 even slices about ½-inch thick. Season each slice generously with 2 tbsp kosher salt and 1 tbsp coarsely cracked fresh black peppercorns, pressing the seasoning into the meat.
Heat 2 tbsp extra-virgin olive oil in a large Dutch oven over medium-high heat until shimmering. Working in batches, sear the beef slices for 2-3 minutes per side until deeply golden brown and caramelized. Transfer the seared beef to a plate and set aside—this initial sear develops the deep umami crust that defines the dish.
Build the Braising Base
In the same Dutch oven, reduce heat to medium and add 2 tbsp unsalted butter, letting it melt and foam. Add the 2 whole yellow onions, cut into ½-inch slices, and cook for 5 minutes until softened. Add the 6 smashed garlic cloves, 4 fresh thyme sprigs, and 2 fresh rosemary sprigs, stirring for 1 minute until fragrant.
Stir in 2 tbsp tomato paste and cook for 2 minutes until it darkens slightly. Pour in 1 cup dry red wine, scraping up any browned bits from the bottom of the pot—this deglazing captures all the flavor. Let the wine reduce by half before adding 2 cups beef stock. Bring to a gentle simmer, then return the seared beef to the pot.
Braise Until Fork-Tender
Cover the Dutch oven with a tight-fitting lid and transfer it to a 325°F oven. Braise for 2.5-3 hours until the beef is fork-tender and pulls apart easily. The liquid should reduce to a thick, glossy sauce that coats the back of a spoon. If it looks too thin after 2 hours, uncover and simmer on the stovetop for 15-20 minutes to thicken.
Real talk: This is where patience pays off. The beef should be so tender that a wooden skewer slides through with minimal resistance. If you peek and the liquid hasn't reduced enough, resist the urge to crank the heat—low and slow is the only way to achieve that luxurious texture.
Finish and Serve
Remove the beef slices from the braising liquid and arrange them on a serving platter. Skim any excess fat from the sauce, then adjust seasoning with additional kosher salt and black pepper if needed. The sauce should coat the beef beautifully, with a deep red hue from the wine and a rich, velvety consistency.
Garnish with ¼ cup chopped fresh parsley just before serving. This dish pairs perfectly with creamy mashed potatoes, crusty bread, or roasted root vegetables. The beef will continue to tenderize slightly as it rests, so serve immediately while the sauce is still warm and clings to every bite.
Pro Tips For Making Baron Beef Roast
- Sear the Flour Crust: The chuck roast’s crust isn’t just for looks—it’s what locks in flavor. After coating the meat in flour, hit it with a screaming-hot pan (yes, even if you’re using an oven later). Let it brown for 3-4 minutes per side until it’s golden and slightly crispy. I used to skip this, and the dish always tasted flat afterward.
- Trim the Fat Like It’s 1985: That thick fat cap on a chuck roast isn’t just extra work—it’s the difference between dry and melt-in-your-mouth. Use a sharp knife to trim it down to about ¼-inch thick. Leave a little on the edges for flavor, but don’t be shy about cutting. (Pro move: Save the scraps for gravy—trust me, they’re worth it.)
- Don’t Crowd the Pan: When browning the onions for the gravy, resist the urge to pile them all in at once. Spread them out in a single layer and let them caramelize undisturbed for 8-10 minutes. I learned this the hard way—my onions turned to mush, and the gravy lost its depth. Patience here makes a real difference.
- Rest the Meat (Seriously): After roasting, give that chuck roast a solid 15-20 minutes under foil before slicing. I know, I know—you’re hungry now. But cutting into it too soon turns the juices into a pool on your plate. Let it sit, and you’ll get slices that stay tender, not a sad pile of shredded beef. (Your future self will thank you.)
Storing and reheating this recipe
Refrigerator Storage
Let your baron beef roast cool completely before storing in an airtight container—I prefer glass Pyrex with snap-on lids for even heat distribution. The beef and gravy keep beautifully for 4-5 days at 40°F or below, with flavors deepening as the spices meld. For best results, portion the beef and gravy separately to maintain texture—never store them together as the beef will absorb excess moisture and turn soggy. 🌡️
Freezer Prep Tips
For long-term storage, slice the beef into ½-inch portions and freeze in a single layer on a tray before transferring to quart-sized freezer bags. This prevents clumping, and the beef maintains its texture when reheated. The gravy freezes well for up to 3 months—just thaw overnight in the fridge before reheating. Label bags with the date to track freshness. I always freeze gravy in ½-cup portions for easy reheating.
Oven Reheating Method
This is my preferred technique for maintaining moisture and flavor. Place the beef slices in a lightly greased baking dish, cover tightly with aluminum foil, and heat at 300°F for 30-45 minutes. The foil traps steam, preventing dryness. For gravy, reheat in a saucepan over medium-low heat, stirring occasionally—never boil, or it will separate. Add 1-2 tbsp beef stock if it thickens too much during reheating. 🔥
Stovetop Shortcut
For a quicker option, use a heavy-bottomed skillet on medium heat with 1 tbsp olive oil. Add the beef slices and warm for 5-7 minutes, then pour in ½ cup gravy to baste. Cover and cook for 3-5 minutes until heated through. This method works best for smaller portions and keeps the beef juicy. I add a splash of red wine to the gravy for extra depth when reheating.
Microwave Safety
If you're short on time, microwave individual portions covered with a damp paper towel on 50% power for 2-3 minutes, stirring halfway. The damp towel prevents drying, but the texture won't be as tender as oven-reheated beef. For gravy, microwave in 30-second bursts, stirring between each, until heated—never microwave gravy uncovered, or it will skin over. This method is best for quick lunches, not special occasions. ✨
Gravy Rescue Tricks
If your gravy looks too thick after reheating, thin it with 1-2 tbsp beef stock or water. For split gravy, whisk in 1 tsp cornstarch mixed with 1 tbsp cold water until smooth, then simmer for 2 minutes until thickened. To revive flat flavors, add 1 tsp red wine or a pinch of fresh thyme—the acidity and herbs brighten the dish instantly. Always taste and adjust seasoning after reheating. 💡
Nutrition facts
Frequently asked questions
Can I use a different cut of beef for this recipe?
While chuck roast is ideal, you can substitute with round roast or brisket—both work well with this braising method. Avoid lean cuts like sirloin, as they won't develop the same rich texture. For best results, choose a cut with good marbling to ensure tenderness and flavor.
How do I know when the beef is fully cooked?
The beef is done when it reaches an internal temperature of 145°F and feels fork-tender. A wooden skewer should slide through easily, and the juices should run clear. If the sauce reduces too quickly, uncover the pot and simmer for 15-20 minutes to thicken it properly.
Can I make this recipe in a slow cooker?
Yes! Sear the beef as directed, then transfer everything to a 6-quart slow cooker and cook on Low for 7-8 hours or High for 4-5 hours. The slow cooker's gentle heat mimics the oven's effect, creating tender beef with a rich sauce. Just skip the final stovetop reduction—it'll thicken naturally during cooking.
What if my gravy turns out too thin?
Simmer the gravy uncovered on the stovetop for 10-15 minutes to reduce it further. For an instant fix, mix 1 tbsp cornstarch with 2 tbsp cold water, stir it into the gravy, and cook for 2-3 minutes until thickened. Avoid adding flour directly—it can make the gravy cloudy.
How far ahead can I prep the aromatics?
Chop the onions and slice the garlic up to 3 days ahead and store them in airtight containers in the fridge. The herbs (thyme and rosemary) can be prepped 1 day ahead and kept in a sealed container with a damp paper towel to maintain freshness. Just bring them to room temperature before using.