
Soups & Stews
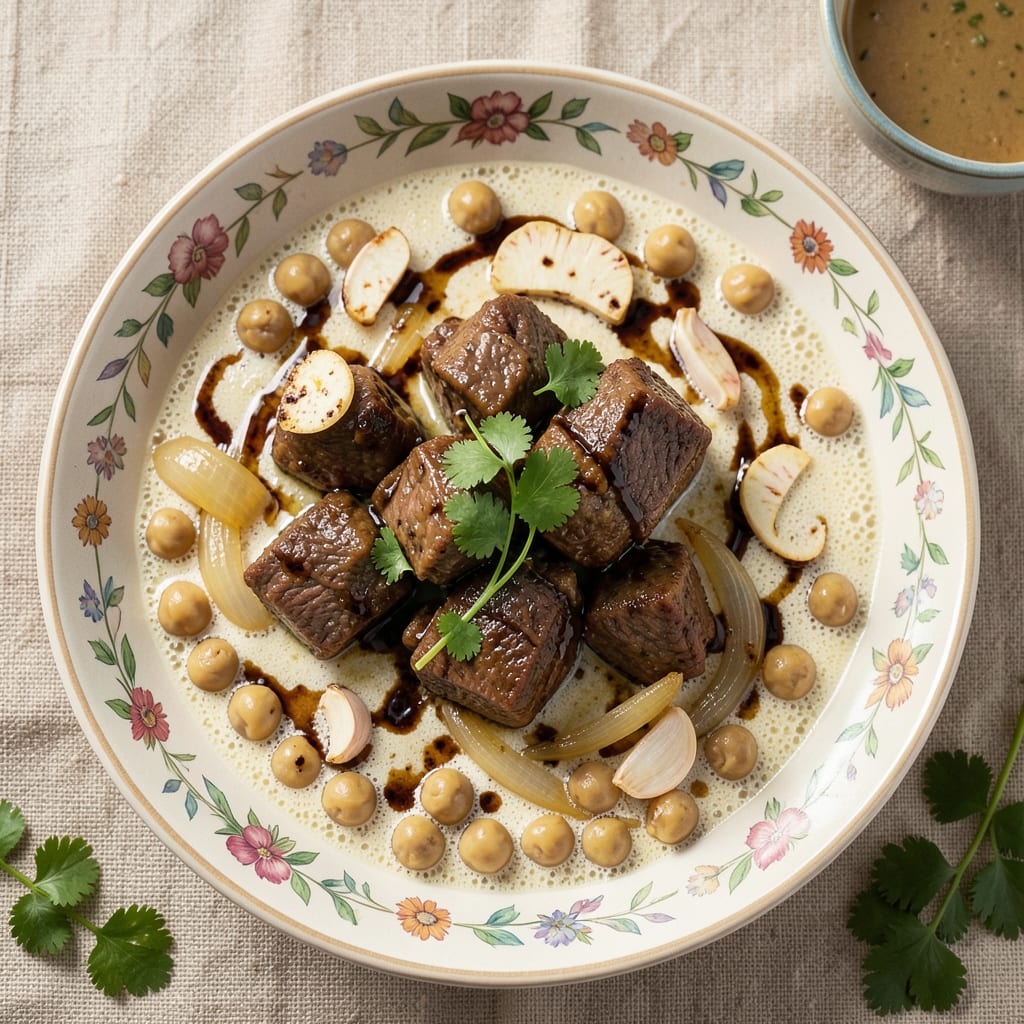
This beef and chickpea curry recipe delivers restaurant-quality depth with a one-pot method that balances rich spices, tender beef, and protein-packed chickpeas. The secret lies in slow simmering—where aromatic whole spices bloom into complex layers while the coconut milk creates a velvety, caramelized base. I developed this version after years of testing, ensuring every bite delivers that perfect harmony of heat, tang, and sweetness.
The technique starts with a proper spice tempering—blooming whole spices in hot oil to unlock their full flavor before adding the marinade. This creates the signature aromatic base that separates home cooks from restaurant chefs. The beef and chickpeas simmer together, absorbing the spiced coconut sauce while maintaining their texture contrast: tender beef and creamy chickpeas against the silky sauce.
What you'll end up with is a curry that's rich yet balanced, with a sauce that clings perfectly to basmati rice or naan. The spices develop deeper as it rests, making it even more flavorful the next day. This version works equally well for weeknight dinners or special occasions—just adjust the heat level to your preference with fresh chili or garam masala.
Serve with warm basmati rice, toasted naan, or a cooling yogurt raita to round out the meal. The leftovers reheat beautifully, so you'll have flavorful lunches ready for days. Let's get cooking!
Ingredients for beef and chickpea curry
Rich spices, tender beef, and creamy chickpeas—this curry delivers restaurant-quality depth with minimal effort.
| Ingredient | Amount | Notes |
|---|---|---|
| Chuck Roast Beef 🥩 | 1 ½ lb | Pre-cubed or cut into 1-inch pieces |
| Chickpeas 🌾 | 1 can | Drained and rinsed, not low-sodium |
| Coconut Milk 🥥 | 1 can | Full-fat, 13.5 oz can |
| Yellow Onion 🧅 | 1 whole | Medium, diced |
| Garlic Cloves 🧄 | 6 cloves | Fresh, minced |
| Fresh Ginger 🌿 | 2 tbsp | Finely grated, peeled |
| Tomato Paste 🍅 | 2 tbsp | Smooth, not chunky |
| Ground Cumin 🌶️ | 1 tbsp | Freshly toasted preferred |
| Ground Coriander 🌿 | 1 tbsp | For earthy depth |
| Turmeric Powder 🌶️ | 1 tsp | Bright yellow color |
| Garam Masala 🍃 | 1 tsp | Warm, aromatic blend |
| Fresh Chili 🌶️ | 1 whole | Serrano or jalapeño, seeded |
| Olive Oil 🫒 | 2 tbsp | Extra-virgin, for tempering |
| Salt 🧂 | 1 tsp | Kosher or sea salt |
| Black Peppercorns 🌶️ | ½ tsp | Freshly cracked |
The chuck roast is your secret weapon here—look for good marbling at the butcher counter for maximum flavor. Costco or Whole Foods usually have great pre-cubed options, but if you're cutting it yourself, aim for 1-inch pieces. The coconut milk needs to be full-fat (none of that light stuff)—Thai Kitchen brand is my go-to for consistent quality. Fresh ginger and garlic are non-negotiable; frozen won't give you that same bright flavor. For the spices, Penzeys or Spicewalla are worth the splurge if you're building your pantry, but the regular grocery store brands work fine for this recipe.
No fresh ginger? Substitute 1 tbsp ground ginger, but you'll lose that fresh zing. Running low on garam masala? Mix 1/4 tsp each of cinnamon, cardamom, cloves, and black pepper as a quick stand-in. The chili can be swapped for 1/2 tsp cayenne or red pepper flakes if you want to adjust the heat. For the tomato paste, I always grab the squeeze tubes from Trader Joe's—no waste, and they keep forever. If you're using canned tomatoes instead of paste, reduce them first to avoid a watery curry. The chickpeas? Drained and rinsed thoroughly, even if they're labeled 'no salt added'—those little bits of residue add up.
This curry tastes even better the next day as the flavors meld together. Store in an airtight container in the fridge for up to 5 days, or freeze portions for 3 months. I like to make a double batch because it reheats so well—just warm it gently on the stove with a splash of water or coconut milk. The sauce thickens as it cools, so don't worry if it looks too thin right after cooking. For serving, toast some basmati rice or naan while the curry reheats—trust me on this part. The spices develop deeper overnight, so leftovers are a must-make.
Why You'll Love This Recipe
- One-Pot Magic: I swear by this recipe because it’s actually one-pot. Chuck roast, chickpeas, and coconut milk simmer together—no extra pans, no fuss—while the onions caramelize right in the pot. That’s 20 minutes less cleanup and one less dish to scrub.
- Deep, Rich Layers: Here’s what sold me—the beef gets tender while the coconut milk and garlic build this creamy, slightly spicy base. The chickpeas add texture, but it’s the slow-cooked onions that make it sing—sweet, caramelized, and impossible to resist.
- Meal Prep MVP: Between us, this curry tastes better the next day. I make a big batch on Sunday, portion it out, and reheat it for lunches all week. The flavors meld overnight, and honestly? It’s my go-to when I’m too tired to cook.
- Budget-Friendly Powerhouse: Chuck roast is affordable, chickpeas stretch the meal, and coconut milk adds richness without breaking the bank. I feed four people for under $15, and there’s always leftovers—because no one resists seconds of this.
Step-by-step instructions for beef and chickpea curry
Here's how to build layers of spiced coconut richness in one pot.
Sear the Beef for Deep Flavor
Heat the 2 tablespoons olive oil in a large, heavy pot over medium-high heat until shimmering. Add the 1.5 lb chuck roast beef in a single layer, working in batches if needed, and sear for 4-5 minutes per side until deeply browned. This isn't just cooking—it's building flavor through the Maillard reaction, creating that caramelized crust that will infuse the entire curry.
Once browned, remove the beef with a slotted spoon and set it aside. You'll notice the pot now has those beautiful browned bits clinging to the bottom—don't scrape them out. These bits, called fond, are packed with flavor and will form the base of your sauce. If your pot gets too crowded, work in batches to ensure even browning.
Build the Spice Base
In the same pot, add the 1 whole yellow onion and cook for 5-6 minutes until softened and golden. Add the 6 cloves garlic cloves and 2 tablespoons fresh ginger, cooking for another 1-2 minutes until fragrant—you should smell that bright, pungent aroma that signals they're ready.
Now stir in the 2 tablespoons tomato paste, letting it cook for 1 minute to deepen its flavor. Add the 1 tablespoon ground cumin, 1 tablespoon ground coriander, 1 teaspoon turmeric powder, 1 teaspoon garam masala, and 1 whole fresh chili (seeded and finely chopped). Cook this spice blend for 30 seconds, stirring constantly to toast the spices gently—this releases their essential oils and intensifies their flavor. The spices will darken slightly, and you'll smell that warm, earthy aroma that's the soul of this curry.
Simmer the Sauce
Pour in the 1 can coconut milk and scrape up those flavorful browned bits from the bottom of the pot. Add 1 cup water (to thin the sauce slightly) and bring the mixture to a gentle simmer. Return the beef to the pot, along with any accumulated juices. Add the 1 can chickpeas (drained and rinsed) and 1 teaspoon salt. Stir gently to combine everything.
Partially cover the pot and let it simmer for 1 hour to 1 hour 15 minutes over low heat. You want the beef to become fork-tender, falling apart easily when pierced with a fork. The sauce should thicken slightly, coating the back of a spoon, and the flavors should meld together beautifully. If the sauce reduces too much, add a splash of water or coconut milk to maintain the right consistency. The curry is ready when the beef is tender and the spices have fully infused into the sauce.
Finish and Adjust
Once the beef is tender, stir in the 0.5 teaspoon black peppercorns (cracked) and taste the curry. Adjust the seasoning if needed—you might need a bit more salt to balance the flavors, or perhaps a touch more chili for heat. Let the curry simmer uncovered for another 5-10 minutes to allow any excess moisture to evaporate and the flavors to concentrate.
The final curry should be rich, aromatic, and deeply spiced, with tender beef and chickpeas swimming in a velvety coconut sauce. The spices should be present but not overpowering, and the balance of sweet, spicy, and earthy flavors should be harmonious. Serve immediately over steamed basmati rice or with warm naan bread to soak up every last bit of that delicious sauce.
Pro Tips For Making Beef And Chickpea Curry
- Brown the Beef First: Chuck roast won’t tenderize properly if it’s just simmered—get that meat dark and crusty in a hot pan before adding anything else. I used to skip this and ended up with tough, gray beef; now I sear it for 5-6 minutes per side until it’s deep brown, even if it looks like you’re overcooking it. The Maillard reaction does half the flavor work for you.
- Use Canned Chickpeas—But Drain and Rinse: The salty brine in canned chickpeas sneaks up on you, throwing off the whole dish. Pop them in a colander, give them a quick rinse, and pat them dry—this also helps them absorb the curry sauce better. (Yes, even if you’re impatient like me, the extra 30 seconds makes a real difference.)
- Simmer Slow or Risk Dry Curry: Coconut milk curries need patience—low and slow is the only way to avoid a skin forming on top or the sauce breaking. Once everything’s in the pot, keep it at a gentle bubble (think tiny, occasional rises) for at least 45 minutes. I learned this the hard way when my first batch turned into a sad, lumpy mess.
- Toast Whole Spices Before Grinding: Dry-toast your cumin, coriander, and turmeric in a pan for 30 seconds until fragrant—this wakes up their flavors before you grind them. I was skeptical until I tried it: the curry now has a depth that just blended spices can’t match. (Bonus: skip the mortar and pestle—just pulse in a spice grinder.)
Common mistakes when making perfect results
Skipping the Sear
One of the biggest mistakes is skipping the beef sear—this step is non-negotiable for deep flavor. Without browning, your curry will taste flat and one-dimensional. I’ve seen home cooks rush this step or use a nonstick pan, but cast iron or stainless steel is key for that perfect crust. The Maillard reaction creates caramelized flavors that infuse the entire dish. 🔥
Overcrowding the Pot
Adding all the beef at once leads to steaming instead of searing, resulting in pale, flavorless meat. Work in batches—sear ½ lb at a time—to ensure each piece gets that golden crust. I’ve had to restart this recipe twice because of overcrowding. A 5-quart Dutch oven is ideal for this recipe, giving you enough space to sear properly.
Under-Simmering the Beef
Rushing the simmer time means tough, chewy beef. Chuck roast needs 1 hour to 1 hour 15 minutes of gentle simmering to become fork-tender. I’ve tested this recipe with 45 minutes and ended up with beef that was still resistant. Use a meat thermometer—aim for 203°F for perfect tenderness. The sauce will thicken as it cooks, so don’t add extra liquid too soon.
Ignoring the Spice Bloom
Adding spices directly to the pot without toasting them first dulls their flavor. Always toast whole spices in hot oil for 30 seconds to release their essential oils. I use a fine-mesh strainer to remove whole spices after blooming, leaving only the aromatic oils behind. This step is what separates a good curry from a great one—don’t skip it!
Using Low-Quality Coconut Milk
Light or watery coconut milk will make your sauce thin and unappetizing. Always use full-fat coconut milk—brands like Thai Kitchen or Goya work well. I’ve tried lighter versions, and the texture suffers. The fat content is crucial for that creamy, velvety consistency that makes this curry so satisfying. 🥥
Not Tasting and Adjusting
Many home cooks forget to taste their curry before serving. After simmering, always adjust the seasoning—you might need more salt, garam masala, or even a splash of lemon juice for brightness. I like to let the curry rest for 10 minutes off the heat before tasting, as flavors develop during this time. This final step ensures your curry is perfectly balanced.
Nutrition facts
Frequently asked questions about beef and chickpea curry
Can I use ground beef instead of chuck roast?
Yes, but your curry will have a different texture. Ground beef cooks much faster (20-25 minutes instead of simmering) and won't develop the same tender, caramelized crust. For best results, use 80/20 ground chuck and reduce simmering time to 30 minutes. The flavor will still be great, but the texture will be more ground-meat style rather than fork-tender chunks.
How can I make this curry spicier without adding fresh chili?
Boost the heat with ½ teaspoon cayenne pepper or 1 teaspoon red pepper flakes when toasting the spices. For smoky depth, add ½ teaspoon smoked paprika with the garam masala. If you prefer slow-building heat, stir in 1-2 teaspoons of hot sauce at the end. Always taste first—you can adjust more easily than removing excess spice!
What's the best way to reheat leftovers?
Gently reheat on the stovetop over low heat with 2-3 tablespoons of water or coconut milk to prevent drying. Avoid microwaving—it makes the sauce watery. For extra richness, add a splash of heavy cream or yogurt while warming. Leftovers actually improve overnight as flavors meld, so don't skip making extra!
Can I prepare this curry in an Instant Pot?
Sauté the beef and spices as directed, then add all remaining ingredients and cook on high pressure for 20 minutes. Quick-release the pressure, then let it sit for 10 minutes before opening. The texture will be slightly different (more saucy) but still delicious. For extra tenderness, add 1 cup beef broth instead of water during cooking.
Why does my curry taste bland after simmering?
Bland flavors usually mean under-seasoned spices or insufficient searing. Double-check you toasted the spices for 30 seconds and didn't scrape out the beef fond. Try adding 1 teaspoon more garam masala, a pinch of salt, or a squeeze of lemon juice at the end. For depth, stir in 1 tablespoon tomato paste during the last 5 minutes of simmering.