
Main Courses
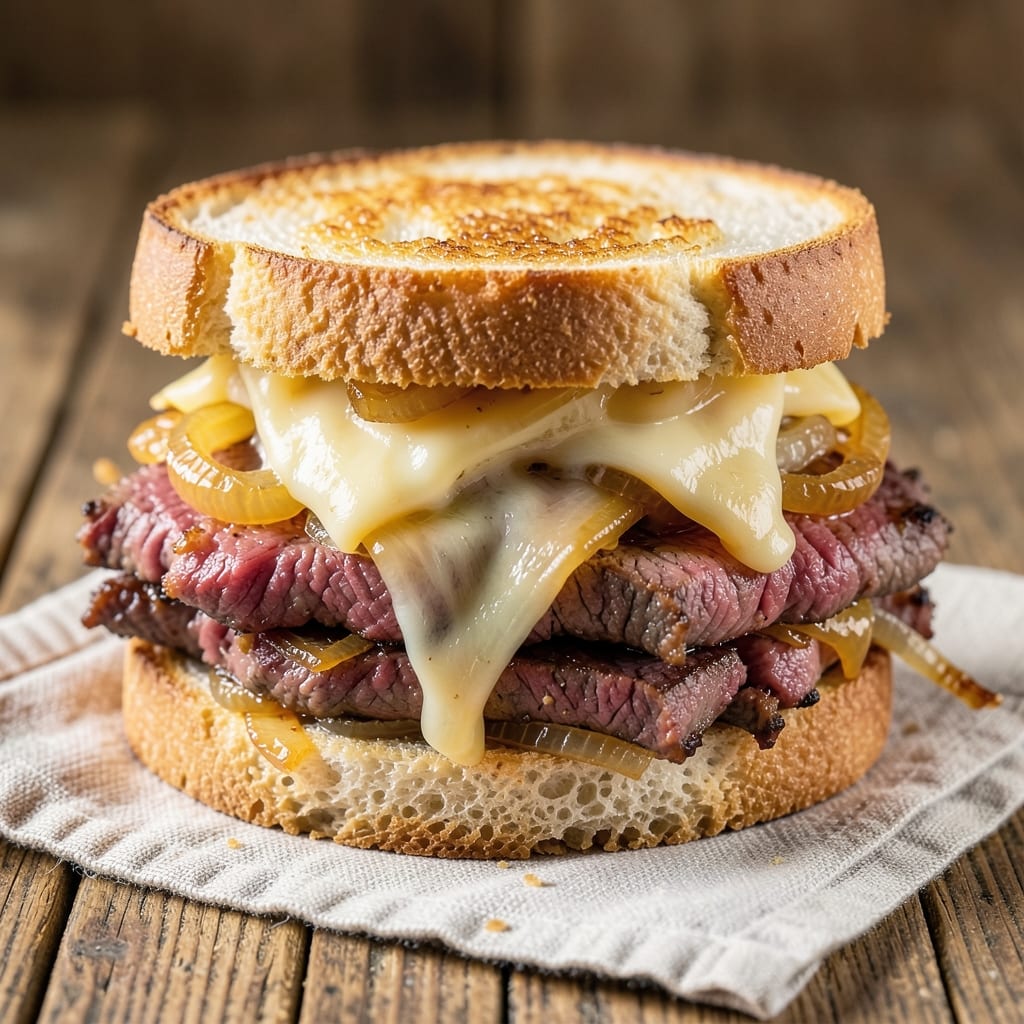
This beef and cheese sandwich recipe transforms a classic comfort food into a crispy-fried masterpiece with caramelized onion crunch. The secret lies in perfectly toasted bread, melted cheese, and a thin layer of beef that stays tender while the edges achieve that irresistible golden-brown crisp. I developed this technique after years of experimenting with sandwich textures, and the results speak for themselves—each bite delivers a satisfying crunch followed by gooey cheese and savory beef.
The beauty of this recipe is its versatility—whether you prefer roast beef or grilled, sharp cheddar or creamy provolone, the method adapts to your preferences. The caramelized onions add a sweet, tangy contrast that elevates every layer, while optional toppings like pickles or mustard can be customized to your taste. What sets this apart is the crispy exterior that holds up perfectly, ensuring no soggy sandwiches here.
What you’ll end up with is a sandwich that’s crispy on the outside, tender on the inside, and packed with layers of flavor. The caramelized onions add a touch of sweetness that balances the richness of the beef and cheese, while the crispy edges make every bite satisfying. This isn’t just a sandwich—it’s a foolproof technique that turns a simple lunch into something extraordinary.
Perfect for a quick weeknight meal or a satisfying lunch, this recipe scales easily for feeding a crowd. Pair it with a side of chips, a simple salad, or a bowl of soup for a complete meal. Let’s get started on creating your next favorite sandwich!
Ingredients for beef and cheese sandwich
Eight crispy layers of beef and cheese magic—just grab these and get frying.
| Ingredient | Amount | Notes |
|---|---|---|
| Bread Slices 🍞 | 8 whole | Thick-cut sourdough preferred |
| Roast Beef 🥩 | ½ lb | Thinly sliced, deli-style |
| Sharp Cheddar Cheese 🧀 | 1 cup | Shredded, aged for flavor |
| Provolone Cheese 🧀 | 1 cup | Sliced thin, creamy texture |
| Yellow Onions 🧅 | 1 whole | Thinly sliced for caramelizing |
| Unsalted Butter 🧈 | 2 tbsp | For caramelizing onions |
| Olive Oil 🫒 | 2 tbsp | For frying sandwiches |
| Salt 🧂 | ½ tsp | Kosher or sea salt |
| Black Pepper 🌶️ | ¼ tsp | Freshly ground preferred |
| Mayonnaise 🥄 | 1 tbsp | Optional for extra richness |
| Dijon Mustard 🍯 | 1 tsp | Optional for tangy kick |
| Pickle Slices 🥒 | 4 whole | Optional for crunch |
The bread is non-negotiable. Sourdough from the bakery section at Whole Foods or your local artisan bakery gives that perfect chewy crust, but any sturdy bread works. Look for slices that are at least 1/2-inch thick—thinner bread burns before it crisps. The beef? Deli-style roast beef from the meat counter (not pre-packaged) stays tender when fried. If you can't find it, thinly sliced flank steak works too—just pound it first. I always buy extra cheese because it melts out so fast, and Kraft sharp cheddar is my go-to for that perfect tangy bite.
No sourdough? Texas toast or brioche are great backups—they're thicker and hold up better to frying. Running low on sharp cheddar? Gruyère or pepper jack add different flavors that still work. For the onions, yellow or red both caramelize beautifully, but yellow has a little more sweetness. If you're in a rush, swap the caramelized onions for store-bought caramelized onions from the deli section (just drain them well). The mayo and mustard are totally optional, but they add that extra layer of richness that makes these sandwiches next-level. I keep a small jar of Duke's mayonnaise and Amoy's Dijon in my fridge for this exact reason.
Bread stays fresh for 3 days in the fridge, but to keep it crispy, pop the slices in the toaster for 1 minute before assembling. The beef can be pre-sliced and stored in the fridge for up to 3 days, while cheese lasts 2 weeks if wrapped tightly. For the caramelized onions, they keep for 5 days in the fridge—make a big batch and save them for other recipes. These sandwiches reheat best in a skillet over medium heat for 1-2 minutes per side—just enough to melt the cheese without making the bread soggy. Freeze extras between parchment paper for up to 1 month, but trust me, they won't last that long.
Why You'll Love This Recipe
- No-Fuss Assembly: I swear by this one—just toast the bread, layer the roast beef, and melt those cheeses. The onions caramelize in the heat, so you don’t even need to chop them finely. Five minutes, tops.
- Melty Magic Combo: Sharp cheddar and provolone together? It’s a flavor bomb. The cheddar brings that sharp bite, while the provolone adds a creamy stretch—every bite is rich without being heavy.
- Lunchbox Legend: Between us, this is my go-to for packed lunches. Wrap it up the night before, and it stays fresh (and delicious) for days. Honestly, my kids beg for it more than their favorite takeout.
- Budget-Friendly Feast: Roast beef on sale? Buy extra. Cheese stretches far, and onions add depth without costing much. I’ve fed a crowd for under $10—no fancy ingredients, just pure satisfaction.
Step-by-step instructions for beef and cheese sandwiches
Here's how to build the perfect crispy-fried sandwich with caramelized onions and melty cheese.
Caramelize the Onions for Sweet Crunch
Heat a large skillet over medium-low heat and melt the 2 tablespoons unsalted butter until it foams. Add the 1 whole yellow onions, sliced thinly, and cook them slowly for 20-25 minutes until they turn golden brown and sweet. Stir occasionally to prevent burning.
You'll know they're done when they look almost jam-like in texture and smell deeply caramelized. This step is worth the wait—those onions will add a sweet, crunchy contrast to the crispy sandwiches. If they start to stick, add a splash of water and scrape up any browned bits from the bottom of the pan.
Assemble the Sandwich Layers
Lay out 4 of the bread slices on your work surface. Spread 1 tablespoon mayonnaise and 1 teaspoon Dijon mustard on each slice—this adds moisture and tang that balances the richness. Sprinkle each with ¼ teaspoon black pepper and ⅛ teaspoon salt to taste.
Layer ¼ pound roast beef (about 2 ounces) on each slice, followed by ¼ cup sharp cheddar cheese and ¼ cup provolone cheese. Top each with 1 tablespoon caramelized onions and 1 pickle slice for that classic tang. Close with the remaining bread slices, pressing gently to hold everything together.
Fry the Sandwiches Until Golden Crisp
Heat 2 tablespoons olive oil in a large skillet over medium heat until shimmering. Place the assembled sandwiches in the pan and cook for 3-4 minutes per side until they're golden brown and the cheese is fully melted. Press down gently with a spatula during the first minute to prevent curling and ensure even contact with the pan.
Don't rush this step—you want the bread to crisp up while keeping the beef and cheese warm inside. The sandwiches should be deep golden brown with a satisfying crunch when you press the edges. If they brown too quickly, reduce the heat slightly to avoid burning.
Serve Immediately for Maximum Crunch
Transfer the crispy sandwiches to a plate and let them rest for just 1 minute before serving. This brief pause allows the cheese to set slightly, making it easier to handle without losing that perfect crunch. Cut each sandwich diagonally into two triangles if desired, but I prefer to serve them whole for that classic diner-style presentation.
Serve these with a side of tangy pickles or a simple green salad to cut through the richness. The contrast of crispy bread, melty cheese, and sweet caramelized onions makes every bite satisfying. Store any leftovers in the fridge for up to 2 days, but they're best enjoyed fresh and warm!
Pro Tips For Making Beef And Cheese Sandwich
- Warm the Bread First: Cold bread turns soggy the second cheese hits it. Toss your slices in a 350°F oven for 2-3 minutes while you prep—just until they’re pliable and slightly toasted. I used to skip this and always ended up with a limp, greasy mess.
- Slice Onions Thin and Fast: Yellow onions release water like a faucet when chopped thick. Use a mandoline or sharp knife to slice them paper-thin, then immediately pat them dry with paper towels. This keeps your sandwich from turning into a waterlogged brick.
- Layer Cheese Last: Provolone melts faster than cheddar, so add it on top of the cheddar instead of mixing them. When you grill or broil, the provolone will seal the sandwich together while the cheddar stays sharp. I learned this after watching my first attempt fall apart mid-bite.
- Grill, Don’t Broil: Broilers turn cheese to rubber. Instead, heat a pan or grill to medium-high and cook the sandwiches for 2-3 minutes per side, pressing down lightly with a spatula. The indirect heat gives you crispy bread and gooey, stretchy cheese—not burnt edges.
Serving suggestions for this beef and cheese sandwich
Classic Diner Sides
Serve your crispy-fried beef and cheese sandwiches with classic diner sides to complete the meal. A small basket of potato chips—I love Kettle Brand sea salt or Utz—adds a satisfying crunch that balances the richness. For something lighter, a side salad with crisp romaine, cherry tomatoes, and a tangy ranch dressing cuts through the melted cheese beautifully. 🥔
Warm Comfort Pairings
Warm sides elevate these sandwiches to restaurant-quality. A bowl of creamy tomato soup with a swirl of Duke’s mayonnaise on top is a perfect match—dip the sandwich into the soup for an extra indulgent bite. Alternatively, crispy roasted potato wedges tossed in olive oil, salt, and rosemary add a hearty, savory contrast that keeps the meal balanced.
Pickle and Mustard Bar
Set out a small pickle bar with dill, bread-and-butter, and sweet gherkins alongside Dijon mustard and mayonnaise for customization. Let guests assemble their own sandwiches with their preferred toppings—this interactive touch makes it feel like a special treat. I always keep Rea Pickles on hand for that classic tangy crunch. 🥒
Drink Pairings
A cold glass of iced tea—sweet or unsweetened—is my go-to drink for these sandwiches. For something fizzy, a craft soda like Jarritos lime or A&W Root Beer adds a nostalgic touch. If you prefer alcohol, a light lager like Peroni or a crisp white wine such as Sauvignon Blanc complements the flavors without overpowering them. 🍹
Kid-Friendly Additions
For families, add apple slices or carrot sticks with a side of ranch dip to make the meal more balanced. Kids love the sweetness of apples paired with the savory sandwich, and it adds a fresh element to the plate. You can also include mini pretzels for an extra crunchy option that’s easy to grab. 🍎
Leftovers Reinvented
Transform leftover sandwiches into beef and cheese sliders by cutting them into smaller portions and serving on toasted slider buns. Warm them in a skillet for 1-2 minutes per side until crispy again. Serve with pickle spears and sweet onion rings for a fun, shareable appetizer-style meal. This is a great way to repurpose leftovers without sacrificing flavor. 🍔
Nutrition facts
Frequently asked questions
Can I use pre-cooked beef like corned beef or pastrami instead of roast beef? This recipe works beautifully with corned beef, pastrami, or even leftover roast beef. Just
What's the best way to make these sandwiches ahead of time?
Assemble the sandwiches (without frying) up to 1 day ahead and refrigerate them in an airtight container. When ready to serve, fry them fresh for that perfect crispy texture. For longer storage, freeze the assembled sandwiches (unfried) for up to 1 month—thaw overnight in the fridge before cooking. Never freeze already-fried sandwiches, as they lose their crispiness.
Why did my sandwiches turn out soggy instead of crispy?
Soggy sandwiches usually happen from one of three things: overcrowding the pan (cook 1-2 at a time), too much moisture (skip mayo/mustard if needed), or not enough heat. Use medium heat and press gently with a spatula during the first minute to ensure even browning. Also, let the bread cool slightly after toasting to prevent excess steam.
What's a good cheese substitute if I don't have sharp cheddar?
Try Gruyère, Swiss, or pepper jack for similar meltiness. For extra creaminess, use provolone or Monterey Jack alone. Avoid pre-shredded cheese (it contains anti-caking agents that prevent proper melting). If you're out of cheese entirely, a thin layer of cream cheese spread between the bread adds richness while keeping things crispy.
How can I make this recipe healthier without sacrificing flavor?
Swap the bread for whole wheat or seeded baguette slices, use leaner beef like flank steak, and reduce cheese by 25%. For the onions, try asparagus or zucchini sautéed in olive oil instead. Skip the mayo and use Greek yogurt mixed with Dijon for tang. The crispy texture will still shine through with these swaps!