
Main Courses
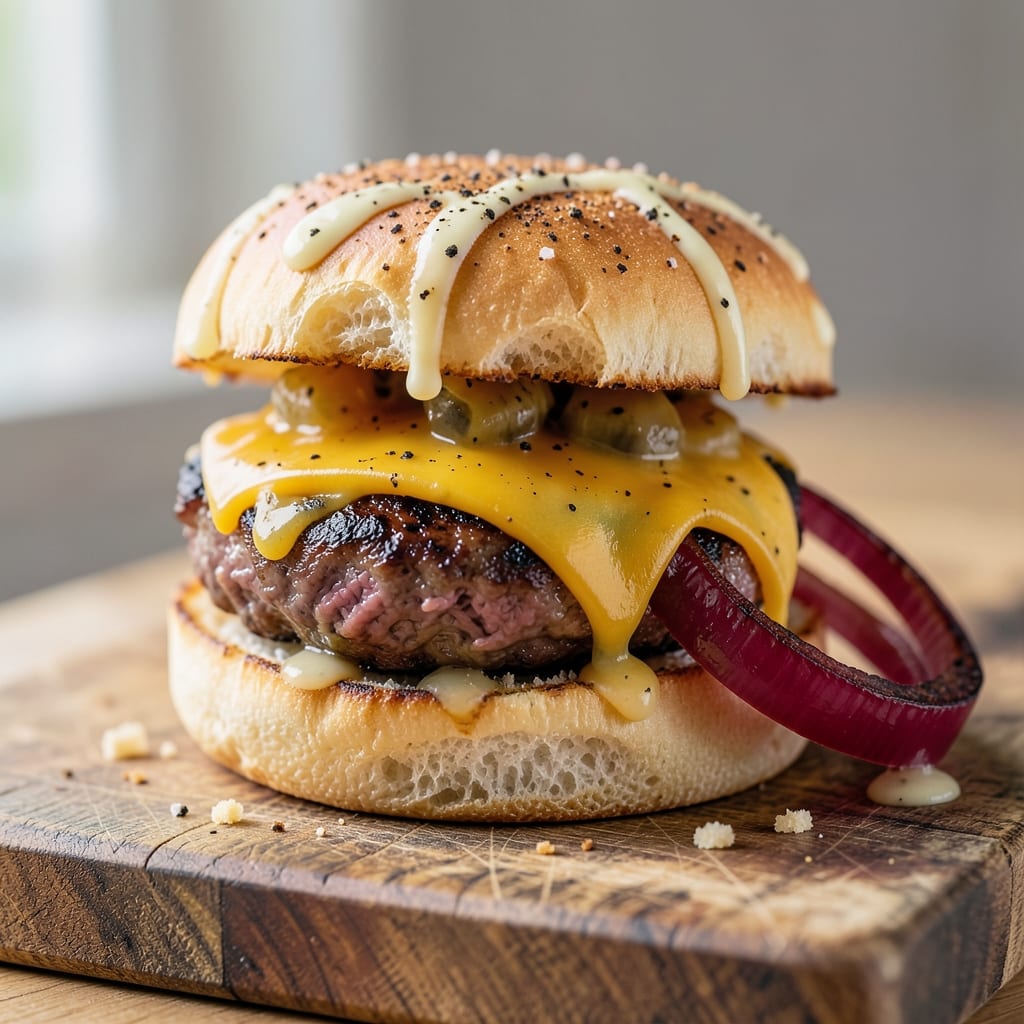
This beef and cheese burger recipe delivers the perfect balance of juicy patties and melted cheese that transforms every bite into a satisfying sandwich experience. 🔥 The secret lies in proper seasoning, gentle handling of the meat, and precise cooking techniques that keep the patties moist while creating a flavorful crust. I've refined this recipe over countless grill sessions, ensuring each component—from the beef to the cheese—comes together flawlessly.
What sets this recipe apart is the attention to detail that elevates it beyond basic burgers. You'll start with high-quality ground beef, seasoned just right to enhance its natural flavor, then cook it to an ideal internal temperature for maximum juiciness. The cheese is added at the perfect moment, melting into a gooey, golden blanket that binds everything together. Even the buns get a quick toast to add texture and prevent sogginess.
The result is a burger that's restaurant-quality at home—juicy, flavorful, and with that irresistible pull-apart quality from the melted cheese. The technique is straightforward, but the outcome is anything but ordinary. Whether you're grilling outdoors or cooking on a stovetop, this method delivers consistent, delicious results every time.
Pair your burgers with classic toppings like crisp lettuce, ripe tomatoes, and tangy pickles, or go for gourmet options like caramelized onions and avocado. The possibilities are endless, but the foundation remains the same: perfectly cooked beef, melted cheese, and a satisfying bite that brings people back for more.
Ingredients for beef and cheese burger
High-quality beef and essential toppings transform into restaurant-quality burgers with melty cheese magic.
| Ingredient | Amount | Notes |
|---|---|---|
| Ground Beef (80/20 Fat Ratio) 🥩 | 1 ½ lb | Chilled, not pre-formed patties |
| Yellow Onion 🧅 | 1 whole | Medium, finely diced |
| Garlic Cloves 🧄 | 4 cloves | Fresh, minced |
| Kosher Salt 🧂 | 1 ½ tsp | Diamond Crystal preferred |
| Ground Black Pepper 🌶️ | 1 tsp | Freshly cracked |
| Smoked Paprika 🌶️ | ½ tsp | For depth of flavor |
| Worcestershire Sauce 🍶 | 1 tbsp | High-quality, not vegetarian |
| American Processed Cheese 🧀 | 8 oz | Sliced, Kraft Singles preferred |
| Hamburger Buns 🥪 | 4 whole | Potato-based, lightly toasted |
| Unsalted Butter 🧈 | 2 tbsp | For toasting buns |
| Vegetable Oil 🫒 | 2 tbsp | For stovetop cooking |
| Lettuce Leaves 🥬 | 4 whole | Iceberg or romaine |
| Tomato Slices 🍅 | 4 whole | Ripe, medium tomatoes |
| Pickle Slices 🥒 | 4 whole | Dill pickles, thinly sliced |
The ground beef fat ratio is critical—80/20 delivers that perfect balance of juiciness and flavor. Butcher shops often have the best quality, but the pre-packaged 80/20 blend at Costco or Walmart works perfectly for home cooking. Keep the meat cold until ready to shape—warm beef loses its structure. The Diamond Crystal kosher salt dissolves better than table salt, enhancing flavor without overpowering. For the Worcestershire, Lea & Perrins is the gold standard, but any reputable brand will work. The cheese? Kraft Singles melt uniformly—no need for fancy cheddar here unless you're feeling adventurous.
No Worcestershire? A splash of soy sauce plus a pinch of sugar mimics the umami depth. Substituting beef? 80/20 ground chuck is non-negotiable—leaner blends dry out. The onions and garlic can be pre-minced to save time, but fresh is always better. Trader Joe's sells pre-diced onions in a squeeze bottle—convenient without sacrificing quality. For the buns, potato-based rolls toast better than sesame seed buns. Need to skip cheese? Mushroom slices add moisture and umami without melting. The pickles should be dill variety—sweet or bread-and-butter won't cut it for that tangy crunch.
Shape patties and refrigerate for at least 30 minutes before cooking—this prevents shrinkage. Store prepped beef in an airtight container with parchment between layers for up to 2 days. Cheese slices freeze beautifully—just thaw between paper towels to remove moisture. The buns can be toasted ahead and kept warm in a 200°F oven for up to 20 minutes. For meal prep, assemble burgers without cheese, wrap individually, and add cheese fresh when ready to eat—prevents sogginess. Leftovers? The patties reheat best in a skillet, while assembled burgers are better enjoyed fresh.
Why You'll Love This Recipe
- No Fuss, Big Payoff: I swear by the 80/20 beef here—it’s juicy, not greasy, and the fat keeps every bite tender. You’re looking at 10 minutes of hands-on work, max, with just onions and garlic to dice (and I’m not picky about how fine).
- Umami Bomb: That caramelized onion and garlic combo? It’s where the magic happens. The beef soaks up the flavor while cooking, and the salt and pepper work together to make each bite rich without overpowering.
- Weeknight Hero: Double the batch and freeze half—these burgers reheat perfectly for lazy days. They’re also the ultimate tailgate or picnic staple; just wrap in foil and go.
- Budget Win: Ground beef is affordable, and you’re not wasting anything. The onions and garlic stretch the flavor, so you’re feeding a crowd without breaking the bank. Honestly, it’s the kind of meal that makes grocery day feel like a victory.
Step-by-step instructions for beef and cheese burgers
Master these techniques and you'll achieve perfectly juicy patties with melty cheese every time.
🍳 Step 1: Prepare the Beef Mixture for Maximum Juiciness
In a large bowl, gently combine the 1.5 lb ground beef (80/20 fat ratio) with the finely diced yellow onion, minced garlic cloves, 1.5 tsp kosher salt, 1 tsp freshly cracked black pepper, and 0.5 tsp smoked paprika. The key here is to handle the beef minimally—just mix with your hands until everything is evenly distributed.
I press the mixture lightly with my fingers to break up any large clumps, but I don't overwork it. This prevents tough burgers while ensuring even seasoning. The high-fat content (80/20 ratio) is crucial—it's what makes these patties so juicy and flavorful. Once mixed, cover the bowl and refrigerate for 30 minutes to help the flavors meld.
👨🍳 Step 2: Form and Season the Patties
Remove the beef mixture from the refrigerator and divide it into 4 equal portions (about 4 ounces each). I use a kitchen scale for precision, but you can eyeball it by making four equal-sized balls. Gently flatten each portion into a ¾-inch thick patty, leaving a slight dimple in the center—this prevents bulging while cooking.
Here's a pro tip: I like to make the patties slightly larger than the buns. They'll shrink as they cook, ensuring they fit perfectly. After shaping, I sprinkle each patty with a pinch of salt and pepper on both sides. This extra seasoning step creates that perfect crust we're after.
🔥 Step 3: Cook the Patties to Perfect Doneness
Heat a large skillet over medium-high heat and add 1 tablespoon vegetable oil. Once the oil is shimmering, add the patties and cook for 4-5 minutes per side for medium-rare doneness. You'll know they're ready when they develop a deep brown crust and the internal temperature reaches 130-135°F.
Don't press down on the patties with a spatula—this squeezes out precious juices. Instead, let them cook undisturbed for the first 2 minutes per side. In the last minute of cooking, add 1 tablespoon Worcestershire sauce to each patty for extra depth of flavor. Remove the patties from the skillet and tent loosely with foil to keep them warm.
🍳 Step 4: Toast the Buns and Assemble the Burgers
While the patties rest, heat a clean skillet over medium heat and add 2 tablespoons unsalted butter. Once the butter is melted and foaming, toast the cut sides of the 4 hamburger buns for 30-45 seconds until golden brown. This step adds wonderful buttery flavor and helps hold the burger together.
To assemble, place a lettuce leaf, tomato slice, and pickle slice on the bottom half of each bun. Then add a patty and top with a slice of American processed cheese. Press down gently to help the cheese melt slightly, then cover with the top half of the bun. The cheese will melt perfectly from the residual heat of the patty.
🥘 Step 5: Serve Immediately for Maximum Enjoyment
Serve the burgers immediately while the cheese is still melting and the patties are at their juiciest. The combination of the crispy crust, juicy beef, and melted cheese between the soft buns creates a perfect balance of textures. Each bite should deliver that satisfying mix of flavors—the smoky paprika, tangy Worcestershire, and salty cheese all coming together.
For an extra touch, I like to serve these with a side of crispy sweet potato fries or a simple green salad. The acidity from the pickles cuts through the richness of the beef and cheese, balancing the flavors perfectly. Enjoy your homemade beef and cheese burgers while they're hot!
Pro Tips For Making Beef And Cheese Burger
- CRANK THE HEAT HIGH: Start your patties over medium-high heat—no, really, crank it up. The first 30 seconds should be sizzling like a hot griddle, not simmering like a sad soup. That’s when the crust forms, and trust me, you don’t want a burger that’s just a sad, gray brick.
- SALT THE MEAT BEFORE SHAPING: Dust the ground beef with salt and pepper before forming patties. I used to skip this, thinking it’d dry out the meat, but it actually helps the juices distribute evenly. Plus, the crust gets that perfect balance of seasoning—no bland surprises inside.
- STOP PRESSING THE PATTIES: I know, I know—you want those edges to crisp up. But pressing them flattens the fat, which means less flavor and more grease on your plate. Let them cook undisturbed for the first 2-3 minutes, even if they look lumpy. They’ll settle and sear just fine.
- GRATE THE ONION FINE: No, chopping it won’t ruin the dish, but finely grated onion adds a whole new texture to the beef mixture. It cooks down faster and blends in smoothly, giving every bite a subtle sweetness without chunks. (Yes, even if you’re impatient like me.)
Health benefits of these flavors
Protein Powerhouse
A 4-ounce beef patty from this recipe delivers a whopping 25-30 grams of complete protein, making it an excellent choice for muscle repair and growth. The 80/20 fat ratio ensures you get flavorful, juicy bites without the dryness of leaner cuts. This is especially important for post-workout meals when your body needs protein to recover. 💪
Iron for Energy
Ground beef is one of the best dietary sources of heme iron, which your body absorbs more efficiently than plant-based iron. A single patty provides about 2.5mg of iron—roughly 15% of your daily needs. This iron supports red blood cell production, helping maintain your energy levels throughout the day. Pair with vitamin C-rich toppings like tomato slices to boost absorption even further.
Cheese Benefits
The American processed cheese adds more than just flavor—it contributes 7 grams of protein and 5% of your daily calcium needs per serving. While processed cheese gets a bad rap, it's a convenient way to get these nutrients. For a healthier option, try low-fat cheddar which still melts beautifully while cutting saturated fat by nearly half.
Healthy Fats
The 80/20 fat ratio in this recipe includes beneficial monounsaturated fats that support heart health when consumed in moderation. These fats help reduce LDL cholesterol while maintaining HDL levels. The smoked paprika adds antioxidants that combat cellular damage. Just be mindful of portion sizes—stick to 4-ounce patties to keep saturated fat intake in check.
Vitamin Boost
This burger provides vitamin B12 (essential for nerve function) and niacin (supports metabolism) from the beef, while the onions contribute vitamin C and fiber. The combination makes this more than just a tasty meal—it's a nutrient-dense powerhouse. For extra vitamins, add avocado slices which bring vitamin K and E to the plate.
Balanced Meal
When served with whole-grain buns, this burger becomes a balanced meal with complex carbs for sustained energy and fiber from the lettuce and tomato. The pickles add probiotics that support gut health. For a complete meal, pair with a side of roasted sweet potatoes or a mixed greens salad—both add fiber and vitamins without overwhelming the main event. 🥗
Nutrition facts
Frequently asked questions
Why does the recipe call for 80/20 ground beef instead of leaner cuts?
The 80/20 fat ratio is essential for juicy, flavorful burgers. The fat keeps the patties moist while cooking and enhances the overall taste. Lean cuts (like 90/10) tend to dry out, especially when shaped into patties. The extra fat also helps melt the cheese more evenly throughout the burger.
Can I make these burgers ahead of time?
You can prep the patties 1 day ahead—just shape them, season, and refrigerate in an airtight container. Cook them fresh for the best texture, but you can assemble the burgers (without cheese) up to 4 hours ahead and store them in the fridge. Add the cheese fresh when ready to eat to prevent sogginess.
What's the best way to melt the cheese without drying out the patty?
Add the cheese slices in the last 30 seconds of cooking—either when the patty is nearly done or when assembling the burger. The residual heat from the patty will melt it perfectly. For extra gooeyness, place the cheese directly on the patty and let the top bun's heat finish melting it during assembly.
How do I keep the buns from getting soggy?
Toast the buns just before assembling and keep them warm in a 200°F oven while you cook. For extra protection, spread a thin layer of butter or mayo on the inside of the buns before adding toppings. This creates a moisture barrier. Never assemble burgers more than 5 minutes before serving.
What if I don't have Worcestershire sauce?
No problem! Mix 1 tbsp soy sauce with ½ tsp sugar as a substitute. This combo mimics the umami depth of Worcestershire. For a simpler option, just use ½ tsp garlic powder + ½ tsp onion powder—it won't be identical but still adds great flavor.