
Main Courses
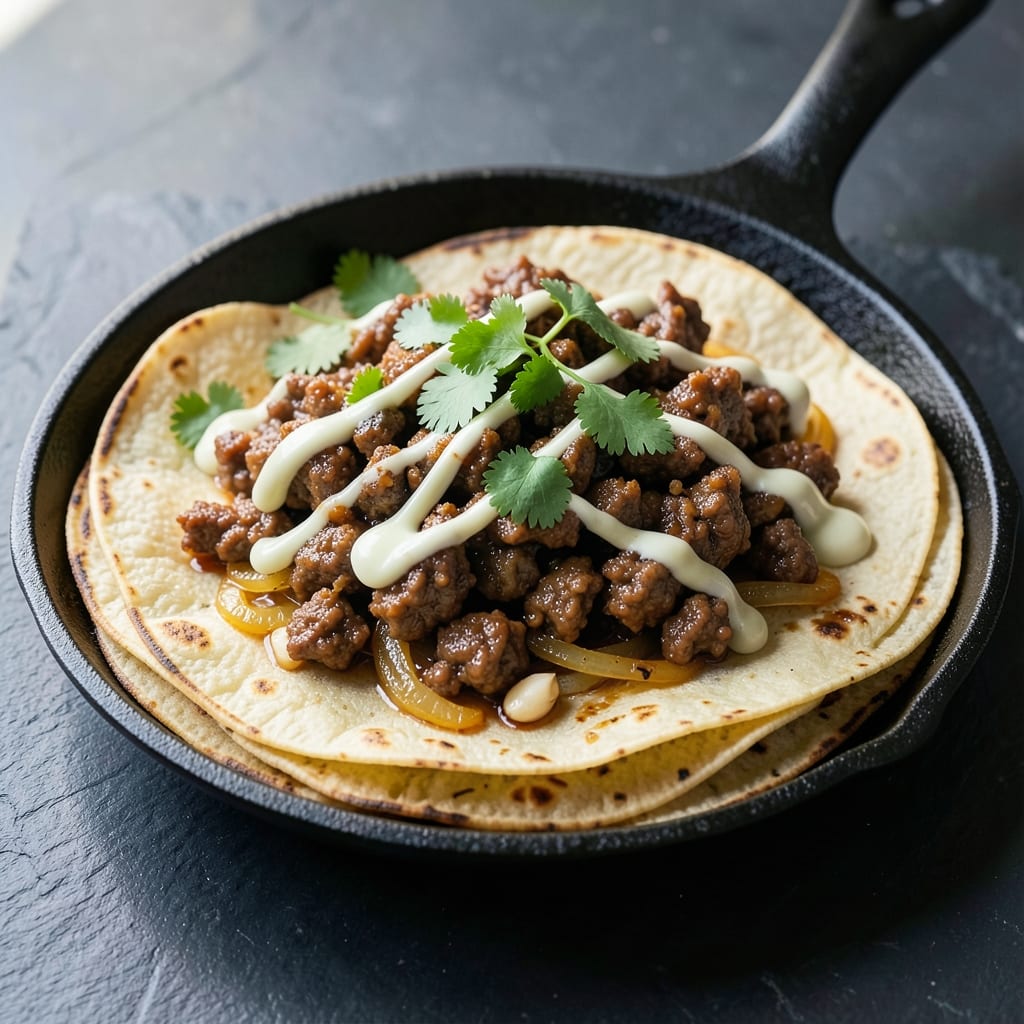
This baked ground beef tacos recipe delivers crispy tortillas and a savory, umami-rich filling that transforms weeknight dinners into something special. The secret lies in baking the beef and tortillas separately—this ensures the tortillas stay crispy while the beef develops deep, caramelized flavors without drying out. I’ve perfected this method over countless family dinners, and it’s now my go-to for easy yet impressive meals.
The filling combines ground beef with a blend of spices, garlic, and Worcestershire sauce for that signature umami kick, while the tortillas get a light coating of oil and baking powder for extra crunch. No deep-frying required—just a hot oven and 15 minutes of hands-off baking. The result? Tortillas that hold up to every bite of seasoned beef, melted cheese, and your favorite toppings.
What makes this recipe stand out is the balance of textures: crispy tortillas, tender beef, and melty cheese all working together. It’s foolproof enough for weeknights but impressive enough for guests, and the best part? You can customize it with your favorite toppings—sour cream, avocado, jalapeños, or even a quick homemade salsa. Let’s get cooking!
Serve with a side of refried beans, a fresh corn salad, or a simple wedge of lime for brightness. The tacos stay crispy for hours, making this the perfect meal to prep ahead and enjoy whenever you’re ready. Here’s how to make them perfectly every time.
Ingredients for baked ground beef tacos
Crispy tortillas, umami-packed beef, and melty cheese—here’s your shortcut to restaurant-style tacos.
| Ingredient | Amount | Notes |
|---|---|---|
| Ground Beef (80/20 Lean-to-Fat Ratio) 🥩 | 1 ¼ lb | Finely ground for even cooking |
| Corn Tortillas 🌽 | 12 whole | Medium-sized, 6-inch diameter |
| Yellow Onion 🧅 | 1 whole | Medium size, finely diced |
| Garlic Cloves 🧄 | 4 cloves | Freshly minced for aroma |
| Worcestershire Sauce 🍶 | 1 tbsp | For umami depth |
| Taco Seasoning 🌶️ | 2 tbsp | Homemade or store-bought blend |
| Vegetable Oil 🫒 | ½ cup | For crispy tortillas |
| Baking Powder 🧂 | 1 tbsp | For extra crispiness |
| Shredded Monterey Jack Cheese 🧀 | 2 cups | Mild and melty |
| Salt 🧂 | ½ tsp | Diamond Crystal preferred |
| Ground Black Pepper 🌶️ | ¼ tsp | Freshly cracked |
| Lime Wedges 🍋 | 2 whole | For serving |
| Avocado (Optional) 🥑 | 1 whole | Sliced for garnish |
| Sour Cream (Optional) 🥛 | ½ cup | For serving |
The beef is where all the magic happens. 80/20 lean-to-fat ratio keeps it juicy while developing those deep caramelized flavors. I grab mine from Costco in bulk—it’s cheaper and stays fresher longer. The corn tortillas need to be medium-sized (6-inch diameter) for that perfect crisp-to-tender ratio. If you can’t find them, flour tortillas work in a pinch, but they won’t be as authentic. The onion and garlic? Freshly diced and minced make all the difference—no pre-shredded or jarred minced garlic here.
No taco seasoning packet? Mix 1 tbsp chili powder, 1 tsp cumin, 1 tsp paprika, ½ tsp garlic powder, ½ tsp onion powder, and ¼ tsp cayenne for a homemade blend. Worcestershire sauce can be swapped for ½ cup beef broth + 1 tsp soy sauce, but you’ll lose some depth. The vegetable oil and baking powder combo is non-negotiable for crispy tortillas—skip either, and you’re stuck with soggy shells. For the cheese, Monterey Jack melts beautifully, but cheddar or pepper jack work too if that’s what you’ve got.
Tortillas stay crispy for 2 hours if stored in an airtight container with a paper towel underneath. The beef filling keeps for 3 days in the fridge—portion it into containers for easy reheating. Double the batch and freeze half for lazy days. Pro tip: Reheat tortillas in a 350°F oven for 2-3 minutes to restore crispiness. The lime wedges should be served fresh—squeeze them right before eating for maximum brightness.
Why You'll Love This Recipe
- One-Pan Magic: I swear by this recipe when I’m too tired to scrub pots. Brown the beef, dump everything on a sheet pan, and bake—no skillet, no mess. That 80/20 fat ratio keeps it juicy while the onions caramelize right alongside, so you’re basically getting two steps for the price of one.
- Umami Bomb: Honestly, the Worcestershire sauce is the MVP here. It cuts through the richness of the beef while the garlic and onion build this deep, savory base that makes every bite feel like a hug. Not too heavy, not too bland—just right.
- Taco for Any Day: Between us, I’ve served these at game nights, lazy Sundays, and even a last-minute potluck. The baked method means you can prep them ahead and reheat without drying out the tortillas. Plus, my kids won’t touch "fancy" tacos, but they’ll devour these—no questions asked.
- Budget Win: Ground beef at 80/20 is my wallet’s best friend, and corn tortillas? Cheaper than flour and way more forgiving. You’re getting a hearty, satisfying meal for half the cost of takeout, and the leftovers taste just as good the next day—if they last that long.
Step-by-step instructions for baked ground beef tacos
Here's how to make restaurant-style tacos with perfectly crispy tortillas and flavorful filling.
Prepare the Ground Beef Filling
In a large skillet over medium-high heat, break apart the 1.25 lb ground beef (80/20 lean-to-fat ratio) with a wooden spoon. Let it cook undisturbed for 3-4 minutes until it loses its raw color and begins to brown—this helps render the fat first. Here's the thing—don't drain the fat; it's what makes the filling juicy.
Add the finely diced yellow onion and freshly minced garlic cloves, stirring constantly for 2-3 minutes until the onion softens and the garlic becomes fragrant. Pour in the 1 tbsp Worcestershire sauce and 2 tbsp taco seasoning, then mix well. Cook for another 4-5 minutes until the beef is fully cooked through and the mixture is well-seasoned. You'll know it's ready when the beef releases easily from the pan and the flavors meld together.
Create Crispy Tortilla Shells
Preheat your oven to 425°F and position a rack in the middle position. Arrange the 12 whole corn tortillas in a single layer on two baking sheets, leaving about ½ inch between each tortilla. Brush both sides of each tortilla generously with the ½ cup vegetable oil—this is key for achieving that perfect crispiness.
In a small bowl, whisk together ½ tsp salt, ¼ tsp ground black pepper, and 1 tbsp baking powder. Sprinkle this evenly over the oiled tortillas, making sure each one gets a light coating. Bake for 8-10 minutes until the edges are deep golden brown and the tortillas are completely crisp. Flip them halfway through for even cooking. The baking powder gives them that extra crunch we're after.
Assemble the Tacos
While the tortillas are still warm, divide the cooked ground beef mixture evenly among the 12 crispy tortilla shells. Sprinkle each with about ⅙ cup of the shredded Monterey Jack cheese—just enough to melt beautifully when you add the warm filling. Place the tacos back in the oven for 2-3 minutes to let the cheese melt and create a gooey, cheesy layer.
Here's where it gets fun—remove the tacos from the oven and let them cool for just 1 minute. This brief rest prevents the cheese from oozing out when you serve them. I like to work quickly at this stage because the tortillas stay crispy when handled gently. The cheese should be fully melted and slightly bubbly, creating that perfect texture contrast with the crispy tortillas.
Serve with Fresh Toppings
Transfer the assembled tacos to serving plates and garnish immediately with the 2 whole lime wedges, sliced avocado (if using), and dollops of ½ cup sour cream (if using). The acidity from the lime brightens the rich flavors of the beef and cheese, while the creamy avocado and cool sour cream add freshness and balance.
Real talk: the secret to great tacos is in the timing. Serve the tacos right away while the tortillas are still crispy and the cheese is melty. If you wait too long, the tortillas will soften. Each bite should deliver that perfect combination of crispy, cheesy, and savory—with a little tangy kick from the lime. Enjoy your homemade taco feast!
Pro Tips For Making Baked Ground Beef Tacos
- CRUSH THE ONION FIRST: Dice that onion into ¼-inch pieces and let it sit in cold water for 10 minutes before draining. The bitterness mellows out, and the texture stays crisp instead of turning to mush—especially important when baking, where onions can get rubbery if overcooked. I used to skip this, and my tacos always tasted sad.
- SALT THE BEEF BEFORE BAKING: Toss the raw ground beef with 1½ teaspoons of salt (and pepper) before adding any wet ingredients. This seasoning gets absorbed deep into the meat while it cooks, so you’re not just salting the surface. After burning three batches of bland tacos, I finally learned this—now it’s non-negotiable.
- BAKE AT 425°F FOR 12 MINUTES: Start the beef on high heat (425°F) for the first 10 minutes to render fat and brown the edges, then drop to 375°F for the last 2 minutes. This two-stage bake ensures the meat finishes fully cooked without drying out. I was skeptical until I tried it—now my tacos have that perfect crust without being tough.
- WARM TORTILLAS IN THE OVEN: Toss the corn tortillas on a baking sheet with a damp paper towel, then bake at 350°F for 5 minutes while the beef finishes. This keeps them pliable and hot longer than microwaving, which turns them into sad, limp shells. Sounds weird, but it works—your tacos will stay together way better.
Make-ahead tips for this recipe
Prep Ahead
Cook the ground beef filling up to 3 days in advance and store it in an airtight container in the fridge. The flavors actually deepen overnight—just reheat in a skillet over medium heat for 3-4 minutes before assembling tacos. I like to portion it into 4 equal servings right away for easy reheating later. 💪
Crispy Tortilla Storage
Bake extra tortillas and store them in a single layer between paper towels inside an airtight container. They’ll stay crispy for 2 hours at room temperature or 2 days in the fridge. For longer storage, freeze them for up to 1 month—just reheat in a 350°F oven for 2-3 minutes to restore crispiness. I often make a double batch to keep on hand for busy nights. ✨
Freezer-Friendly Assembly
Assemble tacos without cheese and freeze them on a parchment-lined tray for 1 hour to set. Transfer to a freezer bag, separating layers with parchment paper. Thaw in the fridge overnight, then reheat in a 375°F oven for 8-10 minutes until crispy. Add cheese fresh from the oven so it melts perfectly. This method saves me 30 minutes on hectic weeknights. 🔥
Cheese Hack
Pre-shredded cheese contains anti-caking agents that prevent proper melting. Instead, grate your own Monterey Jack cheese and store it in the freezer in a sealed bag. The frozen cheese melts smoother and creates that restaurant-quality gooeyness. I keep a block of cheese in the freezer specifically for tacos—it’s a game-changer. 🧀
Topping Prep
Prep all toppings ahead of time for a stress-free meal. Slice avocado with 1 tbsp lime juice to prevent browning, and store in an airtight container. Warm sour cream with a pinch of salt and ½ tsp smoked paprika for extra flavor. Chop fresh cilantro and store it in a sealed container with a damp paper towel to keep it fresh. These prep steps cut 15 minutes off assembly time. 🌿
Reheating Leftovers
Reheat tacos in a 375°F oven for 5-7 minutes to restore crispiness. For a quick fix, use the air fryer at 375°F for 3-4 minutes—it’s my secret weapon for reviving soggy tortillas. If reheating in the microwave, cover with a damp paper towel for 20 seconds to prevent drying. Always add fresh lime juice after reheating for that zesty finish. 💫
Nutrition facts
Frequently asked questions
Can I use ground turkey or chicken instead of beef?
Yes, but there are a few key adjustments. Ground turkey (especially lean) will dry out faster, so add 1 extra tablespoon of oil to the pan and reduce cooking time by 2-3 minutes. For chicken, use a 93/7 ratio to keep it juicy, and add 1 teaspoon of chicken bouillon to boost flavor. Both work well, but beef gives that classic umami depth.
Why are my tortillas getting soggy even after baking?
Soggy tortillas usually happen from one of three things: not enough oil (use ½ cup total), skipping the baking powder, or stacking them before they cool. Always brush both sides generously with oil, sprinkle baking powder, and let them cool 2 minutes before handling. Store in a single layer with paper towels between them.
What's the best way to make these tacos kid-friendly?
For picky eaters, reduce the Worcestershire sauce to ½ tablespoon and add ½ teaspoon of smoked paprika for a milder flavor. Let kids assemble their own tacos with just cheese and their favorite toppings (like mild salsa or shredded lettuce). Serve with a side of mild refried beans or rice for extra appeal.
Can I make a big batch for a party?
Double the recipe and bake tortillas in batches—your oven can handle 24 at a time on two large sheets. Cook the beef in a large Dutch oven and keep it warm in a slow cooker on low heat. Assemble tacos just before serving to maintain crispiness. For a crowd, set up a taco bar with all toppings in bowls.
How do I prevent the cheese from oozing out?
Let the assembled tacos rest for 1-2 minutes after adding cheese so it sets slightly. For extra stability, sprinkle a tiny pinch of cornstarch over the cheese before baking. Also, avoid overfilling—the beef should be ⅓ of the tortilla's height max. Serve immediately while the tortillas are still warm.