
Main Courses
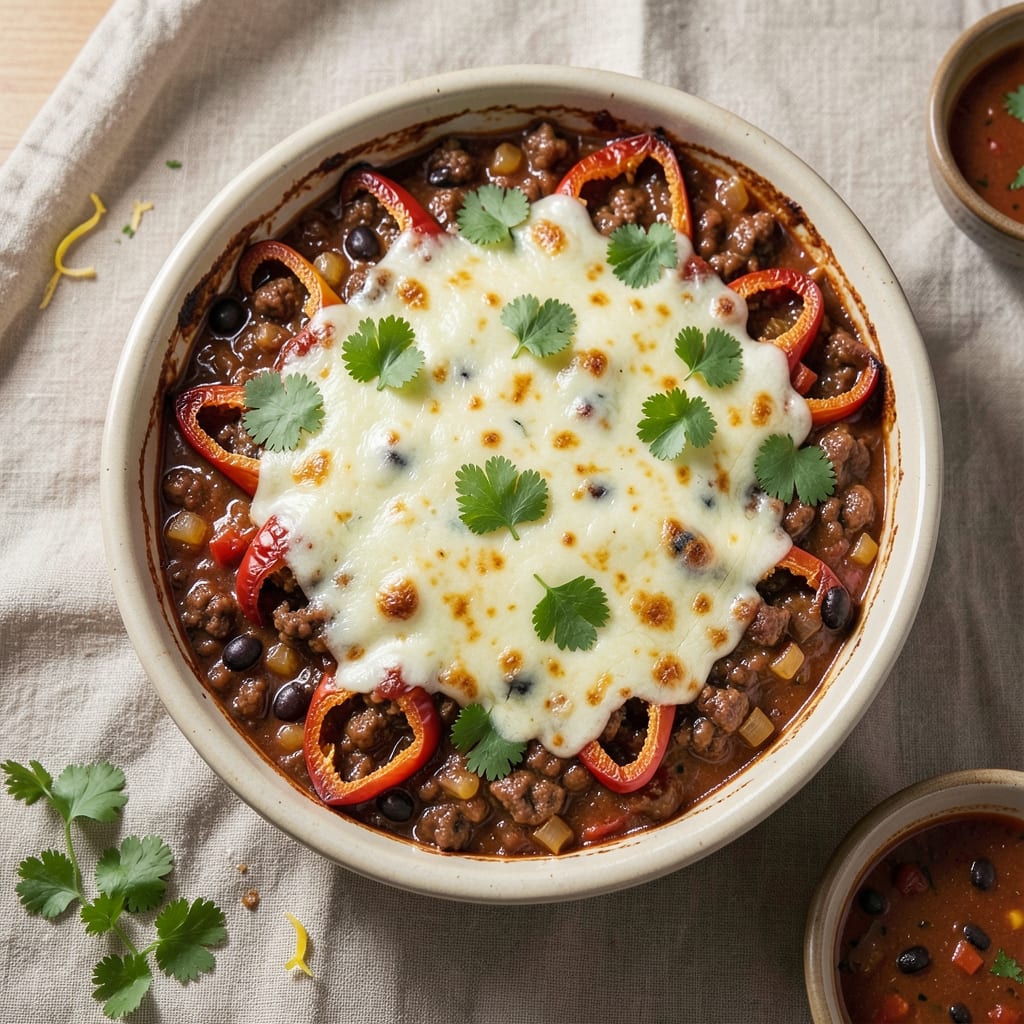
This baked beef chili relleno casserole transforms traditional stuffed poblano peppers into a hearty, crispy-topped dish perfect for feeding a crowd. The secret lies in blending smoky chili filling with tender beef and melted cheese, all topped with a golden tortilla crust that cracks open to reveal creamy, spiced goodness inside.
What sets this recipe apart is the fusion of classic chili relleno flavors with the convenience of a casserole—no stuffing individual peppers required. The beef chili filling simmers with tomatoes, spices, and beans until rich and flavorful, while the tortilla crust achieves that coveted crispy texture without sacrificing tenderness. It's comfort food elevated to restaurant-quality status.
By the time it emerges from the oven, you'll have a dish that's equal parts satisfying and impressive: a golden, bubbling top that reveals pockets of melted cheese and savory beef chili beneath. The aroma alone will have everyone gathering at the table, and the first bite delivers all the smoky, cheesy, spiced perfection you'd expect from a chili relleno—just easier to serve.
Perfect for game day, family dinners, or meal prep, this casserole reheats beautifully and tastes even better the next day. The ingredients list is simple but packed with flavor, and the method is straightforward enough for weeknight cooking. Let's get started!
Ingredients for baked beef chili relleno casserole
Simple ingredients that deliver restaurant-quality chili relleno flavor in casserole form.
| Ingredient | Amount | Notes |
|---|---|---|
| Ground Beef (Chuck) 🥩 | 2 lb | 80% lean, finely ground |
| Poblano Peppers 🌶️ | 4 whole | Roasted, peeled, seeds removed |
| Canned Tomato Sauce 🍅 | 1 ½ cups | San Marzano preferred |
| Black Beans 🌱 | 1 ½ cups | Drained and rinsed |
| Onion (Yellow) 🧅 | 1 whole | Diced, medium size |
| Garlic Cloves 🧄 | 6 cloves | Minced, fresh preferred |
| Chili Powder 🌶️ | 2 tbsp | Medium heat preferred |
| Ground Cumin 🌿 | 1 tbsp | Toasted for depth |
| Smoked Paprika 🌶️ | 1 tbsp | For smoky flavor |
| Salt 🧂 | 1 ½ tsp | Diamond Crystal preferred |
| Black Pepper 🌶️ | ½ tsp | Freshly ground preferred |
| Cheddar Cheese (Shredded) 🧀 | 3 cups | Sharp cheddar preferred |
| Monterey Jack Cheese (Shredded) 🧀 | 1 ½ cups | Mild, for creaminess |
| Flour Tortillas 🌯 | 8 whole | Medium size, cut into strips |
| Olive Oil 🫒 | ¼ cup | Extra-virgin for richness |
The beef here is non-negotiable—chuck roast ground fine gives that rich, meaty texture. Look for 80% lean at Costco or Walmart for the best value. If you can't find chuck, 85% lean ground beef works, but it'll be slightly leaner. The poblano peppers should be firm and glossy—avoid any with soft spots. Roast them until blackened, then peel under running water for that smoky base flavor. For the cheeses, sharp cheddar melts beautifully and adds depth, while Monterey Jack keeps things creamy. Trader Joe's has great pre-shredded options if you're short on time.
No poblano peppers? Anaheim peppers work in a pinch—they're milder but still hold their shape. Short on black beans? Kidney beans or pinto beans are great substitutes. The tortilla crust is where the magic happens—flour tortillas give the best crisp, but corn tortillas add a nice texture contrast if you're feeling adventurous. For the spices, smoked paprika is key for that authentic chili relleno flavor. If you don't have it, a pinch of liquid smoke can mimic it, but it's not the same. The tomato sauce can be canned crushed tomatoes if that's what you have, but San Marzano elevates the dish to another level.
This casserole reheats beautifully—best the next day as the flavors meld. Store leftovers in an airtight container for up to 4 days in the fridge. For longer storage, portion into freezer-safe containers and freeze for up to 3 months. The tortilla crust gets crispy again when reheated—just cover with foil for the first 5 minutes, then uncover to crisp. Make ahead? Assemble the casserole, cover, and refrigerate overnight for even deeper flavors when baked.
Why You'll Love This Recipe
- One-Pan Magic: I swear by this recipe when I’m too tired to scrub pots—just brown the beef and onions, dump in the rest, and bake. That’s it. The poblanos roast right in the oven, softening into smoky sweetness without any extra work.
- Smoky & Savory Boom: Between the charred poblanos (roasted until their skins blister slightly) and the deep, meaty chuck, every bite has this perfect balance of heat and richness. The black beans soak up all the tomato sauce like a sponge, making it hearty but never heavy.
- Leftovers That Don’t Suck: Honestly, this casserole begs to be made in bulk—it reheats like a dream, and the flavors only get better the next day. I’ve packed it for lunch, served it at potlucks, and even frozen portions for lazy Sundays. (Yes, even on a Tuesday night.)
- Budget-Friendly Powerhouse: Ground chuck and canned tomato sauce stretch into a meal that feeds four for under $10. The poblanos add that restaurant-worthy touch without breaking the bank, and black beans keep it filling. My wallet and my family thank me every time.
Step-by-step instructions for baked beef chili relleno casserole
Here's the method for a hearty, crispy-topped casserole that delivers perfect texture and smoky depth.
🍳 Step 1: Sauté the Aromatics and Brown the Beef
Heat the 0.25 cup olive oil in a large skillet over medium-high heat. Add the 1 whole diced yellow onion and cook for 5 minutes until softened and translucent. Stir in the 6 minced garlic cloves and cook for 30 seconds until fragrant—don't let the garlic burn, as it will turn bitter.
Push the onions and garlic to one side of the pan and add the 2 lb ground beef (chuck). Break it apart with a wooden spoon and cook for 8-10 minutes until fully browned, breaking it into small pieces as it cooks. This step develops deep flavor through the Maillard reaction, so don't rush it. Drain excess fat if needed, leaving about 1 tablespoon in the pan for cooking.
👨🍳 Step 2: Build the Chili Filling with Roasted Poblano Peppers
In a food processor, combine the 4 roasted, peeled poblano peppers and pulse until smooth. Transfer the purée to a large bowl and mix in the cooked ground beef, 1.5 cups canned tomato sauce, 1.5 cups drained black beans, 2 tbsp chili powder, 1 tbsp ground cumin, 1 tbsp smoked paprika, 1.5 tsp salt, and 0.5 tsp black pepper. Stir well to combine all ingredients thoroughly. The mixture should be thick but spoonable.
Taste the filling and adjust seasoning if needed—this is where the flavor foundation is built. The poblano peppers add natural sweetness that balances the heat from the chili powder and cumin. If the mixture seems too thick, add 1-2 tablespoons of water to loosen it slightly.
🥘 Step 3: Prepare the Tortilla Crust Layers
Preheat your oven to 375°F. Cut the 8 whole flour tortillas into 1-inch wide strips—this creates a crispy lattice crust that holds up beautifully. You should have about 40-45 strips total. Brush each tortilla strip lightly with a bit of olive oil to help them crisp up in the oven.
Arrange half of the tortilla strips in a single layer on a parchment-lined baking sheet, slightly overlapping them. Brush another light coat of olive oil over the top layer. Bake for 8-10 minutes until the strips are golden brown and crisp. Remove from the oven and set aside—these will form the bottom crust of your casserole.
🍲 Step 4: Assemble and Bake the Casserole
Spread half of the chili filling evenly in the bottom of a 9x13-inch baking dish. Arrange the baked tortilla strips in a lattice pattern over the filling, leaving small gaps for the cheese to melt through. Sprinkle 1.5 cups shredded cheddar cheese and 1 cup shredded Monterey Jack cheese evenly over the tortilla layer.
Add the remaining chili filling over the cheese, then top with another layer of tortilla strips arranged in a lattice pattern. Finish with the remaining 1.5 cups cheddar cheese and 0.5 cup Monterey Jack cheese. The cheese should melt through the tortilla layers, creating a golden, bubbly crust.
🔥 Step 5: Bake Until Crispy and Bubbling
Return the assembled casserole to the 375°F oven and bake for 25-30 minutes until the tortilla crust is deep golden brown and the cheese is fully melted and bubbling. The edges should be crispy, and the filling should be heated through.
For the final 5 minutes of baking, broil on high to achieve maximum crispiness on the tortilla crust. Watch carefully to prevent burning. Remove from the oven and let rest for 10 minutes before serving—this allows the filling to set slightly and makes cutting easier. The result should be a perfect balance of crispy tortilla crust and rich, smoky chili filling.
Pro Tips For Making Baked Beef Chili Relleno Casserole
- CHAR THE PEPPERS RIGHT: Roast whole poblano peppers over an open flame (broiler or gas burner) until blackened all over—then seal them in a bowl for 10 minutes. I used to just char them in a pan, but this method guarantees smoky depth without burning the edges. The skin will peel off like magic, and your chili relleno will taste like it came from a taqueria.
- BROWN THE BEEF FIRST: Don’t skip the sear—break the chuck into crumbles and cook it in batches over medium-high heat until deeply browned. That’s where the flavor lives. I learned this the hard way when my first batch tasted more like stew than chili. Let it cool slightly before mixing with the sauce to avoid a greasy mess.
- DRAIN AND RINSE BEANS: Give those canned black beans a quick rinse under cold water and drain them well—even if they’re “low-sodium.” The extra starch makes the casserole gummy when baked. My grandmother swore by this, and she was right: the texture stays firm and the dish doesn’t turn into a thick paste.
- LAYER DRY BEANS ON BOTTOM: Spread a thin, dry layer of black beans (no sauce) on the bottom of your baking dish before adding the chili mixture. This creates a barrier that keeps the bottom from sticking and burns. I was skeptical until I tried it—now I never bake it without this step. Works like a charm, even in my ancient, nonstick-pretending cast-iron skillet.
Storing and reheating this baked beef chili relleno casserole
Refrigerator Storage
Let your chili relleno casserole cool completely before transferring to an airtight container—I use glass Pyrex with tight-sealing lids. Store in the fridge at 40°F or below for up to 4 days. The tortilla crust stays crispy when reheated properly, and the flavors actually deepen overnight as the spices meld. 💫
Freezer Prep Tips
For longer storage, portion into freezer-safe containers or heavy-duty plastic freezer bags. Leave 1 inch headspace to prevent expansion cracks. I recommend quart-sized containers for individual servings or a gallon-sized for family meals. Label with the date—this casserole keeps well for 3 months without losing texture or flavor.
Oven Reheating Method
My favorite way to reheat is in the oven—it restores that perfect crispy crust. Cover loosely with foil and bake at 350°F for 20-25 minutes until heated through. Uncover for the last 5 minutes to crisp the tortilla strips again. The cheese will melt beautifully, giving you that restaurant-quality finish.
Microwave Shortcut
For quick reheating, cover with a damp paper towel and microwave on 50% power in 2-minute intervals, stirring between each. Total time should be 6-8 minutes until reaching 165°F internal temperature. Add 1 tablespoon of water if the filling seems dry—this prevents a tough texture.
Crispy Crust Revival
If your tortilla crust loses crispiness during storage, pop it under the broiler for 2-3 minutes at the end of reheating. Watch closely to avoid burning—this is the secret to maintaining that satisfying crunch. A sprinkle of grated Parmesan before broiling adds extra flavor and color. 🔥
Make-Ahead Strategy
Assemble the casserole completely, then refrigerate uncovered for 12-24 hours before baking. This allows the tortilla strips to dry out slightly, ensuring maximum crispiness when baked. I do this when hosting dinner parties—it cuts prep time and guarantees a showstopping result. The filling stays moist while the crust becomes irresistibly crunchy.
Nutrition facts
Frequently asked questions
Can I use corn tortillas instead of flour tortillas for the crust?
Yes, but expect a slightly different texture! Corn tortillas will add a subtle sweetness and a more rustic, slightly chewy bite to the crust. For best results, brush them extra lightly with olive oil since they absorb less moisture than flour tortillas. The lattice pattern will still work, though you may need to bake them for 1-2 extra minutes to achieve full crispiness.
How do I make this casserole spicier? Boost the heat by adding 1-2 teaspoons of cayenne pepper or 1 chopped chipotle pepper in adobo sauce to the chili filling. For smoky heat, increase the smoked paprika to 2 tablespoons. If you love fresh heat, top with sliced jalapeños or a dollop of hot sauce before serving.
Why did my tortilla crust turn soggy instead of crispy?
This usually happens when the filling is too wet or the tortillas weren't crisped enough before assembly. Next time, bake your tortilla strips until they're golden brown and crisp, then let them cool completely before arranging. Also ensure your chili filling isn't too saucy—drain any excess liquid from beans and adjust with a splash of water if needed. For extra insurance, sprinkle 1/4 cup crushed cornflakes over the cheese layer before adding the top tortilla strips.
Can I make this dish ahead and freeze it?
Assemble the casserole completely (including cheese), then freeze it unbaked in a freezer-safe dish for up to 3 months. When ready to bake, thaw in the fridge overnight, then bake as directed—add 10-15 extra minutes to the baking time since it starts cold. For best results, bake from frozen at 325°F for 50-60 minutes (covered with foil), then broil for 5 minutes to crisp the top.
What's the best way to serve this casserole?
This dish shines as a complete meal! Serve with cold Mexican lager beer, lime wedges, and fresh cilantro for garnish. For extra flair, add a dollop of sour cream, avocado slices, or pickled red onions on top. It pairs beautifully with a simple green salad or warm cornbread to round out the meal. The crispy crust makes it perfect for sharing—just cut into squares for easy serving!