
Side Dishes
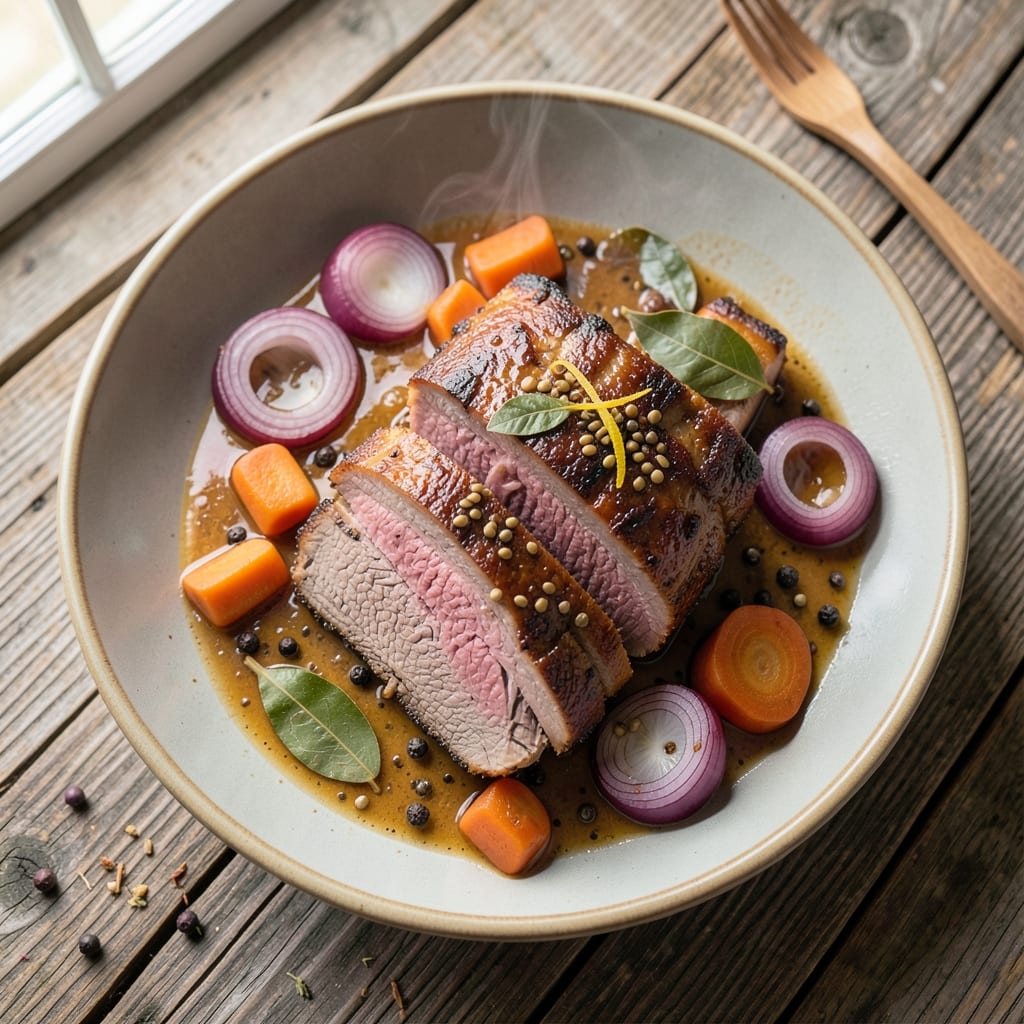
Award-winning corned beef isn’t just a St. Patrick’s Day tradition—it’s a slow-braised masterpiece that transforms tough brisket into melt-in-your-mouth perfection. The secret lies in a 24-hour brine that tenderizes deeply while infusing flavor, followed by a low-and-slow cook that renders fat into rich, juicy pockets. This isn’t your grandmother’s pot roast; it’s a technique refined to win competitions, balancing saltiness, sweetness, and smoky depth in every bite.
What sets this recipe apart is the two-stage cooking process: an initial simmer to break down collagen, then a final reduction to concentrate flavors into a glossy, caramelized glaze. The result? Corned beef so tender it falls apart at the touch, with a crust that crackles like glass. Pair it with the right sides—buttery mashed potatoes, tangy sauerkraut, and a sharp mustard sauce—and you’ve got a meal that commands center stage at any table.
The real magic happens in the details: using high-quality corned beef brisket, monitoring the pot’s liquid level, and letting the meat rest before slicing. This isn’t just dinner; it’s an experience—one where the aroma alone will have your guests gathering before the timer even goes off. The fall-off-the-bone tenderness and complex flavor profile are what judges (and your dinner party) will reward.
Serve with classic accompaniments like crusty rye bread to soak up the juices, or elevate it with a modern twist: roasted root vegetables or a creamy horseradish cream. The key is confidence—this recipe delivers restaurant-quality results at home, every time. Let’s get started on your next award-worthy centerpiece.
Ingredients for award winning corned beef
Sixteen ingredients transform tough brisket into award-winning melt-in-your-mouth perfection.
| Ingredient | Amount | Notes |
|---|---|---|
| Corned Beef Brisket 🥩 | 4 lb | High-quality, well-marbled cut |
| Yellow Onions 🧅 | 2 whole | Medium size, sliced into wedges |
| Carrots 🥕 | 4 whole | Medium size, peeled and halved |
| Bay Leaves 🍃 | 4 whole | Dried, standard size |
| Black Peppercorns 🌶️ | 1 tbsp | Whole, lightly crushed |
| Mustard Seeds 🌿 | 1 tsp | Whole, yellow or brown |
| Garlic Cloves 🧄 | 6 cloves | Fresh, peeled and smashed |
| Beef Broth 💧 | 4 cups | Low-sodium, homemade preferred |
| Apple Cider Vinegar 🍎 | ½ cup | Bottled, unfiltered preferred |
| Kosher Salt 🧂 | 2 cups | Diamond Crystal preferred |
| Brown Sugar 🍯 | ½ cup | Light or dark, packed |
| Fresh Thyme 🌿 | ¼ cup | Leaves only, stems removed |
| Fresh Parsley 🌿 | ¼ cup | Flat-leaf, chopped for garnish |
| Whiskey or Bourbon 🥃 | ½ cup | Optional, 80-proof minimum |
The brisket is non-negotiable here—look for well-marbled, high-quality cuts from a trusted butcher or Costco's pre-order section. I always ask for the point cut (the fattier end) since it stays juicier during long braising. If you're buying whole, trim excess fat but leave some for flavor. For the spices, Penzeys or Spicewalla are my go-tos, but the bulk bins at Whole Foods work too. The key is freshness—if your bay leaves smell like dust, toss them. The same goes for thyme; it should smell vibrant and green.
No whiskey? Extra beef broth or apple cider works just fine—this isn’t a cocktail, after all. Running short on time? Pre-sliced onions and carrots from the grocery store save 10 minutes, though fresh is always better. The vinegar can be swapped for lemon juice at half the amount, but apple cider adds that perfect tang. For the sugar, honey works in a pinch, but brown sugar’s molasses notes are essential. And if you're using pre-made broth, low-sodium is critical—you're adding plenty of salt in the brine.
This dish tastes even better the next day, so make it ahead if you can. Store the cooked brisket in its juices in the fridge for up to 4 days, or freeze for 3 months in an airtight container. The leftovers reheat beautifully—just warm everything gently on the stove. For serving, I like to slice it against the grain and arrange it on a platter with the braising liquid reduced into a glossy sauce. The crust? That's the prize—let it crackle as you slice, and serve it with crusty rye bread to soak up every last drop.
Why You'll Love This Recipe
- One-Pot Magic: I swear by this—just toss the brisket, onions, carrots, and spices into a pot, add water, and let it simmer. No chopping like a pro, no fancy techniques, just set-it-and-forget-it while you handle life.
- Deep, Smoky Richness: That brisket? It falls apart with a tender bite, soaking up the bay leaves and peppercorns until every forkful is ridiculously flavorful. Honestly, the kind of taste that makes you slow down mid-bite.
- Leftovers That Win: This recipe actually improves the next day—those onions caramelize, the meat gets even more melt-in-your-mouth, and suddenly you’ve got a week’s worth of lunches without extra effort. (Yes, even on a Tuesday night.)
- Budget-Friendly Feast: A single brisket feeds a crowd for less than takeout, and the veggies stretch it further. Between us, this is how I feed my book club without breaking the bank—no one leaves hungry.
Step-by-step instructions for slow-braised corned beef
Here's how to transform a tough brisket into melt-in-your-mouth perfection.
Cure the Brisket for Maximum Flavor
In a large mixing bowl, combine the 2 cups kosher salt, 0.5 cup brown sugar, 1 tbsp black peppercorns, 1 tsp mustard seeds, 6 cloves garlic cloves (smashed), 0.25 cup fresh thyme, and 0.5 cup whiskey or bourbon. Mix thoroughly to create an even curing paste.
Pat the 4 lb corned beef brisket completely dry with paper towels—this step is critical for proper curing. Rub the curing mixture all over the meat, pressing it into every crevice. Place the brisket in a non-reactive container, cover, and refrigerate for 5-7 days, turning once daily. This extended curing period ensures deep flavor penetration and tender results.
Prepare the Braising Liquid
After curing, rinse the brisket thoroughly under cold water to remove excess salt. In a large Dutch oven, combine 4 cups beef broth, 0.5 cup apple cider vinegar, and 4 whole bay leaves. Bring to a simmer over medium heat until the aromatics are fragrant, about 5 minutes.
Add the 2 whole yellow onions (sliced into wedges) and 4 whole carrots (peeled and halved) to the pot. Let them simmer for another 5 minutes to soften slightly. This step builds complex flavors that will infuse the meat during braising. Keep the liquid at a gentle simmer—you want it bubbling softly, not boiling vigorously.
Braise Until Fork-Tender
Place the cured brisket into the Dutch oven, fat-side up, along with the remaining curing mixture from the container. Pour in enough water to cover the meat by about 1 inch—this ensures proper steaming while braising. Bring to a gentle boil, then immediately reduce heat to low and cover tightly with a lid.
Transfer the pot to a preheated 300°F oven and braise for 3-4 hours, or until the meat is fork-tender and easily pulls apart. Check the liquid level periodically and add hot water as needed to maintain coverage. The brisket is ready when it reaches an internal temperature of 205°F and the meat fibers separate cleanly with minimal resistance.
Rest and Serve with Pan Sauce
Remove the brisket from the pot and transfer it to a cutting board. Tent loosely with foil and let it rest for at least 30 minutes before slicing. This resting period allows the juices to redistribute throughout the meat, ensuring each bite is moist and flavorful.
While the brisket rests, skim excess fat from the braising liquid and strain it through a fine-mesh sieve into a saucepan. Return the strained liquid to the stove and simmer over medium heat until reduced by half, about 10-15 minutes. The sauce should coat the back of a spoon with a glossy sheen. Stir in the 0.25 cup fresh parsley just before serving for brightness and color.
Slice and Garnish for Presentation
Slice the rested brisket against the grain into ¼-inch thick slices for maximum tenderness. Arrange the slices on a warm platter and ladle the reduced pan sauce generously over the top. Garnish with additional chopped fresh parsley for a pop of color and freshness.
Serve immediately with the braised vegetables from the pot—those onions and carrots will be perfectly tender with deep, caramelized flavors. The result is a restaurant-quality corned beef that's juicy, tender, and packed with complex flavors from the slow braising process.
Pro Tips For Making Award Winning Corned Beef
- CRANK THE HEAT FIRST: Start your corned beef in a cold pot, but once the water hits a rolling boil, turn the heat to medium-high and let it scream for 5 minutes. I used to simmer gently from the start, and the meat always came out mushy—this quick boil tightens the fibers so they stay tender without falling apart.
- PEEL THOSE CARROTS LAST: Toss the onions and bay leaves in first, but hold off on adding the carrots until the meat’s been cooking for 2 hours. Their starch will thicken the broth too soon, making it cloudy and watery instead of rich. (Yes, even if you’re impatient like me.)
- DON’T SKIP THE CRUST CHECK: After 3 hours, lift the brisket out and flip it—you’re looking for a deep golden-brown crust on the bottom. If it’s pale, sear it in a dry pan for 2 minutes per side before returning it to the pot. That crust is where all the flavor hides.
- SALT THE WATER LIKE THE OCEAN: This isn’t just "enough salt"—aim for ½ cup kosher per gallon of water. The brisket’s already cured, but the veggies and broth need that punch to cut through the fat. Taste the water after 1 hour; if it’s bland, add more. (Your future self will thank you.)
Dietary considerations for this award winning corned beef
Gluten-Free Adaptations
Traditional corned beef recipes rely on broths and seasonings that may contain hidden gluten, but this version stays safe for gluten-free diets. Use certified gluten-free beef broth (like Imagine or Pacific Foods) and check all spice blends for cross-contamination warnings. The apple cider vinegar and brown sugar are naturally gluten-free, so no substitutions are needed there. 🌾
Low-Sodium Options
If you're watching your sodium intake, reduce the kosher salt to 1 cup (instead of 2) and compensate with extra garlic, thyme, and black peppercorns for depth. For the broth, choose a no-salt-added version and add just ½ tsp salt to the braising liquid. The whiskey or bourbon also adds complexity without extra sodium.
Dairy-Free Serving Suggestions
Skip the traditional buttered potatoes and opt for roasted sweet potatoes tossed in olive oil and smoked paprika. For a creamy element, make a horseradish cream with Greek yogurt or coconut cream instead of sour cream. The sauerkraut remains dairy-free, and the mustard sauce can be made with Dijon mustard and apple cider vinegar for tangy contrast.
Vegetarian Substitutes
While this recipe is meat-centric, you can create a vegetarian version by using extra-firm tofu or seitan as a base. Marinate the tofu in the same spiced brine (without salt) for 4 hours, then braise with the same vegetables and broth. The texture won’t be identical, but the flavors will shine through—especially with the apple cider vinegar and whiskey for depth.
Allergen-Friendly Swaps
For nut allergies, ensure all spices (like thyme) are processed in nut-free facilities. If mustard is a concern, replace the mustard seeds with 1 tsp ground coriander for warmth. For egg allergies, no adjustments are needed—this recipe is naturally egg-free. Always double-check labels, especially on beef broth and spice blends, for hidden allergens.
Keto-Friendly Adjustments
To make this keto-friendly, reduce the brown sugar to 2 tbsp and increase the apple cider vinegar to ¾ cup for acidity. Skip the carrots (they’re higher in carbs) and use cauliflower instead for a low-carb vegetable. The corned beef itself is naturally keto, and the braised onions add flavor without significant carbs. Serve with cauliflower mash for a guilt-free side.
Nutrition facts
Frequently asked questions
Why does this recipe require a 5-7 day curing process?
The extended curing time is what creates that award-winning depth of flavor and tenderness. The salt and spices penetrate deeply into the meat, breaking down tough fibers while building complex layers of taste. Skipping this step results in a more ordinary pot roast—think of it as the difference between a great wine and a cheap box. The patience pays off in every juicy, flavorful bite.
Can I use pre-cured corned beef instead of making my own brine?
Yes! For a quicker version, use 4 lbs of pre-cured corned beef brisket (like from the deli section) and skip the 5-7 day curing. Simply follow the braising instructions starting from Step 2. The flavor will be slightly different—less customizable but still delicious. Just add 1 extra bay leaf and 1 tsp smoked paprika to compensate for the missing curing process.
What's the best way to reheat leftovers without drying them out?
Reheat in the braising liquid! Place the sliced corned beef in a pot with some of the reserved juices (about ½ cup per pound) and warm over low heat for 10-15 minutes. Never microwave—it turns the meat rubbery. For extra richness, add a splash of beef broth or a pat of butter while reheating. The result will be just as tender as fresh!
How do I know when the meat is perfectly tender?
Use the fork test: When the brisket reaches 205°F internally, pierce it with a fork. If the meat separates cleanly with minimal resistance and the juices run clear (not pink), it's ready. The meat should also pull apart easily when you gently tug at it. Overcooking past this point turns it mushy—so pull it just as it reaches this perfect stage!
Can I make this in an Instant Pot instead of oven-braising?
After curing, place the brisket in the Instant Pot with all braising ingredients. Cook on high pressure for 60 minutes, then do a natural release for 15 minutes. The texture will be slightly different (more tender but less caramelized crust), but still delicious. For extra depth, finish with 5 minutes on sauté mode to reduce the juices into a glossy sauce.