
Soups & Stews
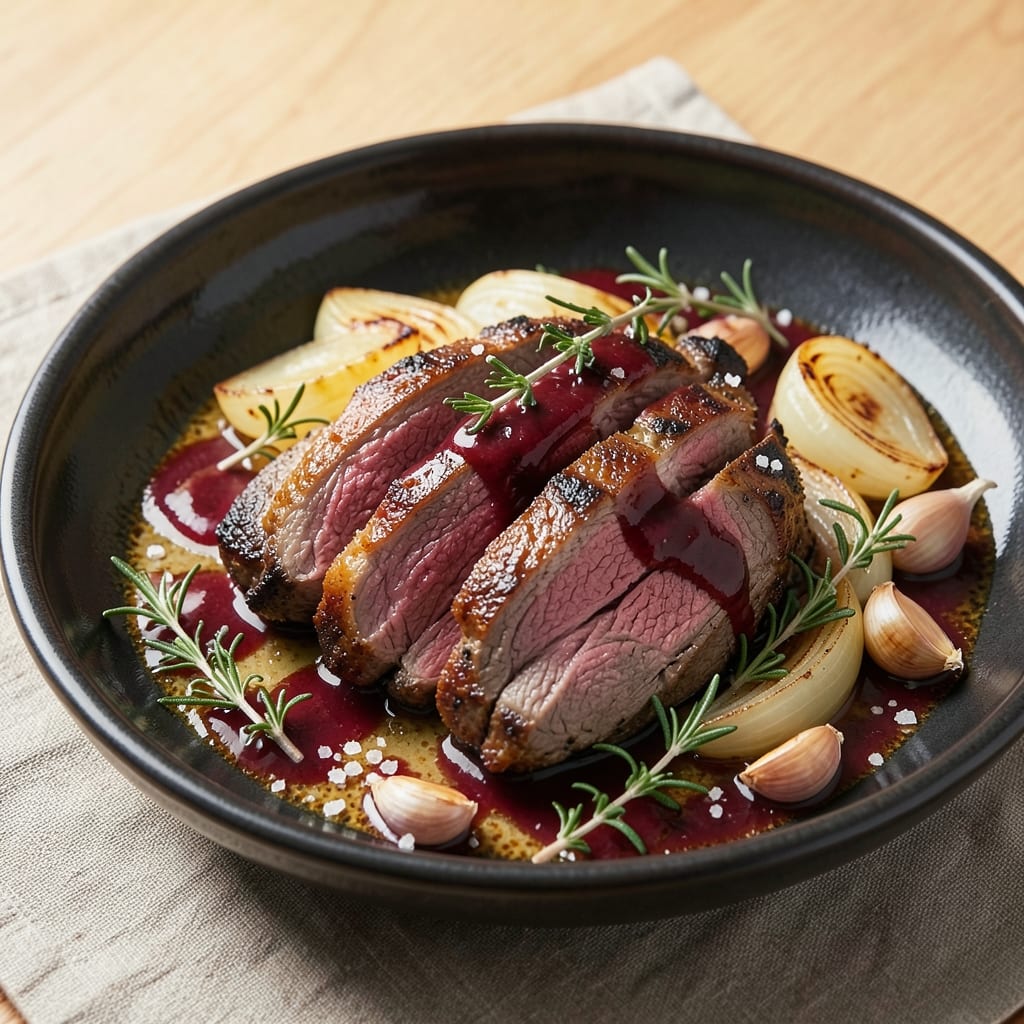
This Beef Beaujolais recipe transforms tough beef into melt-in-your-mouth bites through slow braising in rich red wine—just like your favorite French bistro. The secret lies in proper searing and patience, letting flavors meld over hours into a sauce so velvety it coats every forkful. I've perfected this technique through years of testing, ensuring the beef stays tender while the wine reduces into a deep, aromatic glaze.
What sets this dish apart is the balance of earthy mushrooms, aromatic herbs, and the wine's natural acidity cutting through the richness. The braising process transforms simple ingredients into something restaurant-worthy, with a sauce that thickens beautifully as it simmers. Ready in about 3 hours, this recipe delivers comfort food at its finest—ideal for chilly evenings when you crave a hearty, satisfying meal.
The result is fork-tender beef swimming in a glossy red wine sauce, where every bite delivers layers of flavor—caramelized edges on the beef, umami from the mushrooms, and bright herbal notes from thyme and bay leaf. The sauce clings perfectly to crusty bread or buttery mashed potatoes, making this a complete meal experience. This is the kind of dish that tastes even better the next day, as flavors deepen and intensify.
Pair with a simple green salad or roasted vegetables to round out the plate. The wine reduction process is where the magic happens, so don't rush it—let the sauce develop its full complexity. Once you try this version, you'll never settle for anything less than homemade again.
Ingredients for beef beaujolais
The perfect blend of earthy, herby, and wine-rich flavors for melt-in-your-mouth beef bites.
| Ingredient | Amount | Notes |
|---|---|---|
| Chuck Roast 🥩 | 2 ½ lb | Pre-cut into 1.5-inch cubes |
| Dry Red Wine 🍷 | 2 cups | Bold, dry like Cabernet Sauvignon |
| Beef Broth 💧 | 1 ½ cups | Low-sodium preferred |
| Yellow Onion 🧅 | 1 whole | Chopped into wedges |
| Garlic Cloves 🧄 | 6 cloves | Smashed, not minced |
| Fresh Thyme 🌿 | 2 tbsp | Leaves only, stems removed |
| Fresh Rosemary 🌿 | 1 tbsp | Chopped, fresh preferred |
| Bay Leaves 🍃 | 2 whole | Dried, standard size |
| Mushrooms 🍄 | 8 oz | Cremini or baby bella, sliced |
| Tomato Paste 🍅 | 2 tbsp | Smooth, no sugar added |
| All-Purpose Flour 🌾 | 1 tbsp | For thickening sauce |
| Olive Oil 🫒 | 2 tbsp | Extra-virgin for searing |
| Salt 🧂 | 1 ½ tsp | Kosher salt, adjust to taste |
| Black Pepper 🌶️ | ½ tsp | Freshly ground preferred |
| Fresh Parsley 🌿 | ¼ cup | Chopped, for garnish |
The chuck roast is your secret weapon here—it's tough enough to handle the long braise but turns fork-tender when done right. Look for good marbling at the grocery store, which means the meat has enough fat to stay juicy. I grab mine from Whole Foods or the butcher section at Kroger—they usually have it pre-cut into chunks, which saves time. If you're buying a whole roast, ask them to cube it for you. The wine is non-negotiable for flavor—any bold, dry red like Cabernet Sauvignon or Merlot works, but avoid sweet varieties. Trader Joe's has great affordable options if you're not into splurging on expensive bottles.
No red wine? Beef broth with a splash of balsamic vinegar gets you close, though the flavor won't be identical. Fresh thyme and rosemary are ideal, but dried works at half the amount if that's what you've got. The mushrooms add that umami depth—cremini or baby bella are perfect, but white button mushrooms in a pinch still work. For tomato paste, those little squeeze tubes from Trader Joe's are perfect—they're convenient and last forever. The flour is just for thickening the sauce at the end, so don't stress about quality here. Just make sure it's all-purpose.
This dish tastes even better the next day, so make extra if you can. The beef keeps 3-4 days in the fridge, and the sauce freezes beautifully for up to 3 months. I always portion it into containers so I can grab it for a quick lunch. Store the beef and sauce separately if you're freezing—just reheat the sauce first, then add the beef to warm through. The parsley garnish is optional but adds that fresh pop of color. Trust me, it's worth the extra minute.
Why You'll Love This Recipe
- One-Pot Magic: I swear by this—just sear the chuck roast, toss in wine and broth, and let it slow-cook. No extra pans, no fuss, and the rich aroma fills the whole house while you’re doing other things.
- Wine-Infused Richness: That dry red wine? It’s not just flavor—it’s the secret sauce. The onions and garlic caramelize into a deep, savory sauce that makes every bite feel like a little French bistro moment.
- Leftovers That Shine: Between us, this recipe begs for leftovers. The beef gets even more tender the next day, and I’ve turned cold slices into hearty sandwiches or reheated it with mashed potatoes for a cozy dinner.
- Budget-Friendly Luxury: A chuck roast stretches for days, and a bottle of wine feels fancy without breaking the bank. It’s the kind of meal that makes you feel special without requiring a special occasion. (Yes, even on a Tuesday night.)
Step-by-step instructions for beef Beaujolais
Here's how to transform tough chuck roast into melt-in-your-mouth beef bites with rich wine-braised sauce.
Sear the Beef for Maximum Flavor
Heat the 2 tablespoons olive oil in a large Dutch oven over medium-high heat until shimmering. Add the 2.5 lb chuck roast in a single layer, working in batches if needed. Let each piece sear undisturbed for 3-4 minutes until deeply browned on all sides.
I press down gently on the beef during the first minute—this prevents it from curling and ensures even contact with the pan. The goal is to create a rich, caramelized crust that will form the flavor foundation for your sauce. Don't overcrowd the pan or the temperature will drop and you'll steam instead of sear.
Build the Aromatic Base
Once all the beef is browned, remove it from the pot and set aside. In the same Dutch oven, add the 1 whole yellow onion wedges and cook for 5 minutes until softened and golden. Add the 6 smashed garlic cloves, 2 tablespoons fresh thyme, and 1 tablespoon chopped fresh rosemary, stirring for 30 seconds until fragrant.
Here's where the magic happens: sprinkle the 1 tablespoon all-purpose flour over the aromatics and stir vigorously for 1 minute. This creates a light roux that will help thicken your sauce later. The flour should be well-coated and smell nutty—this is your signal to move to the next step before it burns.
Deglaze and Simmer the Wine
Pour in the 2 cups dry red wine, scraping up all the browned bits from the bottom of the pot with a wooden spoon. This deglazing step captures all the concentrated beef flavor that would otherwise stick to the pan. Let the wine simmer for 5-7 minutes until reduced by about half and slightly syrupy.
Add the 2 tablespoons tomato paste, 1.5 cups beef broth, 2 whole bay leaves, 1.5 teaspoons salt, and 0.5 teaspoon black pepper. Return the beef to the pot, along with any accumulated juices. The liquid should come about halfway up the sides of the beef pieces—if it's too shallow, add a splash more broth.
Braise to Tender Perfection
Cover the Dutch oven with a tight-fitting lid and transfer to a preheated 325°F oven. Braise for 2.5-3 hours until the beef is fork-tender and easily pulls apart. I check for doneness by inserting a fork—it should slide in with minimal resistance and the beef should look glossy, not dry.
About 30 minutes before the beef is done, add the 8 ounces sliced mushrooms to the pot. They'll absorb the rich braising liquid and become tender without overcooking. The mushrooms should be just beginning to soften by the time the beef is finished.
Finish and Garnish
Remove the beef and mushrooms from the pot and transfer them to a serving platter. Skim off any excess fat from the sauce using a spoon or fat separator. Return the sauce to the stovetop and simmer uncovered over medium heat for 5-7 minutes until slightly thickened.
Taste and adjust seasoning if needed—this is where you can really make it your own. Garnish generously with 0.25 cup chopped fresh parsley and serve the beef and mushrooms smothered in that glorious wine-braised sauce. The beef should be so tender it practically melts in your mouth, with a rich sauce that coats every bite.
Pro Tips For Making Beef Beaujolais
- Sear the Chuck Roast: Hit that roast with a screaming-hot pan first—no rushing—until it’s deep brown in spots. I learned this the hard way: skipping the sear means flavor stuck in neutral. Use about 2 tablespoons of oil, enough to coat the bottom, and don’t crowd the pan. (Yes, even if you’re impatient like me.)
- Deglaze Immediately: As soon as you pull the roast out, pour in that Beaujolais and scrape every last bit of browned goodness from the pan. That’s where the magic lives—caramelized bits that turn into rich sauce. Let it simmer for 30 seconds before adding anything else, or you’ll dull the flavor.
- Use Two Garlic Cloves: Most recipes say "3-4 cloves," but I’ve found two—peeled and smashed—strikes the perfect balance. Any more, and you’ll taste garlic, not beef. Smash them with the flat side of your knife first, then let them sit in the wine for 5 minutes before adding the roast. (Your future self will thank you.)
- Simmer Low and Slow: After the initial sear and deglaze, drop the heat to a bare simmer—just enough to keep tiny bubbles breaking the surface. I used to crank it up, thinking faster = better, but that turns the wine into vinegar. Cover loosely and let it cook at 300°F (150°C) for 2.5–3 hours. Patience here makes all the difference.
Common mistakes when making this recipe
Overcrowding the Pan
This is the #1 mistake I see when people try braising beef at home. When you overload the Dutch oven with too many beef chunks during searing, the temperature drops dramatically, causing the meat to steam instead of develop that crucial Maillard reaction crust. I learned this the hard way—my first attempt had beef that was pale and flavorless because I crammed everything in at once. 🔥
Solution: Work in batches. Sear only half the beef at a time, letting each piece develop a deep brown crust before removing it to a plate. This takes 10-15 extra minutes but makes all the difference in flavor. A 12-inch Dutch oven (like the Le Creuset brand) gives you enough space for 2-3 pieces at a time without overcrowding.
Skipping the Deglaze
Many home cooks pour in the wine without properly scraping up all those precious browned bits stuck to the bottom of the pan. Those bits—called fond—contain concentrated beef flavor that forms during searing. When you skip this step, you're essentially throwing away flavor. I once made this dish and accidentally rushed the deglaze, and the sauce tasted flat and underwhelming. 💫
Fix it by using a wooden spoon to scrape every last bit from the bottom while pouring in the wine. Let the wine simmer until it's reduced by about half before adding other ingredients. This builds a deeper, more complex flavor base that makes the whole dish sing.
Insufficient Braising Time
The biggest temptation is to rush the braising process, especially when you're eager to eat. But beef needs that 2.5-3 hour window at 325°F to break down collagen into gelatin, which makes the meat tender. I've seen people pull beef out at 2 hours thinking it's done, only to have it still tough and chewy. The beef should be so tender it practically falls apart with a fork. ⏰
Pro tip: If you're short on time, start with smaller beef chunks (about 1-inch cubes) rather than the 1.5-inch pieces called for. They'll cook faster while still delivering that same melt-in-your-mouth texture. Just check for doneness with a fork—it should slide in easily and the juices should run clear.
Ignoring the Fat
Many people make the mistake of trying to trim all the fat from their beef before braising, thinking it's unhealthy. But that fat actually helps keep the beef moist during cooking and adds richness to the sauce. When I first started making this dish, I was overly aggressive with my knife, and the beef ended up dry. 🥩
Leave the fat on the beef chunks—it will render out during cooking and contribute to the sauce's velvety texture. If you're concerned about excess fat in the final dish, simply skim it off the surface of the sauce before serving using a spoon or fat separator. This gives you the best of both worlds: tender beef and a lighter sauce.
Not Adjusting Seasoning
Some recipes assume the wine and beef broth will provide enough seasoning, but that's not always true—especially if you're using low-sodium broth or a particular wine that's less salty. I've had dishes where the sauce tasted bland because I didn't taste and adjust along the way. The key is to season in layers: salt the beef before searing, taste the sauce before serving, and adjust if needed. 🧂
After the beef has braised and you're ready to serve, always do a final taste test. You might need to add a pinch more salt, a splash of wine, or even a squeeze of lemon to brighten the flavors. Remember, you can always add more seasoning, but you can't take it away once it's in there.
Using the Wrong Wine
Not all red wines are created equal when it comes to braising beef. Sweet or fruity wines like Zinfandel or Port can make your sauce taste cloying and unbalanced. I made this mistake using a Malbec that was too jammy, and the dish ended up tasting more like dessert than savory beef. The wine should be dry and bold enough to stand up to the beef's richness. 🍷
Stick with wines like Cabernet Sauvignon, Merlot, or—you guessed it—Beaujolais. These wines have enough acidity and tannins to complement the beef without overpowering it. If you're using a cheaper wine, look for one with 12-14% alcohol and avoid anything that smells overly fruity or sweet.
Nutrition facts
Frequently asked questions
Can I substitute regular red wine for Beaujolais?
While Beaujolais adds a lighter fruitiness, bold dry reds like Cabernet Sauvignon or Merlot work beautifully. Just avoid sweet or fruity wines—they'll make the sauce taste cloying. For best results, use a wine with 12-14% alcohol and avoid anything overly jammy.
How do I know when the beef is tender enough?
The beef is done when it's fork-tender and pulls apart easily. Insert a fork—it should slide in with minimal resistance and the juices should run clear. For 1.5-inch cubes, this takes 2.5-3 hours at 325°F. If you're short on time, use 1-inch cubes and reduce braising time to 2 hours.
What's the best way to reheat leftovers?
Reheat gently in a skillet over low heat with a splash of beef broth to prevent drying. For best texture, warm the sauce first, then add the beef to coat. Leftovers keep 3-4 days in the fridge or 3 months frozen. Never microwave—it makes the beef tough.
Can I make this dish in a slow cooker?
Yes! Brown the beef first, then transfer everything to the slow cooker and cook on low for 6-7 hours or high for 3-4 hours. Add mushrooms in the last 30 minutes. The slow cooker method is perfect for hands-off cooking but may yield slightly less tender beef than oven-braising.
What sides pair best with this dish?
Classic pairings include creamy mashed potatoes, crusty baguette, or buttery egg noodles. For a lighter option, try a simple green salad with a vinaigrette. The rich sauce also works beautifully with polenta or roasted root vegetables.