
Soups & Stews
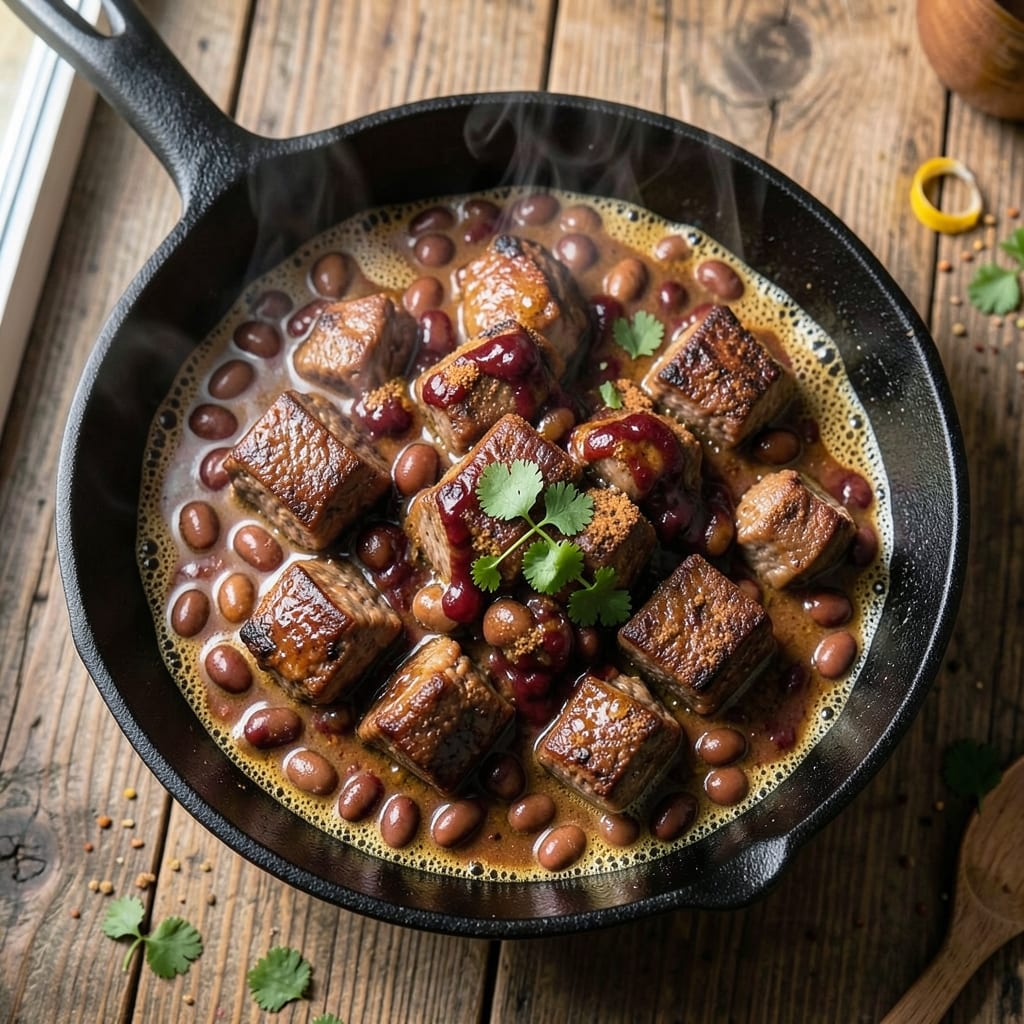
This beef bean beer chili recipe transforms tough beef into melt-in-your-mouth tenderness while creating a rich, smoky broth that's impossible to resist. The secret lies in using beer—not just for flavor, but as a natural tenderizer that breaks down the meat over hours of gentle simmering. I developed this recipe after years of experimenting with chili, and the beer's subtle bitterness balances the sweetness of the beans and tomatoes perfectly.
The process starts with browning the beef in batches to develop deep, caramelized flavors, then building layers of spice with cumin, chili powder, and smoked paprika. A dark beer like stout or porter adds body and complexity, while kidney beans provide hearty texture and plant-based protein. This isn't just chili—it's a deeply satisfying meal that tastes even better the next day.
What you'll end up with is a pot of chili that's thick with beef and beans, infused with smoky spices and beer's malty depth. The broth reduces to a perfect consistency that coats every spoonful, while the meat practically falls apart at the touch of a fork. Serve it with crusty cornbread or tortilla chips for dipping, and prepare for requests to make it again.
This recipe delivers restaurant-quality results without requiring special equipment—just time and patience. The long simmering process develops flavors that can't be rushed, making it perfect for weekend cooking or meal prep. Let's get started on creating your most flavorful chili yet.
Ingredients for beef bean beer chili
Six hearty ingredients make this chili unforgettable—beef that melts, beer that tenderizes, and spices that sing.
| Ingredient | Amount | Notes |
|---|---|---|
| Chuck Roast 🥩 | 2 ½ lb | Pre-cut into 1-inch cubes |
| Dark Beer 🍺 | 2 cups | Stout or porter preferred |
| Kidney Beans 🌱 | 2 cups | Drained and rinsed |
| Tomato Paste 🍅 | ½ cup | Squeeze tube or canned |
| Chili Powder 🌶️ | 2 tbsp | Medium heat preferred |
| Ground Cumin 🌿 | 1 ½ tbsp | Toasted for depth |
| Smoked Paprika 🌶️ | 1 ½ tbsp | For smoky flavor |
| Garlic Cloves 🧄 | 6 cloves | Minced or pressed |
| Yellow Onion 🧅 | 1 whole | Diced into small pieces |
| Beef Broth 💧 | 2 cups | Low-sodium preferred |
| Cocoa Powder 🍫 | 1 tbsp | Unsweetened for depth |
| Salt 🧂 | 1 ½ tsp | Kosher or sea salt |
| Black Pepper 🌶️ | ½ tsp | Freshly ground preferred |
| Bay Leaves 🍃 | 2 whole | For aromatic depth |
| Olive Oil 🫒 | 2 tbsp | For browning beef |
The chuck roast is your secret weapon here. Costco or butcher shops usually have it pre-cut into cubes, which saves time. If you're buying a whole roast, ask for chuck—it's the most flavorful cut. Look for good marbling, not lean meat. The beer? Guinness or a local craft stout works best—something with depth and a little bitterness to balance the sweetness. If you're not a beer drinker, dark ale or even non-alcoholic stout keeps the flavor profile intact. Pro tip: let the beer come to room temperature before adding it to the pot—cold beer can slow down the cooking process.
No dark beer? Substitute with beef broth and a splash of balsamic vinegar—it mimics the depth. Fresh garlic and onion are ideal, but jarred minced garlic works in a pinch. The tomato paste can be skipped if you're short, but it adds that rich, concentrated flavor. For the cocoa powder, natural unsweetened is best—it gives the chili that subtle bittersweet note. If you're making this ahead, freeze the beans and broth separately so you can thaw just what you need. The spices? Toast the cumin and chili powder in a dry pan for 30 seconds before adding to the pot—that little step makes all the difference.
This chili tastes even better the next day—honestly, the flavors meld overnight. Store leftovers in an airtight container in the fridge for up to 5 days, or freeze portions for 3 months. I like to portion it into individual containers so I can grab and reheat for quick lunches. If you're meal prepping, make a double batch—it's that good. The chili thickens as it cools, so you might need to add a splash of broth when reheating. And trust me, the smell alone will have everyone gathering around the kitchen.
Why You'll Love This Recipe
- One-Pot Magic: I swear by this recipe—just dump everything in one pot, walk away for a few hours, and boom. The chuck roast practically melts into tender shreds while the beer and tomato paste build that deep, smoky base. No fancy steps, no stress.
- Beer-Braised Depth: That dark beer isn’t just for flavor—it’s the secret weapon. The malty richness cuts through the heat of the chili powder while caramelizing the edges of the beef, giving it this perfect balance of hearty and bright. Honestly, the first time I tasted it, I nearly spilled my coffee.
- Game for Any Gathering: This chili works just as well for a lazy Sunday supper as it does for a tailgate or a potluck. Serve it with cornbread for a cozy night in, or pile it into bowls with shredded cheese and sour cream for a crowd. My in-laws think it’s "fancy" because of the beer—no one ever questions the beans.
- Leftovers? Please.: Between us, I make this on Sundays just so I can reheat it all week. The flavors only get better as it sits, and the chili powder keeps it warm and satisfying without tasting stale. Plus, the chuck roast stretches to feed four people for two meals—my wallet thanks me every time.
Step-by-step instructions for beef bean beer chili
Here's how to build chili with deep, smoky layers that come together in one pot.
Brown the Chuck Roast for Maximum Flavor
Heat a large Dutch oven over medium-high heat and add the 2 tablespoons olive oil. Once shimmering, add the 2.5 lb chuck roast in 1-inch cubes, working in batches if needed. Let the meat brown undisturbed for 3-4 minutes per side until deeply golden—this creates that rich, caramelized foundation for your chili.
Don't rush this step. You want the exterior to develop a dark crust while the interior stays slightly pink. If the pan gets too crowded, reduce heat slightly to prevent steaming. Once all pieces are browned, transfer them to a plate and set aside.
Build the Aromatic Base
In the same Dutch oven, reduce heat to medium and add the 1 whole yellow onion and 6 cloves garlic cloves. Sauté for 5-6 minutes until the onions soften and turn translucent, then deepen in color. You'll smell that sweet, caramelized aroma—this is where the chili's depth starts.
Next, stir in the 2 tablespoons chili powder, 1.5 tablespoons ground cumin, and 1.5 tablespoons smoked paprika. Toast the spices for 30 seconds until fragrant—this activates their flavors. Here's the thing: don't skip this step. Toasting the spices makes them pop in the finished dish.
Simmer the Chili for Deep Flavor Development
Return the browned chuck roast to the pot. Pour in the 2 cups dark beer, scraping up any browned bits from the bottom. Add the 2 cups kidney beans, 0.5 cup tomato paste, 2 cups beef broth, 1 tablespoon cocoa powder, 1.5 teaspoons salt, and 0.5 teaspoon black pepper. Stir well to combine everything.
Bring the mixture to a gentle boil, then reduce heat to low and cover partially. Let it simmer for 2.5-3 hours—yes, it takes time, but this slow cooking breaks down the meat and lets all the flavors meld together. Stir occasionally, especially in the first hour, to prevent sticking. The chili should reduce slightly and develop a thick, rich consistency.
Finish with Bay Leaves and Rest
About 30 minutes before the chili is done, add the 2 whole bay leaves. These aromatic leaves add subtle earthy notes that balance the beer and spices. Taste the chili and adjust seasoning if needed—you might need a touch more salt or a sprinkle of chili powder to reach your preferred heat level.
Once the chili reaches your desired thickness and flavor intensity, remove the bay leaves. Let the chili rest for 10-15 minutes off the heat. This resting period allows the flavors to settle and the chili to thicken slightly. Serve warm with your favorite toppings—crusty bread, shredded cheese, or a dollop of sour cream all work perfectly.
Pro Tips For Making Beef Bean Beer Chili
- SEAR THE ROAST FIRST: Chuck roast loves a good crust, and skipping this step means flavor hiding in the background. Heat your pot until smoking hot—yes, even if you’re nervous about sticking—and brown the meat in batches. The extra 5 minutes pays off with deep, caramelized richness that beer chili desperately needs.
- USE DRY BEANS: Canned beans are fine, but dry kidney beans soak up the beer and tomato paste better, giving your chili a thicker, heartier texture. If you’re short on time, quick-soak them in boiling water for 30 minutes instead of overnight—just don’t skip the rinse afterward.
- SIMMER LOW AND Slow: Beer chili isn’t a race. After the initial sear and beer deglaze, drop the heat to a bare simmer (think tiny bubbles, not a rolling boil) and let it cook for at least 2.5 hours. Rushing this turns tough meat into mush and skunks the beer flavor—patience here makes all the difference.
- SALT THE BEER: Beer’s bitterness needs balancing, and adding ½ teaspoon of salt directly to the beer (before pouring it in) cuts through the harshness better than adding it later. It’s an easy fix that prevents your chili from tasting like you’re drinking liquid hops.
Best sauces and condiments for this beef bean beer chili
Classic Beer Braising
The beer isn't just a flavor enhancer—it's the heart of this chili. I recommend using Guinness or a local craft stout for its rich maltiness and subtle bitterness, which balances the sweetness of the beans and tomatoes. If you prefer a lighter beer, like a pale ale, add 1 teaspoon of blackstrap molasses to deepen the flavor. For non-drinkers, dark ale or non-alcoholic stout works just as well. The beer's acidity tenderizes the beef while adding complexity that you won't find in traditional chili recipes. 🍺
Spice Blend Boost
Toast your spices—chili powder, cumin, and smoked paprika—in a dry pan for 30 seconds before adding them to the pot. This simple step unlocks their full potential, creating layers of flavor that make this chili unforgettable. For extra depth, add ½ teaspoon of ground coriander or ½ teaspoon of cinnamon—just a pinch enhances the smoky, earthy notes. If you love heat, stir in ½ teaspoon of cayenne pepper at the end, but taste first—sometimes homemade chili is already spicy enough! 🌶️
Umami Enhancers
For an extra boost of savory richness, add 1 tablespoon of Worcestershire sauce or 1 teaspoon of fish sauce when you pour in the beer. These ingredients add depth without overpowering the beer's natural flavor. If you're a fan of miso paste, stir in 1 teaspoon of white miso along with the spices—it adds a subtle fermented note that pairs beautifully with the beer. For a vegetarian twist, swap the beef broth for mushroom broth and add 1 tablespoon of soy sauce for umami. 💫
Sweet and Tangy Balance
Brighten the chili with a touch of sweetness and acidity. Stir in 1 tablespoon of apple cider vinegar or 1 teaspoon of balsamic vinegar at the end of cooking to cut through the richness. For sweetness, add 1 tablespoon of brown sugar or 1 mashed banana (yes, really!)—it sounds unusual, but the natural sweetness complements the beer and spices perfectly. If you're using a dry red wine instead of beer, add 1 teaspoon of honey to balance the tannins. 🍯
Toppings That Elevate
Finish your chili with toppings that add texture and freshness. A sprinkle of crumbled blue cheese or sharp cheddar melts beautifully into the warm chili. For crunch, top with crushed tortilla chips or toasted pumpkin seeds. A dollop of sour cream or Greek yogurt cools the heat, while fresh cilantro or green onions add brightness. For a smoky finish, drizzle with hot honey or chipotle crema. These toppings turn a simple bowl of chili into a restaurant-worthy meal. ✨
Nutrition facts
Frequently asked questions
Can I use any type of beer in this chili?
Dark beers like stout or porter work best because their malty richness complements the chili's flavors. For lighter beers like pale ale, add 1 teaspoon of blackstrap molasses to deepen the flavor. Non-alcoholic stout or even beef broth with balsamic vinegar can substitute if needed.
Why does this chili need such a long cooking time?
The 2.5-3 hour simmer is key for tenderizing the beef and developing deep flavors. Slow cooking breaks down connective tissue, making the meat melt-in-your-mouth tender while letting all ingredients meld together. Patience here creates restaurant-quality results at home.
What if my chili turns out too thin?
Simmer uncovered for 10-15 extra minutes to thicken naturally. If still too thin, mix 1 tablespoon cornstarch with 2 tablespoons cold water, stir into the chili, and simmer 5 minutes more. Never add flour directly to hot chili—it clumps!
Can I make this chili in an Instant Pot?
Yes! Brown the beef first, then add all ingredients and cook on high pressure for 45 minutes. Quick-release the pressure, then adjust thickness by simmering 10 minutes uncovered. The beer's alcohol will evaporate more quickly, so you may need to reduce the amount slightly.
How do I make this chili spicier?
Add ½ teaspoon cayenne pepper or 1 tablespoon hot sauce at the end. For built-in heat, increase chili powder to 3 tablespoons and add ½ teaspoon chipotle powder with the spices. Always taste first—homemade chili can already be quite spicy!