
Soups & Stews
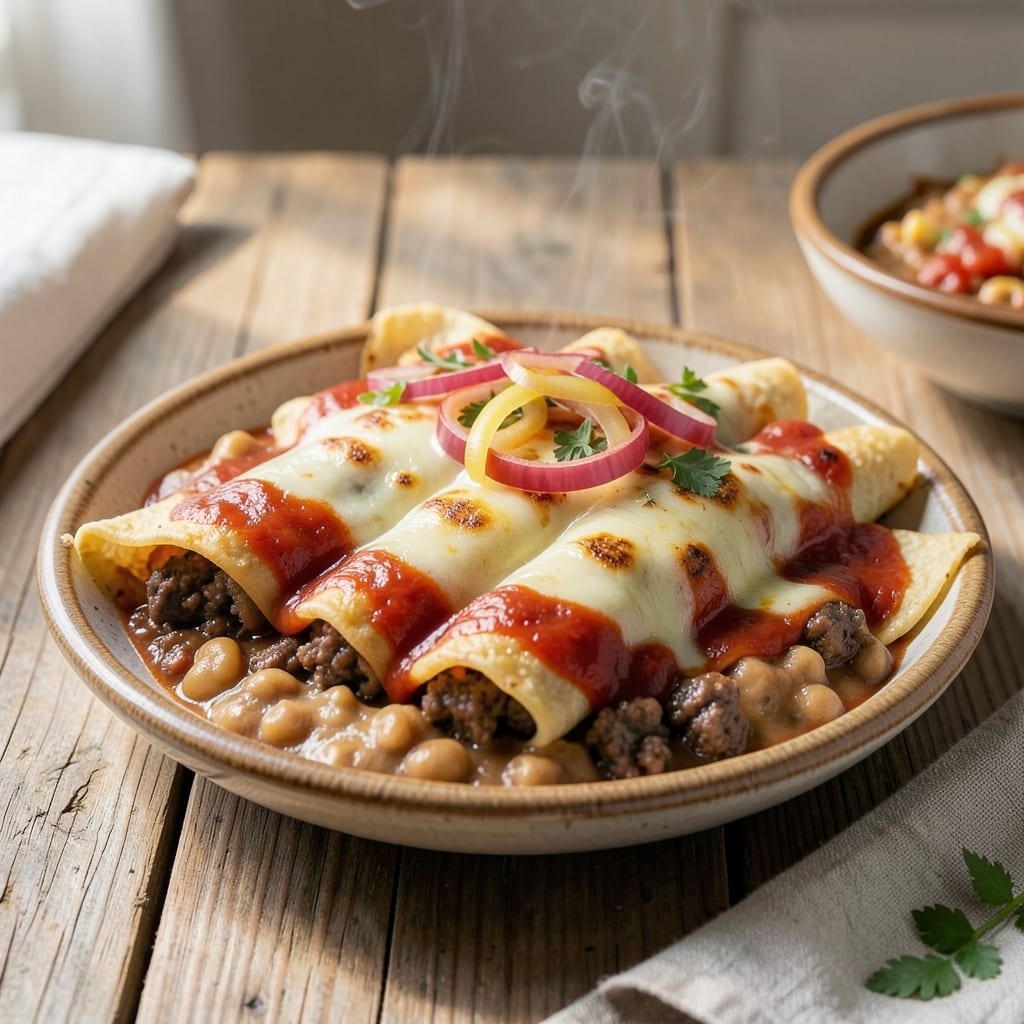
This beef bean and cheese enchilada recipe delivers crispy tortillas wrapped around layers of savory beef, hearty beans, and melty cheese—each bite is a perfect balance of texture and flavor. 🔥 The secret lies in browning the beef properly and using slightly stale tortillas for that ideal crispiness without compromising the tender filling inside. This dish transforms simple pantry staples into a restaurant-worthy meal that's ready in under an hour.
What sets these enchiladas apart is the combination of ground beef and refried beans, which creates a filling that's both rich and satisfying. The cheese melts into a creamy blanket around the filling, while the tortillas develop a golden, crispy exterior that holds up perfectly to the sauce. I've perfected this recipe over years of testing, ensuring every layer works together for maximum flavor and texture.
By the time you pull these from the oven, you'll have enchiladas with crispy edges that shatter slightly, a filling that's tender yet flavorful, and a sauce that clings beautifully to each bite. The aroma alone will have everyone gathering around the table—this is comfort food at its finest, with just the right amount of effort to make it feel special.
Serve with your favorite red or green enchilada sauce and a sprinkle of fresh toppings like cilantro or sour cream. The leftovers reheat beautifully, making this an excellent meal for feeding a crowd or prepping ahead for busy weeks. Let's get cooking!
Ingredients for beef bean and cheese enchilada
Pantry staples plus a few fresh touches—these enchiladas come together faster than you'd think.
| Ingredient | Amount | Notes |
|---|---|---|
| Ground Beef 🥩 | 1 lb | 80/20 fat ratio preferred |
| Refried Beans 🥫 | 1 ½ cups | Canned or homemade, slightly cooled |
| Shredded Cheese 🧀 | 2 cups | Monterey Jack or cheddar blend |
| Flour Tortillas 🌯 | 8 whole | Medium size, slightly stale for crispiness |
| Enchilada Sauce 🍅 | 2 cups | Red or green, store-bought or homemade |
| Yellow Onion 🧅 | 1 whole | Medium size, finely diced |
| Garlic Cloves 🧄 | 3 cloves | Fresh, minced |
| Taco Seasoning 🌶️ | 2 tbsp | Homemade or store-bought |
| Olive Oil 🫒 | 1 tbsp | For browning beef |
| Salt 🧂 | ½ tsp | Kosher or sea salt |
| Black Pepper 🌶️ | ¼ tsp | Freshly ground |
| Sour Cream 🥛 | ¼ cup | For serving, optional |
| Fresh Cilantro 🌿 | ¼ cup | Chopped, for garnish |
The ground beef is where the flavor starts. 80/20 fat ratio gives you that rich, juicy texture—skip the lean stuff. I grab mine from the butcher counter at Whole Foods or Kroger when it's on sale, but the pre-packaged stuff works fine. For the refried beans, La Fonda or Bush's are my go-tos—they're creamy and hold up well. Fresh tortillas? Mission or Old El Paso are reliable, but if you've got them, slightly stale tortillas crisp up better. The onion and garlic are non-negotiable for flavor, so don't skip them—just make sure they're finely diced for even cooking.
No enchilada sauce? Tomato sauce plus a pinch of cumin and chili powder works in a pinch. Swapping the cheese? Oaxaca or pepper jack add a nice kick. For the taco seasoning, I make my own (chili powder, cumin, garlic powder, onion powder, salt, and a pinch of cayenne), but Taco Bell seasoning is a decent shortcut. If you're prepping ahead, assemble the enchiladas and refrigerate them overnight—they crisp up beautifully when baked the next day. The sour cream and cilantro are just for serving, so you can skip them if you're watching calories.
Assembled enchiladas keep 3-4 days in the fridge, covered tightly. For longer storage, freeze them unbaked—wrap each one individually in foil, then stack in a freezer bag. Bake straight from frozen, adding 5-10 extra minutes to the cooking time. Leftovers reheat best in the oven at 350°F for 10 minutes—microwaving makes them soggy. Double the batch and freeze half; you'll thank me later.
Why You'll Love This Recipe
- One-Pan Wonder: I swear by this trick—just brown the beef in the same pan you’ll use for the beans, then dump everything in one spot. The sauce sticks to the tortillas perfectly, and cleanup? One spatula, one pan. That’s it.
- Creamy Crunch Magic: The refried beans add this rich, velvety texture, while the melted cheese gets that golden, slightly crispy edge when it hits the oven. Honestly, the contrast is what makes it ridiculously good—like a hug in tortilla form.
- Weeknight to Party Fix: Make a double batch on Sunday, and you’ve got lunch for the kids, dinner for guests, or even a potluck casserole. (Yes, even on a Tuesday night.) The sauce keeps it warm and cozy, but it’s fancy enough to serve with a side salad if you’re feeling fancy.
- Budget-Buster Combo: Ground beef and beans stretch so far—this feeds four for under $10 easy. Between us, it’s my go-to when I need to stretch groceries without sacrificing flavor. Plus, leftovers reheat like a dream.
Step-by-step instructions for beef bean and cheese enchiladas
Here's how to build layers of flavor and crispy perfection with these comforting enchiladas.
🍳 Step 1: Brown the Beef and Sauté Aromatics
Heat the 1 tablespoon olive oil in a large skillet over medium-high heat. Add the 1 lb ground beef and cook for 5-6 minutes, breaking it apart with a wooden spoon until browned and no longer pink. Drain excess fat if needed.
Add the finely diced 1 whole yellow onion and minced 3 garlic cloves, cooking for 3-4 minutes until softened. Stir in the 2 tablespoons taco seasoning, ½ teaspoon salt, and ¼ teaspoon black pepper. Pour in ½ cup water and simmer for 2 minutes to let the seasoning bloom. Remove from heat and mix in the 1.5 cups refried beans.
👨🍳 Step 2: Prepare the Enchilada Filling
Spread the beef mixture evenly on a baking sheet and let it cool for 10 minutes. This prevents soggy tortillas when assembling. While it cools, preheat your oven to 375°F.
In a small bowl, combine the 2 cups shredded cheese with ¼ cup chopped fresh cilantro for extra flavor. This mixture will be your cheese layer between each tortilla. Keep the 2 cups enchilada sauce warm in a separate bowl.
🥘 Step 3: Assemble the Enchiladas
Warm the 8 flour tortillas by wrapping them in a damp towel and microwaving for 20 seconds (or warm in dry skillet for 10 seconds per side). This makes them pliable and less likely to crack.
Spread about 2 tablespoons of the beef mixture onto each tortilla, leaving a ½-inch border at the edges. Sprinkle 1 tablespoon of the cheese mixture over the filling, then roll tightly from the bottom up. Place seam-side down in a greased 9x13-inch baking dish.
🔥 Step 4: Bake Until Bubbly and Golden
Pour 1 cup enchilada sauce over the assembled enchiladas, then top with the remaining 1 cup enchilada sauce. Sprinkle the remaining 1 cup shredded cheese evenly over the top. Bake for 20-25 minutes until the cheese is bubbly and the edges are golden brown.
For extra crispiness (the promise!), broil for 1-2 minutes at the end, watching closely to avoid burning. Let rest for 5 minutes before serving to help the filling set.
🍽️ Step 5: Serve with Fresh Toppings
Garnish each serving with 1 tablespoon sour cream and an extra sprinkle of chopped fresh cilantro. The tortillas should be crispy enough to hold their shape, while the cheese inside remains perfectly melty. Serve immediately with extra enchilada sauce on the side for dipping.
Pro Tips For Making Beef Bean And Cheese Enchilada
- Brown the Beef Properly: I learned this the hard way—skipping the full brown on ground beef leaves you with a meal that tastes more like a stew than enchiladas. Cook the beef until it’s no longer pink (about 5-6 minutes on medium-high heat), breaking it apart with a spoon, and let those juices evaporate. That’s where the flavor hides.
- Warm the Tortillas Right: Cold tortillas turn brittle and crack when rolled. Heat them for 20-30 seconds per side in a dry skillet or wrap them in a damp towel and microwave for 30 seconds—just enough to make them pliable. Trust me, your enchiladas will hold together better, and you won’t end up with a tower of sad, broken shells.
- Skip the Overstuffed Roll: Stuffing tortillas too tightly means they’ll burst when baking, and no one wants a cheese avalanche. Use about 2 tablespoons of filling per tortilla—enough to taste every bite without the struggle. Press gently but leave room for the cheese to melt and stretch.
- Use a Mix of Cheeses: That pre-shredded cheese in the bag? It’s designed to stay dry. For real melty goodness, mix half with a block cheese like Monterey Jack or cheddar (grated yourself—it makes a difference). The blend browns better and doesn’t turn into a gluey mess when baked.
Storing and reheating this dish
Refrigerator Storage
Assembled enchiladas keep beautifully in the fridge for up to 3-4 days when stored properly. Let them cool completely before transferring to an airtight container—I use Glasslock containers because they seal tightly and prevent drying. Cover with a damp paper towel to maintain moisture, then refrigerate. When reheating, bake at 350°F for 10-15 minutes until bubbly and heated through. 🧊
Freezer Prep Tips
For longer storage, freeze enchiladas unbaked in individual portions. Wrap each one tightly in plastic wrap, then place in a freezer bag with all air removed. Label with the date—they'll keep for 2-3 months. When ready to eat, bake straight from frozen at 375°F for 30-35 minutes, adding 5-10 extra minutes of broil time for crispy edges. 🥶
Oven Reheating
My preferred method for reheating is always in the oven—it preserves that perfect crispy texture. Place enchiladas on a baking sheet lined with parchment paper and bake at 350°F for 10 minutes covered with foil. Then uncover and bake 5-7 more minutes until the cheese is melted and edges are golden. This method prevents sogginess and keeps the tortillas crisp. ✨
Microwave Shortcut
When you're in a hurry, the microwave works in a pinch. Cover enchiladas with a damp paper towel and heat on 50% power for 2-3 minutes. Stir the sauce and add a splash of water if needed to loosen it. The texture won't be as crisp, but it's still delicious. For best results, transfer to the oven for 5 minutes at 350°F to restore some crunch. 🔥
Sauce Refresh
Reheated enchiladas often need a sauce boost. Warm ½ cup enchilada sauce in a small saucepan and drizzle over the top before serving. The extra sauce helps revive the tortillas' crispness and adds fresh flavor. I also like to sprinkle with ¼ cup crumbled queso fresco or a dollop of Mexican crema for extra brightness. 🌶️
Topping Revival
Fresh toppings make all the difference with reheated enchiladas. Sprinkle with chopped cilantro and diced avocado just before serving. For extra crunch, add crushed tortilla chips or toasted pepitas. These toppings also help absorb any excess moisture from reheating. Keep them separate until serving to maintain freshness. 🥑
Nutrition facts
Frequently asked questions
Can I use corn tortillas instead of flour?
Corn tortillas work but won't be as crispy as flour—this recipe relies on the sturdy texture of flour for that perfect crunch. If you must use corn, bake at 350°F for 5 extra minutes and broil 30 seconds longer for better texture. They'll be softer but still delicious!
How do I make these extra crispy?
Use slightly stale tortillas (left out overnight) and bake at 400°F for 20 minutes before adding sauce. After baking, broil 1-2 minutes for maximum crunch. For next-level crispiness, brush tortillas with melted butter before rolling!
What if I don't have enchilada sauce?
Mix 1 cup tomato sauce with 1 tablespoon chili powder, ½ teaspoon cumin, and ½ teaspoon garlic powder. Simmer 5 minutes for a quick substitute. For extra richness, stir in ¼ cup beef broth to thin it out.
Can I make these ahead for a party?
Assemble completely, refrigerate overnight, then bake straight from the fridge (add 5 extra minutes to cooking time). For freezing, wrap individual enchiladas in foil and freeze unbaked—bake from frozen at 375°F for 35-40 minutes.
What's the best cheese for melting?
Monterey Jack or a cheddar/Monterey Jack blend melts perfectly. For extra gooeyness, mix in ¼ cup cream cheese with the shredded cheese. Avoid pre-shredded cheese with anti-caking agents—it doesn't melt as smoothly.