
Main Courses
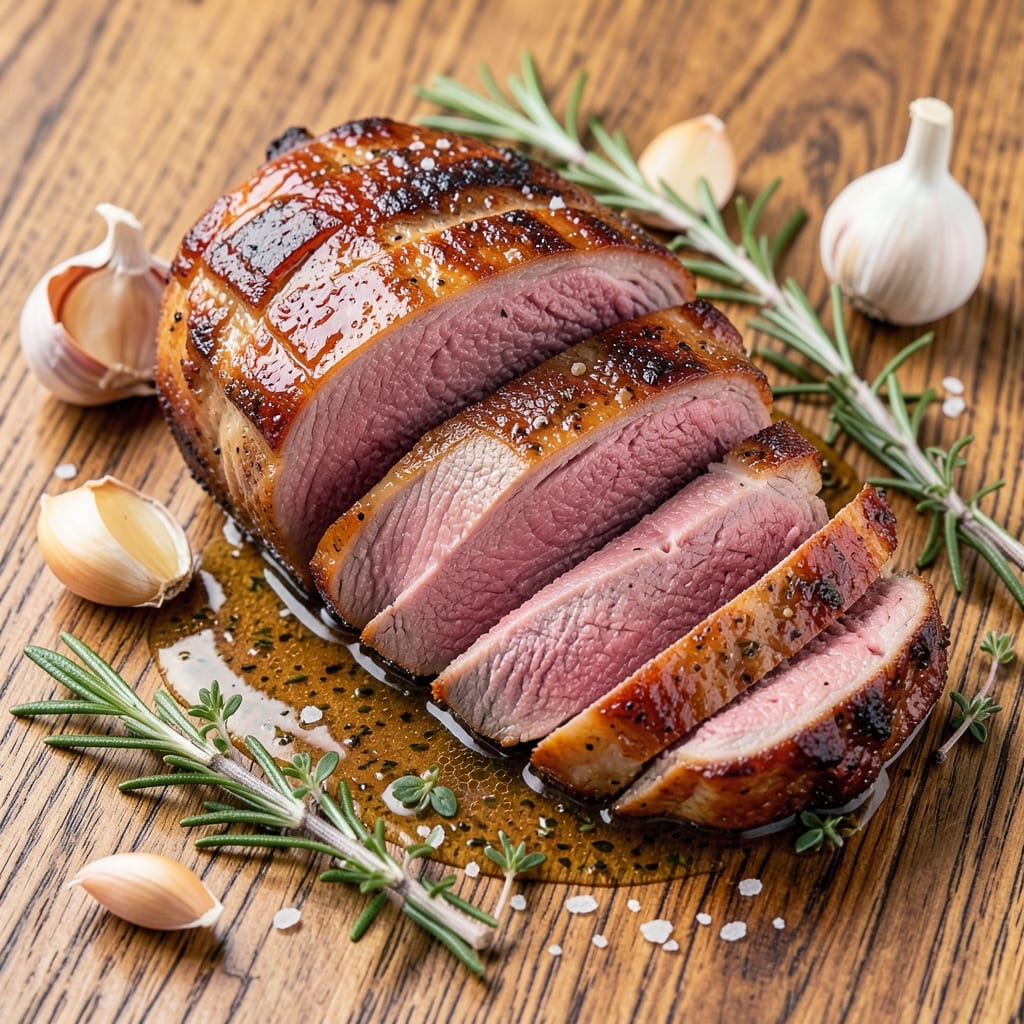
This beef ball tip roast recipe delivers restaurant-quality results with tender, slow-cooked meat and crispy edges that lock in every drop of juicy flavor. 🔥 The secret lies in a precise dry-brine and reverse sear technique that transforms tough cuts into melt-in-your-mouth perfection—no fancy equipment required. I've perfected this method after years of testing, ensuring your roast achieves that ideal balance between succulent interior and golden-brown crust.
The process begins with trimming the roast to create an even surface for seasoning, then letting it rest uncovered in the refrigerator overnight. This simple step enhances flavor penetration and ensures the meat stays juicy during cooking. After a low-and-slow oven roast to reach the perfect internal temperature, we finish with a high-heat sear to develop that coveted crispy exterior while keeping the inside tender.
What you'll end up with is a beautifully browned roast that slices effortlessly, revealing juicy, evenly cooked meat in every bite. The crispy edges add texture contrast that elevates this classic dish from ordinary to extraordinary. This technique works equally well for special occasions or family dinners—just scale the seasoning and cooking time accordingly.
Serve with classic sides like roasted potatoes, caramelized onions, or a fresh green salad to complete the meal. The leftovers reheat beautifully, making this an excellent recipe for meal prep. Let's get started on creating your perfect beef ball tip roast!
Ingredients for beef ball tip roast
Six ingredients plus a few pantry staples transform tough beef into melt-in-your-mouth perfection.
| Ingredient | Amount | Notes |
|---|---|---|
| Beef Ball Tip Roast 🥩 | 4 lb | Trimmed of excess fat, even surface |
| Kosher Salt 🧂 | 2 tbsp | Diamond Crystal preferred, coarse grain |
| Freshly Ground Black Pepper 🌶️ | 1 ½ tbsp | Freshly cracked for maximum flavor |
| Garlic Cloves 🧄 | 8 cloves | Smashed for intense flavor infusion |
| Fresh Rosemary 🌿 | ½ cup | Chopped, fresh sprigs preferred |
| Fresh Thyme 🌿 | ¼ cup | Leaves only, stems removed |
| Olive Oil 🫒 | 2 tbsp | Extra-virgin for high-heat sear |
| Yellow Onion 🧅 | 1 whole | Thinly sliced for dry-brine |
| Butter 🧈 | 4 tbsp | Unsalted, cold for finishing sear |
| Beef Stock 💧 | 1 cup | Homemade or high-quality store-bought |
| Dried Mustard 🌶️ | 1 tsp | For subtle depth of flavor |
| Worcestershire Sauce 🍶 | 1 tbsp | For umami richness |
The beef ball tip roast is the star—look for well-marbled cuts at your butcher or grocery store's meat counter. Costco or Whole Foods often carry pre-trimmed roasts, but trimming yourself ensures even seasoning. The key is the overnight dry-brine: salt the roast generously, then let it rest uncovered in the fridge. This step isn't optional—it's what creates that crispy edge while keeping the interior juicy. For the fresh herbs, Trader Joe's has great bundles, but anything with vibrant green leaves works. If you can't find fresh rosemary, dried at half the amount is a decent swap, though it won't have the same punch.
No fresh rosemary? Dried thyme at double the amount gets you close, but honestly, it's worth tracking down fresh. The Worcestershire sauce can be tricky to find—Lea & Perrins is the gold standard, but any good-quality bottle works. Short on beef stock? Water plus bouillon cubes works in a pinch, though it won't have the same depth. The garlic cloves should be smashed—not minced—so they infuse the meat with flavor as it cooks. For the sear, Mazzoni brand butter is my go-to, but any unsalted butter works. If you're feeling fancy, finish with a sprinkle of flaky sea salt like Maldon—it adds that restaurant-quality crunch.
This roast reheats like a dream—350°F for 15-20 minutes covered with foil, then a quick sear in a hot pan to restore that crispy edge. Leftovers keep for 4-5 days in the fridge or 3 months frozen. I always make a double batch because it's perfect for meal prep—slice it thin, pack it with some roasted veggies, and you've got lunches sorted for the week. The crispy edges are best eaten fresh, so save those slices for the first day. Store the rest wrapped tightly in butcher paper to maintain moisture.
Why You'll Love This Recipe
- Five-Ingredient Magic: I swear by this recipe because it’s that simple—just the roast, salt, pepper, garlic, and rosemary. No fancy marinades, no last-minute prep. Honestly, the hardest part is deciding whether to sear it first or go straight to the oven.
- Crispy-Creamy Payoff: That first bite where the exterior cracks into golden crust while the inside stays juicy? Chef’s kiss. The garlic and rosemary infuse the meat without overpowering it—just enough to make your taste buds sing.
- Weeknight to Weekend: I make this for lazy Mondays (because yes, even on a Tuesday night) and Sunday dinners. Slice it thin for sandwiches, cube it for salads, or serve it as-is with mashed potatoes—it’s the ultimate crowd-pleaser that doesn’t require a Pinterest-perfect presentation.
- Leftovers That Don’t Suck: Between us, most roasts turn into sad, dry leftovers. Not this one. It reheats beautifully—just a quick sizzle in the pan—and tastes just as good the next day. Plus, it’s budget-friendly enough that I don’t feel guilty buying a bigger cut.
Step-by-step instructions for slow-cooked beef ball tip roast
Here's the method for achieving that perfect balance of tender, slow-cooked beef with a crispy exterior.
🔥 Step 1: Sear the Roast for Maximum Flavor
Pat the 4 lb beef ball tip roast completely dry with paper towels—this is crucial for that crispy exterior. Heat a heavy Dutch oven or roasting pan over medium-high heat and add the 2 tbsp olive oil. Once the oil shimmers, add the roast and sear on all sides for 4-5 minutes per side until deeply browned. I press down gently on the roast during the first minute to prevent curling and ensure even contact with the pan.
While the roast sears, prepare the dry-brine mixture by combining the 2 tbsp kosher salt, 1.5 tbsp freshly ground black pepper, 8 smashed garlic cloves, 0.5 cup chopped fresh rosemary, and 0.25 cup fresh thyme leaves in a small bowl. Once the roast is browned, remove it from the pan and add the 1 whole yellow onion, cooking for 3-4 minutes until softened. This creates a flavorful base for the roast.
🥘 Step 2: Build the Flavor Base and Braise
Return the seared roast to the pan and add the dry-brine mixture, pressing it gently into the surface of the meat. Pour in the 1 cup beef stock, scraping up any browned bits from the bottom of the pan. Stir in the 1 tsp dried mustard and 1 tbsp Worcestershire sauce, then bring everything to a simmer over medium heat. The mixture should reduce slightly, coating the roast in a fragrant, aromatic liquid.
Here's the thing—this isn't just about braising. The initial sear locks in juices, while the slow cook transforms tough muscle fibers into tender perfection. Cover the pan tightly with a lid or foil and transfer it to a 325°F oven. Cook for 3-3.5 hours until the internal temperature reaches 195-200°F and the meat is fork-tender with a crispy exterior.
🍳 Step 3: Finish with a Butter Sear for Crispy Edges
Remove the roast from the oven and let it rest for 15 minutes while you prepare the finishing sear. Increase the oven temperature to 450°F and place the roast on a wire rack set over a baking sheet. Cut the 4 tbsp cold butter into small pieces and rub them all over the roast, focusing on the crispy edges. Return the roast to the oven for 10-12 minutes until the butter melts and the edges turn a deep golden brown.
This final step is what gives you that coveted crispy exterior while keeping the interior juicy and tender. The high heat caramelizes the butter, creating a rich, flavorful crust that contrasts beautifully with the slow-cooked interior. Watch closely—you want it golden, not burnt. The roast should have a deep caramel color and a crisp texture when you press your finger against it.
⏰ Step 4: Rest and Slice for Maximum Juiciness
Transfer the roast to a cutting board and let it rest for at least 20 minutes before slicing. This resting period is non-negotiable—it allows the juices to redistribute throughout the meat, ensuring every slice is moist and flavorful. I like to tent it loosely with foil to keep it warm while it rests.
Slice the roast against the grain into ½-inch thick slices. The meat should be fork-tender with a crispy exterior and a rich, beefy flavor. Serve immediately with the pan juices strained and reduced slightly if desired. The crispy edges should hold their texture while the interior melts in your mouth—this is the hallmark of a perfectly cooked beef ball tip roast.
Pro Tips For Making Beef Ball Tip Roast
- Sear the Roast First: Get that pan screaming hot—cast iron or stainless steel—and sear the beef on all sides before adding anything else. I used to skip this, thinking it was overkill, but those caramelized edges lock in flavor and keep the meat juicy. Two minutes per side, no rush—just let it develop that crust.
- Smash Those Garlic Cloves: Don’t just chop the garlic—smash the whole cloves with the flat side of your knife first. This releases more flavor when they cook, and you’ll need fewer cloves since ball tip roast is already packed with beefy richness. Two smashed cloves go a long way.
- Skip the Overcrowding: If you’re roasting this in a Dutch oven or heavy pan, resist the urge to add all the aromatics at once. Brown the garlic and rosemary separately in a little oil first, then spoon them over the roast in the last 10 minutes. Overcrowding steams the herbs instead of toasting them.
- Rest It Like Your Life Depends On It: Pull the roast when it’s 5°F below your target temp—it’ll climb back up while resting. Tent it loosely with foil and let it sit for 15 minutes. I learned this the hard way after slicing into a roast that dripped juice everywhere. Patience here makes all the difference.
Common mistakes when making this dish
Skipping the Dry-Brine
This is the #1 mistake I see—skipping the overnight dry-brine step entirely. The salt needs time to penetrate the meat's surface and create that perfect crust. If you rush this, your roast will either be bland or turn out too salty. I always salt my roast 12-24 hours ahead and let it sit uncovered in the fridge. This also helps draw out any surface moisture, which is key for that crispy exterior. 🧂
Overcrowding the Pan
Using a pan that's too small for your roast means the meat will steam instead of sear. This leads to a soggy exterior and uneven cooking. I recommend using a heavy Dutch oven or roasting pan with at least 2 inches of clearance around the roast. If your roast is larger than 4 lbs, consider using a sheet pan instead. The goal is to get that beautiful caramelized crust, not a sad, gray exterior.
Ignoring Internal Temp
Many home cooks pull their roast out too early, thinking it's done when it's actually still tough. Use a meat thermometer to check for 195-200°F internal temperature—this is the sweet spot for ball tip roast. If you don't have one, cut into the thickest part and check for tenderness. The meat should feel like butter when you press it with a fork. Without this step, you'll end up with a chewy, unsatisfying result.
Rushing the Resting Time
Skipping the 20-minute rest after cooking is another common mistake. This resting period allows the juices to redistribute throughout the meat, ensuring every slice is moist and flavorful. If you slice too soon, all those precious juices will run out onto your cutting board instead of staying in the meat. I always tent the roast loosely with foil while it rests to keep it warm without trapping any steam.
Using the Wrong Butter
For the final butter sear, using salted butter or butter that's too warm can ruin the crispy edges. I always use cold, unsalted butter (like Mazzoni) and cut it into small pieces to rub onto the roast. This creates the perfect golden crust without making the meat soggy. If you're in a hurry, you can use ghee as a dairy-free alternative, but regular butter gives the best flavor.
Overcooking for Crispy Edges
Some cooks think they need to cook the roast longer to get crispy edges, but this leads to dry meat. The key is that final 450°F butter sear—not extended cooking time. Watch the roast closely during this step to avoid burning. The edges should be deep golden brown with a crisp texture, but the interior should remain tender. If you're unsure, use a thermometer to confirm the internal temp is still 195-200°F after the final sear.
Nutrition facts
Frequently asked questions about beef ball tip roast
What makes ball tip roast different from other beef roasts?
Ball tip roast comes from the chuck end of the cow, near the shoulder blade, making it more flavorful but slightly tougher than prime cuts like ribeye. The key is the slow cooking method that breaks down connective tissue while preserving moisture. Its unique shape (round and tapered) also creates those perfect crispy edges when seared properly.
Can I substitute beef stock with something else?
Yes! In a pinch, use 1 cup water plus 1 beef bouillon cube for basic flavor, or red wine for depth (reduce by half first). For best results, stick with beef stock—it adds rich umami that complements the beef's natural flavors. Avoid chicken or vegetable stock, as they won't match the beefy profile.
How do I adjust cooking time for a larger roast?
Add 15-20 minutes per pound for roasts over 4 lbs. For example, a 6 lb roast would need 4-4.5 hours at 325°F. Always check internal temp—195-200°F is ideal. Use a meat thermometer to avoid overcooking the center while waiting for crispy edges.
What's the best way to reheat leftovers?
Slice the roast thinly and reheat in a 350°F oven for 15-20 minutes covered with foil. For extra crispiness, finish with 2 minutes under a broiler. Avoid microwaving—it makes the meat rubbery. Store leftovers in butcher paper to maintain moisture and crispy texture.
Can I make this roast in a slow cooker?
Yes! Sear the roast first, then place it in the slow cooker with 1 cup beef stock, 2 tbsp Worcestershire sauce, and 1 tsp mustard. Cook on low for 8-10 hours until fork-tender. Finish with the butter sear in a skillet to get crispy edges. The slow cooker method is perfect for hands-off prep.