
Soups & Stews
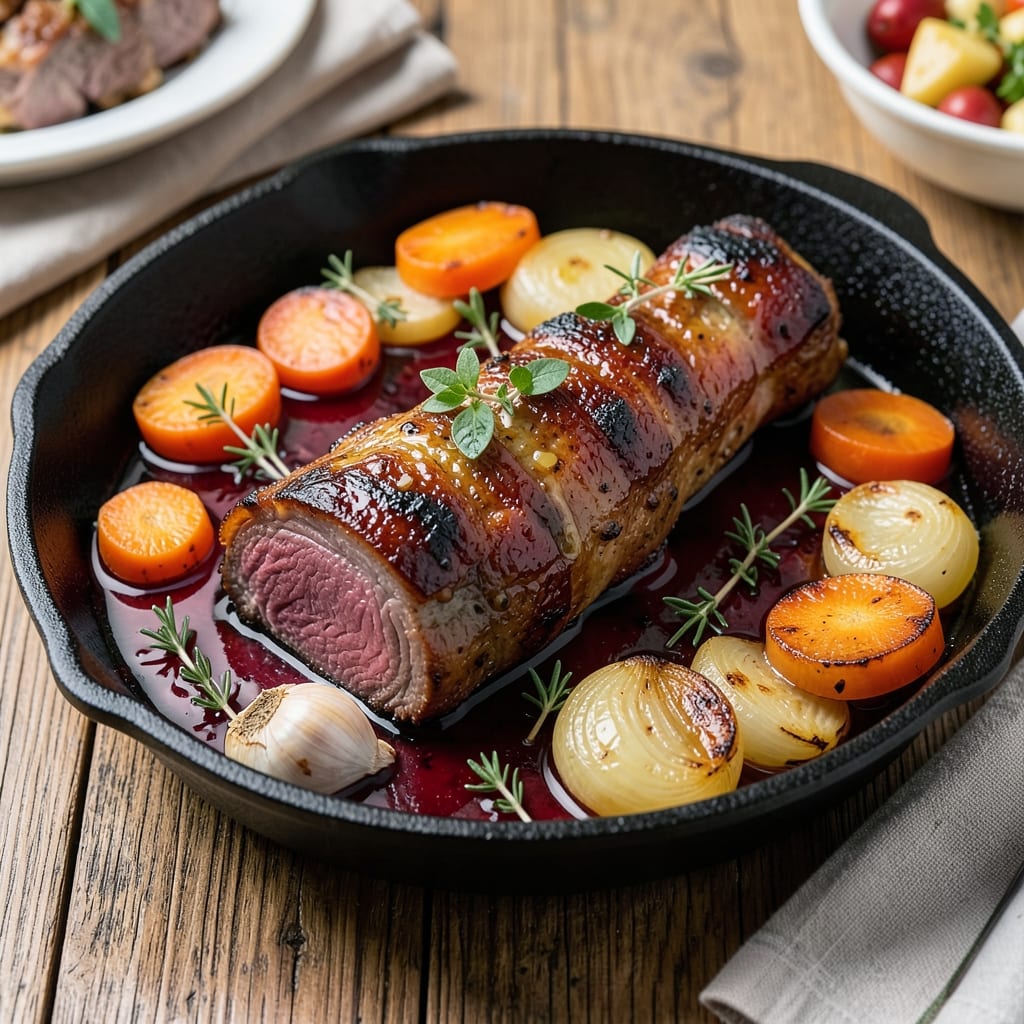
This beef backbone recipe transforms tough cuts into melt-in-your-mouth tenderness through slow simmering, unlocking deep, savory flavors that elevate any meal. The key lies in searing the bone-in meat first to build a rich foundation, then braising it low and slow until the collagen dissolves into a velvety, aromatic broth. This method delivers restaurant-quality results at home, perfect for hearty weeknight dinners or special occasions.
The process begins with a deep sear in a heavy pot, creating a flavorful crust that forms the base for the braising liquid—typically red wine, aromatics, and herbs. As the beef simmers for hours, the bones release marrow and gelatin, transforming the dish into a luxurious stew with natural richness. This technique works beautifully with beef shanks, chuck roasts, or even oxtails, though the backbone's natural marrow adds an extra layer of depth.
What you'll achieve is a dish where the meat falls apart at the touch of a fork, swimming in a sauce thickened by its own juices. The aroma alone will fill your kitchen with warmth, while the texture offers a satisfying contrast between tender meat and crisp vegetables. Serve it with crusty bread to soak up every last drop of that flavorful broth.
Whether you're preparing a classic French-style braise or a Korean-inspired bossam, the principles remain the same: patience and technique turn simple ingredients into something extraordinary. This recipe is your gateway to mastering slow-cooked beef dishes that impress without requiring advanced skills.
Ingredients for beef backbone
These fourteen ingredients unlock restaurant-quality beef backbone richness through slow simmering and collagen release.
| Ingredient | Amount | Notes |
|---|---|---|
| Beef Backbone 🥩 | 2 ½ lb | Bone-in, cut into 2-inch pieces |
| Red Wine 🍷 | 1 ½ cups | Bold, dry variety like Cabernet Sauvignon |
| Carrots 🥕 | 4 whole | Medium-sized, peeled and halved lengthwise |
| Yellow Onion 🧅 | 1 whole | Medium, sliced into 1/2-inch rounds |
| Garlic Cloves 🧄 | 6 cloves | Peeled and smashed |
| Fresh Thyme 🌿 | 2 sprigs | Stems removed, leaves only |
| Fresh Rosemary 🌿 | 1 sprig | Woody stems removed |
| Tomato Paste 🍅 | 2 tbsp | Smooth, not chunky |
| Olive Oil 🫒 | ¼ cup | Extra-virgin, for searing |
| Beef Broth 💧 | 2 cups | Low-sodium, homemade preferred |
| Salt 🧂 | 1 ½ tsp | Diamond Crystal kosher salt |
| Black Peppercorns 🌶️ | 1 tsp | Freshly cracked |
| Bay Leaves 🌿 | 2 whole | Dried, standard size |
| All-Purpose Flour 🌾 | 1 tbsp | For thickening, optional |
The beef backbone is the star—look for bone-in cuts with visible marrow at your local butcher or Costco's bulk meat section. Freshness matters here: the meat should have a vibrant red color and firm texture. If buying frozen, thaw overnight in the fridge. For the red wine, bold, dry varieties like Cabernet Sauvignon work best—avoid sweet wines. The carrots can be baby carrots if preferred, but whole medium carrots develop better flavor during braising. Fresh thyme and rosemary should smell aromatic and vibrant; if they smell dull, they've lost potency. Penzeys or local specialty stores carry high-quality dried herbs if fresh aren't available.
No red wine? Substitute with beef broth plus 1 tbsp balsamic vinegar—it mimics the depth. Fresh herbs unavailable? Use dried at one-third the amount, but toast them first in a dry pan for 30 seconds to awaken their flavor. The tomato paste can be replaced with 2 tbsp crushed tomatoes if you prefer less intensity. For a richer sauce, add 1 tbsp Worcestershire sauce (ensure it's vegetarian if needed). The beef broth should be low-sodium—homemade or high-quality store brands like Pacific Foods are ideal. If you're avoiding gluten, skip the flour and let the sauce reduce naturally.
This dish tastes even better the next day as flavors meld. Store leftovers covered in the fridge for up to 5 days or freeze portions for 3 months. The sauce thickens as it cools, so add a splash of broth when reheating. For serving, crusty bread is essential—it soaks up the luxurious broth beautifully. The bones can be separated from the meat after cooking and used for homemade bone broth later. Portion into individual containers for easy lunches, or freeze in single servings for quick meals.
Why You'll Love This Recipe
- One-Pot Magic: I swear by this—just toss everything in a deep pot (backbone bones, wine, veggies) and let it simmer. The bones do all the work while you stir in the garlic at the end for that oh-wow aroma.
- Wine-Infused Richness: That red wine isn’t just for show—it melts into the beef, turning it tender and deep. The onions caramelize right in the pot, and the carrots soak up all that flavor like little flavor sponges.
- Weeknight to Dinner Party: Same recipe, different vibes. Serve it over mashed potatoes for a lazy Tuesday, or plate it with crusty bread for guests. The leftovers? Even better the next day, especially reheated with a splash of broth.
- Budget-Friendly Feast: Backbone bones are cheaper than steak but pack serious flavor. You get a hearty, filling meal with minimal ingredients—no fancy cuts, no wasted money. Honestly, it’s my go-to for stretching a grocery budget without skimping on taste.
Step-by-step instructions for slow-simmered beef backbone
Master this technique for melt-in-your-mouth beef with rich, wine-infused sauce.
Sear the Beef Backbone for Deep Flavor
Heat a heavy Dutch oven over medium-high heat until very hot. Add the 0.25 cup olive oil and let it shimmer for 1 minute. Working in batches if needed, add the 2.5 lb beef backbone pieces, bone-side down first. Press down gently with a metal spatula to ensure even contact—this creates maximum surface area for browning.
Sear for 4-5 minutes per side until deeply golden brown with caramelized edges. The goal is to develop a rich fond at the bottom of the pot that will form the base of your sauce. If the oil starts smoking excessively, reduce heat slightly but maintain a steady sizzle. Remove the beef and set aside on a plate.
Build the Aromatic Base with Vegetables and Herbs
In the same Dutch oven, add the 1 whole yellow onion and 4 whole carrots, spreading them evenly across the fond. Cook for 5 minutes until the onions soften and begin to caramelize. Add the 6 cloves garlic cloves, 2 sprigs fresh thyme, and 1 sprig fresh rosemary, stirring to combine.
Pour in the 1.5 cups red wine and scrape up all the browned bits from the bottom with a wooden spoon. This deglazing step captures all the concentrated beef flavor. Let the wine simmer for 3-4 minutes until reduced by half. Stir in the 2 tbsp tomato paste and cook for another 1 minute to deepen the color and flavor.
Simmer the Beef with Herbs and Broth
Return the beef to the Dutch oven along with any accumulated juices. Add the 2 cups beef broth, 1.5 tsp salt, 1 tsp black peppercorns, and 2 whole bay leaves. Bring to a gentle simmer, then reduce heat to medium-low to maintain a steady bubble. The liquid should barely move—this slow cook ensures tender meat without curdling the sauce.
Cover and simmer for 2-2.5 hours until the beef is fork-tender and pulls away from the bone easily. Check occasionally and add a splash of water if the liquid reduces too much. The aroma should be rich and complex, with layers of wine, herbs, and caramelized vegetables filling your kitchen.
Thicken the Sauce and Finish
Once the beef is tender, remove it from the pot and strain the cooking liquid through a fine-mesh sieve into a clean saucepan. Discard the solids. Return the liquid to the Dutch oven and stir in the 1 tbsp all-purpose flour to thicken the sauce. Simmer for 3-4 minutes until the sauce coats the back of a spoon and reduces slightly.
Return the beef to the Dutch oven and let it soak in the sauce for 5 minutes off the heat. This final step ensures the meat absorbs all the rich, wine-infused flavors. Serve the beef backbone with the sauce spooned over the top, accompanied by crusty bread or roasted vegetables to soak up every last drop.
Pro Tips For Making Beef Backbone
- Sear the Bone First: I learned this the hard way—skipping the sear means flavorless broth. Get that backbone screaming hot in a dry pan for 3-4 minutes per side until it’s dark brown, not just pink. The Maillard reaction here isn’t optional; it’s what turns "meat in wine" into "rich, layered depth."
- Blanch the Carrots: Does it look weird? Yes. Does it work? Every single time. Toss chopped carrots in boiling water for 2 minutes before adding them to the pot—this softens them just enough so they don’t turn to mush later. (And yes, even if you’re impatient like me.)
- Deglaze with Wine Immediately: After searing the backbone, don’t walk away. Pour in that red wine right when it’s hot—the residue stuck to the pan will lift right off, giving you a glossy, flavor-packed base. Let it reduce by half before adding anything else, or you’ll end up with a watery sauce.
- Crush the Garlic: Whole garlic cloves? Skip it. Mince those cloves or smash them with the flat of your knife—this releases their oils and infuses the wine faster. I used to add them whole, and the dish always tasted like it was missing something. (Spoiler: It was the garlic.)
Essential equipment for perfect results
Dutch Oven Essentials
Your Dutch oven is the workhorse of this recipe—look for a 5-6 quart model with tight-fitting lid and sturdy handles. I swear by Lodge cast iron for its even heat distribution and durability, but All-Clad stainless steel works beautifully if you prefer lighter weight. Avoid non-stick coatings—they can't handle the high heat needed for proper searing. 🔥
For best results, preheat your Dutch oven for 10 minutes before adding oil. This ensures even searing and prevents temperature fluctuations. If your pot has a dark enamel interior, it will hide fond buildup better than lighter colors. Always use wooden or silicone utensils to avoid scratching the surface.
Precision Thermometer
A meat thermometer with a probe is non-negotiable for perfect results. I use the ThermoWorks Smoke—it reads temperatures from -40°F to 575°F and has a backlit display. Insert the probe into the thickest part of the beef backbone to monitor internal temperature. The meat is done when it reaches 203°F for fork-tender perfection. 🌡️
For braising, maintain a gentle simmer—this means small bubbles at the surface, not a rolling boil. If you don't have a thermometer, touch the pot's exterior: it should feel warm but not hot to the touch. Overheating can cause the sauce to break or the meat to toughen.
Wooden Spoon & Spatula
Invest in a heat-resistant wooden spoon (like OXO Good Grips) for stirring and deglazing. The wooden handle stays cool while the bowl conducts heat evenly. For searing, a stainless steel spatula with a siliconized edge prevents sticking and helps press the beef for even browning. 🍳
Avoid metal spoons during the searing phase—they can scratch your Dutch oven's surface. I keep my wooden spoon in the pot while cooking so it's always at hand for scraping up flavorful browned bits. After cooking, let the spoon air-dry completely to prevent mold growth.
Fine-Mesh Sieve
For straining the sauce, a fine-mesh sieve (like Ozeri Touch Screen) creates a silky texture without removing all the herbal notes. Place it over a heatproof bowl to catch the strained liquid. If you don't have one, a cheesecloth-lined colander works in a pinch, though it requires more effort to press out all the liquid. ✨
Strain the sauce while it's still warm—this makes it easier to press out all the liquid and prevents clogging. I like to press the vegetables with the back of a spoon to extract every last drop of flavor. The strained sauce will thicken as it cools, so add a splash of broth when reheating if needed.
Optional: Sous Vide Circulator
For even more tenderness, consider a sous vide circulator (like Anova Precision Cooker). Sear the beef as directed, then vacuum-seal it with aromatics and cook at 160°F for 4-6 hours before finishing in the Dutch oven. This method ensures perfect doneness without drying out the meat. 💫
If you go this route, finish the dish by searing the sous vide-cooked beef in the Dutch oven for 2-3 minutes per side to develop a crust. The combination of sous vide precision and traditional braising gives you the best of both worlds—restaurant-quality texture and deep flavor.
Nutrition facts
Frequently asked questions
Why does this recipe use bone-in beef backbone?
The bones are essential—they release rich marrow and collagen during slow cooking, creating a naturally thick, flavorful sauce. The marrow adds depth while the collagen transforms into gelatin, giving the dish that luxurious, velvety texture. Skip the bones, and you miss out on half the magic!
Can I substitute red wine with something else?
Yes! For a non-alcoholic version, use 1.5 cups beef broth plus 1 tbsp balsamic vinegar. Or swap for 1 cup apple cider vinegar + 0.5 cup broth—both create similar acidity to tenderize the meat and balance flavors. Just avoid sweet wines or juices, as they won't caramelize properly.
How do I know when the beef is fully tender?
Use a fork to test the thickest piece—it should slide in effortlessly with no resistance. For precision, aim for 203°F internal temp (measured with a meat thermometer). If you're unsure, cut a small piece: tender meat will pull apart cleanly, while tough pieces will resist.
What if my sauce turns out too thin?
Simmer uncovered for 5-10 minutes to reduce it naturally. For quicker thickening, mix 1 tbsp cornstarch with 2 tbsp cold water, stir into the sauce, and cook until it reaches your desired consistency. Avoid flour if you're gluten-sensitive—it can make the sauce gummy.
Can I make this in an Instant Pot?
Sear the beef first in a skillet, then transfer to your Instant Pot with all ingredients. Cook on high pressure for 60 minutes, followed by a 10-minute natural release. The pressure cooker speeds up the process while still delivering tender meat—just add 1 extra cup broth since Instant Pots lose more liquid.