
Soups & Stews
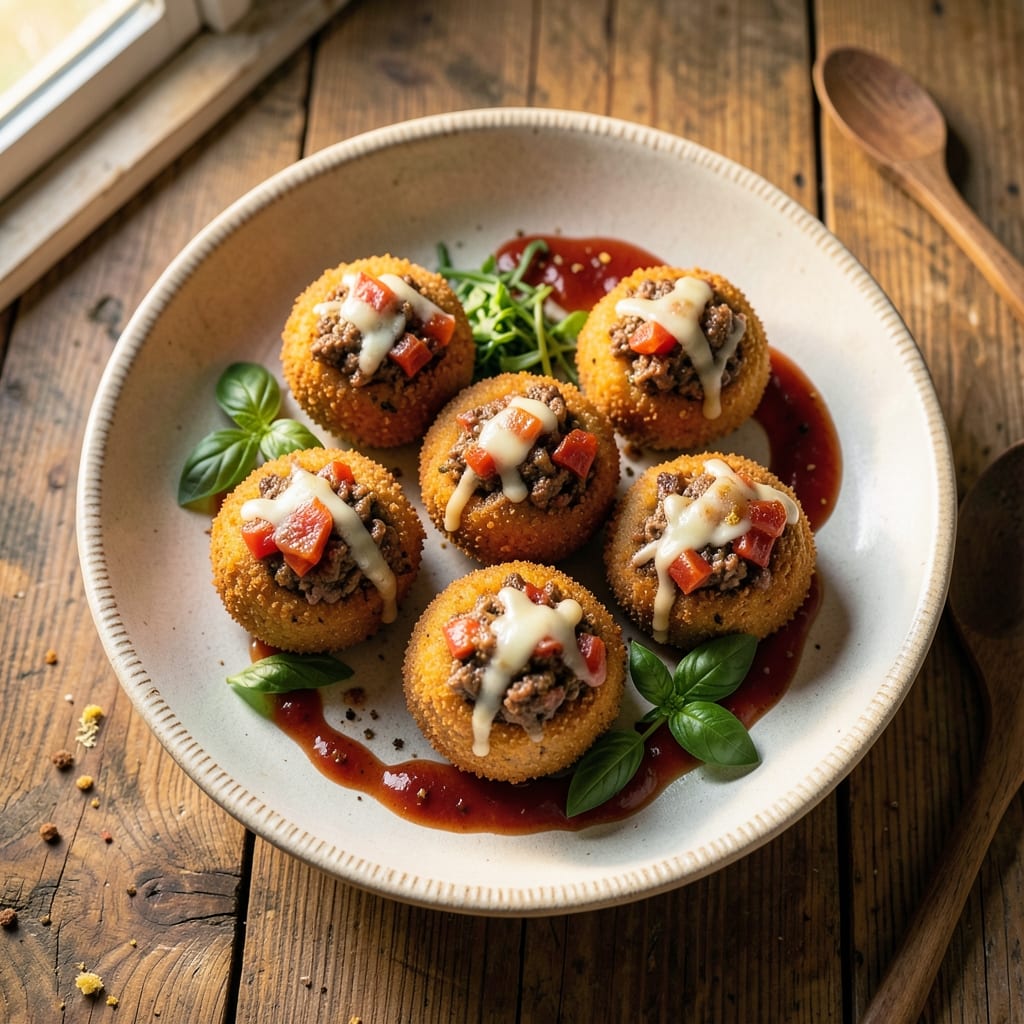
This beef arancini balls recipe transforms humble ingredients into golden, crispy bites with a melt-in-your-mouth cheese center that's impossible to resist. The secret lies in a rich, slow-cooked beef ragù that forms the perfect filling—tender, flavorful, and just the right consistency to hold its shape. I've perfected this technique over years of testing, ensuring every bite delivers that satisfying crunch followed by creamy mozzarella and herby ragù.
What sets these arancini apart is the two-step breading process that guarantees a crispy exterior without compromising the tender interior. The filling must be cool but not cold when shaping, and the breading requires patience—dredging in flour, egg wash, and panko creates that signature crunch. Whether you deep-fry for maximum crispiness or bake for a lighter version, the result is always the same: irresistible golden spheres that disappear faster than you can say "arancini."
The key to success is precision in both the filling preparation and the frying process. Too much moisture in the filling leads to soggy arancini, while improper breading results in uneven crispiness. My method addresses these common pitfalls with simple techniques that work every time. Serve these crispy bites with warm marinara sauce for dipping or alongside a fresh arugula salad to balance the richness.
This recipe delivers restaurant-quality results at home with minimal effort. The beef ragù can be made ahead and stored, making these arancini perfect for game day, parties, or a special appetizer that will impress any guest. Once you master this technique, you'll never buy frozen arancini again—they simply can't compare to homemade.
Ingredients for beef arancini balls
Golden, crispy bites with melty cheese centers require just these 17 quality ingredients.
| Ingredient | Amount | Notes |
|---|---|---|
| Ground Beef 🥩 | 1 lb | 80/20 fat ratio preferred |
| Onion 🧅 | 1 medium | Diced, yellow or white |
| Carrots 🥕 | 2 medium | Diced, peeled |
| Celery Stalks 🌿 | 2 whole | Diced, fresh |
| Garlic Cloves 🧄 | 4 cloves | Minced, fresh |
| Tomato Paste 🍅 | ½ cup | High-quality, no sugar added |
| Dry Red Wine 🍷 | ½ cup | Bold variety like Cabernet |
| Beef Broth 💧 | 1 cup | Low-sodium preferred |
| All-Purpose Flour 🌾 | ½ cup | For breading |
| Large Eggs 🥚 | 2 whole | Room temperature |
| Japanese Breadcrumbs 🍞 | 2 cups | Panko preferred |
| Shredded Mozzarella Cheese 🧀 | 2 cups | Part-skim, fresh |
| Parmesan Cheese 🧀 | ½ cup | Freshly grated |
| Olive Oil 🫒 | ½ cup | For frying |
| Salt 🧂 | 1 ½ tsp | Kosher or sea salt |
| Black Pepper 🌶️ | ½ tsp | Freshly ground |
| Dried Oregano 🍃 | 1 tsp | Italian variety |
The beef ragù is where flavor builds. Ground chuck with 20% fat gives rich texture—leaner cuts dry out. Whole Foods or Costco carry pre-ground chuck, but if buying whole, trim excess fat. For the veggies, diced uniformly (small cubes) ensures even cooking. Carrots and celery should be roughly the same size as onions. The tomato paste? San Marzano is ideal—its sweetness balances the wine. If you can't find it, any high-quality paste works, but avoid the sugary kind. The red wine adds depth; Cabernet Sauvignon works best, but any bold dry red will do.
No red wine? Substitute beef broth with 1 tbsp balsamic vinegar—it mimics the acidity. Short on mozzarella? Provolone or fontina melts beautifully too. The panko breadcrumbs are non-negotiable for crispiness, but if you're out, regular breadcrumbs plus an extra egg wash helps. For the cheese filling, cool it completely before shaping—warm filling makes soggy arancini. The ragù can be made a day ahead; store in an airtight container in the fridge for up to 3 days.
Shape the arancini while the filling is cool but still pliable—about 60°F. Keep extra breadcrumbs handy to coat any sticky spots. For frying, maintain oil at 350°F—lower temps make them greasy, higher burns the exterior. These keep 2 days refrigerated in an airtight container, but they're best fresh. For freezing, bread and fry first, then freeze on a tray before bagging—prevents sticking. Reheat in a 350°F oven for 10 minutes to restore crispiness.
Why You'll Love This Recipe
- One-Pot Magic: I swear by this recipe because it’s all in one skillet—no chopping boards, no extra pans, just the beef, onions, and those veggies (carrots and celery) dancing together until they’re tender. Honestly, I’ve made it while scrolling through my phone; it’s that unfussy.
- Savory Soul Food: That garlic and beef combo? Chef’s kiss. The onions caramelize just enough to sweetness the whole thing, and the celery adds this subtle crunch that keeps it interesting. It’s the kind of flavor that makes you want to eat it straight from the pan—no sauce needed.
- Game for Any Day: Between us, these balls are my go-to for game days, potlucks, or just a lazy Sunday. Freeze half the batch, and boom—you’ve got a ready-to-bake meal for next month. My roommates still tease me for making them too often, but they never say no.
- Budget Powerhouse: Ground beef is cheap, and these ingredients stretch forever. I’ve fed six people for under $15 with this—plus, the leftovers reheat like a dream. Not the prettiest, but the taste makes up for it every time. (Yes, even on a Tuesday night.)
Step-by-step instructions for beef arancini balls
Master these techniques and you'll achieve the perfect balance of crispy exterior and melty, flavorful interior every time.
Prepare the Beef Filling
In a large skillet, heat 0.25 cup of the olive oil over medium-high heat. Add the 1 lb ground beef and cook until browned, breaking it apart with a wooden spoon. Drain excess fat, leaving about 1 tablespoon in the pan.
Add the 1 medium diced onion, 2 medium diced carrots, and 2 whole diced celery stalks. Cook for 5-6 minutes until the vegetables soften. Stir in the 4 cloves minced garlic and cook for 30 seconds until fragrant.
Lower the heat to medium and add the 0.5 cup tomato paste, 0.5 cup dry red wine, 1 cup beef broth, 1.5 tsp salt, 0.5 tsp black pepper, and 1 tsp dried oregano. Simmer for 10-12 minutes until the liquid reduces by half and the mixture thickens. Remove from heat and let cool completely before proceeding.
Assemble the Arancini
In a large bowl, combine the cooled beef mixture with 2 cups shredded mozzarella cheese and 0.5 cup freshly grated parmesan cheese. Mix gently but thoroughly to distribute the cheese evenly throughout the filling.
Using a small cookie scoop or tablespoon, form the mixture into 1.5-inch diameter balls, packing them firmly but not too tightly. Place them on a parchment-lined baking sheet and refrigerate for 30 minutes to firm up.
This chilling step is crucial—it prevents the cheese from oozing out during frying and helps maintain the balls' shape. If the mixture feels too sticky, wet your hands slightly to prevent sticking.
Create the Breading Station
Set up three shallow bowls: one with the 0.5 cup all-purpose flour, one with the 2 whole room temperature eggs beaten lightly with a fork, and one with the 2 cups Japanese breadcrumbs. Season the flour with a pinch of salt and pepper.
Working in batches, roll each chilled arancini ball in the flour first, shaking off any excess. Dip into the egg wash, letting any excess drip off, then press firmly into the breadcrumbs, coating completely. Tap gently on the side of the bowl to remove any loose crumbs.
This three-step breading process creates that signature triple-layered crust. Don't rush—each ball should be fully coated for maximum crispiness. Place the breaded balls on a wire rack set over a baking sheet to keep them from touching.
Fry to Golden Perfection
Heat 0.25 cup of the olive oil in a deep skillet or Dutch oven over medium heat until it reaches 350°F. Fry 4-5 arancini balls at a time, turning occasionally with tongs, for 3-4 minutes until deep golden brown on all sides.
Watch the oil temperature carefully—it should stay between 340-350°F. If it gets too hot, the exterior will burn before the interior cooks through. Drain on a wire rack or paper towels to remove excess oil.
For the best results, fry in batches and keep the finished arancini warm in a 200°F oven while you complete the rest. The internal temperature should reach 165°F when checked with an instant-read thermometer.
Serve Immediately
Serve the arancini balls immediately while they're still crispy. The contrast of the hot, golden exterior with the creamy, cheesy interior is what makes these bites so irresistible.
For extra flair, sprinkle with additional freshly grated parmesan cheese and serve with a side of marinara sauce for dipping. The sauce should be warm but not boiling to maintain the arancini's crisp texture.
These arancini keep well for 2 hours at room temperature, but they're best enjoyed fresh from the fryer. If you have leftovers, store them in an airtight container and reheat in a 350°F oven for 5-7 minutes to restore crispiness.
Pro Tips For Making Beef Arancini Balls
- Brown the Beef First: Dump that raw ground beef into the pan and walk away—no, seriously. Let it sizzle until it loses its pink entirely (about 3-4 minutes) before adding the onions. I used to rush this, and my arancini always tasted undercooked inside. High heat here means deeper flavor later.
- Slice Celery Thin: That thick celery stalk? Dice it into matchsticks—no bigger than a pencil lead. Thick pieces stay woody and chewy, while thin ones soften right into the beef. I learned this the hard way when my first batch had a celery surprise in every bite.
- Don’t Overmix the Filling: Once the veggies and beef are cooked, just stir until combined—no need to mash it into a paste. Overworking the filling makes the arancini dense and gummy. Leave it slightly chunky for texture, and the rice will hold together better when breaded.
- Use Cold Rice: Spread the cooked beef-veggie mixture on a tray and refrigerate for 20 minutes before shaping. Cold filling prevents the rice from turning mushy when you fry it later. I skip this step sometimes, and the arancini fall apart like sad meatballs.
Creative variations of these flavors
Spicy Sausage Twist
Swap the beef ragù for a spicy Italian sausage filling—use 1 lb sweet or spicy Italian sausage instead of ground beef. Cook the sausage first, then deglaze with 0.5 cup red wine and 1 cup beef broth as directed. Add 1 tsp red pepper flakes and 1 tbsp hot honey to the filling for extra kick. The sausage adds richness while keeping the same crispy exterior. 🌶️
Mushroom & Spinach Fusion
For a vegetarian-friendly version, replace the beef with 8 oz sliced mushrooms and 2 cups chopped spinach. Sauté the mushrooms until golden, then add 1 cup ricotta cheese to the filling mix along with the mozzarella. The mushrooms add an earthy depth, while ricotta creates a lighter, creamier center. Garnish with fresh basil after frying.
Seafood Arancini
Transform these into seafood arancini by mixing the cooled ragù with 1 cup cooked shrimp or 1 cup chopped crabmeat. Add 1 tbsp lemon zest and 2 tbsp chopped parsley to brighten the flavor. Use panko mixed with 1 tbsp paprika for the breading—this adds a smoky contrast to the delicate seafood. Serve immediately with a lemon aioli for dipping. 🦞
Breakfast Arancini
Turn these into a breakfast dish by adding 4 scrambled eggs and ½ cup shredded cheddar to the filling. Season with ½ tsp smoked paprika and ½ tsp garlic powder for a savory morning bite. Fry as usual, but serve with a side of sriracha mayo or hot sauce for dipping. These are perfect for brunch or a hearty snack any time of day.
Sweet & Savory Glazed
For a sweet-savory twist, brush the breaded arancini with 2 tbsp honey or maple syrup before frying. Add ½ cup dried cranberries and ¼ cup chopped pecans to the filling for texture. The caramelized exterior pairs beautifully with the herby ragù inside. Serve with a whipped mascarpone dip for a dessert-like appetizer. 🍯
Regional Variations
In Sicily, arancini are often made with ricotta and peas instead of meat. For a Neapolitan-style version, use mozzarella di bufala and add sun-dried tomatoes to the filling. In Southern Italy, some versions include anchovies for umami depth—start with 2-3 anchovy fillets dissolved in the wine. Each region puts its own spin on the classic! 🗺️
Nutrition facts
Frequently asked questions
Can I make these beef arancini ahead of time?
The filling can be prepared up to 3 days ahead and stored in an airtight container in the fridge. For best results, shape and bread the arancini 1 day before serving—this allows flavors to meld. Freeze uncooked breaded arancini on a tray, then transfer to a bag. Cook straight from frozen, adding 1 extra minute to frying time.
Why are my arancini balls falling apart?
This usually happens when the filling is too warm or the cheese melts before frying. Always chill the filled balls for 30 minutes before breading. If the mixture feels too sticky, add 1 tbsp extra flour to the filling. For extra stability, pack the balls slightly tighter when shaping.
What's the best way to reheat leftover arancini?
To restore crispiness, place arancini on a baking sheet and heat in a 350°F oven for 5-7 minutes. For air fryer reheating, cook at 375°F for 3-4 minutes. Avoid microwaving—they'll turn soggy. Keep reheated arancini warm in a 200°F oven if serving multiple batches.
Can I bake these instead of frying?
Yes! Brush breaded arancini with olive oil and bake at 400°F for 18-20 minutes, flipping halfway. For extra crispiness, broil for 1-2 minutes at the end. Baked versions are lighter but may lack the same crunch. Use a wire rack to prevent sogginess.
How do I make the breading extra crispy?
Use Japanese panko breadcrumbs (they're lighter and crispier). Pat breaded arancini dry with paper towels before frying to remove excess moisture. For the egg wash, add 1 tbsp cold water to help bind the breadcrumbs. Double-fry for extra crunch: fry once at 325°F for 2 minutes, then again at 375°F until golden.