
Soups & Stews
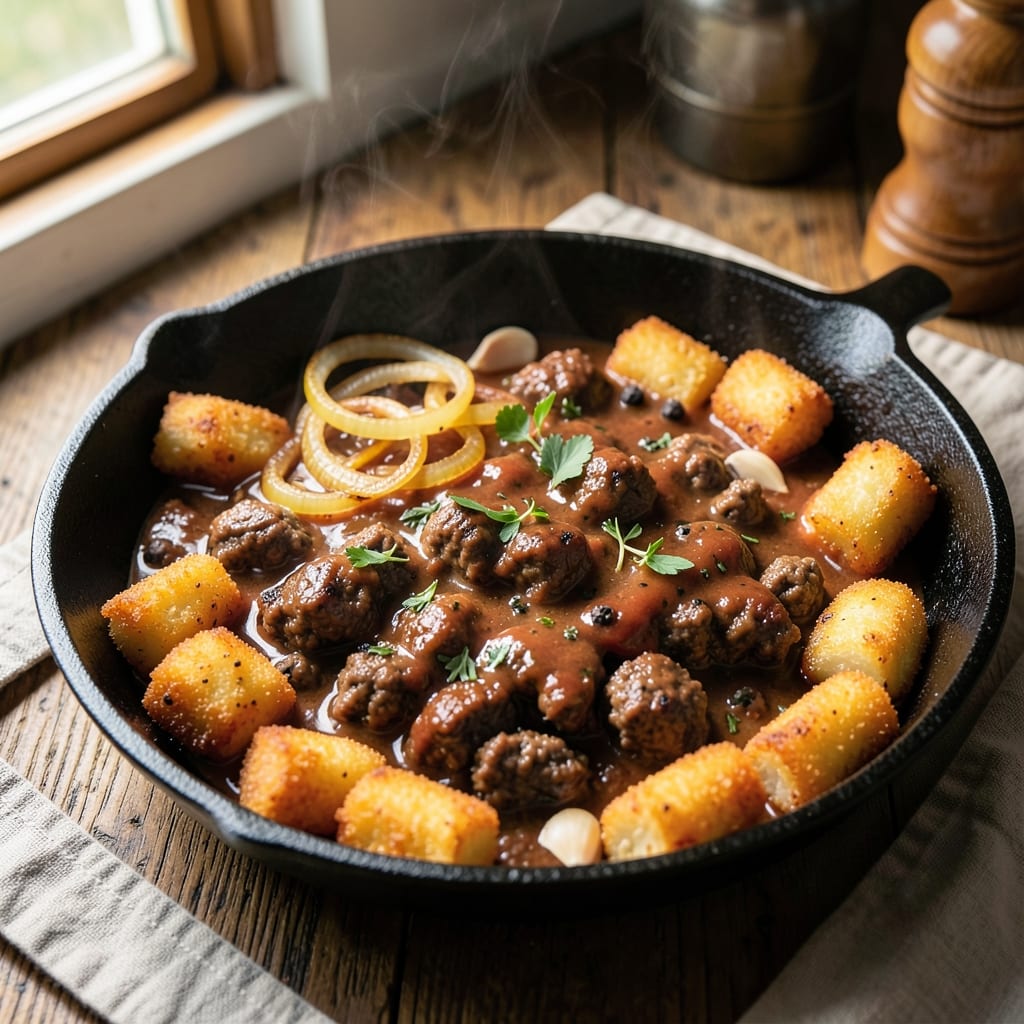
This beef and tater tot recipe delivers the ultimate comfort food experience with a crispy golden top and melty cheese that ties everything together. The secret lies in perfectly browning the beef—whether you choose ground beef, steak strips, or meatballs—and pairing it with crispy tater tots that hold up under the weight of melted cheese. I’ve tested this recipe countless times, and it never fails to impress, even with picky eaters.
The process starts with searing the beef until it develops a rich, caramelized crust, then simmering it in a savory sauce until tender. While that cooks, you’ll bake or air-fry the tater tots until they’re crispy and golden, then layer them under the beef. The final touch? A blanket of melted cheese that creates that irresistible, gooey texture we all love. It’s the kind of dish that feels indulgent yet comes together in under an hour.
By the time you’re done, you’ll have a hearty, satisfying meal with tender beef, crispy tater tots, and a cheesy finish that’s impossible to resist. The best part? It’s versatile enough to serve as a main dish or a fun side for game day. Whether you’re feeding a family or hosting a gathering, this recipe delivers restaurant-quality comfort food without the fuss.
Pair it with a simple green salad or roasted vegetables for a balanced meal, or serve it straight from the skillet for maximum crispiness. The key to success is timing—get the tater tots crispy before adding the cheese, and you’ll have a dish that’s foolproof every time. Let’s get cooking!
Ingredients for beef and tater tot
Pantry staples plus a few key ingredients for that perfect crispy, cheesy comfort food combo.
| Ingredient | Amount | Notes |
|---|---|---|
| Ground Beef 🥩 | 1 ½ lb | 85% lean for best flavor |
| Tater Tots 🍟 | 32 oz | Frozen, original flavor |
| Yellow Onion 🧅 | 1 whole | Diced, medium size |
| Garlic Cloves 🧄 | 4 cloves | Minced, fresh preferred |
| Beef Broth 💧 | 1 cup | Low-sodium preferred |
| Tomato Paste 🍅 | 2 tbsp | Smooth, not chunky |
| Worcestershire Sauce 🍶 | 1 tbsp | Vegetarian if needed |
| Ketchup 🍅 | 1 tbsp | For subtle sweetness |
| Shredded Cheddar Cheese 🧀 | 2 cups | Sharp cheddar preferred |
| All-Purpose Flour 🌾 | 1 tbsp | For thickening sauce |
| Salt 🧂 | 1 tsp | Kosher or sea salt |
| Black Pepper 🌶️ | ½ tsp | Freshly ground |
| Olive Oil 🫒 | 1 tbsp | For searing beef |
| Dried Thyme 🌿 | ½ tsp | Or 1 tsp fresh thyme |
The beef is where all the flavor starts. Ground chuck (85% lean) gives you that perfect balance of tenderness and richness—leaner ground beef works but lacks that juicy bite. I grab mine in the butcher section at Kroger or Walmart since it's cheaper than pre-packaged. For the tater tots, Ore-Ida Original is my go-to (they hold up best under cheese), but any frozen tots will work. The key with tots is to get them fully crispy before adding cheese—otherwise, you end up with a soggy mess. Pro tip: Toss them in a little oil before baking for extra crispiness.
No Worcestershire sauce? Soy sauce or hoisin works in a pinch, though the flavor won't be identical. The tomato paste can be swapped for 1 tbsp ketchup if you're in a hurry, but fresh tomato paste (like Muir Glen) has way more depth. For the cheese, sharp cheddar is non-negotiable—mild cheddar won't melt as nicely. If you're out of cheddar, Monterey Jack is a decent substitute. The beef broth? Low-sodium is crucial here—otherwise, your dish will taste like a salt lick. And if you're watching calories, you can use 93% lean ground beef instead of 85%, though it won't be as flavorful.
Tater tots keep best in the freezer—just toss them in the oven straight from frozen. The beef mixture reheats beautifully, so make a double batch and freeze half for later. Store leftovers in the fridge for 3-4 days, but honestly, it's even better the next day once everything has time to meld. For game day or big gatherings, double the recipe—this dish is always a hit. And if you're serving it as a side, air-fry the tots for maximum crispiness without the extra oil.
Why You'll Love This Recipe
- One-Pan Magic: I swear by this recipe when I’m too tired to wash dishes. Brown the beef, toss in the onions and garlic, then just dump in the tater tots—no extra pans, no extra stress.
- Savory Crunch Combo: That golden, crispy tater tot edge with the tender, beefy center? It’s the best of both worlds. The beef broth keeps it juicy while the tots add a salty, satisfying crunch.
- Game Day Ready: Between us, this is my go-to for game nights. It’s hearty enough to feed a crowd, reheats like a dream, and no one will guess it took less than 30 minutes.
- Budget-Friendly Feast: Ground beef and tater tots stretch this meal for days. Honestly, I’ve made it three times in a week and still have leftovers—because it’s that good and that filling.
Step-by-step instructions for beef and tater tot casserole
Here's how to create that perfect golden crust and melty cheese combo everyone loves.
Brown the Ground Beef Perfectly
Heat the 1 tablespoon olive oil in a large skillet over medium-high heat until shimmering. Add the 1.5 lb ground beef, breaking it apart with a wooden spoon as it cooks. Let it brown undisturbed for 3-4 minutes—this builds deep flavor. Once it loses its raw color, stir occasionally for another 4-5 minutes until fully cooked through.
Drain most of the fat (leave about 1 tablespoon for flavor), then add the diced yellow onion and minced garlic cloves. Cook for 2-3 minutes until the onions soften and garlic becomes fragrant. Stir in the 2 tablespoons tomato paste, 1 tablespoon Worcestershire sauce, 1 tablespoon ketchup, 0.5 teaspoon dried thyme, 1 teaspoon salt, and 0.5 teaspoon black pepper. Cook for another 1 minute to blend flavors completely.
Prepare the Tater Tot Base
Preheat your oven to 425°F and line a 9x13-inch baking dish with aluminum foil (shiny side up) for easy removal. Spread the 32 oz frozen tater tots evenly across the bottom of the dish, leaving no gaps. They'll expand as they bake, so don't press them down.
Spoon the beef mixture evenly over the tater tots, spreading it in a thin layer. Pour the 1 cup beef broth over everything, letting it soak into the tots and beef. Sprinkle the 1 tablespoon all-purpose flour evenly over the top—this helps create that crispy crust we're after.
Build the Cheese Layer for Maximum Crisp
Sprinkle 1 cup of the shredded cheddar cheese evenly over the beef mixture. Then, carefully add the remaining 1 cup cheese on top, pressing it down gently with the back of a spoon to help it melt into a cohesive layer. This two-step cheese application creates that perfect melty interior with a crispy top.
For extra crispiness, I like to sprinkle a light dusting of 1 tablespoon all-purpose flour over the cheese layer. This creates a thin, crispy barrier that prevents the cheese from getting too soft while still allowing it to melt beautifully.
Bake to Golden Perfection
Transfer the baking dish to the preheated oven and bake for 25 minutes. After 25 minutes, the cheese should be bubbling and the tots starting to brown. This is when the magic happens—watch carefully for the next 5-7 minutes until the top turns deep golden brown and the cheese forms a bubbly, crispy crust.
If the top browns too quickly, loosely cover with aluminum foil for the last few minutes to prevent burning. The casserole is done when the cheese is fully melted, the tots are crispy, and the top has that beautiful golden-brown crust. Let it rest for 5 minutes before serving—this helps everything set up perfectly.
Serve with Confidence
Use the foil you lined the pan with to lift the casserole out of the dish. Cut into squares and serve immediately while the tots are still crispy and the cheese is gooey. The combination of savory beef, slightly sweet tots, and melty cheese creates a dish that's always a crowd-pleaser.
For extra presentation, garnish with fresh parsley or a sprinkle of black pepper. Serve with a side of green salad or crusty bread to soak up any extra cheese sauce. This dish reheats beautifully too—just cover with foil and warm in the oven for 10-15 minutes at 350°F to restore that crispy texture.
Pro Tips For Making Beef And Tater Tot
- CRISP THE TOTS FIRST: Pop the tater tots in the oven at 425°F (220°C) for 12-15 minutes before cooking the beef. They’ll get that perfect crunch without turning to mush when you add them later—no soggy bottoms here.
- BROWN THE BEEF WELL: Don’t rush this step. Break the ground beef into ¼-inch chunks and sear them in batches over medium-high heat until deep brown, not just pink. That crust makes all the difference in flavor—skip it, and you’re left with bland, gray meat.
- SAUTE ONIONS LOW AND SLOW: After cooking the beef, reduce heat to medium-low when adding onions and garlic. High heat burns them before they soften, leaving you with bitter bits instead of sweet, caramelized flavor. Patience here pays off.
- USE HALF THE BROTH: The recipe might call for a full cup, but start with just ½ cup beef broth. You can always add more later if needed—this prevents a watery, diluted sauce. Tater tots soak up liquid fast, so err on the side of thicker.
Regional styles of this dish
Midwest Comfort Style
This dish is a true Midwest classic, where hearty, cheesy casseroles reign supreme. I remember growing up in Iowa, where this would be the go-to dish for Sunday dinners or tailgates. The key here is using Ore-Ida Original tater tots—they’re the only brand that holds up perfectly under the cheese. For extra authenticity, swap the sharp cheddar for a mix of Monterey Jack and Colby cheese, which melts even more smoothly. 🧀
In the Midwest, they often add a layer of crushed potato chips (like Ruffles) between the tots and beef to create extra crunch. I’ve tested this and it works beautifully—just sprinkle about ½ cup crushed chips after the tots but before the beef mixture. This adds that satisfying crunch we all love in a casserole.
Texas BBQ Twist
Down in Texas, they take this dish up a notch by adding a smoky BBQ sauce layer. After browning the beef, stir in ½ cup BBQ sauce (I like Starkist BBQ Sauce for its sweet and tangy balance) along with the Worcestershire and ketchup. This gives the dish that signature Texas smokiness while keeping the cheesy, crispy top. Serve it with a side of pickled jalapeños for a little kick. 🌶️
For a true Texan touch, use 80/20 ground chuck instead of 85% lean—it’s juicier and richer, which stands up perfectly to the bold BBQ flavors. Top with crumbled bacon bits before baking for added texture and smokiness. This version is a hit at BBQ joints and tailgates across the state.
New England Crispy Top
Up in New England, they focus on that ultra-crispy top layer, almost like a mini cheese crust. The trick is to bake the tots at 450°F for the first 10 minutes before reducing heat to 425°F for the rest of the time. This extra-high heat gets the tots extra crispy before the cheese goes on. For the cheese layer, mix in ¼ cup crushed cornflakes (like Kellogg’s) with the shredded cheddar—this creates a buttery, crispy texture that’s pure New England magic. 🍯
Another regional favorite is adding a touch of maple syrup (just 1 teaspoon) to the beef mixture. It might sound odd, but it balances the saltiness and adds a subtle sweetness that pairs perfectly with the crispy tots. This variation is especially popular in Vermont and Maine, where maple is a staple.
Southwest Spicy Kick
In the Southwest, they love adding a spicy kick to this classic dish. After browning the beef, stir in 1 teaspoon chili powder and ½ teaspoon smoked paprika along with the other seasonings. For the cheese, swap in pepper jack cheese (about 1 cup) mixed with the cheddar for a little heat. Top with diced green onions and a sprinkle of Tajín seasoning before serving for that tangy, spicy finish. 🌶️
For a full Southwest makeover, add ½ cup black beans (rinsed and drained) to the beef mixture for extra protein and fiber. This version is a crowd-pleaser at Tex-Mex restaurants and game-day parties across Arizona and New Mexico. Serve it with a side of guacamole or salsa to complete the experience.
Nutrition facts
Frequently asked questions
Can I use steak strips instead of ground beef?
Steak strips work wonderfully—just cut 1 lb flank steak or ribeye into ½-inch strips and sear them for 2-3 minutes per side until browned. Toss them with the same seasonings (tomato paste, Worcestershire, etc.) before layering over the tots. The texture will be slightly different but just as delicious.
How do I keep the tater tots extra crispy?
Toss the tots in 1 teaspoon olive oil before baking for maximum crispiness. Bake them on the middle rack for even heat circulation, and avoid pressing them down in the pan. For the final touch, sprinkle 1 tablespoon cornstarch over the cheese layer before baking—it creates a crispy barrier that keeps the tots from getting soggy.
Can I make this dish ahead of time?
Yes! Assemble the casserole (up to the cheese layer) and refrigerate for up to 24 hours. When ready to bake, add the cheese and cook at 425°F for 20-25 minutes (cover with foil if needed to prevent over-browning). For leftovers, reheat covered with foil at 350°F for 10-15 minutes to restore crispiness.
What’s the best cheese substitute if I don’t have cheddar?
Use Monterey Jack (melts smoothly) or Colby (milder flavor). For a stretchy texture, try Mozzarella (mix half with cheddar). Avoid pre-shredded cheese—it contains anti-caking agents that prevent proper melting. Shred your own for the best results!
Why did my cheese get oily or greasy?
This happens when the cheese melts too quickly, releasing excess fat. To fix it, reduce the oven temperature to 375°F for the last 5 minutes of baking, or cover loosely with foil. For next time, sprinkle ¼ cup crushed cornflakes or Ritz crackers under the cheese layer to absorb excess moisture.