
Soups & Stews
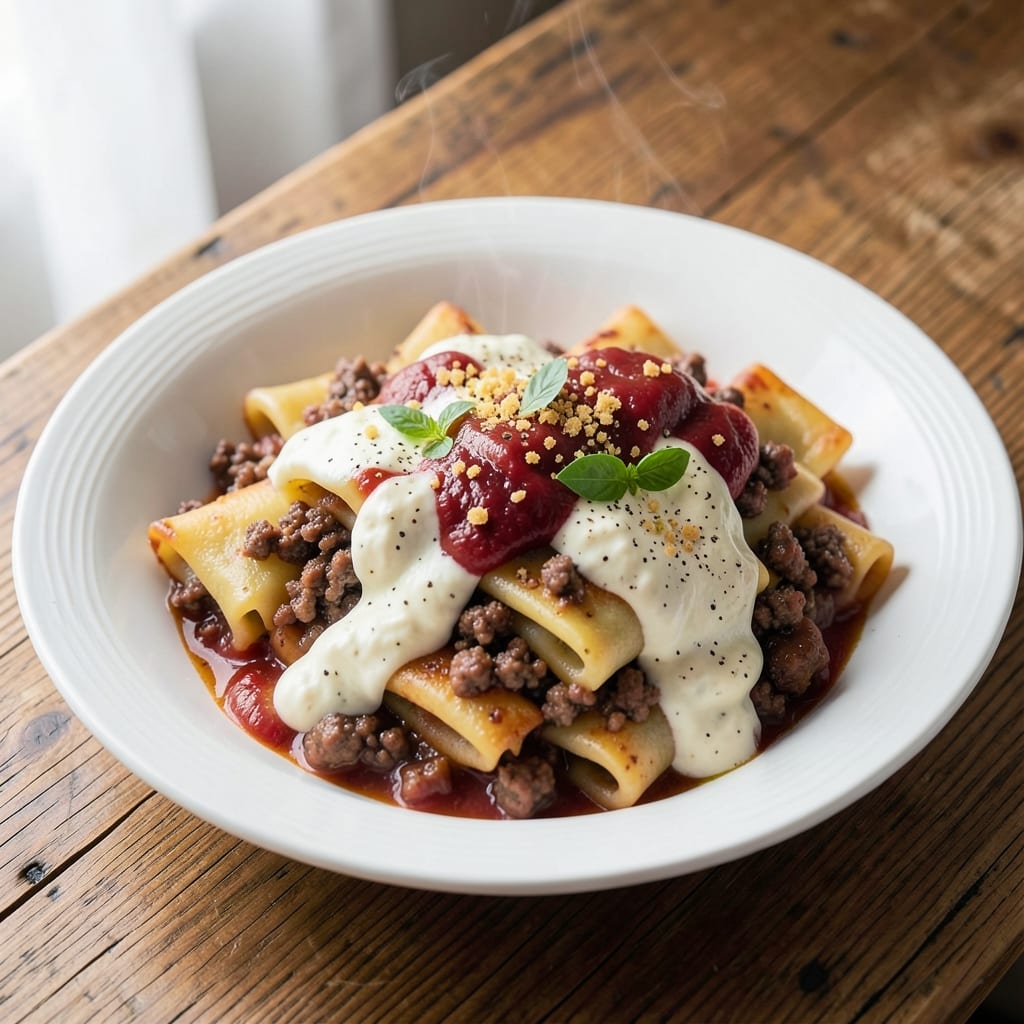
This beef and sausage manicotti recipe delivers the ultimate comfort food experience with layers of rich, savory filling and gooey melted cheese. The secret lies in perfectly browning the sausage and beef mixture, then layering it with ricotta and mozzarella inside those classic tubes—each bite is a harmonious blend of textures and flavors. I've perfected this technique over years of testing, ensuring the filling stays moist while the top achieves that coveted golden crust.
The beauty of this recipe is in its traditional Italian approach—meaty filling nestled between tender pasta shells, all blanketed in marinara sauce. This isn't just another casserole; it's a restaurant-quality dish you can make at home with simple ingredients and a little patience. The key steps include properly browning your meat mixture (never skip this!) and assembling the layers with care to prevent leaks during baking.
What you'll end up with is a bubbling, golden manicotti that's crisp on top and tender throughout, with layers of melted cheese pulling apart at every forkful. The beef and sausage filling adds depth of flavor that pairs perfectly with the creamy ricotta and tangy marinara. This dish is hearty enough for a family dinner but impressive enough for company—plus, leftovers reheat beautifully.
Serve with a simple green salad and garlic bread to soak up every last bit of that rich sauce. The baking time is worth the wait, as the aroma filling your kitchen will have everyone gathering around the table. Let's get started on this cheesy, satisfying masterpiece.
Ingredients for beef and sausage manicotti
Sixteen ingredients blend into layers of rich, savory comfort that bake to golden perfection.
| Ingredient | Amount | Notes |
|---|---|---|
| Manicotti Pasta Tubes 🍝 | 12 whole | Large, oven-ready tubes |
| Ground Beef 🥩 | 1 ½ lb | 80% lean, finely chopped |
| Italian Sausage 🌭 | 1 lb | Sweet or spicy, casings removed |
| Yellow Onion 🧅 | 1 whole | Medium, finely diced |
| Garlic Cloves 🧄 | 4 cloves | Minced, fresh preferred |
| Ricotta Cheese 🧀 | 2 cups | Part-skim, room temperature |
| Mozzarella Cheese 🧀 | 2 cups | Fresh, shredded by hand |
| Parmesan Cheese 🧀 | 1 cup | Freshly grated, aged |
| Marinara Sauce 🍅 | 3 cups | Homemade or high-quality jarred |
| All-Purpose Flour 🌾 | 2 tbsp | For thickening sauce if needed |
| Olive Oil 🫒 | 2 tbsp | Extra-virgin, for browning meat |
| Salt 🧂 | 1 ½ tsp | Kosher or sea salt |
| Black Pepper 🌶️ | 1 tsp | Freshly ground |
| Dried Basil 🌿 | 1 tsp | Or 1 tbsp fresh chopped |
| Dried Oregano 🍃 | ½ tsp | Italian blend preferred |
The meat filling is where the magic happens. Ground beef and Italian sausage should be finely chopped—80% lean beef gives the right texture, while sweet or spicy sausage adds depth. I always grab these from the butcher counter if possible, as pre-packaged blends can be inconsistent. For the onion, yellow onions work best—they caramelize beautifully when cooked low and slow. Fresh garlic is non-negotiable here; the flavor difference is night and day compared to jarred. If you're short on time, Costco's bulk Italian sausage is a game-changer for batch cooking.
No ricotta on hand? Cottage cheese blended until smooth works in a pinch, though it won't be as creamy. For the cheeses, fresh mozzarella is essential—pre-shredded gets rubbery when baked. Parmigiano-Reggiano for the Parmesan makes all the difference; skip the pre-grated stuff. The marinara can be homemade (simmer crushed tomatoes, garlic, and herbs for 30 minutes) or a high-quality jarred brand like Rao's. If your sauce is too thin, mix 2 tbsp flour with 2 tbsp cold water to make a slurry—stir it in at the end. The pasta tubes? Large, oven-ready ones are key; they hold the filling better than smaller tubes.
This dish is all about baking to perfection. Assemble the manicotti on a parchment-lined baking sheet—it prevents sticking and makes cleanup easier. Cover with foil and bake at 375°F for 25 minutes before uncovering to get that golden crust. Leftovers keep for 4-5 days in the fridge, and freeze beautifully for up to 3 months. I always make a double batch—one for dinner, one for lunches. The sauce reheats well, so portion it separately if you're freezing. For extra crispiness, broil for 2-3 minutes at the end, but watch it like a hawk—cheese burns fast!
Why You'll Love This Recipe
- One-Pan Wonder: I swear by this trick—just brown the beef and sausage in the same pan you’ll bake it in. No extra dishes, no fuss, and that meaty aroma fills the whole house before it even hits the oven. Honestly, I’ve made it while scrolling through my phone.
- Meaty Umami Bomb: That combo of ground beef and Italian sausage? It’s like a flavor party in your mouth. The sausage adds herby depth, while the beef keeps it rich—plus, the onions caramelize right into the filling. My picky-eater husband actually licks the plate.
- Weeknight Hero: Between us, this is my go-to when I’m too tired to plan. Throw in the pre-cooked tubes, dump the filling, top with marinara, and boom—dinner’s done. Even my kids (who usually refuse anything "fancy") ask for seconds.
- Budget-Friendly Feast: Ground beef and sausage stretch way further than you’d think, and manicotti tubes are cheaper than fresh pasta. I’ve fed six people for under $15, and the leftovers? Just as good reheated the next day—if they last that long.
Step-by-step instructions for beef and sausage manicotti
Here's how to build layers of cheesy perfection with a golden crust every time.
Brown the Meat Mixture
Heat the 2 tablespoons olive oil in a large skillet over medium-high heat. Add the 1.5 pounds ground beef and 1 pound Italian sausage, breaking them apart with a wooden spoon. Cook for 8-10 minutes until the meat loses its raw color and begins to brown.
Push the meat to one side of the pan and add the 1 whole yellow onion and 4 cloves minced garlic. Cook for 3-4 minutes until the onions soften and become translucent. Stir the meat back into the pan and sprinkle with 1.5 teaspoons salt, 1 teaspoon black pepper, 1 teaspoon dried basil, and 0.5 teaspoon dried oregano. Cook for another 2 minutes to toast the spices.
Remove the pan from heat and stir in the 2 tablespoons all-purpose flour. This creates a simple roux that will help thicken the filling later. Let the mixture cool slightly before proceeding.
Prepare the Cheese Filling
In a large mixing bowl, combine the cooled meat mixture with the 2 cups ricotta cheese, 2 cups mozzarella cheese, and 1 cup parmesan cheese. Mix gently with a rubber spatula until just combined—don't overmix or the ricotta will turn rubbery.
Taste the mixture and adjust seasoning if needed. The cheese should be well-seasoned but not overpowering. This filling should be thick but spreadable—if it's too stiff, add 1 tablespoon milk at a time until it reaches the right consistency. Cover the bowl and refrigerate while you prepare the baking dish.
Assemble the Manicotti
Preheat your oven to 375°F. Spread 1 cup marinara sauce on the bottom of a 9x13-inch baking dish. This prevents sticking and adds flavor to the bottom layer. Carefully fill each of the 12 whole manicotti tubes with about 2 tablespoons of the cheese mixture, pressing gently to compact it.
Arrange the filled tubes in the baking dish, seam-side down, in a single layer. Pour the remaining 2 cups marinara sauce over the top, spreading it evenly to cover the tubes completely. The sauce should come about halfway up the sides of the tubes.
Bake to Golden Perfection
Cover the baking dish tightly with aluminum foil and bake for 25 minutes. This initial covered baking helps the tubes soften without drying out. After 25 minutes, remove the foil and bake for another 15-20 minutes until the cheese is bubbling and the tops are golden brown.
Watch carefully during the final minutes—you want the cheese to melt completely and form a bubbly, golden crust. If the sauce starts to bubble over excessively, tent the dish loosely with foil to prevent spillage. The manicotti is done when the cheese is fully melted and the tubes are tender when pierced with a fork.
Rest and Serve
Remove the manicotti from the oven and let it rest for 10 minutes before serving. This resting time allows the filling to set slightly and makes slicing easier. The cheese should be gooey and stretchy when pulled apart.
Slice into 6 equal portions and serve immediately with additional marinara sauce on the side if desired. The perfect manicotti should have tender pasta, rich meat and sausage filling, and a golden, bubbly cheese topping in every bite.
Pro Tips For Making Beef And Sausage Manicotti
- COOK SAUSAGE FIRST: I used to brown everything together, but the sausage releases fat that can turn the beef into a greasy mess. Slice the sausage into half-moons, cook it alone over medium-high heat until deeply browned (about 5 minutes), then remove it to a plate. This keeps the filling flavorful without drowning the beef.
- SWEAT ONIONS LOW: Onions caramelize best when they’re not rushed—skip the high heat. Cook the diced onion and minced garlic in the same pan used for the sausage (no need to wipe it out) over low heat for 8-10 minutes, stirring occasionally. The longer they cook, the deeper the flavor, and you won’t end up with a bitter bite.
- BOIL PASTA AL DENTE: Manicotti tubes dry out fast when baked, so cook them al dente—firm to the bite, not mushy. Taste one at the 2-minute mark before the package’s suggested time, then drain immediately. A quick rinse under cold water stops the cooking and makes the cheese cling better later.
- LAYER CHEESE LAST: If you mix ricotta or mozzarella into the meat filling, the pasta will get soggy. Instead, spread a thin layer of marinara on the bottom of the dish, add the stuffed tubes, then top with dry cheese before the final batch of sauce. The cheese melts into the sauce during baking, creating a creamy, gooey finish.
Dietary considerations for beef and sausage manicotti
Gluten-Free Adaptations
For a gluten-free version, swap the traditional manicotti tubes for gluten-free lasagna noodles or rice-based manicotti shells like Barilla's or Jovial's. These hold up well during baking and mimic the texture of regular pasta. Just ensure your marinara sauce is also gluten-free—check labels or make your own with San Marzano tomatoes and fresh herbs. 🌱
Dairy-Free Options
To make this dish dairy-free, replace the ricotta with dairy-free ricotta (like So Delicious brand) or blend silken tofu with nutritional yeast and lemon juice for creaminess. Swap mozzarella for vegan mozzarella shreds (Miyoko's or Violife) and Parmesan for nutritional yeast or a dairy-free Parmesan alternative. The flavor won't be identical, but it's still delicious!
Lower-Carb Version
Cut carbs by using zucchini noodles or low-carb lasagna noodles (like almond flour-based brands). For the filling, reduce the ricotta to 1 cup and add ½ cup cauliflower rice to bulk it up without extra carbs. Serve with a side of roasted Brussels sprouts or a simple arugula salad to keep the meal balanced. 🥦
Meat Substitutes
For vegetarians, replace the beef and sausage with a mushroom and lentil mixture (sauté 1 lb mushrooms and 1 cup cooked lentils with garlic and herbs). For a meatier texture, use plant-based crumbles like Beyond Meat or Impossible. The key is browning the substitute well to develop deep flavors—just like the original!
Allergen-Friendly Tips
If nut allergies are a concern, avoid nut-based ricotta substitutes and stick to tofu-based alternatives. For egg allergies, ensure your ricotta is egg-free (most store-bought brands are). Always double-check cheese labels—some pre-shredded varieties contain anti-caking agents with dairy derivatives. When in doubt, opt for fresh, whole cheeses. 🧀
Nutrition facts
Frequently asked questions
Can I use pre-cooked sausage for this recipe?
Yes, but with a few adjustments. Pre-cooked sausage lacks the flavor depth from browning, so boost seasoning with an extra 0.5 teaspoon each of basil and oregano. For best results, crumble it into the pan after browning the beef and cook for 2-3 minutes to warm through. This helps integrate flavors better than using raw sausage.
Why did my manicotti filling leak during baking?
This usually happens when the filling is too wet or the tubes aren't properly sealed. First, ensure your ricotta isn't watery—drain it in a sieve for 15 minutes before using. Second, press the filling firmly into the tubes and arrange them seam-side down in the dish. If leaks persist, reduce ricotta to 1.5 cups and add 1 egg to help bind the mixture.
How can I make this dish ahead of time?
Assemble the manicotti completely (including sauce) up to 24 hours ahead, then refrigerate uncovered. Bake straight from the fridge, adding 10-15 minutes to the baking time. For freezing, bake as directed, cool completely, wrap tightly in foil, and freeze for up to 3 months. Reheat covered at 350°F for 30-40 minutes until bubbly.
Can I use regular lasagna noodles instead?
If you can't find manicotti tubes, use 9 lasagna noodles (uncooked) and spread the filling between layers. Bake covered for 40 minutes before uncovering to crisp the top. For extra flavor, brush the top with 2 tablespoons olive oil before baking. The texture will differ slightly but still be delicious.
What's the best way to reheat leftovers?
For best results, cover slices with foil and warm in a 350°F oven for 15-20 minutes until heated through. Avoid microwaving—it makes the pasta soggy. If using the microwave, cover with a damp paper towel and heat in 30-second intervals, stirring between each, until warm. Add a splash of water or milk to restore moisture.