
Soups & Stews
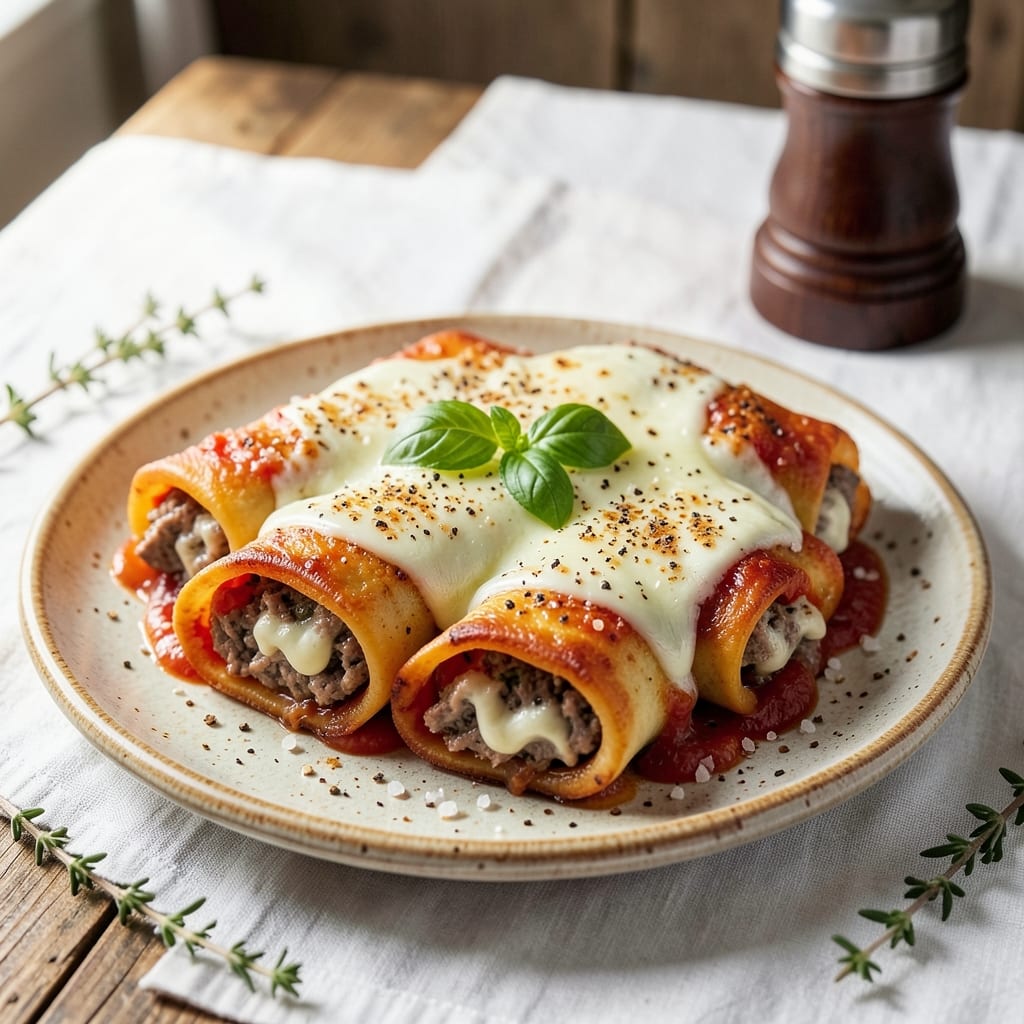
This beef and ricotta cannelloni recipe delivers restaurant-quality Italian comfort food with rich, savory filling and gooey melted cheese between tender pasta layers. 🌟 The secret lies in balancing perfectly seasoned ground beef with creamy ricotta, herbs, and a touch of Parmesan—creating a filling that stays moist even after baking. What sets this apart is the technique of piping the filling into fresh pasta shells, ensuring every bite is packed with flavor without falling apart.
Traditional Italian cannelloni requires patience and precision, but this method simplifies the process without sacrificing authenticity. You'll start with a flavorful beef mixture—browned to perfection and infused with garlic, onions, and Italian seasoning—then combine it with ricotta for that signature creamy texture. The filling is piped into fresh pasta shells (or rolled if using dried), then topped with marinara or Alfredo sauce before baking to golden perfection.
What you'll end up with is a dish that looks impressive but is surprisingly approachable—layers of tender pasta, oozing cheese, and bold, herby sauce that ties everything together. The aroma alone will have everyone gathering around the table, while the first bite delivers that perfect combination of hearty beef and creamy ricotta. This is comfort food at its finest, elevated by traditional techniques that make it feel like a homemade Italian feast.
Serve with garlic bread and a simple arugula salad for the full experience, or enjoy it as a satisfying main course on its own. The recipe includes variations for adding spinach or mushrooms to the filling, so you can customize it to your taste. Let's get started on creating this showstopper!
Ingredients for beef and ricotta cannelloni
These 14 ingredients create restaurant-quality beef and ricotta cannelloni with gooey cheese layers.
| Ingredient | Amount | Notes |
|---|---|---|
| Ground Beef 🥩 | 1 ½ lb | 80% lean or leaner for best texture |
| Ricotta Cheese 🧀 | 1 lb | Whole-milk for creaminess, room temperature |
| Large Eggs 🥚 | 2 whole | Room temperature for even binding |
| Parmesan Cheese 🧀 | 1 cup | Freshly grated from block |
| Yellow Onion 🧅 | 1 whole | Medium size, finely chopped |
| Garlic Cloves 🧄 | 4 cloves | Freshly minced for aromatic punch |
| Italian Seasoning 🌿 | 1 tbsp | Or blend of dried basil, oregano, thyme |
| Ground Black Pepper 🌶️ | ½ tsp | Freshly cracked for intensity |
| Kosher Salt 🧂 | 1 tsp | Diamond Crystal preferred |
| Unsalted Butter 🧈 | ½ cup | Cold, cubed for browning beef |
| Fresh Basil Leaves 🌿 | ¼ cup | Chopped for fresh herb finish |
| Cannelloni Pasta Sheets 🍝 | 12 pieces | Fresh preferred, dried if necessary |
| Marinara Sauce 🍅 | 2 ½ cups | High-quality jarred or homemade |
| Mozzarella Cheese 🧀 | 1 cup | Shredded, low-moisture preferred |
The beef is non-negotiable—80% lean or leaner gives you that perfect balance of flavor and texture. Costco or Whole Foods always have the best quality ground beef, but any reputable grocery store's pre-ground works too. Look for bright red color and good marbling. The ricotta? Whole-milk is a must for that creamy texture—part-skim gets watery. I always grab mine from the refrigerated section at Trader Joe's or Whole Foods, where it's pre-drained. Fresh pasta sheets make all the difference—Eataly or local Italian markets carry the best, but dried works in a pinch if you can't find fresh. Just boil them for one less minute than package instructions say.
No fresh basil? Dried oregano at half the amount gets you close, but honestly, nothing beats fresh. Short on mozzarella? Parmesan plus a splash of heavy cream mimics that stretchy texture. The marinara can be jarred—Rao's or Barilla are my go-tos—but homemade is worth the 15 minutes if you've got time. For the Italian seasoning, I blend 1 tsp dried basil, 1 tsp oregano, 0.5 tsp thyme for the perfect mix. The Parmesan needs to be freshly grated—pre-shredded gets clumpy and melts weird. Pro tip: Toast your garlic cloves in butter for 30 seconds before mincing—deepens the flavor instantly.
Fresh pasta shells? Use within 2 days—they dry out fast. The ricotta mixture keeps for 24 hours in the fridge, covered tightly. For make-ahead magic, assemble the casserole (unbaked) and refrigerate for up to 12 hours before baking. Leftovers reheat beautifully—cover with foil and warm at 350°F for 15 minutes. The filling gets even more flavorful overnight, so double the batch if you can. Store baked cannelloni for 3-4 days in the fridge or freeze portions for 2 months—just thaw overnight in the fridge before reheating.
Why You'll Love This Recipe
- I swear by this trick: just mix the cooked beef, ricotta, egg, and Parmesan right in the bowl—no fancy piping bags. The onion adds just enough sweetness to balance the richness, and honestly? You’ll have more filling than you know what to do with.
- No-Fuss Assembly: I swear by this trick: just mix the cooked beef, ricotta, egg, and Parmesan right in the bowl—no fancy piping bags. The onion adds just enough sweetness to balance the richness, and honestly? You’ll have more filling than you know what to do with.
- Creamy-Meaty Magic: That first bite where the tender beef meets the pillowy ricotta? It’s like a hug in pasta form. The egg binds everything together so smoothly, and the Parmesan gives it this irresistible, salty finish that makes you want to roll another one.
- Weeknight to Dinner Party: Same recipe, different vibes. Slap it together for a lazy Tuesday or dress it up with a sprinkle of basil and a side salad for guests. It reheats like a dream, so I’ve served it at both my kitchen table and my best friend’s Thanksgiving—no judgment either way.
Step-by-step instructions for beef and ricotta cannelloni
Here's the method for showstopping cannelloni with perfectly balanced layers—creamy filling, tender pasta, and bubbly cheese.
🍳 Step 1: Brown the Beef and Sauté Aromatics
Heat a large skillet over medium-high heat and add the ½ cup unsalted butter. Once melted, add the 1.5 lb ground beef and cook, breaking it apart with a wooden spoon, until it loses its raw color and begins to brown—about 5-7 minutes. This step is crucial for developing deep flavor through the Maillard reaction.
Push the beef to one side of the pan and add the finely chopped yellow onion and minced garlic cloves. Cook for 3-4 minutes until softened and fragrant. Here's the thing—don't rush this part. The onions should be translucent and the garlic should smell amazing before moving forward.
👨🍳 Step 2: Create the Creamy Ricotta Filling
In a large mixing bowl, combine the cooked beef mixture with the 1 lb room-temperature ricotta cheese, 2 whole large eggs, 1 cup freshly grated Parmesan cheese, 1 tablespoon Italian seasoning, ½ teaspoon ground black pepper, and 1 teaspoon kosher salt. Using a fork or silicone spatula, mix gently until just combined—you want to avoid overmixing which could make the filling tough.
Fold in the ¼ cup chopped fresh basil leaves and stir in the 1 cup shredded mozzarella cheese. The mixture should be thick but pipeable—if it's too loose, add a few more spoonfuls of Parmesan. This filling is the heart of your cannelloni, so take your time ensuring it's perfectly balanced in texture and flavor.
🥘 Step 3: Assemble the Cannelloni Layers
Preheat your oven to 375°F. Spread 1 cup marinara sauce on the bottom of a 9x13-inch baking dish. Working quickly but carefully, spoon about 2 tablespoons of the ricotta-beef filling onto each of the 12 cannelloni pasta sheets, leaving a ½-inch border at the top. Here's where it gets fun—roll each sheet tightly around the filling, tucking in the sides as you go.
Arrange the filled cannelloni seam-side down in the baking dish, standing them upright in a single layer. Pour the remaining 1½ cups marinara sauce over the top, making sure each piece is well-coated. The sauce will bubble up during baking and create that gorgeous golden crust we're after.
🔥 Step 4: Bake to Golden Perfection
Cover the baking dish tightly with aluminum foil and bake for 25 minutes. This initial covered baking allows the cannelloni to cook through without drying out. After 25 minutes, remove the foil and bake for another 10-15 minutes until the tops are golden brown and bubbling.
You'll know it's ready when the cheese is melted and slightly browned on top, and the sauce has thickened to a glossy consistency. The edges should look crispy, and you should smell that amazing combination of garlic, herbs, and melted cheese. Let the cannelloni rest for 5 minutes before serving—this gives the filling time to set slightly and makes slicing cleaner.
Pro Tips For Making Beef And Ricotta Cannelloni
- Brown the Beef Properly: Don’t just cook the ground beef—brown it. Break it into small chunks first, then sear in a dry pan over medium-high heat until the edges crisp and the color deepens. This isn’t just for flavor; it’s the foundation of the filling. I used to skip this and ended up with bland cannelloni—don’t make that mistake.
- Salt the Ricotta Like It’s Salad: Ricotta’s mild, so season it aggressively before mixing with eggs and Parmesan. Use at least ½ teaspoon of salt per 8 oz of cheese, plus black pepper and a pinch of nutmeg if you’re feeling fancy. Unsalted Parmesan? Add another ¼ teaspoon. Trust me, the filling will taste flat if you hold back here.
- Dry the Onion, Not the Filling: Pat the finely diced onion completely dry with a paper towel after cooking it down. Moisture in the filling makes the cannelloni soggy when baking. I learned this after my first batch leaked all over the pan—now I double-check with a clean towel.
- Pre-Bake the Pasta Shells: Blanching the cannelloni shells in boiling water for 2 minutes (then draining) locks in their shape and prevents them from turning to mush in the oven. Skip this, and you’ll end up with a sad, limp pile. Works for fresh or dried shells—just adjust the time.
Troubleshooting perfect results
Filling Too Dry?
If your ricotta mixture feels too thick or dry, don’t panic—just add 1 tablespoon of heavy cream or whole milk at a time until it reaches a smooth, pipeable consistency. Overmixing can also make the filling tough, so mix gently with a silicone spatula. For extra creaminess, I sometimes add 2 tablespoons of grated Parmesan to help bind it better. 🧀
Pasta Breaking?
Fresh pasta shells are delicate, so handle them with care. If they tear while filling, try this trick: boil your pasta for 1 minute less than package instructions and pat dry with a kitchen towel before filling. For dried pasta, use 14-inch tubes and boil them al dente—overcooking makes them brittle. Always roll gently and avoid overstuffing with filling.
Sauce Too Watery?
If your marinara sauce is too thin after baking, mix 1 tablespoon of cornstarch with 2 tablespoons of water, stir into the sauce, and simmer for 2-3 minutes until thickened. For extra richness, top with a sprinkle of grated Parmesan before serving. Jarred sauces often need this adjustment—homemade versions usually hold up better during baking.
Cheese Not Melting?
Low-moisture mozzarella is key for meltiness, but if your cheese isn’t bubbling properly, try this: sprinkle ½ cup shredded mozzarella directly on top of the cannelloni before the final 10 minutes of baking. The high heat will melt it beautifully. For extra insurance, add 1 tablespoon of heavy cream to your filling—it helps the cheese emulsify during baking. 🔥
Filling Leaking?
If your filling oozes out during baking, your pasta might be undercooked or overfilled. For fresh pasta, boil it just until it’s pliable but still firm. For dried pasta, use 14-inch tubes and fill them no more than ⅔ full. Seal the edges tightly with a dab of egg wash (1 egg yolk + 1 tsp water) before baking to lock in the filling.
Uneven Baking?
To prevent dry edges or undercooked centers, rotate your baking dish halfway through cooking (after the first 25 minutes). If the top isn’t browning enough, broil for 1-2 minutes at the very end—watch closely to avoid burning. For extra insurance, tent loosely with foil if the edges brown too quickly. A dark baking dish also helps create a better crust. 🌟
Nutrition facts
Frequently asked questions
Can I use dried pasta shells instead of fresh?
Yes, but with adjustments! Dried 14-inch cannelloni tubes work well—just boil them for 1 minute less than package instructions to keep them firm. Fresh pasta is ideal for texture, but dried shells hold up better if you're making this ahead. Always pat them dry before filling to prevent sogginess.
How do I make the filling extra creamy?
For ultra-creamy filling, mix 1 tablespoon heavy cream into the ricotta mixture or add 2 extra tablespoons of Parmesan. Chill the filling for 30 minutes before using—this helps it hold its shape better. For a richer version, fold in ½ cup finely chopped spinach (squeeze out moisture first).
What's the best sauce alternative to marinara?
Try Alfredo sauce for a creamy twist or bolognese for deeper meaty flavor. For a lighter option, use brown butter and sage sauce (melt ½ cup butter, add 1 tbsp sage, then reduce). Any sauce should be 1 cup for the base layer and 1.5 cups for topping to prevent drying.
Can I make this ahead of time?
Assemble the cannelloni (unbaked) and refrigerate for up to 12 hours before baking. For make-ahead freezing, bake first, then cool completely and freeze portions for 2 months. Thaw overnight in the fridge—never at room temperature—to preserve texture. Reheat covered at 350°F for 15 minutes.
Why did my cannelloni fall apart?
Overfilling or undercooked pasta are the usual culprits. Use 2 tbsp filling per shell max and boil pasta just until pliable. For dried pasta, fill no more than ⅔ full. Seal edges with egg wash (1 egg yolk + 1 tsp water) before baking. Bake at 375°F—higher temps can make fresh pasta too tender.