
Main Courses
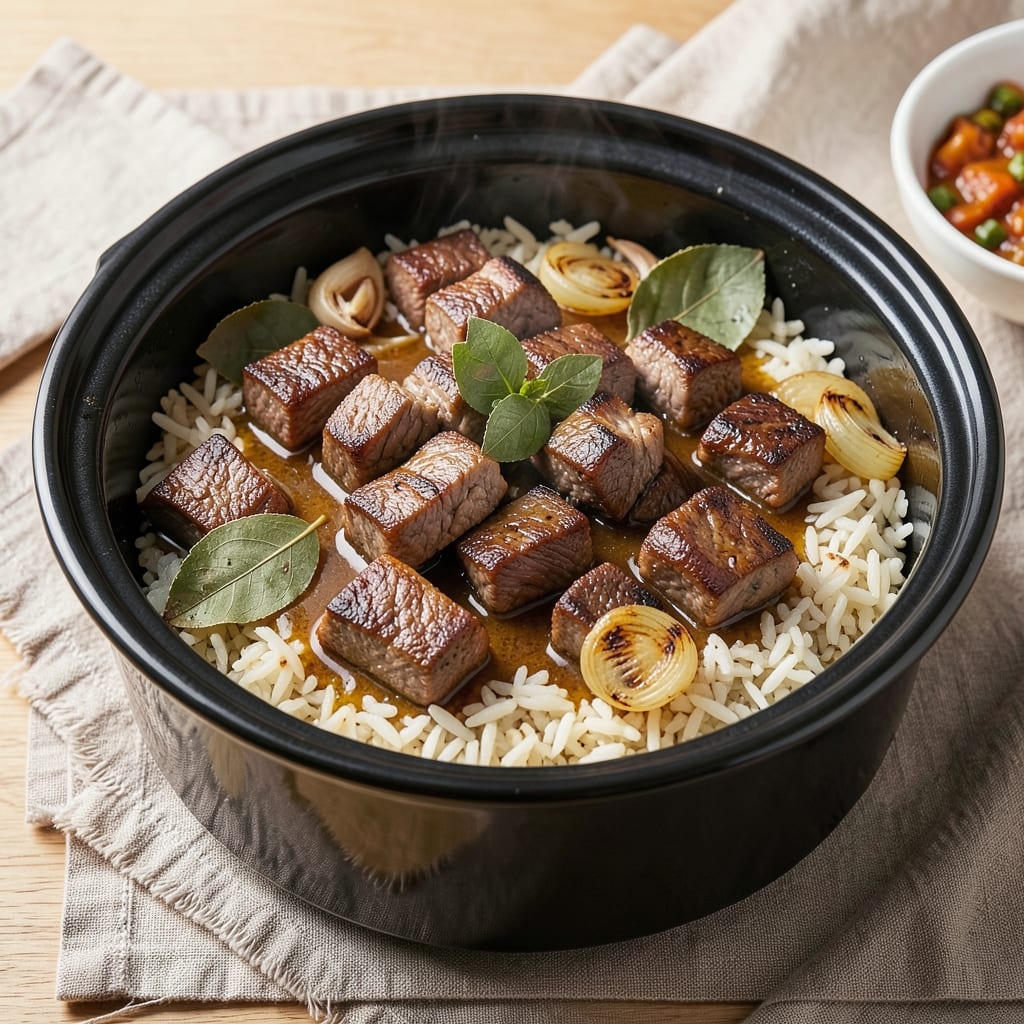
This beef and rice pressure cooker recipe transforms tough cuts into tender, flavorful bites in just 20 minutes—no stovetop babysitting required. The secret lies in searing the beef first to build deep, caramelized flavors before pressure cooking, while the rice absorbs all that rich, savory broth. I developed this method after struggling with slow-cooked versions that left rice mushy or beef dry, and it finally delivers that perfect harmony of textures and seasoning.
What sets this recipe apart is the balance: tender beef that practically melts in your mouth and rice that's fluffy yet infused with the meat's natural juices. We'll use a simple combination of beef broth, garlic, and bay leaves to create a fragrant base, then let the pressure cooker do the work of breaking down the meat while keeping everything in one pot. The result is a hearty, restaurant-quality meal that requires minimal prep and cleanup.
By the time you're done, you'll have a steaming pot of savory beef and rice that's ready to serve—no waiting for separate components to finish cooking. The beef will be fork-tender with just enough bite, while the rice soaks up all that delicious broth and aromatics. This is the kind of weeknight dinner that feels like a special occasion without the fuss.
Perfect for feeding a family or meal prepping for the week, this recipe scales easily while maintaining its perfect balance of flavors. The pressure cooker ensures even cooking and maximum flavor extraction, making it ideal for busy schedules. Let's get started on this game-changing one-pot meal.
Ingredients for beef and rice pressure cooker
Game-changing ingredients for a restaurant-worthy one-pot meal that delivers perfect textures every time.
| Ingredient | Amount | Notes |
|---|---|---|
| Chuck Roast 🥩 | 1 ½ lb | Cut into 1.5-inch cubes |
| Long-Grain White Rice 🍚 | 1 cup | Uncooked, jasmine or basmati preferred |
| Beef Broth 💧 | 2 cups | Low-sodium preferred, homemade or high-quality |
| Garlic Cloves 🧄 | 4 cloves | Minced, fresh preferred |
| Yellow Onion 🧅 | 1 whole | Diced, medium size |
| Bay Leaves 🌿 | 2 whole | Dried, standard size |
| Paprika 🌶️ | 1 tbsp | Smoked for depth |
| Ground Black Pepper 🌶️ | 1 tsp | Freshly cracked |
| Kosher Salt 🧂 | 1 ½ tsp | Adjust to taste |
| Olive Oil 🫒 | 2 tbsp | Extra-virgin for searing |
| Fresh Thyme Leaves 🌿 | ½ tsp | Or 1/4 tsp dried thyme |
| Water 💧 | 1 cup | For rice absorption |
The chuck roast is your secret weapon here—it's budget-friendly and packed with flavor when seared properly. Costco or Walmart usually carry it pre-cut, but if you're buying a whole roast, ask the butcher to cube it for you. Look for good marbling, which means little flecks of fat throughout the meat—this keeps it juicy during cooking. Fresh thyme adds a bright note that balances the richness, so grab a small bunch from the grocery store's produce section (it's usually near the basil). For the rice, jasmine or basmati stays separate and fluffy—basmati has a slightly firmer bite, while jasmine is more fragrant. If you're in a pinch, long-grain white rice works too, but it won't have that same aromatic punch.
No smoked paprika? Regular paprika plus a pinch of liquid smoke gets you close. Short on beef broth? Water plus 1 tbsp soy sauce works in a bind, though homemade broth is worth the effort. The garlic and onion can be swapped for 2 tbsp garlic powder and 1 tbsp onion powder if you're short on time, but fresh is ideal. If you don't have fresh thyme, dried works at one-quarter the amount. For the rice, if you're using a pressure cooker with a rice setting, you can skip the extra water—just follow the manufacturer's guidelines. The bay leaves? Don't skip them—they add that subtle, earthy depth that makes this dish feel special. And if you're meal prepping, double the recipe—it reheats beautifully!
This meal is a meal prep dream—tastes even better the next day as flavors meld. Store in an airtight container in the fridge for up to 5 days, or freeze portions for 3 months. The rice will absorb extra moisture over time, so if it seems dry when reheating, just add a splash of broth or water and cover for a minute. For serving, a sprinkle of fresh parsley or cilantro adds a pop of color. Leftovers reheat perfectly in the microwave or on the stovetop—just stir in a little broth if it's too dry. And trust me, the pressure cooker makes this the easiest way to get dinner on the table without the usual fuss.
Why You'll Love This Recipe
- Five-Ingredient Magic: I swear by this combo—chuck roast, rice, broth, garlic, and onion. That’s it. No fancy prep, no hidden spices. The pressure cooker does all the heavy lifting while I sip my coffee.
- Deep Flavor, Zero Fuss: The chuck roast turns fork-tender, soaking up the garlic and onion until the rice is coated in that rich, savory broth. Honestly, it tastes like it simmered all day, even though it’s ready in under an hour.
- Meal Prep MVP: Double the batch and store it for the week. The rice stays fluffy, the beef stays juicy, and reheating? Just a splash of water and 5 minutes. My lunchbox’s new best friend—especially when I forget to pack dinner.
- Budget-Friendly Feast: Chuck roast stretches across meals, and long-grain rice fills everyone up. Between us, this feeds four for under $15 and still leaves leftovers. That’s dinner covered for days without breaking the bank.
Step-by-step instructions for beef and rice pressure cooker recipe
Here's how to create a rich, flavorful one-pot meal that's ready in record time.
Sear the Chuck Roast for Deep Flavor
Heat the 2 tablespoons olive oil in your pressure cooker over medium-high heat. Add the 1.5 lb chuck roast cut into 1.5-inch cubes, working in batches if needed, and sear for 3-4 minutes per side until deep golden brown. This step is crucial—it develops a rich crust that infuses the broth with incredible flavor.
Don't crowd the pot. You want the beef to sizzle and develop that beautiful caramelization. If your cooker gets too crowded, work in two batches to avoid steaming instead of searing. Once all the beef is browned, transfer it to a plate and set aside.
Build the Flavor Base
In the same pressure cooker, add the 1 whole yellow onion (diced) and 4 cloves garlic (minced). Sauté for 2-3 minutes until the onion becomes translucent and the garlic releases its fragrant aroma. You'll smell that irresistible base building—this is where the magic begins.
Now add the 1 tablespoon paprika, 1 teaspoon ground black pepper, 1.5 teaspoons kosher salt, and 0.5 teaspoon fresh thyme leaves. Stir everything together for 30 seconds to toast the spices slightly. This quick toasting enhances their flavors and gets them ready to meld with the beef and rice.
Combine All Ingredients
Return the seared beef to the pressure cooker. Add the 1 cup long-grain white rice, 2 cups beef broth, 2 whole bay leaves, and 1 cup water. Give everything a thorough stir to distribute the flavors evenly. The rice should be fully submerged, and you should see the spices and aromatics blending into the broth.
Here's the thing—don't skip the stirring. Those browned bits from the seared beef contain concentrated flavor. By mixing them throughout, you create a sauce that coats every grain of rice and every bite of beef. This is what makes your pressure cooker meal taste restaurant-quality.
Pressure Cook to Perfect Tenderness
Secure the lid on your pressure cooker and set it to high pressure. Cook for 20 minutes from the time it reaches pressure. This timing ensures the beef becomes fork-tender while the rice absorbs all that flavorful liquid. The pressure cooker does all the hard work for you—no need to monitor closely.
When the cooking time is complete, allow the pressure to release naturally for 10 minutes before quick-releasing any remaining pressure. This gradual release prevents the rice from becoming mushy and helps the flavors settle. You'll know it's done when the float valve drops and the lid can be safely removed.
Rest and Serve
Carefully remove the lid and let the beef and rice sit covered for 5 minutes. This resting period allows the rice to finish absorbing any remaining liquid and the flavors to meld together. You'll notice the aroma becomes even more intense—this is your sign that everything is ready.
Give everything a final stir before serving. The rice should be tender with a slight bite, and the beef should be so tender it practically falls apart. Remove the bay leaves before serving, as they can be slightly bitter if consumed. This one-pot meal is perfect for busy weeknights—just scoop and serve straight from the pot!
Pro Tips For Making Beef And Rice Pressure Cooker
- SEAR THE ROAST FIRST: Chuck roast needs that deep, caramelized crust to stay tender—not just a quick rinse. Hit it with high heat for 3-4 minutes per side until it’s golden brown, then deglaze with a splash of broth. I used to skip this, and the beef always ended up dry, even in the pressure cooker.
- CHOP ONIONS SMALLER THAN YOU THINK: Yellow onions disappear fast in this dish, but if they’re too big, they’ll turn mushy instead of melting into the rice. Aim for ¼-inch dice—small enough to dissolve but big enough to taste. (Yes, even if you’re impatient like me.)
- DON’T OVERLOAD THE POT: Pressure cookers need room to breathe. Fill the pot with rice and broth so the liquid covers the meat by about ½ inch, then add the rice—no more than the manufacturer’s max line. I learned this the hard way when my first batch turned out like porridge.
- USE COLD BROTH FOR EVEN COOKING: Pouring cold beef broth over the seared meat and rice before sealing the lid prevents sudden temperature spikes that can make the rice gummy. The pressure cooker will heat everything up evenly, and the rice will absorb the broth perfectly. (Your future self will thank you.)
Best sauces and condiments for this recipe
Classic Beef Gravy
This rich, velvety gravy transforms your pressure-cooked beef and rice into a restaurant-worthy dish. After removing the beef from the pot, strain the cooking liquid through a fine-mesh sieve into a saucepan. Whisk in 2 tablespoons cornstarch mixed with 2 tablespoons cold water to create a slurry, then simmer over medium-low heat for 3-4 minutes until thickened. For extra depth, add 1 teaspoon Worcestershire sauce and ½ teaspoon soy sauce. Pour generously over each serving—it clings beautifully to the rice and beef. 💛
Spicy Cilantro-Lime Crema
Brighten up your beef and rice with this zesty topping that cuts through the richness. Blend ½ cup sour cream, ¼ cup Greek yogurt, 2 tablespoons fresh lime juice, 2 tablespoons chopped cilantro, ½ teaspoon ground cumin, and a pinch of salt. For heat, add ¼ teaspoon cayenne pepper or 1 teaspoon hot sauce. Drizzle over each serving and garnish with extra cilantro and lime wedges. This crema adds a refreshing contrast that keeps the meal feeling light.
Garlic-Herb Butter
Elevate your dish with a simple yet luxurious finishing touch. Melt 2 tablespoons butter in a small saucepan, then add 2 minced garlic cloves and 1 teaspoon chopped fresh thyme. Cook for 1 minute** until fragrant but not browned. Remove from heat and stir in ½ teaspoon lemon zest and a pinch of salt. Spoon this aromatic butter over individual servings just before eating—it melts into the rice and beef, adding a rich, herby note that ties everything together. ✨
Pickled Red Onions
Add a tangy crunch with these quick-pickled onions that balance the hearty flavors. Thinly slice ½ red onion and place in a small bowl. Cover with ¼ cup apple cider vinegar and sprinkle with ½ teaspoon sugar and ½ teaspoon salt. Let sit for at least 15 minutes before serving. The onions will soften slightly and develop a bright, acidic flavor that cuts through the richness of the beef. Scatter them over the top for color and texture contrast.
Sriracha-Mayo Drizzle
For those who love a kick, this spicy mayo drizzle adds heat and creaminess in one swipe. Mix 2 tablespoons mayonnaise with 1 teaspoon sriracha and a pinch of salt. Thin with 1 teaspoon water if needed for easier drizzling. Swirl it across the top of your beef and rice just before serving—it adds a vibrant red color and a perfect balance of heat and creaminess. This topping is especially popular with kids and spice lovers alike. 🌶️
Nutrition facts
Frequently asked questions
Can I use ground beef instead of chuck roast cubes?
Yes, but with adjustments! Ground beef works well, but use 1 lb instead of 1.5 lbs since it's more tender. Brown it thoroughly first, breaking it into small pieces to ensure even cooking. The pressure cook time remains 20 minutes, but you may need to add ½ cup extra broth to prevent drying out. The texture will be different—more like a beefy rice dish rather than fork-tender chunks.
Why does my rice turn out mushy in the pressure cooker?
This usually happens from over-releasing pressure or too much liquid. Always release pressure naturally for 10 minutes first, then quick-release. Also check your liquid ratio—you should have 3 cups total liquid (2 cups broth + 1 cup water) for 1 cup rice. If using pre-soaked rice or a rice setting, reduce water by ¼ cup. The rice absorbs liquid during the natural release, so don't drain it afterward.
What's the best way to reheat leftovers?
Reheat in the pressure cooker for 2-3 minutes on high pressure with ¼ cup extra broth to restore moisture. For stovetop, use medium-low heat with a splash of broth, covered, for 3-4 minutes. Microwave in 1-minute intervals, stirring between each, with 2 tablespoons water to prevent drying. Leftovers keep 5 days in the fridge or 3 months frozen.
Can I make this with brown rice or quinoa?
For brown rice, increase cooking time to 25 minutes and use 1.5 cups liquid per 1 cup rice. Quinoa cooks in 15 minutes with 2 cups liquid per 1 cup quinoa. Both work beautifully—they just need adjusted ratios and times. Brown rice will be chewier, while quinoa adds a nutty flavor. The beef cooking time remains 20 minutes regardless of grain choice.
How do I know when the beef is fully cooked?
Use a meat thermometer—beef should reach 210°F for tender, pull-apart texture (safe minimum is 145°F). The pressure cooker's time is accurate for 1.5-inch cubes, but thicker pieces may need 5 extra minutes. If unsure, cut into a piece—the juices should run clear, not pink. Never eat undercooked beef, even from pressure cooking.