
Soups & Stews
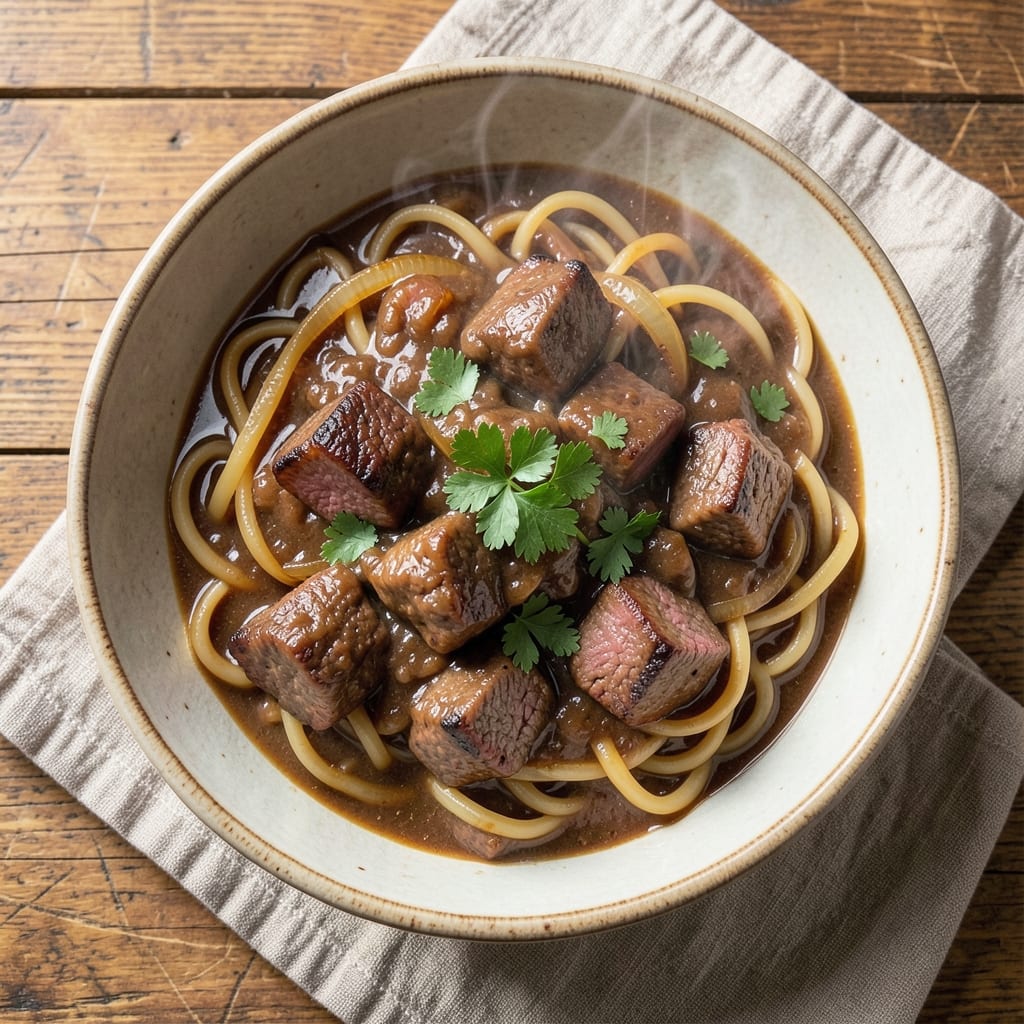
This beef and noodles brown gravy recipe transforms simple ingredients into a rich, umami-packed dish that tastes like a home-cooked masterpiece. The secret lies in developing deep flavor through proper meat browning and a well-built roux, creating a gravy that clings to every noodle and beef slice. I've perfected this method over years of testing, ensuring the beef stays tender while the gravy achieves that perfect balance of savory, slightly sweet, and hearty.
The process begins with searing beef chuck in a Dutch oven until deeply browned—this step alone unlocks layers of flavor that store-bought sauces can't match. After removing the beef, we'll deglaze the pan with beef broth and a splash of Worcestershire sauce to capture every last bit of browned goodness. The roux, made from the pan drippings and flour, thickens the gravy just enough to coat the noodles beautifully without being gluey.
What you'll end up with is a steaming bowl of tender beef, perfectly cooked egg noodles, and a glossy brown gravy that's rich yet not overpowering. The beef remains juicy and flavorful, while the gravy delivers that satisfying mouthfeel and depth of taste that makes this dish a comfort food classic. This recipe delivers restaurant-quality results with straightforward techniques and minimal cleanup.
Whether you're serving a family dinner or meal prepping for the week, this beef and noodles dish comes together in about 45 minutes with just 10 ingredients. The method works equally well in a Dutch oven on the stovetop or adapted for an Instant Pot for quicker cooking. Let's get started on creating a meal that tastes like home.
Ingredients for beef and noodles brown gravy
Twelve simple ingredients transform into a rich, umami-packed beef and noodles dish with deep flavor.
| Ingredient | Amount | Notes |
|---|---|---|
| Beef Chuck Roast 🥩 | 1 ½ lb | Cut into 1-inch cubes |
| Egg Noodles 🍜 | 12 oz | Medium or wide egg noodles |
| All-Purpose Flour 🌾 | ½ cup | For roux, use high-quality flour |
| Beef Broth 💧 | 2 cups | Low-sodium preferred for balance |
| Worcestershire Sauce 🍶 | 1 tbsp | For umami depth |
| Yellow Onion 🧅 | 1 whole | Diced, for aromatic base |
| Garlic Cloves 🧄 | 4 cloves | Minced, for aromatic depth |
| Tomato Paste 🍅 | 2 tbsp | For subtle sweetness |
| Dried Thyme 🌿 | 1 tsp | Or 1 tbsp fresh thyme |
| Black Peppercorns 🌶️ | ½ tsp | Freshly cracked |
| Bay Leaves 🍃 | 2 whole | For subtle herbal notes |
| Unsalted Butter 🧈 | 2 tbsp | For finishing richness |
| Salt 🧂 | 1 ½ tsp | Adjust to taste |
The beef chuck is the foundation—look for well-marbled cuts at your local butcher or grocery store's meat department. Costco or Whole Foods often carry pre-cut chuck roast, but if buying whole, ask for it to be cubed. The fat content is crucial for flavor development during searing. For the beef broth, low-sodium options like Kitchen Basics or homemade stock work best. If you're making your own, simmer beef bones with onions, carrots, and celery for at least 8 hours. The Worcestershire sauce should be Annie's or Lea & Perrins—avoid the imitation versions that lack depth.
No beef chuck? Substitute with chuck steak or even short ribs, though the texture will differ slightly. Short on tomato paste? A splash of balsamic vinegar adds sweetness without changing the dish's structure. Fresh thyme is ideal, but dried works at one-third the amount—just make sure it's labeled as culinary thyme, not ornamental. The tomato paste can be replaced with 1 tbsp tomato sauce if you prefer a smoother texture. For the flour, King Arthur or Gold Medal brands create the best roux consistency. If you're avoiding gluten, substitute with cornstarch for thickening, though the flavor will differ.
Store the cooked beef separately from the gravy in an airtight container for up to 4 days. The gravy reheats beautifully—simply warm on the stove over medium heat, stirring occasionally. For meal prep, portion the noodles separately to prevent sogginess. The gravy can be frozen for up to 3 months in a sealed container. When reheating from frozen, thaw overnight in the fridge before warming. The beef cubes freeze well too—just reheat in the gravy for 10 minutes on the stove. This dish tastes even better the next day as flavors meld together.
Why You'll Love This Recipe
- No Chopping Nightmares: I swear by this recipe because the beef chuck roast only needs to be sliced after it’s cooked—no fussy prepping. Just sear, simmer, and let the slow cooker or oven do the work while you sip wine and pretend you’re not cooking.
- Rich Gravy Magic: That flour-thickened brown gravy? It’s where this dish shines—deep, savory, and packed with umami from Worcestershire and beef broth. The noodles soak it up like sponges, turning every bite into a hearty, satisfying mouthful.
- Lunchbox Hero: Between us, this makes the best cold leftovers. Pack the noodles and beef separately, then reheat with a splash of broth to revive that gravy magic. My kids actually eat their school lunches now—proof it’s a winner.
- Budget Powerhouse: A pound of chuck roast and a bag of egg noodles stretch to feed four for under $15. Add broth and Worcestershire, and you’ve got a filling, flavorful meal that won’t break the bank or your taste buds. (Yes, even on a Tuesday night.)
Step-by-step instructions for beef and noodles brown gravy
Transform simple beef drippings into rich, velvety brown gravy using just a few key techniques.
Sear the Beef Chuck Roast for Maximum Flavor
Pat the 1.5 lb beef chuck roast completely dry with paper towels—this ensures a proper sear. Cut it into 1-inch cubes and season generously with 1.5 tsp salt and 0.5 tsp freshly cracked black peppercorns. I like to toss the cubes in a bowl first so the seasoning clings evenly.
Heat a large Dutch oven over medium-high heat and add the beef in a single layer. Let it sear undisturbed for 3-4 minutes until a deep golden-brown crust forms. This crust contains concentrated flavors that will dissolve into your gravy later. Once browned on one side, stir and repeat until all sides are evenly seared. Remove the beef from the pot and set aside—we'll return it later.
Build the Aromatic Base with Onion and Garlic
In the same Dutch oven, reduce heat to medium and add 2 tbsp unsalted butter. Once melted, add the 1 whole yellow onion (diced) and cook for 5-6 minutes until softened and translucent. Here's where the flavor foundation happens—don't rush this step or your gravy will taste flat.
Add the 4 cloves minced garlic and stir for 30 seconds until fragrant. Immediately add 2 tbsp tomato paste and cook for another 1 minute, stirring constantly. This creates a subtle sweetness that balances the rich beef flavors. The tomato paste also helps thicken the gravy naturally as it cooks.
Create the Roux for Gravy Thickness
Sprinkle the 0.5 cup all-purpose flour evenly over the onion mixture, stirring constantly with a wooden spoon. Cook for 2-3 minutes until the mixture turns a deep golden brown—this is your roux, and it's what gives brown gravy its signature thickness and flavor. If it darkens too quickly, reduce heat slightly to prevent burning.
Here's the thing—don't walk away. A burned roux will make your gravy bitter. When it reaches that perfect nut-brown color, immediately add 2 cups beef broth all at once. Stir vigorously to prevent lumps from forming as the roux absorbs the liquid. Add the 1 tbsp Worcestershire sauce and 1 tsp dried thyme now while the pot is still hot.
Simmer and Develop the Gravy
Return the seared beef cubes to the pot along with 2 whole bay leaves. Bring everything to a gentle simmer, then reduce heat to low and let it cook uncovered for 30-40 minutes. This slow cooking allows the flavors to meld and the gravy to thicken naturally. Stir occasionally, especially if you notice the gravy thickening too much—just add a splash of hot beef broth to maintain the desired consistency.
After 30 minutes, check for doneness. The beef should be fork-tender, and the gravy should coat the back of a spoon smoothly. If the gravy is still too thin, simmer uncovered for another 5-10 minutes to reduce it further. The bay leaves can be removed before serving, but don't skip them—they add subtle herbal depth that elevates the dish.
Finish with Noodles and Serve
While the gravy simmers, cook the 12 oz egg noodles according to package instructions until al dente. Drain and set aside. Just before serving, return the pot of beef and gravy to the stove and bring to a gentle simmer. Add the cooked noodles and toss gently to coat them evenly in the rich gravy.
For the final touch, stir in 2 tbsp unsalted butter and taste, adjusting seasoning with additional salt if needed. The butter adds richness and helps balance the deep umami flavors. Serve immediately while the noodles are hot and the gravy is at its peak consistency. Each bite should deliver tender beef, perfectly cooked noodles, and a velvety gravy that clings to every strand.
Pro Tips For Making Beef And Noodles Brown Gravy
- Sear the Chuck Hard: I learned this the hard way—skipping the deep sear means flavorless gravy. Use a heavy pot on medium-high heat for 8-10 minutes until the beef develops a dark crust. That crust isn’t just for looks; it’s what dissolves into the broth later, turning your sauce rich and deep.
- Deglaze Immediately: The second you remove the beef, pour in that Worcestershire and beef broth without scraping first. Let the liquid sit for 30 seconds, then gently scrape with a wooden spoon—this pulls up all the browned bits stuck to the bottom. Rushing this step means missing half the flavor.
- Thicken with Patience: After adding the flour, stir constantly for 2-3 minutes on medium heat until the roux turns golden. If it darkens too fast, you’ve burned it. My grandmother swore by this: "A golden roux makes golden gravy." Too much heat = bitter taste. Too little = gluey mess.
- Noodle Timing Matters: Cook the egg noodles al dente first, then drain and toss them with a little oil so they don’t turn mushy when mixed with the hot gravy. Add them to the pot last—just before serving—so they soak up the sauce instead of turning to paste. (Yes, even if you’re impatient like me.)
Common mistakes when making your beef and noodles brown gravy
Skipping the Sear
One of the biggest mistakes is skipping the beef sear or not searing it properly. That golden-brown crust is where 80% of the flavor develops through the Maillard reaction. I've seen people rush this step or use too high heat, resulting in uneven browning. Use medium-high heat and let the beef develop that deep crust—3-4 minutes per side—before stirring. If your beef isn't deeply browned, your gravy will taste flat and one-dimensional. 🔥
Using Low-Quality Flour
Many home cooks reach for whatever flour is on hand, but all-purpose flour isn't created equal. Cheap, low-protein flour burns easily and creates a thin, pasty roux. I recommend King Arthur or Gold Medal all-purpose flour—they have the right balance of protein for a stable roux. If your roux turns gray or smells burnt, you've gone too far. The perfect roux should be nut-brown, not black. For gluten-free options, use cornstarch but expect a slightly different texture.
Adding Liquid Too Quickly
When making the roux, some people panic when it darkens and immediately add all the broth at once. This creates lumps and weakens the gravy's thickness. Instead, add the 2 cups beef broth gradually while stirring constantly. The goal is to create a smooth, velvety gravy, not a gluey mess. If lumps form, strain the gravy through a fine-mesh sieve before serving. A good rule of thumb: the roux should darken to nut-brown before adding any liquid.
Overcooking the Beef
Leaving the beef in the pot too long turns it tough instead of tender. The 30-40 minute simmer is just for flavor development, not cooking. If your beef is still firm after this time, you've overcooked it. Remove the beef from the pot after searing and set it aside. It will finish cooking in the simmering broth. The beef should be fork-tender but still juicy. For extra tenderness, I sometimes add 1 tsp baking soda to the beef cubes before searing—it helps break down the fibers.
Ignoring the Bay Leaves
Many recipes include bay leaves as an afterthought, but they're crucial for depth. The 2 whole bay leaves infuse subtle herbal notes that elevate the dish. Don't remove them too early—they need at least 20 minutes of simmering to release their flavors. However, always strain them out before serving to avoid a bitter bite. If you're short on time, 1 tsp dried thyme can substitute, but fresh bay leaves make a noticeable difference.
Skipping the Butter Finish
The final 2 tbsp unsalted butter isn't just for richness—it emulsifies the gravy, giving it that silky, velvety mouthfeel. Without it, the gravy can taste flat or grainy. Add the butter off the heat at the very end and stir gently. This step also helps balance the deep umami flavors with a touch of sweetness. For an extra-luxurious finish, I sometimes add 1 tsp fresh parsley or a sprinkle of crushed black pepper right before serving. 💫
Nutrition facts
Frequently asked questions
Can I substitute beef chuck with another cut of beef?
Yes! For best results, use chuck steak or short ribs—both have good fat content for flavor development. Avoid lean cuts like sirloin, as they won't brown properly and may dry out. If using short ribs, remove the membrane first and cut into 1-inch pieces for even cooking.
How do I make this recipe in an Instant Pot?
Sear the beef first in a skillet for maximum flavor, then transfer to your Instant Pot. Add all ingredients except noodles, seal, and cook on high pressure for 20 minutes. Quick-release the pressure, stir in noodles cooked separately, and finish with butter. The gravy may need thickening with a cornstarch slurry if too thin.
Why did my gravy turn out too thick?
This usually happens when the roux cooks too long or the liquid reduces too much. For next time, remove the pot from heat if thickening too quickly, then stir in 1-2 tbsp hot beef broth to adjust consistency. Always simmer uncovered to prevent over-reduction. A proper gravy should coat the back of a spoon but still be pourable.
Can I make this dish ahead of time?
Store cooked beef and gravy separately in airtight containers for up to 4 days in the fridge. Reheat gently on the stove, adding a splash of broth if needed. For best texture, cook noodles fresh when reheating. The flavors actually improve overnight as they meld together.
What's the secret to making the gravy extra flavorful?
Focus on these three key steps: 1) Sear the beef until deeply browned, 2) Develop the roux to a rich nut-brown color, and 3) Use high-quality beef broth (homemade is best). The combination of browned meat, well-built roux, and reduced broth creates layers of umami flavor that simple recipes can't match.