
Soups & Stews
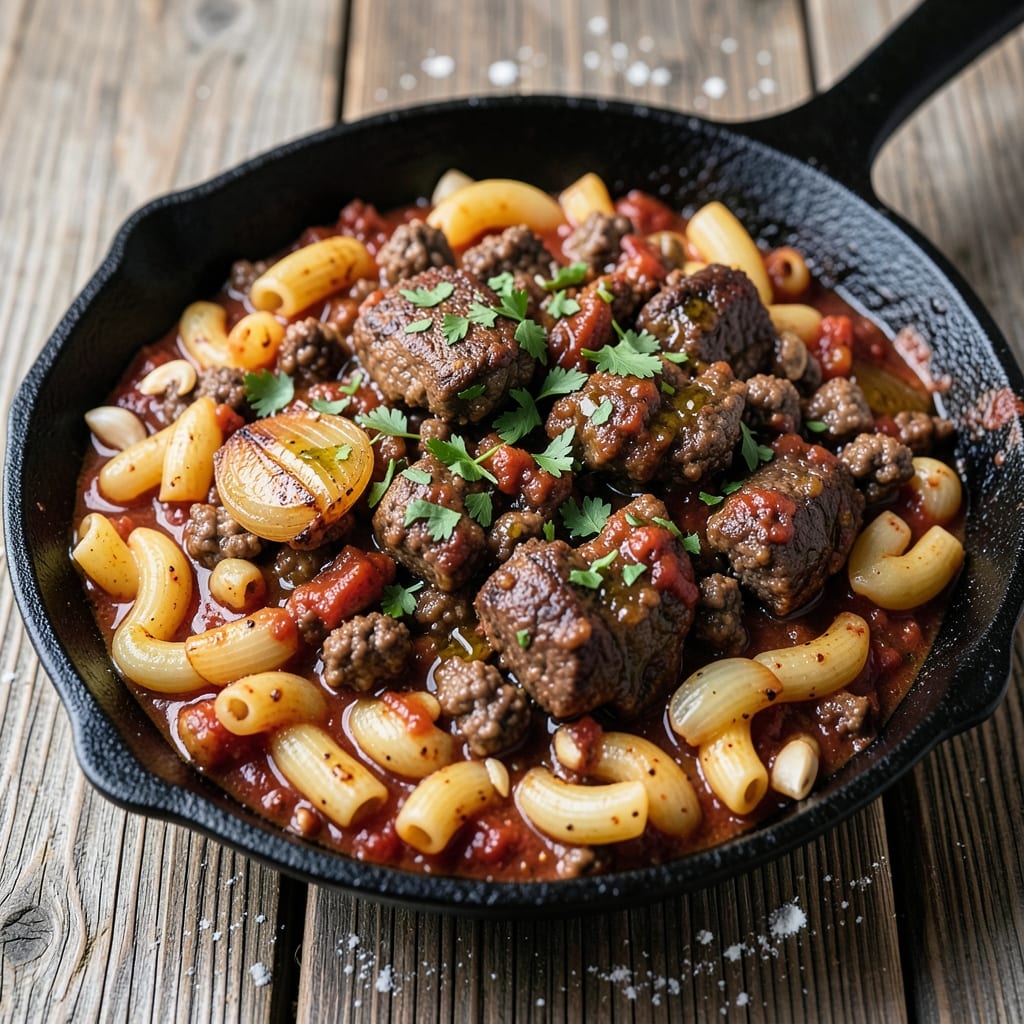
This beef and macaroni skillet recipe transforms weeknight dinner into a hands-off masterpiece with just one pan. The secret lies in browning ground beef until deeply flavorful, then combining it with elbow macaroni and a rich tomato-based sauce that simmers into perfect harmony. What makes this dish truly special is the crispy cheese crust that forms on top—no extra baking dish required.
What sets this recipe apart is its simplicity and efficiency. You'll start by searing the beef in batches to render all the fat and develop deep, savory flavors, then cook the macaroni directly in the same skillet. The sauce comes together quickly with pantry staples, and the final step creates that coveted golden cheese crust that adds texture and richness. It's the kind of meal that feels indulgent but comes together in under 45 minutes.
The result is a hearty, comforting dish with tender beef, perfectly cooked macaroni, and a sauce that's rich yet balanced. The cheese crust adds a satisfying crunch, while the melted cheese on top ties everything together. This skillet meal is perfect for feeding a family or entertaining guests—it's easy to scale up and serves directly from the pan.
For an extra touch of elegance, top with fresh parsley or a sprinkle of grated parmesan before serving. The flavors only get better as it sits, making it an ideal make-ahead option for busy evenings. Let's get cooking!
Ingredients for beef and macaroni skillet
Pantry staples meet restaurant-quality flavors in this one-pan beef and macaroni skillet.
| Ingredient | Amount | Notes |
|---|---|---|
| Ground Beef 🥩 | 1 ½ lb | 80/20 fat ratio preferred |
| Elbow Macaroni 🍝 | 12 oz | Uncooked, standard size |
| Yellow Onion 🧅 | 1 whole | Medium size, diced |
| Garlic Cloves 🧄 | 4 cloves | Fresh, minced |
| Canned Tomato Sauce 🍅 | 1 ½ cups | No sugar added preferred |
| Beef Broth 💧 | 1 cup | Low-sodium preferred |
| Shredded Mozzarella Cheese 🧀 | 2 cups | Part-skim or whole milk |
| Grated Parmesan Cheese 🧀 | ½ cup | Freshly grated preferred |
| All-Purpose Flour 🌾 | 2 tbsp | For thickening sauce |
| Kosher Salt 🧂 | 1 ½ tsp | Adjust to taste |
| Ground Black Pepper 🌶️ | ½ tsp | Freshly ground preferred |
| Dried Italian Seasoning 🌿 | 1 tsp | Or 1 tbsp fresh basil |
| Vegetable Oil 🫒 | 2 tbsp | For skillet preheating |
The ground beef is where the flavor starts. 80/20 fat ratio is ideal—it renders enough fat to crisp the macaroni and create that rich sauce. Kroger or Walmart usually carry it pre-packaged, but check the label for fat content. If you're buying a whole chuck roast to grind yourself, look for good marbling. The elbow macaroni should be standard size (about 1/2-inch diameter)—those tiny 'angel hair' noodles won't work here. For the tomato sauce, Rao's or Muir Glen are my go-tos, but any no-sugar-added brand works. The beef broth? Low-sodium is key—you'll be adding salt later, and you don't want to oversalt the whole dish.
No beef broth? Chicken broth at half the amount works in a pinch, but the flavor won't be as rich. Substituting canned tomatoes for the sauce? Crush them by hand—blended tomatoes lose texture. The Italian seasoning can be swapped for 1/2 tsp dried oregano plus 1/4 tsp dried basil. If you're short on mozzarella, cheddar melts differently but works. For the Parmesan, grate it yourself—pre-grated gets clumpy and won't melt as nicely. The flour is just for thickening, so don't skip it unless you're comfortable with a thinner sauce. And if you're watching calories, use part-skim mozzarella—the flavor difference is minimal.
This skillet reheats beautifully—actually tastes better the next day as flavors meld. Store leftovers covered in the fridge for up to 4 days, or freeze for 3 months. For freezing, let it cool completely first, then portion into airtight containers. The cheese crust gets softer when reheated, but a quick broil for 2-3 minutes brings back that crispy texture. Double the recipe? Just use a larger skillet—12-inch cast iron is perfect for 8 servings. The flavors only get better over time, so make extra for lunches.
Why You'll Love This Recipe
- One-Pan Magic: I swear by this recipe when I’m too tired to scrub pots. Brown the beef right in the skillet, toss in the noodles and sauce, and let it all meld—no extra dishes, no stress. Honestly, the only cleanup is wiping the same pan you cooked in.
- Caramelized Onion Love: That slow-cooked onion, soft and sweet, is the secret weapon. I chop it while the beef browns, and by the end, it’s practically jammy—every bite has this rich, savory depth that makes it taste like you slaved over it.
- Leftover Hero: This dish actually improves the next day. The noodles soften just enough, the flavors deepen, and it reheats like a dream. I make a double batch on Sundays because it’s the only meal I don’t dread eating for lunch.
- Budget-Friendly Feast: Ground beef, elbow macaroni, and a can of sauce? This feeds four for under $8. Between us, it’s the kind of meal that makes grocery budgets stretch without sacrificing taste—my kids don’t even notice it’s not homemade pasta.
Step-by-step instructions for beef and macaroni skillet
This one-pan wonder delivers crispy edges and creamy centers with minimal effort.
Brown the Ground Beef Perfectly
Heat the 2 tablespoons vegetable oil in a large oven-safe skillet over medium-high heat until shimmering. Add the 1.5 pounds ground beef, breaking it apart with a wooden spoon as it cooks. Let it brown undisturbed for 3-4 minutes until the meat loses its raw color and begins to crisp at the edges.
Once the beef is mostly browned, stir in the diced yellow onion and minced garlic cloves. Cook for another 2-3 minutes until the onions soften and the garlic releases its fragrant aroma. The beef should be fully cooked with no pink remaining—this ensures food safety while building deep flavor. Season immediately with 1.5 teaspoons kosher salt, 0.5 teaspoon ground black pepper, and 1 teaspoon dried Italian seasoning. Let it cool slightly before proceeding.
Build the Sauce Foundation
Sprinkle the 2 tablespoons all-purpose flour over the beef mixture and stir vigorously for 1-2 minutes until the flour is fully incorporated and the mixture looks slightly thickened. This creates a roux that will help thicken your sauce beautifully. Pour in the 1.5 cups canned tomato sauce and 1 cup beef broth, stirring constantly to combine everything into a smooth mixture.
Bring the sauce to a gentle simmer over medium heat, then reduce heat to low and let it cook uncovered for 5-7 minutes until it thickens slightly. You're aiming for a consistency where the sauce coats the back of a spoon but isn't gluey. Taste and adjust seasoning if needed—this is your flavor base, so don't skimp on salt and pepper. The sauce should be rich and savory, ready to absorb the pasta's starch.
Cook the Elbow Macaroni Al Dente
Add the 12 ounces elbow macaroni to the skillet, stirring to coat each piece evenly with the sauce. Increase heat to medium-high and bring to a boil. Once boiling, reduce heat to medium and cook uncovered for 8-10 minutes, stirring occasionally, until the pasta is al dente—firm to the bite but cooked through. You want it to finish cooking in the oven rather than becoming mushy.
Here's the thing—don't overcook the pasta. It should have a slight bite in the center when you taste it. The residual heat in the oven will finish cooking it perfectly while creating that golden cheese crust we're after. If the sauce looks too thin at this point, let it reduce for an extra minute or two—this will help create a thicker final texture.
Create the Cheese Crust Magic
Preheat your oven to 375°F. Once the pasta is al dente, sprinkle 1 cup shredded mozzarella cheese evenly over the top, followed by the 0.5 cup grated parmesan cheese. The cheese should melt into a bubbly, golden crust while the pasta finishes cooking. Transfer the skillet to the preheated oven and bake for 10-12 minutes until the cheese is deep golden brown and bubbling vigorously.
Watch the skillet carefully during the last few minutes of baking. You want the cheese to brown beautifully but not burn. If any spots look like they're browning too quickly, you can tent the skillet loosely with aluminum foil. The edges should be crispy while the center remains creamy—this contrast is what makes this dish so satisfying. Remove from the oven when the cheese is fully melted and golden.
Rest and Serve with Confidence
Let the skillet rest for 3-5 minutes before serving. This brief resting period allows the cheese to set slightly and makes it easier to serve without losing that perfect cheese crust. The pasta will continue to absorb any remaining sauce, resulting in perfectly creamy, flavorful bites.
Serve immediately with a side of garlic bread or a simple green salad. Each bite should deliver tender pasta, savory beef, and a rich, melty cheese topping with crispy edges. The one-pan method means minimal cleanup, and the flavors only get better as the dish sits—just don't wait too long, as the cheese crust cools quickly. This skillet is perfect for busy weeknights or hearty family dinners where everyone wants to share from the same pan.
Pro Tips For Making Beef And Macaroni Skillet
- CRUSH THE ONIONS: Dice them small—no bigger than ¼-inch pieces—so they melt into the sauce instead of sitting as chewy chunks. I used to skip this, and half the time, I’d find onion bits staring back at me like a bad surprise.
- COOK THE GROUND BEEF TWICE: Brown it first, then push it to the side and let it crisp again after adding the sauce. This gives you that deep, caramelized flavor that turns a simple skillet into something special. Yes, it takes an extra minute, but it’s worth it.
- SALT THE PASTA WATER LIKE THE OCEAN: If you’re using elbow macaroni straight from the pot, that water needs to be packed with salt—about 1½ tablespoons per quart. Unsalted pasta water is the fastest way to ruin a dish that should be rich and bold.
- STIR THE SAUCE EARLY: As soon as you add the tomato sauce, give it a good stir and let it simmer uncovered for 5 minutes. This burns off the raw taste of canned tomatoes and thickens the sauce naturally—no weird aftertaste, just deep flavor. (And no, you don’t need to add water.)
Regional styles of this beef and macaroni skillet
Midwest Comfort Style
In the heartland, this dish transforms into a cheesy beef macaroni bake with a thick, velvety sauce. The key difference? Add ½ cup evaporated milk to the sauce base for extra creaminess, and top with an additional ½ cup breadcrumbs before baking. This creates a crispy, buttery crust that Midwestern families love—perfect with a side of cornbread muffins for dipping. 🌽
For an authentic touch, swap the Italian seasoning for 1 tsp celery salt and ½ tsp onion powder—a nod to classic American comfort food. Many Midwest recipes also include ½ cup diced bell peppers with the onions for a touch of sweetness that balances the savory beef. The dish is often served family-style straight from the skillet, with extra cheese on the side for those who want it.
Southern BBQ Twist
Southern cooks elevate this skillet by adding smoky depth—start by browning the beef with 1 tbsp smoked paprika and ½ tsp cayenne pepper. Replace the tomato sauce with 1 cup BBQ sauce (like Sweet Baby Ray's or Stubb's) mixed with ½ cup beef broth. This creates a tangy, slightly sweet sauce that pairs beautifully with the cheesy crust.
Top with ¼ cup chopped green onions and a sprinkle of crushed red pepper flakes before baking. Serve with buttery cornbread or collard greens for a full Southern meal. The BBQ sauce adds a sticky, caramelized element that makes every bite irresistible—especially when paired with a cold sweet tea. 🍹
Tex-Mex Fusion
For a Tex-Mex version, swap the mozzarella for Monterey Jack cheese and add ½ cup black beans with the macaroni. Stir in 1 tsp ground cumin and ½ tsp chili powder when building the sauce. Top with ¼ cup diced jalapeños and 2 tbsp chopped cilantro before baking for a spicy kick.
Serve with warm flour tortillas or avocado slices on the side. The black beans add fiber and heartiness, while the Monterey Jack melts beautifully into a stretchy, cheesy topping. This version is a crowd-pleaser at Tex-Mex gatherings—especially when paired with a margarita or Mexican lager. 🌶️
New England Clam Chowder Influence
New England cooks give this skillet a seafood-inspired twist by adding ½ cup chopped clams or clam juice to the sauce. Replace the beef with ½ lb ground turkey (or keep the beef for a hybrid version) and stir in ½ tsp Old Bay seasoning when building the sauce. Top with ¼ cup grated sharp cheddar instead of Parmesan for a tangy finish.
Serve with oyster crackers or crusty sourdough bread for dipping. The clams add a briny depth that complements the creamy cheese, making this a unique take on a classic comfort dish. It’s especially popular in coastal areas where fresh seafood is abundant. 🦪
Nutrition facts
Frequently asked questions
Can I use pre-cooked macaroni to save time?
For a 20-minute shortcut, use 12 ounces pre-cooked elbow macaroni (like the kind sold in cans or pre-boiled packages). Just drain it well and add it directly to the skillet with the sauce. You'll skip the stovetop cooking step entirely, but the oven time will still create that perfect cheese crust. The texture will be slightly different but still delicious!
What's the best way to prevent a soggy cheese crust?
For that crispy, golden crust, make sure your cheese is shredded fresh (pre-shredded contains anti-caking agents that prevent proper melting). Also, let the pasta cook just until al dente before adding cheese—this prevents excess moisture. If your skillet is too large, spread the cheese thinner to maximize browning. A quick broil for 1-2 minutes at the end can revive any soft spots.
Can I make this dish ahead of time?
Yes, but with one key adjustment: assemble the skillet but skip the cheese until ready to serve. Refrigerate the cooked base for up to 2 days or freeze for 3 months. When ready to eat, top with cheese and broil for 3-5 minutes to melt and brown. The flavors actually improve overnight as the sauce thickens further!
What if my skillet isn't oven-safe?
No problem! Transfer the skillet contents to a 9x13-inch baking dish after the pasta is cooked. Sprinkle cheese on top and bake at 375°F for 8-10 minutes until bubbly and golden. The cheese will still create that perfect crust—just monitor closely to prevent burning. A cast iron skillet works beautifully for stovetop cooking, then you can transfer to a baking sheet if needed.
How can I make this dish more flavorful?
For extra depth, add 1 teaspoon Worcestershire sauce with the tomato sauce or stir in ½ cup beef stock instead of water. A pinch of red pepper flakes or 1 teaspoon smoked paprika adds warmth, while fresh herbs like basil or parsley on top brighten the flavors. For umami, sprinkle 1 tablespoon nutritional yeast over the cheese before baking—it adds a cheesy, nutty flavor without extra dairy.