
Soups & Stews
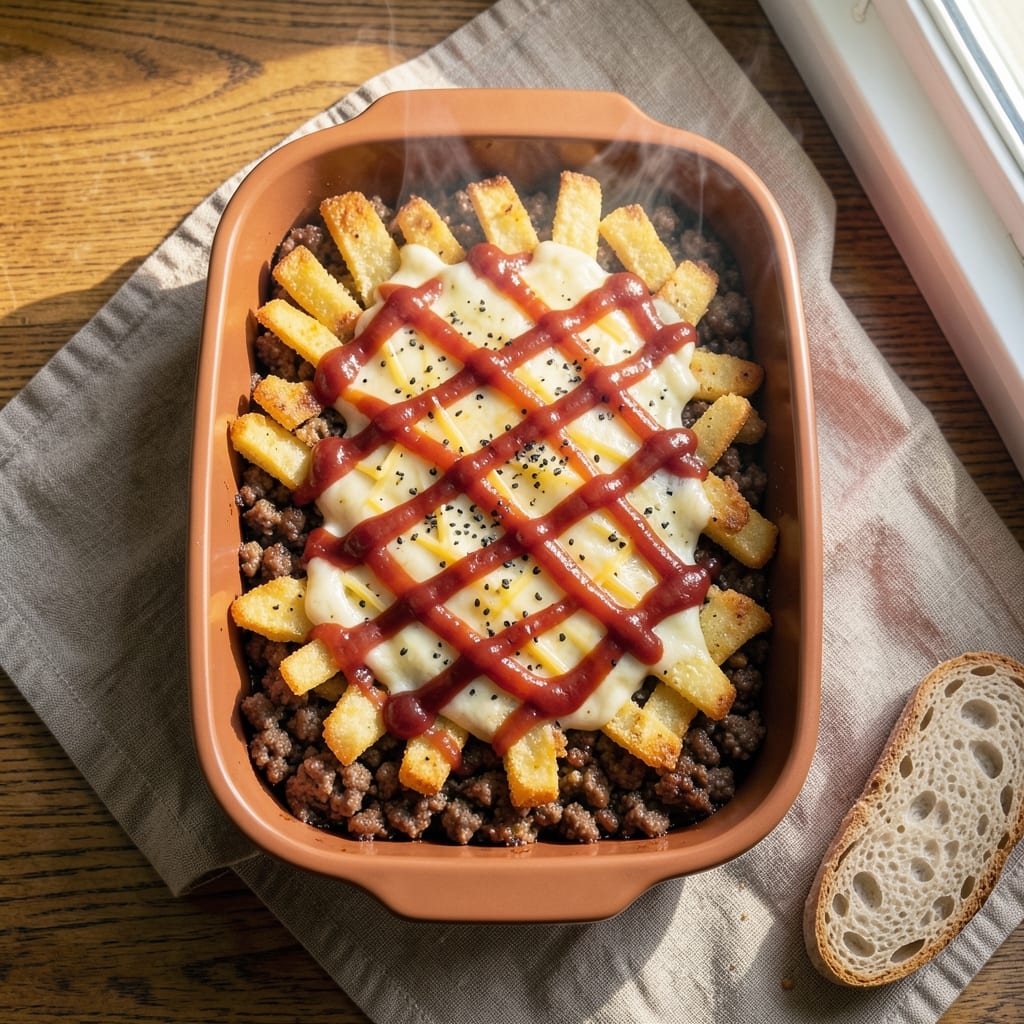
This beef and hash brown casserole recipe delivers comfort food perfection in one foolproof baking dish. The secret lies in a crispy potato crust that seals in all those savory beef juices while creating a satisfying crunch with every bite. I've perfected this technique over countless weeknight dinners, and it never fails to impress even the pickiest eaters.
The beauty of this recipe is its simplicity—just a few basic ingredients that come together to create a hearty meal. You'll start with tender ground beef seasoned perfectly, then build layers with hash browns and cheese that transform into a golden, crispy crust during baking. The 30-minute prep time makes it ideal for busy evenings, while the 45-minute baking time lets you relax while dinner cooks.
What you'll end up with is a steaming plate of casserole topped with that irresistible potato crust—crispy on the outside, creamy and cheesy within. The beef stays tender and flavorful, while the hash browns add satisfying texture. This is the kind of dish that tastes even better the next day, making it perfect for meal prep or bringing to gatherings.
The best part? Every component works together to create a dish that's rich, satisfying, and completely customizable. Add extra cheese for more indulgence, mix in vegetables for nutrition, or keep it classic. Here's how to make it perfectly every time.
Ingredients for beef and hash brown casserole
Sixteen ingredients transform into a hearty casserole with a golden, crispy potato crust.
| Ingredient | Amount | Notes |
|---|---|---|
| Ground Beef (80/20 Lean-to-Fat Ratio) 🥩 | 1 ½ lb | Coarsely chopped for even cooking |
| Frozen Hash Browns 🥔 | 2 cups | Thawed, not pre-cooked |
| Shredded Sharp Cheddar Cheese 🧀 | 2 cups | Freshly grated preferred |
| All-Purpose Flour 🌾 | ½ cup | For thickening sauce |
| Beef Broth (Low-Sodium) 💧 | 1 ½ cups | Homemade or high-quality store-bought |
| Ketchup 🍅 | ½ cup | For sweet-savory balance |
| Worcestershire Sauce 🧂 | 1 tbsp | For umami depth |
| Onion Powder 🧅 | 1 tsp | Freshly ground preferred |
| Garlic Powder 🧄 | 1 tsp | Not garlic salt |
| Ground Black Pepper 🌶️ | ½ tsp | Freshly cracked |
| Diamond Crystal Kosher Salt 🧂 | 1 tsp | For seasoning |
| Unsalted Butter 🧈 | ½ cup | Melted for crispy topping |
| Fresh Parsley 🌿 | ¼ cup | Chopped for garnish |
The ground beef is the foundation—80/20 fat ratio ensures tenderness while keeping it flavorful. Kroger or Costco typically stock this cut affordably, and you can find pre-coarsely-chopped versions in their meat department to save time. For the hash browns, Ore-Ida or Alexia brands work best—they hold their shape during baking. The key to the crispy crust lies in using freshly grated cheese (pre-shredded contains anti-caking agents that prevent proper melting) and melting unsalted butter for the topping. Don't skip the beef broth—it adds moisture without overwhelming the dish.
No Worcestershire sauce? Soy sauce plus a pinch of sugar mimics the umami-sweet balance. Substitute onion powder with 1/4 cup finely minced fresh onion sautéed in the beef. For a lower-carb option, swap half the hash browns for cauliflower rice, though texture will differ. The ketchup can be reduced if you prefer less sweetness—simmer it with 1 tbsp vinegar for 5 minutes before adding. If your cheese is extra sharp, reduce the salt slightly to avoid over-seasoning. For extra richness, stir 1/4 cup sour cream into the cheese mixture before baking.
This casserole reheats beautifully—cover with foil and bake at 375°F for 20-25 minutes until bubbly. For meal prep, assemble completely (including topping) and refrigerate up to 24 hours before baking—this enhances the crust's crispiness. Portion into individual baking dishes for easy reheating. Leftovers keep for 4-5 days in the fridge, though I find it tastes best within 2 days. The crispy topping loses its crunch when frozen, so it's best enjoyed fresh or reheated quickly from the fridge.
Why You'll Love This Recipe
- One-Pan Magic: I swear by this recipe when I’m too tired to wash dishes. The hash browns crisp right on top while the beef browns below—no flipping, no fuss, just one sheet pan that does all the work.
- Cheese-Packed Crunch: That sharp cheddar on top isn’t just for looks—it melts into a golden, bubbly blanket while staying crispy in spots. Honestly, the first time I tasted it, I nearly burned my tongue waiting for it to cool.
- Weeknight Workhorse: Between us, this feeds a crowd without stress. Double the recipe for game day or potlucks, or halve it for a cozy Tuesday night when the kids are home. The beef broth keeps it rich, but the flour thickens it just enough to feel hearty.
- Budget-Friendly Leftovers: I make this on Sundays because it’s cheap to feed the family, and it reheats like a dream. The hash browns stay crispy even after two days—no sad, soggy sides here. My wallet and my freezer thank me.
Step-by-step instructions for beef and hash brown casserole
Master this hearty dish with a perfect cheesy potato crust that traps all the savory juices inside.
Brown the Ground Beef Thoroughly
Heat a large oven-safe skillet over medium-high heat. Add the 1.5 lb ground beef (80/20 lean-to-fat ratio) and break it apart with a wooden spoon. Cook until the beef is evenly browned and no longer pink in the center, about 6-8 minutes. The fat should render out and create a rich base for your casserole.
Real talk: Don't rush this step. Proper browning develops deep flavor. If the pan gets too crowded, work in batches. Once fully browned, drain excess fat from the skillet, leaving about 1 tablespoon behind for flavor. Add the 1 tsp onion powder, 1 tsp garlic powder, 0.5 tsp ground black pepper, and 1 tsp Diamond Crystal kosher salt, stirring to coat the beef evenly.
Create the Savory Sauce Base
Reduce heat to medium and add the 0.5 cup all-purpose flour to the skillet, stirring constantly for 1-2 minutes until the flour turns golden brown and nutty-smelling. This creates a roux that will thicken your sauce beautifully. Immediately pour in the 1.5 cups low-sodium beef broth, scraping up any browned bits from the bottom of the pan.
Bring the mixture to a gentle simmer, then stir in the 0.5 cup ketchup and 1 tbsp Worcestershire sauce. Let it cook for 3-4 minutes until slightly thickened. The sauce should coat the back of a spoon but still be pourable. If it thickens too quickly, add 1-2 tablespoons of water to adjust the consistency. This sauce forms the flavorful heart of your casserole.
Layer the Hash Browns and Cheese
Spread the thawed 2 cups frozen hash browns evenly over the beef mixture in the skillet. Press down gently with a spatula to create an even layer. This step ensures the hash browns crisp up properly and form the perfect base for your cheesy topping. Sprinkle the 2 cups shredded sharp cheddar cheese evenly over the hash browns, distributing it in an even layer.
I like to use freshly grated cheddar here—it melts more smoothly and creates a richer, creamier texture. If your cheese is pre-shredded, pulse it in a food processor to break up any anti-caking agents that can make the cheese grainy when melted.
Bake Until Golden and Bubbly
Transfer the skillet to a preheated 375°F oven and bake for 25-30 minutes. The casserole is ready when the top is golden brown and the edges are bubbling vigorously. The cheese should be fully melted and the hash browns should be crispy on top with a tender interior.
Here's the thing—your oven might run hot or cold. Start checking at the 20-minute mark. If the top browns too quickly, tent loosely with aluminum foil. The internal temperature should reach 165°F when measured at the center. Let it rest for 5 minutes before serving to allow the juices to redistribute throughout the casserole.
Finish with Melted Butter and Fresh Parsley
Remove the casserole from the oven and let it cool for 2 minutes. In a small saucepan, melt the 0.5 cup unsalted butter over low heat. Once melted, drizzle it evenly over the top of the casserole, allowing it to create a glossy, golden finish. The butter adds richness and helps create that restaurant-quality sheen.
Garnish immediately with the 0.25 cup chopped fresh parsley. This final step adds brightness and freshness that cuts through the richness of the beef and cheese. Serve directly from the skillet for maximum crispiness, or transfer to a serving dish if preferred. Each bite should deliver tender beef, creamy potatoes, and a perfectly crispy cheesy top layer.
Pro Tips For Making Beef And Hash Brown Casserole
- CRISP THE HASH BROWNS FIRST: Frozen hash browns straight from the bag? Bad idea. Spread them on a baking sheet and bake at 425°F (220°C) for 15-20 minutes until golden and crispy—this prevents a soggy bottom later. (Yes, even if you’re in a hurry, skip the microwave.)
- BROWN THE BEEF WELL: That 80/20 ground beef isn’t just for flavor—it’s for texture. Cook it until it’s deeply browned, not just pink, and drain most of the fat. The extra effort makes the casserole richer and the crust stickier. (I used to skip this and wondered why it tasted bland.)
- LAYER CHEESE LAST: Dumping all the shredded cheddar on top too early means it melts into a greasy mess. Save half for the final sprinkle after the casserole’s mostly baked—this guarantees a gooey, golden crust instead of a sad, flat one.
- THICKEN WITH FLOUR SLURRY: Mix 2 tablespoons of flour with ¼ cup cold water, then stir it into the beef broth before adding it to the pan. This creates a smoother, thicker sauce that clings to the hash browns and beef instead of pooling at the bottom. (Sounds weird, but it works—trust me.)
Pro cooking tips for great beef and hash brown casserole
Skillet Selection Matters
Use a 10-12 inch oven-safe skillet with sloped sides—I recommend a Lodge cast iron or All-Clad stainless steel for even heat distribution. Cast iron retains heat beautifully, while stainless steel prevents sticking. Avoid non-stick pans—they don’t brown the beef as well, and the crust won’t get as crispy. If you don’t have oven-safe cookware, transfer the casserole to a 9x13-inch baking dish after layering. 🔥
Preventing a Soggy Crust
The crispy potato crust is the star, so don’t skip pressing the hash browns firmly into the sauce. After adding the cheese, place the skillet on the stove over medium heat for 2-3 minutes to let the cheese begin melting before transferring to the oven. This pre-melting step creates a stronger bond between layers, preventing a soggy bottom. For extra insurance, sprinkle 1/4 cup crushed cornflakes or panko breadcrumbs over the cheese before baking. ✨
Cheese Melting Secrets
Freshly grated cheese always melts better than pre-shredded, but if you must use pre-shredded, pulse it in a food processor for 10-15 seconds to break up anti-caking agents. For a double-cheese boost, mix 1 cup cheddar with 1 cup Monterey Jack—the Jack adds creaminess while the cheddar delivers sharp flavor. If your cheese isn’t melting smoothly, your oven might not be hot enough. Increase the temperature to 390°F for the last 5 minutes of baking. 🧀
Time-Saving Shortcuts
Skip browning the beef entirely by using 1 lb pre-cooked ground beef (found in the meat section of most grocery stores). For faster prep, use instant mashed potatoes mixed with 1/4 cup milk instead of hash browns—spread this over the beef mixture before adding cheese. If you’re short on time, microwave the hash browns for 3-4 minutes to thaw them quickly, then pat them dry with a paper towel before layering. 💡
Oven Temperature Calibration
Ovens vary wildly—mine runs 25°F hotter than the set temperature. Test your oven’s accuracy with an oven thermometer (place it on the middle rack while baking). If your casserole browns too quickly, tent it loosely with foil for the last 10 minutes of baking. For a deeper flavor, broil on high for 1-2 minutes at the very end—just watch it closely to avoid burning. 🌡️
Make-Ahead Mastery
Assemble the casserole completely (including the butter topping) and refrigerate it unbaked for up to 24 hours. When ready to bake, add 5-10 minutes to the cooking time since it starts cold. For freezing, bake the casserole, then cool it completely before wrapping tightly in plastic wrap and aluminum foil. Reheat from frozen at 350°F for 50-60 minutes, covered with foil. The texture won’t be as crispy, but it’s still delicious. ❄️
Nutrition facts
Frequently asked questions
Can I use fresh potatoes instead of frozen hash browns?
Fresh potatoes work, but you'll need to prep them carefully. Thinly slice 3 medium russet potatoes (about 4 cups when sliced) and parboil for 5 minutes to soften. Drain well and pat dry completely before layering. Fresh potatoes won't get as crispy as frozen hash browns, but they'll still create a satisfying texture. For extra crispiness, toss the sliced potatoes with 1 tbsp cornstarch before layering.
How do I make this casserole in a slow cooker?
Transfer the cooked beef mixture to a 5-6 quart slow cooker, then layer the hash browns and cheese on top. Cover and cook on Low for 3-4 hours or High for 1.5-2 hours. For crispiness, transfer to a baking dish and broil for 3-5 minutes at the end. The texture will be softer than oven-baked, but still delicious. The slow cooker method is perfect for hands-off preparation!
Why is my potato crust soggy instead of crispy? Soggy crusts usually happen when moisture escapes during baking. First,
Can I add vegetables to this recipe?
Mix in 1 cup diced bell peppers or 1 cup corn kernels with the beef for extra veggies. For heartier additions, try 1 cup sliced mushrooms or 1 cup chopped zucchini. Sauté any fresh veggies with the beef to soften them before adding other ingredients. Just be mindful of moisture content—too many watery veggies can make the crust soggy.
How long can I store leftovers?
Store leftovers in an airtight container in the refrigerator for up to 4-5 days. For best texture, reheat covered with foil at 350°F for 20-25 minutes until bubbly. The crispy crust will soften slightly when reheated, so it's best enjoyed fresh or made in smaller batches. For freezing, assemble completely (including butter topping) and freeze unbaked for up to 1 month—add 10-15 minutes to baking time when ready to serve.