
Breakfast & Brunch
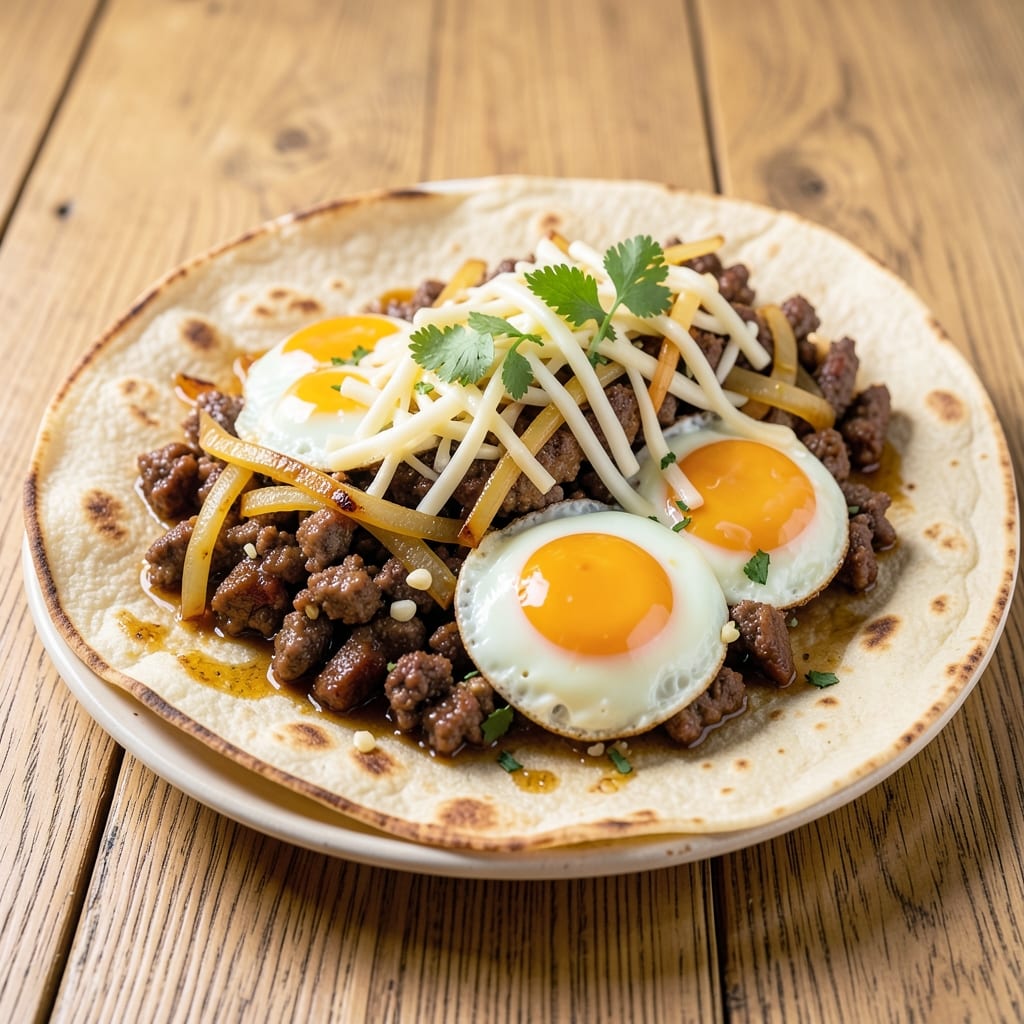
This beef and egg burrito recipe delivers the perfect balance of crispy tortillas, runny yolks, and savory beef that makes every bite irresistible. 💛 The secret lies in perfectly browning the beef and scrambling the eggs just until they're still tender, then wrapping them in warm tortillas that develop a satisfying crunch. I've tested countless variations to ensure the fillings stay packed and the edges stay golden—no soggy burritos here.
What sets these burritos apart is the technique: cooking the beef until deeply caramelized and scrambling the eggs in a separate pan so they stay creamy. Then, the assembly is key—layering ingredients strategically so nothing leaks out when you take that first bite. The result is a burrito that's sturdy enough to hold its shape while delivering that perfect mix of textures and flavors in every forkful.
By the time you're done, you'll have burritos with crispy edges that shatter slightly, runny yolks that ooze with every bite, and a filling that's packed with savory beef and just the right amount of cheese. The aroma alone will have everyone at the table asking for seconds, and the presentation makes it feel like a restaurant-quality meal without the fuss.
Serve these burritos with your favorite dipping sauces—salsa, sour cream, or guacamole—and pair them with a side of refried beans or a fresh salad. This recipe is designed to impress, whether you're feeding a crowd or treating yourself to a hearty breakfast. Let's get started!
Ingredients for beef and egg burrito
Crispy tortillas, runny yolks, and perfectly seasoned beef—just 13 ingredients for burritos that taste like a restaurant favorite.
| Ingredient | Amount | Notes |
|---|---|---|
| Large Flour Tortillas 🌯 | 8 whole | Flour, 10-inch size preferred |
| Ground Beef 🥩 | 1 ½ lb | 80/20 fat ratio for flavor |
| Large Eggs 🥚 | 6 whole | Room temperature for even cooking |
| Shredded Monterey Jack Cheese 🧀 | 2 cups | Freshly shredded, not pre-shredded |
| Yellow Onion 🧅 | 1 whole | Diced, about 1 cup |
| Garlic Cloves 🧄 | 4 cloves | Minced, for beef seasoning |
| Taco Seasoning 🌶️ | 2 tbsp | Homemade or store-bought |
| Salt 🧂 | 1 tsp | Kosher or sea salt |
| Black Pepper 🌶️ | ½ tsp | Freshly ground preferred |
| Vegetable Oil 🫒 | 2 tbsp | For crisping tortillas |
| Butter 🧈 | 2 tbsp | Unsalted, for egg cooking |
| Sour Cream 🥛 | ½ cup | For serving, optional |
| Salsa 🍅 | ½ cup | For serving, optional |
The ground beef is where the magic starts—80/20 fat ratio gives you that deep, caramelized flavor. Trader Joe's or Costco usually carry it pre-ground, but if you're buying a whole chuck roast, ask the butcher to grind it fresh. The onions and garlic get cooked down until soft, so no need to chop them too fine. For tortillas, Mission brand is my go-to—they crisp up beautifully. Keep them wrapped in a dry towel until you're ready to assemble, or they'll get soggy. The cheese? Freshly shredded melts way better than the pre-shredded kind with anti-caking agents.
No taco seasoning packet? Mix 1 tbsp chili powder, 1 tsp cumin, 1 tsp paprika, ½ tsp garlic powder, ½ tsp onion powder, and a pinch of cayenne. The eggs should be scrambled just until set—they'll finish cooking from the residual heat of the burritos. Running out of sour cream? Greek yogurt works too. For extra crispiness, heat the tortillas in a dry skillet for 20 seconds per side before filling. And if you're worried about leaks, layer the cheese on the inside of the tortilla before adding the beef—it acts like a glue. Trust me on this.
Assembled burritos keep for 2 days in the fridge, but they reheat best fresh. Wrap them in foil and warm in a 350°F oven for 10 minutes—the foil keeps them from drying out. For make-ahead prep, cook the beef and eggs separately, then assemble when ready. The tortillas can be toasted ahead and stored in an airtight container for 3 days. Freeze unassembled burritos for 1 month—just add a splash of water to the filling when reheating. And pro tip: Serve with lime wedges—they cut through the richness perfectly.
Why You'll Love This Recipe
- Five-Ingredient Magic: I swear by this combo—ground beef, eggs, cheese, onion, and tortillas. That’s it. No fancy prep, no hidden steps. Just brown the meat, scramble the eggs, and fold. Honestly, the simplicity makes it feel like cheating.
- Cheese Pulls Everything: The Monterey Jack melts into a golden, stringy blanket when it hits the hot filling. That crispy tortilla edge? Even better with the gooey cheese binding it all. Between us, I’ve seen grown adults fight over the last bite.
- Lunchbox or Picnic Hero: Wrap a few in foil for a workday lunch or toss some in a cooler for a tailgate. Cold or warm, they hold up—no sad soggy edges here. My son actually asks for these in his lunchbox. (Yes, even on a Tuesday.)
- Budget-Friendly Powerhouse: Ground beef and eggs stretch across meals, and tortillas? You can buy them in bulk. I’ve made eight of these for $12 and still had leftovers. Plus, the cheese stretches further than you’d think—just don’t tell my kids.
Step-by-step instructions for crispy beef and egg burritos
Here's how to make burritos with perfectly crispy tortillas and runny yolks that'll impress everyone.
🍳 Step 1: Cook the Beef Filling
Heat a large skillet over medium-high heat and add the 1.5 lb ground beef. Break it up with a wooden spoon as it cooks, about 3-4 minutes, until it loses its raw color. Here's the thing—don't drain the fat yet, that's flavor we need.
Add the 1 whole diced yellow onion and 4 minced garlic cloves, cooking for another 2-3 minutes until softened. Stir in the 2 tbsp taco seasoning, 1 tsp salt, and 0.5 tsp black pepper. Pour in ¼ cup water and let it simmer for 3-4 minutes until the liquid reduces and the beef is fully seasoned. You want it moist but not soupy—this ensures your burritos stay together.
🍳 Step 2: Prepare the Egg Mixture
In a separate bowl, whisk together the 6 whole large eggs until the yolks and whites are fully combined. Real talk: room temperature eggs are key here—they cook more evenly and give you those perfect runny yolks. If your eggs are cold, let them sit out for 30 minutes before using.
Heat the 2 tbsp butter in a non-stick skillet over medium-low heat. Pour in the eggs and let them cook gently. Here's where it gets fun—stir them lightly with a spatula, folding the eggs as they set. You're aiming for soft, creamy curds with those glorious runny yolks still intact. Remove from heat once they're just set but still slightly wobbly in the center.
🥘 Step 3: Assemble the Burrito Filling
Spread out the 2 cups shredded Monterey Jack cheese on a clean surface. This makes it easy to scoop up your filling without making a mess. Divide the cooked beef mixture and egg mixture evenly between the cheese piles, mixing gently to combine. The cheese will help bind everything together when we roll.
I like to work quickly here—warm tortillas are more pliable. Warm each large flour tortilla for 10-15 seconds in a dry skillet over medium heat, then place one on your work surface. Spoon about ¼ of the filling onto the bottom third of the tortilla, leaving about 1 inch of space at the edges.
👨🍳 Step 4: Roll Tightly for Perfect Shape
Fold the bottom third of the tortilla up over the filling, then fold in the sides. This is the moment that matters: roll tightly from the bottom up, pressing gently as you go. You want a compact burrito that won't unravel when you cut into it. If it feels too loose, add a little more filling or adjust your rolling technique.
Place the completed burritos seam-side down on a plate. If they start to unroll, don't panic—just gently press them back into shape. The key to keeping them together is that tight roll. For extra crispiness, you can lightly brush the tortillas with the 2 tbsp vegetable oil before rolling, but don't overdo it or they'll get greasy.
🔥 Step 5: Crisp and Serve
Heat a large skillet over medium heat and add the burritos. Cook for 2-3 minutes per side until the tortillas are golden brown and crispy. You'll know they're ready when they release easily from the pan and have a nice crunch. Don't walk away—they crisp up fast!
Serve immediately with the 0.5 cup sour cream and 0.5 cup salsa on the side. The contrast of crispy tortilla with creamy eggs and runny yolks is what makes these burritos so special. Cut into one and watch as the cheese melts just enough to coat every bite—perfection.
Pro Tips For Making Beef And Egg Burrito
- CRISP THE TORTILLAS LAST: Warm your tortillas for 10-15 seconds in a dry skillet over medium heat—just until they’re pliable, not fully cooked. I used to overdo this and end up with sad, rubbery wraps. Save the crisping for wrapping time when the tortilla hits the hot pan with the filling, or wrap them in foil to keep them soft while you finish cooking.
- SWEAT THE ONION FIRST: Dice that onion into ¼-inch pieces and cook it in the same skillet as the beef for 3-4 minutes before adding anything else. The slow release of moisture softens it perfectly and adds depth—no need for raw onion bits in your burrito. (Yes, even if you're impatient like me.)
- UNDERCOOK THE BEEF: Pull the ground beef out of the pan when it’s still slightly pink (160°F internal temp) and drain excess fat. Overcooking makes it dry and tough—this way, it stays juicy and absorbs flavors better. Add a splash of water or beef broth at the end if it’s too dry.
- WRAP TIGHT AND SEAL: Fold the burrito burrito-style (taco-style won’t hold) and press the edges firmly—then flip it seam-side down in the skillet for 30 seconds. The cheese will melt and act like glue, keeping everything together. (Your future self will thank you when it doesn’t unravel at the first bite.)
Essential equipment for this recipe
Skillet Essentials
Start with a 12-inch cast iron skillet for the beef—it retains heat beautifully and creates those deep caramelized flavors. I swear by Lodge Pre-Seasoned Cast Iron for even cooking and easy cleanup. For the eggs, use a non-stick 10-inch skillet like GreenPan to prevent sticking while achieving that perfect creamy texture. 🔥
Tortilla Tools
A tortilla warmer (like the Oster 4-Slice) is a game-changer—it keeps tortillas pliable and warm without drying them out. If you don’t have one, a clean kitchen towel draped over a plate works in a pinch. For crisping, a non-stick 10-inch skillet (again, GreenPan) is ideal—it heats evenly and prevents sticking when you toast the assembled burritos.
Cheese Prep Gear
Skip pre-shredded cheese—it’s full of anti-caking agents that make it clump. Instead, grab a box grater (I love the Microplane) and freshly shred 2 cups Monterey Jack. The finer the shreds, the better they’ll melt and bind your filling. Keep a small bowl nearby to catch any stray cheese bits while you work.
Assembly Workspace
Clear a large, flat surface (like a baking sheet or cutting board) for assembling. I like to use parchment paper underneath to catch any cheese or filling that might escape. A spatula (preferably silicon-coated) helps spread the filling evenly without tearing the tortillas. Keep a small plate nearby to hold sour cream and salsa for serving.
Optional Upgrades
For extra crispiness, invest in a mini deep fryer (like the Ninja Foodi) to fry the assembled burritos for 1-2 minutes—they’ll be golden and shatteringly crisp. No deep fryer? A wire cooling rack placed over a baking sheet lets air circulate while you crisp them in the skillet. A tongs makes flipping the burritos easier than a spatula. 💫
Nutrition facts
Frequently asked questions about beef and egg burritos
Can I make these burritos ahead of time?
Assemble the burritos and wrap them tightly in foil or plastic wrap. Store them in the fridge for up to 2 days. To reheat, warm in a 350°F oven for 10 minutes—the foil keeps them from drying out. For longer storage, freeze unassembled burritos for 1 month. Just add a splash of water when reheating to restore moisture.
How do I keep the burritos from falling apart?
Tight rolling is key! Fold the bottom third first, then the sides, and roll tightly from the bottom up. The 2 cups of cheese acts as a glue—spread it on the tortilla before adding filling. For extra security, brush the edges with a tiny bit of oil before rolling. If they still unravel, wrap them in foil after assembly and keep them warm until serving.
What's the best way to get crispy tortillas?
Warm the tortillas in a dry skillet for 10-15 seconds per side before filling, then crisp them again after assembly. For maximum crunch, lightly brush the outside with 2 tbsp vegetable oil before the final crisping step. A non-stick 10-inch skillet works best—it heats evenly without sticking.
Can I use corn tortillas instead of flour?
Corn tortillas work but require adjustments—they're more fragile and don't crisp as well. If using them, warm them longer (20 seconds per side) and brush with more oil. They'll be less sturdy, so roll extra tightly. For best results, stick with flour tortillas—they hold up better to the filling and crisp beautifully.
What's the secret to runny yolks?
Use room temperature eggs and cook them over medium-low heat until just set—still slightly wobbly in the center. Remove from heat immediately and let them finish cooking from residual heat. Never overcook! Also, keep the filling warm (350°F oven for 5 minutes) before serving to maintain that perfect yolk consistency.