
Main Courses
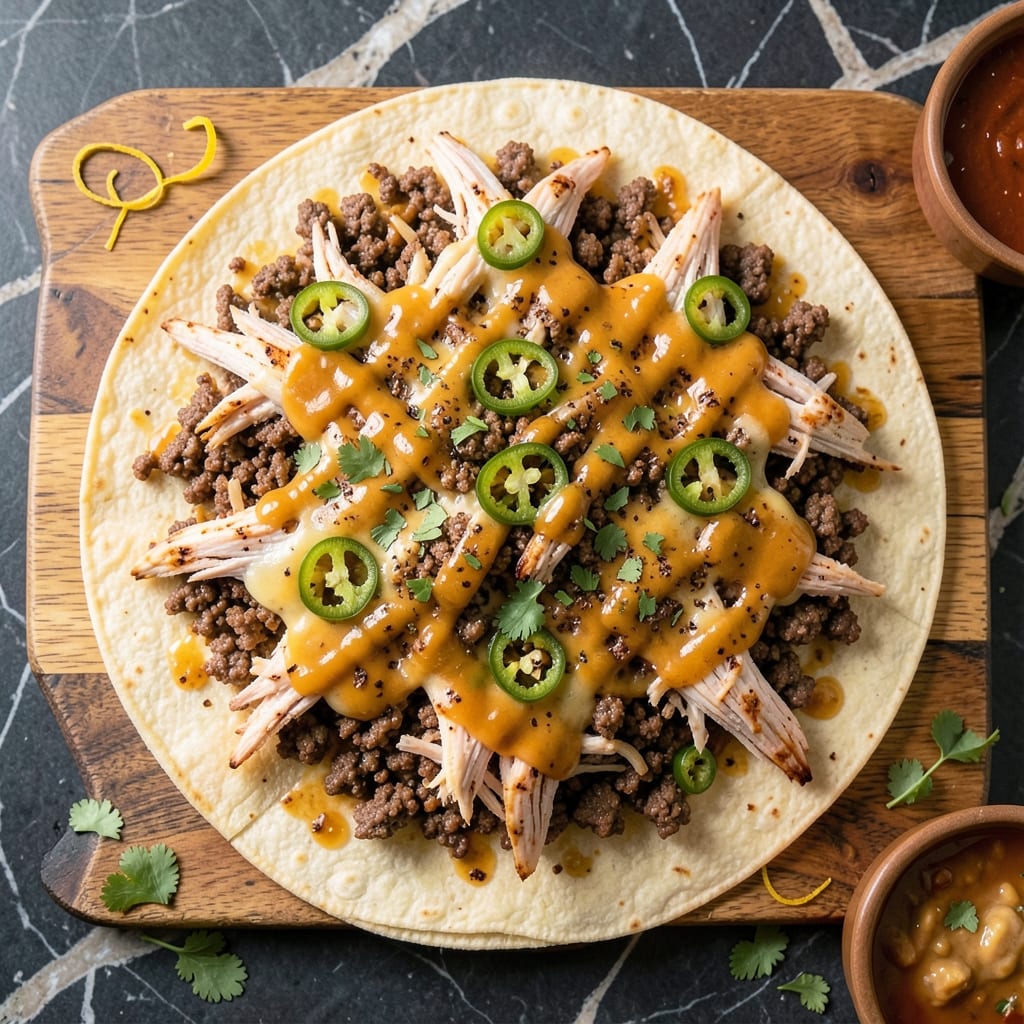
This beef and chicken nachos recipe delivers the ultimate comfort food experience with perfectly crispy tortilla chips layered under rivers of melted cheese. The key to success lies in balancing tender proteins, bold seasonings, and that signature crispy texture that makes every bite satisfying. I've perfected this method over countless game days and family gatherings, ensuring the chips stay crispy while the cheese melts into gooey perfection.
What sets these nachos apart is the combination of perfectly seasoned ground beef and shredded chicken, both cooked to ideal tenderness before being layered over the chips. The tortillas are cut into thick strips and baked until golden and crispy, creating a sturdy base that holds up to all the toppings. This isn't your basic nacho platter—it's a restaurant-quality dish you can make at home with simple techniques and quality ingredients.
The final result is a towering stack of crispy tortilla chips topped with layers of melted cheese that create rivers when you cut through, juicy beef and chicken, and all your favorite toppings. Each bite delivers the perfect balance of textures—crispy chips, creamy cheese, tender proteins, and fresh vegetables. The aroma alone will have everyone gathering around the table, ready for seconds.
Whether you're hosting a game day party or feeding a hungry family, these beef and chicken nachos are designed to impress without requiring advanced skills. The recipe scales easily, and you can customize the toppings to suit any preference. Let's get started on creating this crowd-pleasing masterpiece.
Ingredients for beef and chicken nachos
Game day staples with restaurant-quality crispy chips and melty cheese rivers—no shortcuts here.
| Ingredient | Amount | Notes |
|---|---|---|
| Large Flour Tortillas 🍞 | 12 whole | Blue corn or flour preferred |
| Ground Beef 🥩 | 1 ½ lb | 80/20 fat ratio for juiciness |
| Shredded Chicken 🍗 | 2 cups | Cooked, store-bought or homemade |
| Shredded Monterey Jack Cheese 🧀 | 4 cups | Freshly shredded preferred |
| Shredded Cheddar Cheese 🧀 | 2 cups | Sharp cheddar for extra flavor |
| Taco Seasoning 🌶️ | 2 tbsp | Homemade or store-bought blend |
| Sour Cream 🥛 | ½ cup | Full-fat for best texture |
| Fresh Tomato 🍅 | 1 whole | Diced for freshness |
| Red Onion 🧅 | ½ whole | Thinly sliced for crunch |
| Jalapeño Pepper 🌶️ | 1 whole | Seeded and sliced for heat |
| Fresh Cilantro 🌿 | ¼ cup | Chopped for garnish |
| Vegetable Oil 🫒 | ¼ cup | For crisping tortilla strips |
| Salt 🧂 | 1 tsp | Kosher or sea salt |
| Black Pepper 🌶️ | ½ tsp | Freshly ground preferred |
| Garlic Powder 🧄 | 1 tsp | For extra flavor depth |
The tortillas are the foundation. Mission brand or La Banderita from the Latin aisle are my go-tos—they hold up best to the cheese. If you're using blue corn, toast them first for extra crispiness. For the beef, 80/20 fat ratio is non-negotiable—it stays juicy while cooking. I usually grab ground beef from Costco when I'm making a big batch, but any quality supermarket brand works. The shredded chicken can be store-bought or homemade—just make sure it's fully cooked and drained well.
No fresh jalapeño? Pickled jalapeños at half the amount work in a pinch. The cheese is where you can get fancy—Oaxaca cheese melts like a dream if you want to splurge. Short on cilantro? Fresh parsley works too, though it's not the same. For the tortilla strips, cut them into 1-inch-wide strips—thicker equals crispier. The oil matters here too—avocado oil has a higher smoke point than vegetable oil, so it's worth the upgrade if you're doing a big batch.
Prep ahead by making the seasoned beef and chicken in advance—they keep well in the fridge for 3 days. The tortilla strips crisp up best when baked right before serving, so hold off on that until the last 10 minutes. Once assembled, nachos reheat beautifully—350°F for 5-10 minutes gets them melty again. Store leftovers covered in the fridge for 2 days—the cheese gets even gooier overnight.
Why You'll Love This Recipe
- I’ll be real: the combo of tender ground beef and juicy shredded chicken turns this into a meal, not just a snack. That first bite of melty Monterey Jack and cheddar? It’s like a warm hug for your taste buds.
- Two-Protein Powerhouse: I’ll be real: the combo of tender ground beef and juicy shredded chicken turns this into a meal, not just a snack. That first bite of melty Monterey Jack and cheddar? It’s like a warm hug for your taste buds.
- One-Pan Magic: Honestly, this is the kind of recipe that makes me feel like a lazy genius. Lay out the tortillas, dump the beef and chicken on top, sprinkle the cheese, and broil—no flipping, no fuss. The tortillas crisp up perfectly while the cheese pulls into gooey strings.
- Budget-Friendly Feast: Between us, this recipe stretches my grocery budget way further than takeout ever could. Ground beef and shredded chicken are affordable staples, and the cheese stretches over multiple servings. I’ve fed six people for under $15 with leftovers for lunch the next day.
Step-by-step instructions for crispy beef and chicken nachos
Here's how to build nachos with perfectly crispy tortilla stacks and gooey cheese rivers.
Prepare the Protein Mixtures
In a large skillet over medium-high heat, add the 1.5 lb ground beef and cook until browned, breaking it apart with a wooden spoon. Drain excess fat, then stir in the 2 tbsp taco seasoning, 1 tsp garlic powder, 1 tsp salt, and 0.5 tsp black pepper. Cook for another 2 minutes to toast the spices.
Meanwhile, warm the 2 cups shredded chicken in a separate microwave-safe bowl for 30 seconds to make it easier to handle. Mix in 1 tsp taco seasoning and set aside. This step ensures both proteins are seasoned perfectly before assembly.
Prep and Crisp the Tortilla Strips
Cut each of the 12 whole large flour tortillas into 8 equal strips (about 2-inch wide and 3-inch long each). Arrange them in a single layer on a baking sheet, brushing each with a light coat of 0.25 cup vegetable oil using a pastry brush. This oil is key to achieving that crispy texture we're after.
Bake at 425°F for 8-10 minutes, flipping halfway through, until the edges are golden brown and crispy. Watch closely—they'll burn if left too long. Remove and set aside on a paper towel-lined plate to drain excess oil.
Assemble the Nacho Stacks
Arrange 6 crispy tortilla strips in a stack on a large baking sheet or platter. Spread 1 cup shredded Monterey Jack cheese and 0.5 cup shredded cheddar cheese evenly over the strips, then add 0.5 cup cooked ground beef and 0.5 cup shredded chicken. Repeat with remaining ingredients to make 8 stacks.
Here's the thing—don't overcrowd the baking sheet. You want space for the cheese to melt and bubble properly. If needed, use two baking sheets. This layering creates those perfect cheese rivers when melted.
Melt and Brown the Cheese
Transfer the assembled stacks to a preheated 375°F oven and bake for 5-7 minutes until the cheese is fully melted and bubbly. Watch for the edges to turn light golden brown—this is your signal the cheese is perfectly melted.
For extra browning, broil for 1-2 minutes at the end, keeping a close eye to prevent burning. The cheese should stretch slightly when pulled apart, indicating it's reached the perfect melt consistency.
Top and Serve Immediately
Remove from oven and immediately top each stack with 0.5 cup diced fresh tomato, 0.5 cup thinly sliced red onion, 1 cup sliced jalapeño pepper, and 0.25 cup chopped fresh cilantro. Drizzle with 0.5 cup sour cream and serve while everything is still warm.
Here's why timing matters: The crispy tortillas soften slightly when topped with warm cheese, creating that perfect balance of textures. Serve with additional sour cream and sliced jalapeños on the side for customization. The nachos are best enjoyed immediately when the tortillas are still crispy and the cheese is at its gooiest!
Pro Tips For Making Beef And Chicken Nachos
- Preheat That Pan: I learned this the hard way—skipping the preheat on your baking sheet or skillet means soggy tortillas and a sad nacho pile. Crank the oven to 425°F (220°C) and let the pan sit for 5 minutes before adding anything. The tortillas will crisp up properly, and the cheese won’t turn into a greasy mess.
- Brown the Beef First: Drain the grease after cooking the ground beef—yes, even if it’s tempting to leave it for flavor. The extra fat will make your tortillas greasy and limp instead of crisp. If you want that smoky taste, add a splash of beef broth or a pinch of smoked paprika after draining.
- Layer Cheese Like a Pro: Don’t just dump all the cheese on top at once—it’ll slide off and burn. Start with a thin layer of Monterey Jack (it’s melty and less likely to run), then add the beef and chicken. Finish with a sprinkle of cheddar on top. The Jack will create a sticky base, and the cheddar will give that classic gooey finish.
- Use Cold Shredded Chicken: Sounds weird, but it works—I was skeptical until I tried it. Cold shredded chicken holds its shape better and doesn’t turn into a wet, sad pile when the cheese melts. If you’re using leftover rotisserie chicken, let it cool completely before assembling the nachos. No one wants a watery nacho disaster.
Pro cooking tips for great beef and chicken nachos
Protein Prep Secrets
The key to juicy beef is using an 80/20 fat ratio—the extra fat keeps it moist while cooking. Brown the beef thoroughly before adding seasoning to develop deep, meaty flavors. I like to break it into small pieces with a wooden spoon while cooking to ensure even seasoning throughout. For the chicken, a quick 30-second microwave warm-up makes handling easier and prevents dryness when mixing with seasoning. 🥩
Crispy Tortilla Mastery
Cutting tortillas into 2-inch-wide strips creates the perfect surface area for crispiness. Use a pastry brush to apply oil evenly—don't skip this step! Bake at 425°F for exactly 8-10 minutes, flipping halfway. The strips should be golden brown but not dark brown. I've learned the hard way that over-baking turns them into sad, brittle sticks. 🍞
Cheese Layering Tricks
Layer cheese in thin, even layers between tortilla strips—this creates those signature cheese rivers when melted. Use a mix of Monterey Jack and sharp cheddar for the perfect balance of creaminess and bite. For extra meltiness, sprinkle a pinch of cornstarch (about ½ tsp) over the cheese before baking—it helps prevent clumping. 🧀
Oven Temperature Control
Start with 375°F for melting cheese—this gentle heat ensures even melting without burning. If your oven runs hot, reduce to 350°F. For the final browning, broil for just 1-2 minutes—watch like a hawk! The cheese should stretch slightly when you pull apart a piece. I always use an oven thermometer to verify my oven's actual temperature, as most home ovens are off by 25°F or more. 🌡️
Timing is Everything
Assemble nachos right before baking to keep tortillas crispy. If you're serving a crowd, work in batches—don't let assembled nachos sit too long before baking. For reheating leftovers, cover with foil and warm at 350°F for 5-10 minutes. The tortillas will soften slightly but still hold their structure. Always serve with fresh toppings on the side so guests can customize their heat and texture preferences. 🔥
Nutrition facts
Frequently asked questions
Can I make these nachos ahead of time?
You can prep the proteins and cheese mixture in advance, but assemble and bake the nachos right before serving. The tortilla strips lose crispiness when made ahead. For a make-ahead option, bake the tortilla strips first and store them in an airtight container for 2 hours. Re-crisp at 375°F for 3-5 minutes before assembling.
What's the best way to keep the tortilla chips crispy?
Bake the tortilla strips at 425°F for 8-10 minutes until golden brown, then drain on paper towels. Assemble the nachos right before baking and use 375°F for 5-7 minutes—this keeps them crispy while melting the cheese. Avoid stacking too high or the bottom layers will soften.
Can I substitute the beef with another protein?
Swap the beef for shredded pork carnitas or crumbled chorizo for a different flavor profile. For a vegetarian option, use black beans or spiced lentils. Just adjust the seasoning to match your protein choice. The chicken remains the perfect balance for any substitution.
Why did my cheese get clumpy? Clumpy cheese usually happens from moisture or improper melting.
How do I make these nachos spicier?
Add 1 tbsp cayenne pepper or 2 tbsp hot sauce to the beef mixture. For extra heat, top with diced serrano peppers or pickled jalapeños after baking. For a smoky kick, sprinkle with chipotle powder or serve with extra hot sauce on the side. Adjust to taste!