
Soups & Stews
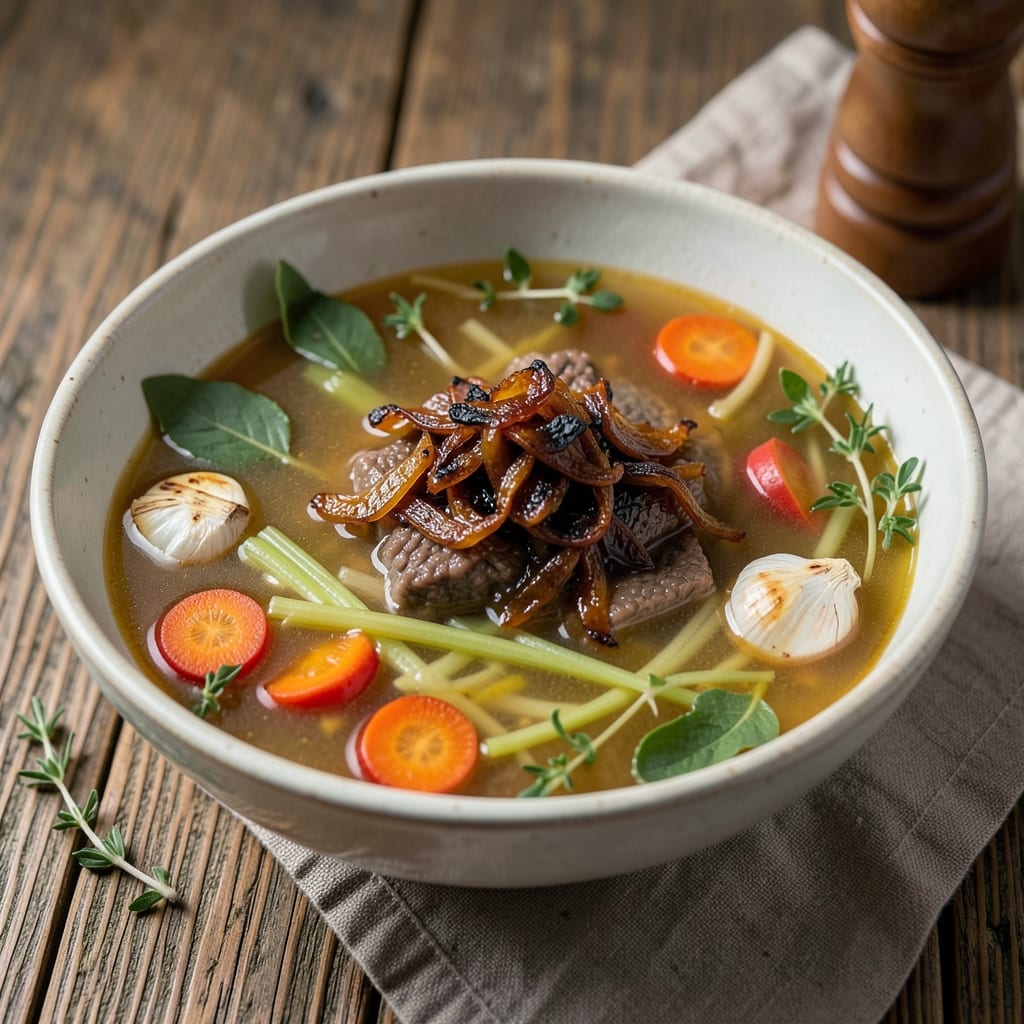
This beef and chicken bone broth recipe transforms raw bones into liquid gold—packed with umami depth and collagen-rich richness that elevates every dish it touches. The secret lies in slow simmering, where aromatics and bones release their full flavor potential over hours, creating a foundation for soups, braises, and risottos that taste like home.
Unlike store-bought versions, homemade bone broth develops layers of complexity from scratch—caramelized onions, earthy celery, and herbs infuse the liquid with warmth while collagen from the bones transforms it into a velvety, nutrient-dense base. This method requires patience, but the results are worth every minute of simmering time.
The process is straightforward: combine bones with water and aromatics, simmer gently to extract flavor without scorching, and strain for a clear, golden broth. What you’re left with is a versatile ingredient that turns ordinary meals into extraordinary ones—think restaurant-quality gravies, hearty stews, or even a simple pasta dish.
Perfect for meal prep or gifting, this broth keeps beautifully in the freezer for months. Whether you're a home cook or a seasoned chef, mastering this technique will change how you approach flavor in your kitchen. Let’s get started on creating your own umami-packed foundation.
Ingredients for beef and chicken bone broth
Twelve ingredients for a broth so rich it transforms ordinary meals into extraordinary ones.
| Ingredient | Amount | Notes |
|---|---|---|
| Beef Bones 🦴 | 3 lb | Marrow-rich, cut into chunks |
| Chicken Bones 🍗 | 2 lb | Necks and backs preferred |
| Yellow Onions 🧅 | 2 whole | Peeled, roughly chopped |
| Carrots 🥕 | 4 whole | Scrubbed, cut into chunks |
| Celery Stalks 🌿 | 6 whole | Trimmed, cut into pieces |
| Garlic Cloves 🧄 | 8 cloves | Smashed, skins left on |
| Fresh Parsley Stems 🌿 | 1 bunch | Tough stems only, chopped |
| Fresh Thyme Sprigs 🌿 | 4 whole | Stems included for flavor |
| Black Peppercorns 🌶️ | 1 tbsp | Crushed lightly |
| Apple Cider Vinegar 🍎 | ¼ cup | For collagen extraction |
| Sea Salt 🧂 | 2 tbsp | Diamond Crystal preferred |
| Cold Water 💧 | 12 cups | Filtered if possible |
The bones are everything here. Look for marrow-rich beef bones at your butcher—they’re worth the extra cost for that velvety texture. Chicken bones should be raw, never cooked, to maximize flavor extraction. Costco or local butchers often have them pre-packaged, but if you’re buying whole, ask for necks and backs—they’ve got the best flavor. Fresh herbs matter too: parsley stems and thyme sprigs add layers of aroma without overpowering. If you’re short on time, dried herbs work at half the amount, but fresh is ideal.
No fresh thyme? Dried thyme at one-third the quantity works in a pinch. Short on parsley? Fresh bay leaves add depth without changing the flavor profile. The vinegar is non-negotiable—it helps break down collagen for that signature richness. Apple cider vinegar or white vinegar both work, but avoid balsamic. For extra umami, add a 1-inch piece of kombu seaweed (remove before serving). And if you’re using pre-chopped veggies, skip the carrot peeling—the skin adds sweetness.
This broth gets better with time—24-48 hours of simmering is ideal, but even 12 hours yields incredible results. Store in glass jars or airtight containers in the fridge for up to 5 days, or freeze in ice cube trays or silicone molds for easy portioning. Label with the date—it keeps for 6 months in the freezer. The first batch will always be the best; save the scraps for stock instead of wasting them.
Why You'll Love This Recipe
- No-Fuss Setup: I swear, this takes less effort than making coffee. Toss the bones—beef and chicken—along with roughly chopped onions, carrots, and celery into a pot, cover with water, and let it simmer. No measuring cups, no fancy techniques, just raw, honest flavor waiting to happen.
- Deep Umami Magic: That first sip? Rich, savory, and impossible to resist. The beef and chicken bones release collagen and gelatin, while the onions, carrots, and celery add natural sweetness—no salt bombs or artificial flavors needed. It’s the kind of broth that makes you slow down and savor every spoonful.
- Pantry Goldmine: Freeze extra batches for when life gets busy. Use it for soups, grains, or even a quick pan sauce—it’s the ultimate flavor booster. Honestly, I’ve turned this into my go-to base for everything from ramen to risotto, and it never lets me down.
- Budget Superstar: Beef and chicken bones are often cheaper than meat cuts, and this recipe stretches them into gallons of liquid goodness. I’ll be real: my grocery bill dropped when I started making my own, and the taste? Way better than anything store-bought. Win-win.
Step-by-step instructions for beef and chicken bone broth
Here's how to extract maximum flavor from your bones for a deeply rich, restaurant-quality broth.
Prepare the Bones and Aromatics
Start by rinsing the 3 lb beef bones and 2 lb chicken bones under cold water to remove any impurities, then pat them completely dry with paper towels. This step is crucial—any moisture left on the bones will dilute your broth later. Using a sharp cleaver or heavy-duty knife, cut the beef bones into 2-inch chunks to expose more marrow and collagen.
In a separate bowl, combine the 2 whole yellow onions, 4 whole carrots, 6 whole celery stalks, 8 cloves garlic, 1 bunch fresh parsley stems, and 4 whole fresh thyme sprigs. Roughly chop the vegetables into ½-inch pieces—no need for precision here, just even distribution. The skins on the garlic cloves will add subtle bitterness that deepens the flavor profile. Set aside the crushed 1 tbsp black peppercorns for later.
Sear the Bones for Depth of Flavor
Heat a large stockpot over medium-high heat until it's very hot. Working in batches if needed, add the bone chunks in a single layer and sear them for 3-4 minutes per side until they develop a deep golden-brown crust. This caramelization creates the Maillard reaction, which forms complex flavors that dissolve into the broth. Don't crowd the pot—this prevents proper browning.
As you sear, you'll notice the bones release fat and juices. This is normal and actually enhances the richness. Once all bones are browned, transfer them to your 12-quart stockpot (or largest pot you have). The seared bones will form the foundation of your broth's depth.
Build the Broth Base
Return the stockpot to medium heat and add the prepared vegetable mixture along with the 0.25 cup apple cider vinegar. The vinegar helps extract collagen from the bones and tenderizes them. Let everything simmer gently for 10 minutes, stirring occasionally, until the vegetables soften slightly and release their aromatics into the pot.
Here's the thing—this initial simmer isn't about cooking the vegetables through. You want them to break down just enough to infuse the broth with their sweetness and earthiness. The vegetables will continue cooking slowly as the broth develops. After the 10 minutes, add the 2 tbsp sea salt and the crushed black peppercorns, stirring to dissolve the salt completely.
Cover with Cold Water and Simmer Low
Pour in the 12 cups cold water, making sure all the bones and vegetables are completely submerged. The cold water prevents the broth from boiling immediately, which could cause the bones to cook too quickly on the surface. Bring the mixture to a gentle simmer—you should see small bubbles at the edges but not a rolling boil. This low-and-slow approach is key to extracting maximum collagen and flavor.
Once simmering, partially cover the pot with a lid (leave a small gap for steam to escape) and reduce heat to medium-low. Let it cook uncovered for 4 hours, then add enough water to maintain the level (about 1-2 cups) and continue simmering for another 4 hours. This 8-hour total ensures the bones break down completely, releasing gelatin and creating that signature silky texture.
Strain and Finish the Broth
After the 8 hours, turn off the heat and let the broth sit for 15 minutes to allow any settled particles to sink. Line a fine-mesh strainer with cheesecloth or a clean kitchen towel, then carefully pour the broth through, discarding the solids. For extra clarity, you can strain it a second time through a fine-mesh sieve.
Return the strained broth to the pot and skim off any remaining fat from the surface with a fat separator or spoon. Taste and adjust seasoning with additional sea salt if needed—remember, the broth will reduce slightly as it cools. Let it cool to room temperature, then refrigerate overnight. The fat will solidify on top, making it easy to remove for a lighter broth if desired. Store in airtight containers in the refrigerator for up to 5 days or freeze for up to 3 months.
Pro Tips For Making Beef And Chicken Bone Broth
- Roast Bones First: I learned this the hard way—raw bones take forever to render. Toss beef and chicken bones in a 400°F oven for 20-30 minutes before simmering. The Maillard reaction kicks in, deepening flavor and cutting cooking time by hours. (Yes, even if you're impatient like me.)
- Char the Veggies: Skip the gentle sauté—blacken those onion, carrot, and celery pieces in a dry pot until they smell like a forest fire. The caramelized bits dissolve into the broth, adding richness. Just don’t walk away; burnt veggies taste like ash.
- Strain Twice: After simmering, line a fine-mesh strainer with cheesecloth or a coffee filter. Pour the broth through once, then press the solids with a spoon. Do it again with fresh cheesecloth—this catches the last of the gritty bits that ruin smooth sips.
- Add Vinegar Early: Toss in ¼ cup apple cider or white vinegar with the bones at the start. It lowers the pH, helping extract collagen and gelatin faster. Sounds weird, but it works: broth turns cloudy at first, then clears beautifully after 4+ hours. (Your future self will thank you.)
Troubleshooting great beef and chicken bone broth
Cloudy Broth Fix
If your broth looks cloudy after straining, it’s likely due to fine particles or overcooked vegetables. For a clearer broth, strain it through a fine-mesh sieve lined with cheesecloth or a clean kitchen towel twice. If the cloudiness persists, try adding 1 tbsp apple cider vinegar to the water before simmering—it helps clarify the broth by breaking down proteins. 💧
Skimming Fat Challenges
Fat separation can be tricky, especially with beef bones. Use a fat separator spoon or a large spoon to skim fat while the broth is still warm—it’s easier to remove before it solidifies. For a lower-fat broth, chill it overnight in the fridge; the fat will solidify on top, making it simple to scoop off. If you prefer some fat for flavor, leave it in and store the broth in airtight containers to preserve its richness.
Bones Not Breaking Down
If your bones aren’t softening after 8 hours, they might need more time or a longer simmer. Extend the cooking time to 12-24 hours for maximum collagen extraction. Alternatively, add 1 tbsp apple cider vinegar or lemon juice to the water—it helps tenderize the bones faster. Avoid boiling; keep the heat at a gentle simmer to prevent tough, rubbery bones.
Vegetables Burning
Burnt vegetables can make your broth bitter. To prevent this, simmer gently and avoid letting the broth boil vigorously. If you notice any burnt bits, remove them immediately with a slotted spoon. For extra protection, parboil the vegetables for 5 minutes before adding them to the broth. This softens them slightly and reduces the risk of burning during the long simmer. 🌶️
Weak Flavor Profile
A weak broth often means insufficient simmering time or under-seasoning. Boost flavor by searing the bones longer for a deeper Maillard reaction or adding extra aromatics like bay leaves, fennel seeds, or a splash of soy sauce. For an umami kick, include 1-inch kombu seaweed (remove before serving). If the broth tastes bland after simmering, reduce it by half on the stovetop to intensify the flavors.
Broth Too Salty
Over-salting is common when adjusting seasoning. If your broth tastes too salty, dilute it by adding 1 cup of water per 4 cups of broth and simmer for 10 minutes to rebalance the flavors. For a quicker fix, strain the broth through a clean cloth to remove excess salt. To prevent this in the future, taste the broth before adding all the salt—remember, it will become more concentrated as it cools.
Nutrition facts
Frequently asked questions
Why do I need to use cold water instead of hot?
Cold water prevents the broth from boiling immediately, which helps extract more collagen and gelatin from the bones. When you add cold water, the broth gradually heats up, allowing the bones to break down gently over time rather than cooking too quickly on the surface. This slow process creates that signature silky texture and rich flavor.
Can I use chicken bones from a rotisserie?
No, rotisserie chicken bones are already cooked and won't yield the same rich, collagen-packed broth. Raw chicken bones—especially necks and backs—contain more flavor and nutrients. If you're short on time, use raw chicken bones from a butcher or save your rotisserie bones for a lighter chicken stock instead.
How do I know when the bones are fully broken down?
After 8 hours of simmering, the bones should be soft enough to pierce with a fork. Beef bones will have a slightly gelatinous texture, while chicken bones will feel tender and easily crumble. If they're still firm, extend the simmering time to 12-24 hours for maximum collagen extraction.
What can I do with the leftover vegetables after straining?
Don't waste those flavorful veggies! Compost them, or blend them into a quick vegetable broth for soups or sauces. You can also chop them finely and mix into mashed potatoes, pasta dishes, or stir-fries for extra depth. Every bit of flavor counts in your kitchen!
Is it better to keep the fat in the broth?
It depends on your preference! The fat adds richness and helps preserve flavor, so many chefs leave it in for cooking. However, if you prefer a lighter broth, chill it overnight—the fat will solidify on top and can be easily skimmed off before using. For storage, leave the fat in for maximum flavor retention.