
Main Courses
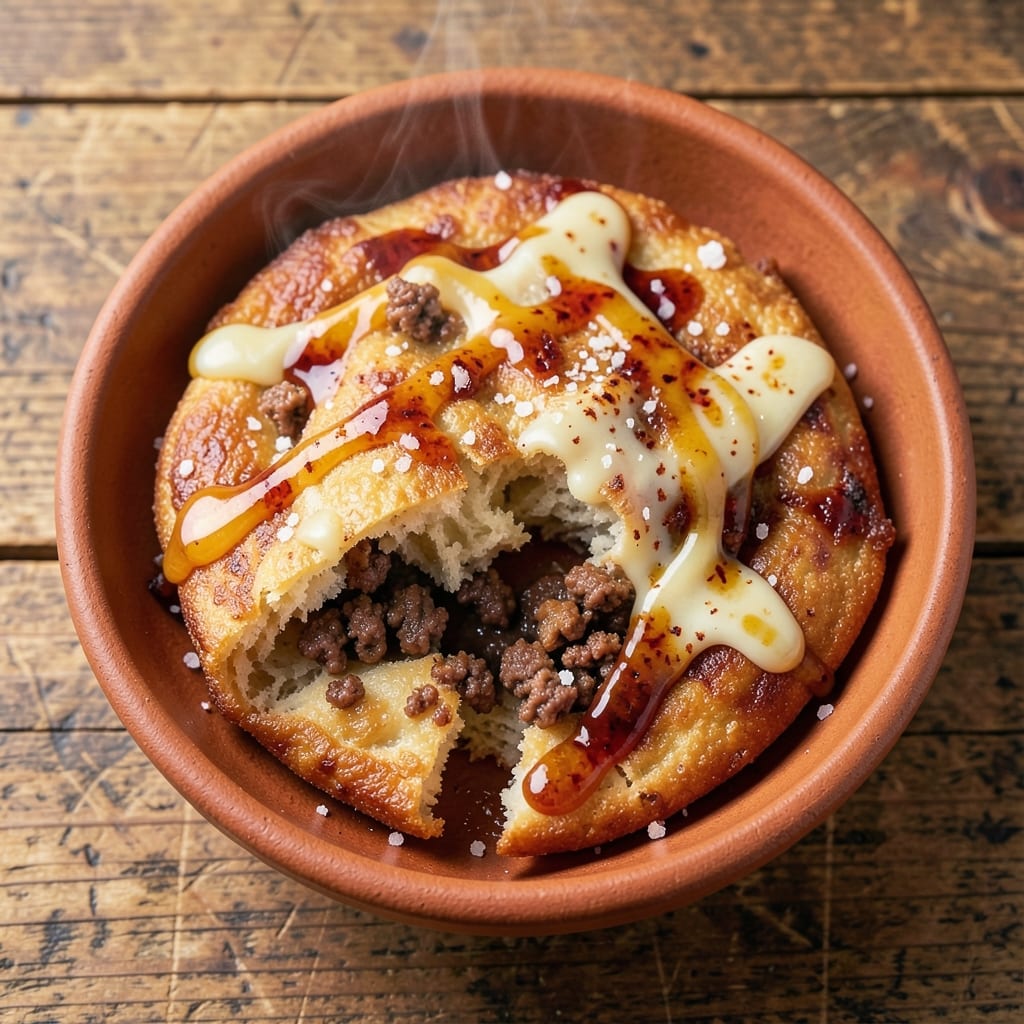
This beef and cheese sopapilla recipe delivers the ultimate comfort food experience—crispy golden tortilla bites stuffed with savory beef and melted cheese that oozes at every bite. The secret lies in the dough's perfect texture, where flaky layers trap the rich filling, creating a handheld masterpiece that's both satisfying and impressive. I've refined this recipe over years to balance traditional techniques with modern convenience, ensuring you get restaurant-quality results at home.
The magic starts with a simple dough that's rolled thin and cut into squares, then filled with seasoned ground beef and cheese before being fried to golden perfection. What sets this apart is the foolproof method for achieving that signature crispy exterior while keeping the inside tender—no more soggy or greasy sopapillas. The beef filling is seasoned just right, so it complements the melted cheese without overpowering it, creating harmony in every bite.
By the time you're done, you'll have a plate of sopapillas that are crispy on the outside, gooey with melted cheese inside, and packed with flavorful beef. The aroma alone will have everyone gathering around, and the first bite delivers that perfect balance of textures and tastes. This recipe is perfect for game day, family gatherings, or when you just crave something indulgent.
Whether you prefer the classic deep-fried version or a lighter oven-baked adaptation, this recipe adapts to your needs while keeping that essential crispy texture. Let's get started on making these irresistible bites that everyone will love.
Ingredients for beef and cheese sopapilla
Golden, crispy bites packed with savory beef and melted cheese magic—just 13 ingredients for comfort food perfection.
| Ingredient | Amount | Notes |
|---|---|---|
| All-Purpose Flour 🌾 | 3 cups | Sifted for flaky texture |
| Unsalted Butter 🧈 | ½ cup | Cold, cubed for flakiness |
| Granulated Sugar 🍚 | 1 tbsp | For balance with savory filling |
| Instant Yeast 🍞 | 1 tsp | Active dry works too |
| Salt 🧂 | ½ tsp | Diamond Crystal preferred |
| Ground Beef 🥩 | 1 lb | 80/20 fat ratio for juiciness |
| Yellow Onion 🧅 | 1 whole | Finely diced for beef filling |
| Garlic Cloves 🧄 | 3 cloves | Minced for beef seasoning |
| Chili Powder 🌶️ | 1 tbsp | For beef seasoning |
| Ground Cumin 🌿 | 1 tsp | Toasted for depth of flavor |
| Shredded Sharp Cheddar Cheese 🧀 | 2 cups | Freshly grated preferred |
| Vegetable Oil 🫒 | 3 cups | For deep-frying (350°F) |
| Powdered Sugar 🍚 | ½ cup | Optional for dusting |
The dough is where the magic happens. King Arthur flour or Bob's Red Mill work best for that signature flaky texture—don't substitute all-purpose if you're picky about crispiness. Cold butter is non-negotiable here (pop it in the freezer 20 minutes if your kitchen's warm), and Diamond Crystal kosher salt gives you that perfect balance. The yeast? Fresh is ideal, but Saf-Instant is foolproof if you're in a hurry. For the beef, 80/20 fat ratio is key—it keeps the filling juicy while frying. I grab mine pre-ground from Costco or Trader Joe's to save time, but if you're feeling fancy, buy whole chuck roast and grind it yourself for even better flavor.
No chili powder? Smoked paprika plus a pinch of cayenne gets you close. Running low on cumin? Ground coriander at half the amount works in a pinch. The onion can be swapped for green onions if you're in a rush, but the sweetness of yellow onion really makes the beef shine. For the cheese, Monterey Jack melts even better than cheddar if you're worried about gooeyness. And if you're baking instead of frying, reduce the oil to 1 tbsp and brush the dough lightly with olive oil before baking at 375°F for 12-15 minutes. The powdered sugar is totally optional—skip it if you're watching sugar, but trust me, it's worth the sprinkle for that classic finish.
Make the dough ahead and refrigerate it for up to 24 hours—it actually develops better flavor. The beef filling keeps 3 days in the fridge, so you can prep that separately. For frying, 350°F is your sweet spot—use a deep fry thermometer to nail it. These stay crispy for about 20 minutes after frying, so work in batches if you're feeding a crowd. Store leftovers in an airtight container for 3 days, but honestly? They reheat beautifully in the oven at 350°F for 5-7 minutes—just cover with foil to keep them from drying out. Freeze unfried sopapillas for up to 3 months—fry straight from frozen, no thawing needed.
Why You'll Love This Recipe
- Pantry-Friendly Magic: I swear by this recipe when I forget to meal prep—just flour, butter, sugar, and yeast. No fancy ingredients, no last-minute grocery runs. The dough comes together faster than you can say "sopapilla," and honestly? That buttery, pillowy texture feels like a hug after a long day.
- Sweet-Savory Crunch: The outside gets crispy and golden, while the inside stays soft and gooey—like a cross between a cinnamon roll and a cheesy puff. Between us, the beef filling (if you add it) turns this into something dangerously addictive. One bite and you’ll understand why I keep making it.
- Weeknight Crowd-Pleaser: This feeds a family of four (or a hungry roommate) without stress. Serve it warm with honey or syrup for breakfast, or pack leftovers for lunch—trust me, no one will complain. It’s my go-to when I need something reliable that tastes like love.
- Budget Stretch Star: Flour, butter, and sugar are cheap staples, and a single batch stretches across meals. I’ll be real: my kids ask for seconds, and I’ve reheated these for days without losing that perfect crisp. It’s the kind of recipe that makes grocery money go further while still feeling special.
Step-by-step instructions for beef and cheese sopapilla
Here's how to make these irresistible crispy bites with a savory beef filling and gooey cheese center.
Prepare the Beef Filling
In a large skillet over medium-high heat, cook the 1 lb ground beef until it loses its raw color and begins to brown. I like to break it up with a wooden spoon to ensure even cooking. Once browned, drain any excess fat but leave about 1 tablespoon in the pan for flavor.
Add the finely diced 1 whole yellow onion and cook for 3-4 minutes until softened. Stir in the 3 minced garlic cloves, 1 tablespoon chili powder, and 1 teaspoon ground cumin, cooking for another 1 minute until fragrant. Remove from heat and let cool slightly—this filling needs to be room temperature when mixed with the dough.
Make the Dough and Shape the Sopapillas
In a large mixing bowl, combine the 3 cups all-purpose flour, 1 teaspoon instant yeast, and ½ teaspoon salt. Cut in the ½ cup cold cubed unsalted butter using a pastry cutter or your fingers until the mixture resembles coarse crumbs. Add the 1 tablespoon granulated sugar and mix until just combined.
Gradually add ½ cup warm water (about 110°F) while mixing with a wooden spoon until the dough comes together. Turn it out onto a lightly floured surface and knead for 3-4 minutes until smooth. Divide the dough into 8 equal pieces and roll each into a 6-inch circle, about ¼-inch thick. Keep them covered while you prep the filling.
Assemble and Deep-Fry the Sopapillas
Fill each rolled dough circle with 2 tablespoons of the beef mixture, then fold the edges toward the center to create a half-moon shape. Seal the edges by pinching lightly with your fingers. Place the assembled sopapillas on a floured tray, spacing them 1 inch apart—they'll expand during frying.
Heat 3 cups vegetable oil in a deep fryer or heavy pot to 350°F. Fry the sopapillas 2 at a time for 2-3 minutes per side until golden brown and puffed. Drain on paper towels and immediately fill each with ¼ cup shredded sharp cheddar cheese. Return to the fryer for 10-15 seconds to melt the cheese—watch closely so it doesn't over-brown.
Serve with Optional Powdered Sugar
Transfer the sopapillas to a serving platter and dust lightly with the ½ cup powdered sugar if desired. Serve immediately while still warm and crispy. The cheese should be melted and gooey inside, with a perfectly crispy exterior that shatters when you bite in.
For extra fun, serve with a side of sour cream or chili sauce for dipping. These sopapillas are best enjoyed fresh out of the fryer—every bite delivers that magical contrast of crispy dough, savory beef, and melty cheese!
Pro Tips For Making Beef And Cheese Sopapilla
- Use Warm Butter: Instant yeast needs warmth to activate—don’t skip melting the butter first. Cold butter slows fermentation, and you’ll end up with dense, chewy sopapillas instead of light, pillowy ones. Let that butter sit in the bowl for 5 minutes before mixing.
- Salt the Dough Early: Dissolve the salt in the warm butter-water mix before adding yeast. I learned this the hard way—salting after mixing can kill the yeast, leaving you with flat, flavorless dough. Trust me, it makes a real difference.
- Don’t Overproof the Dough: Sopapillas need just enough time to rise—about 45 minutes until puffy, not until it’s doubled. Overproofing makes them collapse when fried, and nobody wants a sad, flat sopapilla. Keep an eye on it.
- Fry in Small Batches: Crowding the pan drops the oil temperature, leading to greasy, unevenly cooked sopapillas. Work in batches of 3-4 at a time, and keep the oil at 350°F—any hotter, and they’ll burn before the cheese melts. Patience here pays off.
Pro cooking tips for this recipe
Dough Perfection
Cold butter is your secret weapon for flaky, crispy sopapillas. Cube ½ cup unsalted butter and chill it for 20 minutes before cutting into the dough. I like to use Land O'Lakes or Plugrá for reliable results. The dough should be soft but not sticky—add 1 tablespoon cold water if needed. Roll each piece to exactly ¼-inch thickness for even cooking. 🧈
For extra flakiness, fold the dough like a letter before rolling it out. This creates thin layers that crisp beautifully. Keep unused dough covered with a damp towel while you work to prevent drying. The dough can be made 24 hours ahead and refrigerated for even better flavor development.
Beef Filling Mastery
Use an 80/20 fat ratio ground beef—the extra fat keeps the filling juicy during frying. I like to brown the beef in batches to avoid steaming. Drain most of the fat but leave 1 tablespoon in the pan for flavor. For deeper flavor, toast the cumin in the dry pan for 30 seconds before adding the onion. 🌶️
Let the beef filling cool completely before assembling. Warm filling makes the dough soggy. For extra richness, stir in 1 tablespoon beef broth with the spices. This helps balance the heat from the chili powder while keeping the filling moist. The filling should be room temperature when you mix it with the dough.
Frying Techniques
Use a deep-fry thermometer to maintain 350°F oil temperature—this is critical for even cooking. I recommend Presto 02811 for accuracy. Fry 2 sopapillas at a time to avoid dropping the oil temperature. They're done when golden brown and puffed—about 2-3 minutes per side. 🔥
For the cheese step, use sharp cheddar that melts smoothly. I like Kraft Natural or Monterey Jack for best results. Return the sopapillas to the fryer for just 10-15 seconds—watch closely to prevent burning. The cheese should be fully melted but the exterior still crisp.
Oven Alternative
For a lighter version, brush the assembled sopapillas with 1 tablespoon olive oil and bake at 375°F for 12-15 minutes until golden. The cheese will melt but won't get quite as gooey. Spritz with water mist halfway through for extra crispiness. 💡
Baked sopapillas stay crispy for about 10 minutes after coming out of the oven. For best results, serve immediately with extra cheese on top. This method uses 90% less oil while still delivering great flavor and texture.
Nutrition facts
Frequently asked questions
Can I make the beef filling ahead of time?
Yes, you can prep the beef filling up to 3 days in advance and store it in an airtight container in the fridge. Just make sure it's completely cooled before refrigerating to prevent soggy dough. Reheat gently in a skillet before assembling the sopapillas for best results.
What's the best way to keep the sopapillas crispy?
Fry them in small batches to maintain 350°F oil temperature—overcrowding lowers the heat and makes them greasy. For oven-baked versions, brush with oil and bake at 375°F for 12-15 minutes, then serve immediately. Keep them warm in a 200°F oven if holding for a crowd.
Can I substitute the beef with another protein?
Try ground turkey (use 93% lean for juiciness) or shredded chicken (season with extra spices). For a vegetarian option, use crumbled sausage or mushrooms sautéed with the same spices. Just ensure your filling is room temperature before assembling.
Why did my sopapillas turn out dense instead of crispy?
Overworking the dough or using warm butter can make them dense. Roll each piece to exactly ¼-inch thickness and keep the dough chilled. Also, ensure your oil is at 350°F—too low a temperature causes greasy, dense results. If using the oven, brush with oil and bake on the middle rack.
How do I make these sopapillas gluten-free?
Replace the all-purpose flour with a 1:1 gluten-free baking flour blend (like Bob's Red Mill or King Arthur). Add ½ teaspoon xanthan gum to improve texture. The dough may be slightly stickier, so use extra flour when rolling. For frying, maintain the same oil temperature and cooking time.