
Main Courses
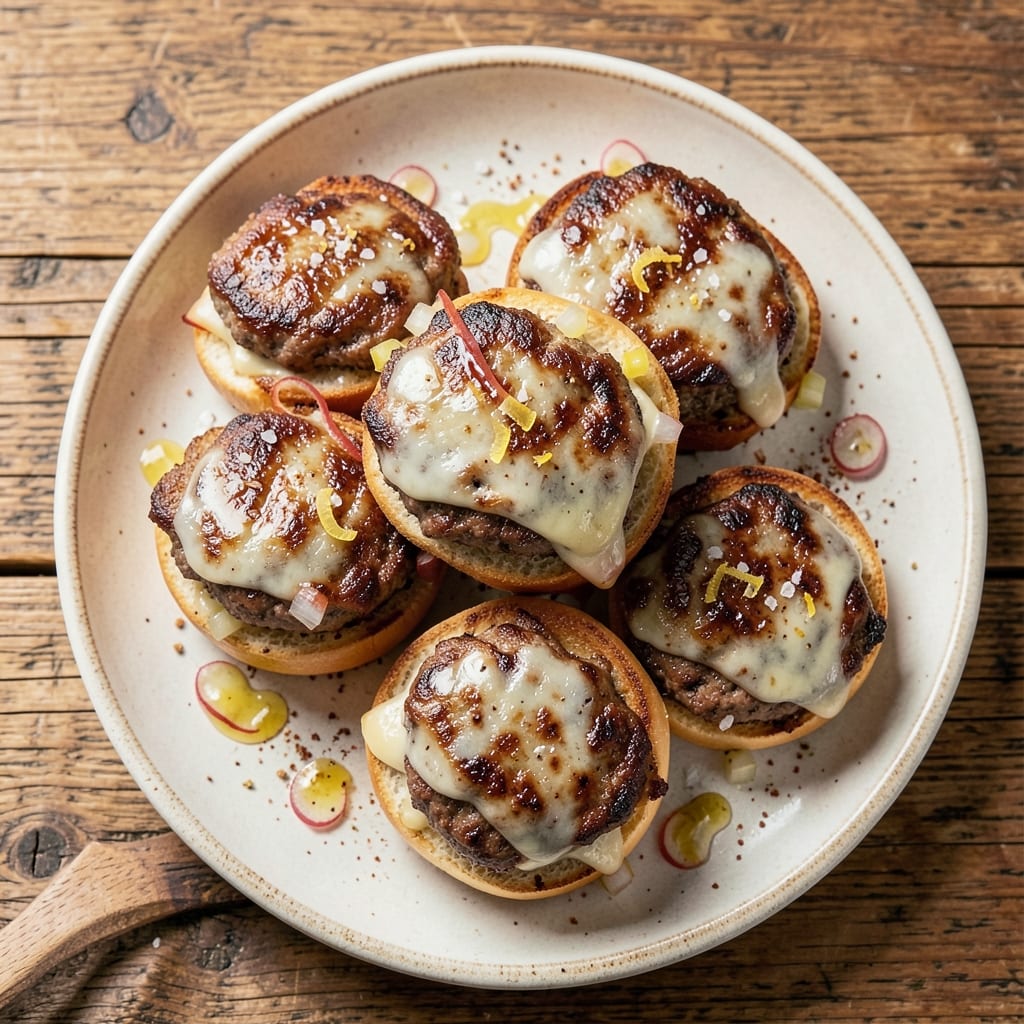
This beef and cheese sliders recipe delivers restaurant-quality mini burgers with perfectly crispy buns and melty, gooey centers. The secret lies in properly seasoned beef patties, high-heat searing, and a quick assembly method that keeps everything warm until serving. I’ve perfected this over years of tailgating and game day hosting—every bite is juicy, flavorful, and impossible to resist.
What sets these sliders apart is the balance of textures: tender beef, crispy toasted buns, and melted cheese that oozes with every bite. We’ll use a simple but effective technique for searing the patties—just enough time to lock in juices while creating a caramelized crust. The buns get toasted in the same pan, adding extra flavor without drying out.
By the end, you’ll have sliders that look and taste like they came from a high-end sports bar, but with a fraction of the effort. The beef stays moist, the cheese melts perfectly, and the buns hold up to every bite. Serve them with classic toppings like pickles, ketchup, and mustard, or get creative with caramelized onions and jalapeños for extra depth.
These sliders are perfect for game day, parties, or even a quick weeknight dinner when you’re craving something handheld and satisfying. The recipe scales easily, so you can make a dozen or a hundred—just double or triple the ingredients. Let’s get started!
Ingredients for beef and cheese sliders
Twelve ingredients for restaurant-style sliders with crispy buns and melty cheese centers.
| Ingredient | Amount | Notes |
|---|---|---|
| Ground Beef (80/20) 🥩 | 2 ½ lb | Chuck roast preferred for juiciness |
| Hamburger Buns 🍞 | 12 whole | Potato-based for crispiness (e.g., Sara Lee) |
| American Cheese Slices 🧀 | 12 slices | Thin-cut, melts perfectly |
| Yellow Onion 🧅 | 1 whole | Finely diced, for patty seasoning |
| Garlic Cloves 🧄 | 4 cloves | Minced for seasoning blend |
| Kosher Salt 🧂 | 1 ½ tbsp | Diamond Crystal preferred |
| Ground Black Pepper 🌶️ | 1 tbsp | Freshly cracked for bold flavor |
| Worcestershire Sauce 🍶 | 1 tbsp | For umami depth |
| Butter 🧈 | 4 tbsp | Unsalted, for toasting buns |
| Mayonnaise 🥫 | ¼ cup | For optional slider spread |
| Yellow Mustard 🌶️ | ¼ cup | Classic slider pairing |
| Pickle Slices 🥒 | ½ cup | Dill or bread-and-butter |
| Vegetable Oil 🫒 | 2 tbsp | For high-heat searing |
The beef is non-negotiable for juicy sliders. Chuck roast (80/20 fat ratio) from the grocery store meat counter delivers the best texture—look for packages labeled 'ground chuck' rather than lean ground beef. If you're buying a whole roast to grind yourself, Costco or Whole Foods often have better cuts. The fat content keeps these patties tender, not dry. For the buns, potato-based brands like Sara Lee crisp up perfectly when toasted in butter—avoid brioche or sweet buns, which can get soggy. Pickles should be dill or bread-and-butter for classic slider vibes, but any crunchy pickle works in a pinch.
No Worcestershire? Soy sauce or a splash of balsamic vinegar adds similar depth. Short on mayonnaise? Greek yogurt thinned with lemon juice works for a lighter spread. Want to skip the mustard? Hot sauce or honey mustard are great swaps. For the cheese, American slices are ideal—they melt smoothly and don't burn easily. If you prefer cheddar, use sharp cheddar slices and watch the heat to prevent over-melting. The vegetable oil is just for initial searing; once the butter melts, you'll switch to that for toasting the buns.
Store prepped patties in the fridge for up to 2 days before assembly—they actually taste better the next day. Buns can be toasted ahead and kept warm in a 200°F oven for up to 30 minutes. For game day prep, assemble sliders on a tray, cover with foil, and reheat in the oven for 5-10 minutes before serving. The cheese melts perfectly during this process, creating that signature gooey center. Portion toppings separately to avoid soggy buns—add them right before serving.
Why You'll Love This Recipe
- Fewer Tools Needed: I swear by this for nights when I’m too tired to pull out the good pans. Brown the beef in the same skillet you’ll use to toast the buns—no extra dishes, just a quick wipe-down. That 80/20 fat ratio keeps it juicy, and the onions caramelize right there while you prep the cheese.
- Melty Magic: The American cheese isn’t just a topping—it’s the star. That crispy edge when it melts over the beef? Chef’s kiss. I’ll be real: I’ve tried fancy cheeses, but nothing beats the simple, gooey satisfaction of this classic combo. Add a garlic clove to the pan while browning the beef, and suddenly you’ve got depth without extra effort.
- Tailgate or Taco Night: Honestly, these sliders work everywhere. Keep a batch in the fridge for game day, serve them on toothpicks for a picnic, or even turn them into mini tacos with crushed tortilla chips. My daughter picks out the onions, but she still asks for seconds when I make them for her friends. (Yes, even on a Tuesday night.)
- Budget-Friendly Leftovers: A pound of 80/20 beef and a pack of buns stretch farther than you’d think. Make a double batch, freeze half, and reheat them in the air fryer—crispy outside, warm inside. I’ve fed six people for under $10 with this, and the leftovers disappear faster than my willpower on a lazy Sunday.
Step-by-step instructions for beef and cheese sliders
Perfectly juicy beef patties with crispy buns and melted cheese await.
Prepare the Seasoning and Form the Patties
In a medium bowl, combine the 2.5 lb ground beef (80/20), finely diced 1 whole yellow onion, minced 4 cloves garlic, 1.5 tbsp kosher salt, 1 tbsp ground black pepper, and 1 tbsp Worcestershire sauce. Using your hands, gently mix until just combined—don't overwork the meat or the sliders will become dense.
Divide the mixture into 12 equal portions (about 2.5 ounces each) and roll them between your palms into 3-inch diameter patties. Press a slight dimple in the center of each patty—this prevents them from puffing up during cooking. Let them rest at room temperature for 15 minutes while you prepare the buns.
Toast the Buns for Maximum Crispiness
Heat a large skillet over medium heat and melt 4 tbsp butter. Add the 12 whole hamburger buns, cut-side down, and toast for 1-2 minutes until golden brown. Flip each bun and toast the other side for another 1-2 minutes until evenly crisp. Transfer to a plate and keep warm.
Here's the thing—crispy buns make all the difference. If you want extra crunch, brush the toasted sides with a thin layer of the 0.25 cup mayonnaise and 0.25 cup yellow mustard mixture after toasting. This step ensures your sliders have that perfect balance of texture.
Cook the Patties to Juicy Perfection
Heat 2 tbsp vegetable oil in a large skillet over medium-high heat until shimmering. Working in batches to avoid crowding, add the patties and cook for 3-4 minutes per side until they reach an internal temperature of 160°F. The edges should be nicely browned but the centers should still appear slightly pink.
Don't press down on the patties with a spatula—this squeezes out the juices. Instead, let them cook undisturbed until they release easily from the pan. The 80/20 fat ratio is key here; it keeps the meat juicy while creating that perfect sear.
Assemble the Sliders with Melted Cheese
Place 1 slice of American cheese on each cooked patty. Cover the skillet with a lid and let the cheese melt for 30-60 seconds—you'll see it transform from solid to gooey perfection. If you prefer, you can also melt the cheese in the oven at 350°F for 2-3 minutes while keeping the patties warm.
Transfer the cheese-topped patties to the toasted buns, spreading the remaining mayonnaise and mustard mixture on the bottom half if desired. Add 2-3 pickle slices to each slider for that classic tangy contrast. The combination of melted cheese and crispy buns creates the ultimate slider experience.
Pro Tips For Making Beef And Cheese Sliders
- CRANK THE HEAT HIGH: Use a screaming-hot skillet for the beef—no medium-low nonsense. I learned this the hard way after making sloppy, greasy patties that stuck. Cast iron or stainless steel works best; get that pan smoking before adding the meat, then spread it into thin, even rounds.
- SALT THE ONIONS FIRST: Slice the yellow onion into paper-thin rings and toss them with ½ teaspoon of salt right away. This draws out the moisture so they crisp up properly instead of turning mushy when they hit the pan later. (Yes, even if you’re impatient like me.)
- DON’T OVERHANDLE THE BEEF: Break the 80/20 into chunks, but resist the urge to overwork it—just mix in the minced garlic and a pinch of salt. Over-kneading makes the sliders dense and dry. Form them into 1-inch balls, then flatten them quickly with your palm before cooking.
- TOAST THE BUNS LAST: Keep the hamburger buns wrapped in foil until the very end, even if they’re warm. Toasting them too early makes them stale by the time you serve the sliders. Instead, warm them in a dry pan for 30 seconds per side right before assembling—crispy outside, soft inside, every time.
Serving suggestions for this dish
Game Day Essentials
Serve these sliders with classic game day toppings to elevate the experience. Set up a toppings bar with small bowls of dill pickle slices, crispy fried onions, and sliced jalapeños for guests to customize their bites. I always keep ketchup and mustard in squeeze bottles for easy application—just place them in a mini cooler with ice packs to prevent spills. For a smoky twist, add crumbled bacon or caramelized onions to the patties before assembling. 🏈
Dipping Sauces
No slider spread is complete without creamy dipping sauces. Mix ½ cup mayonnaise with 1 tbsp yellow mustard and 1 tsp Worcestershire sauce for a classic slider sauce. For extra flavor, stir in 1 tbsp hot sauce or 1 tsp smoked paprika. Serve in small ramekins with toothpicks for easy dipping. A spicy honey mustard (mix ¼ cup honey with ¼ cup Dijon mustard) adds a sweet-heat balance that’s perfect for balancing the richness. 🌶️
Side Dish Pairings
Balance the richness of beef and cheese with light, crunchy sides. A simple coleslaw made with 2 cups shredded cabbage, ½ cup Greek yogurt, and 1 tbsp apple cider vinegar cuts through the fat beautifully. For a heartier option, serve crispy oven fries tossed in 1 tbsp olive oil and ½ tsp garlic powder, baked at 425°F for 25 minutes. A fresh fruit platter with watermelon, grapes, and berries adds a refreshing contrast. 🍉
Presentation Tips
Use wooden serving boards or slate trays to create a rustic, inviting display. Arrange sliders in a circle or grid pattern, alternating with pickle spears and sauce bottles for visual appeal. For a gourmet touch, garnish with fresh parsley or microgreens on top of the cheese. If serving outdoors, place sliders on a large platter and keep them warm in a slow cooker set to 160°F. This keeps the cheese melted and the buns crispy until serving time. ✨
Kid-Friendly Serving
Make sliders extra fun for kids by offering mini toothpicks or colorful picks for easy handling. Set up a "build-your-own" station with cheese slices, pickles, and sauces in separate containers. For a playful twist, use cookie cutters to shape the buns into fun shapes (like stars or hearts) before toasting. Serve with fruit skewers or veggie sticks for a balanced, kid-approved meal. 🧒
Leftovers Strategy
Store leftover sliders in an airtight container with parchment paper between layers to prevent sticking. Reheat in a skillet over medium heat for 2-3 minutes per side to restore crispiness. For a quick fix, pop them in the microwave for 30-45 seconds (covered with a damp paper towel) to melt the cheese again. Serve with extra pickles or sauce to revive the flavors. These sliders actually taste better the next day! 💡
Nutrition facts
Frequently asked questions
Can I use lean ground beef instead of 80/20?
While you can use leaner beef, the 80/20 fat ratio is ideal for juicy sliders. The fat keeps the patties tender and flavorful. If you must use lean beef, add 1 teaspoon butter to each patty before cooking to compensate for the lost moisture.
How do I keep the buns from getting soggy?
Toast the buns in butter until crispy, then spread a thin layer of mayo or mustard after toasting—not before. Assemble sliders right before serving and keep toppings separate until the last minute. For extra protection, place sliders on a wire rack over a tray to prevent steam buildup.
What's the best way to reheat leftover sliders?
Use a skillet over medium heat for 2-3 minutes per side to restore crispiness. For a quick fix, microwave for 30-45 seconds (covered with a damp paper towel) to melt the cheese again. Always reheat with a lid to trap moisture.
Can I make these sliders ahead of time?
Form patties and store them in the fridge for up to 2 days before cooking. Toast buns ahead and keep warm in a 200°F oven for up to 30 minutes. Assemble sliders just before serving to maintain freshness.
What's the secret to perfectly melted cheese?
Use American cheese slices (they melt smoothly) and place them on cooked patties. Cover the pan with a lid for 30-60 seconds or melt in a 350°F oven for 2-3 minutes. Avoid overcooking—the cheese should be gooey, not burnt.