
Main Courses
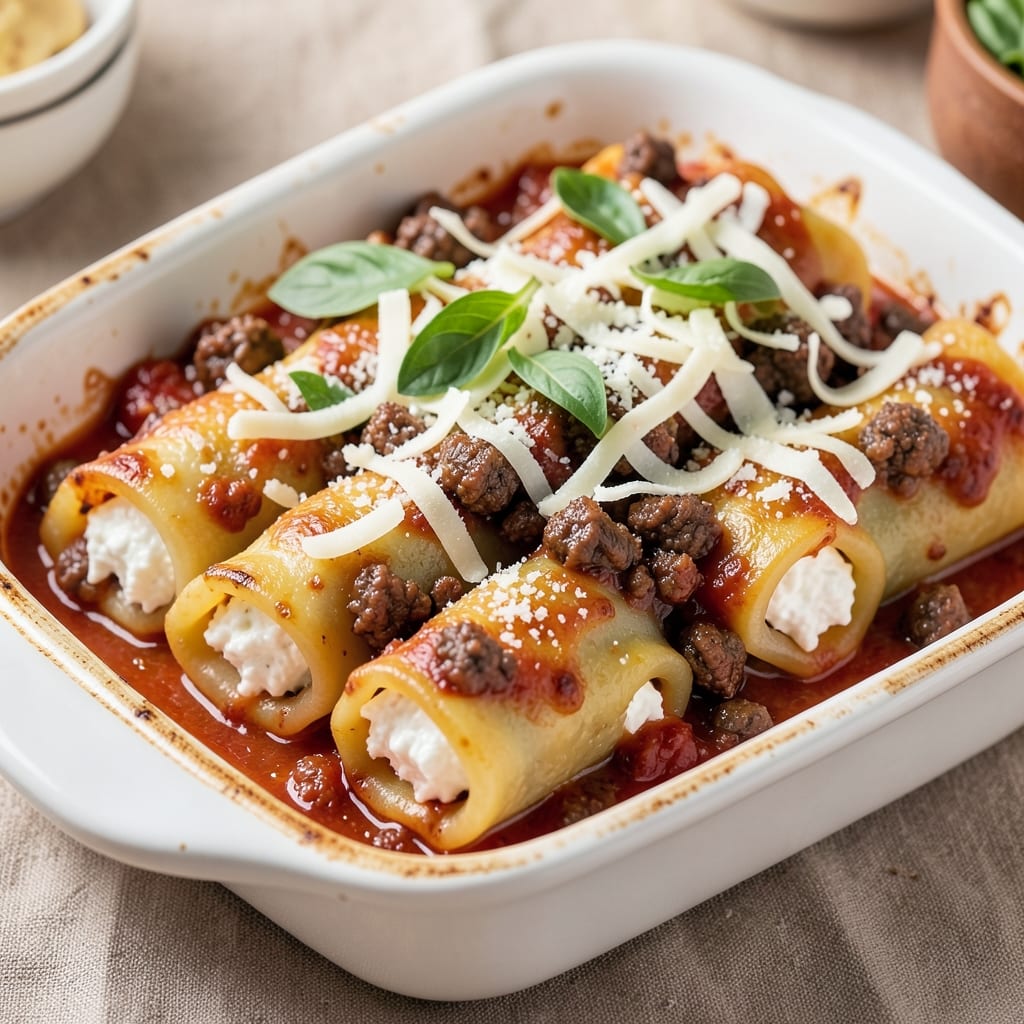
This beef and cheese manicotti recipe delivers the ultimate comfort food experience—crispy golden edges, layers of melted mozzarella, and a rich beef filling that transforms weeknight dinners into restaurant-quality meals. 💛 The secret lies in properly assembling the shells with a perfect cheese blend and baking them until the top is perfectly browned and bubbly.
What sets this recipe apart is the combination of traditional Italian techniques with modern shortcuts—like using store-bought pasta shells for convenience without sacrificing authenticity. The beef filling is seasoned just right, ensuring tender meat that stays juicy while the cheese layers melt into a creamy, stretchy blanket between each shell.
By the time you pull this dish from the oven, you'll have a crispy top that shatters slightly with each bite, revealing gooey cheese and savory beef filling underneath. The aroma alone will have everyone gathering around the table, and the presentation—whether plated or served family-style—makes it feel like a special occasion.
Pair with a simple tomato sauce or marinara for dipping, and don't forget fresh basil or grated parmesan for garnish. This recipe is designed to impress, whether you're feeding a crowd or treating yourself to a cozy Sunday dinner. Let's get started!
Ingredients for beef and cheese manicotti
Six servings of restaurant-quality manicotti—crispy edges, melty cheese layers, and savory beef filling.
| Ingredient | Amount | Notes |
|---|---|---|
| Ground Beef 🥩 | 1 ½ lb | 80% lean, finely ground |
| Yellow Onion 🧅 | 1 whole | Medium size, finely chopped |
| Garlic Cloves 🧄 | 4 cloves | Fresh, minced |
| Canned Tomato Sauce 🍅 | 1 ½ cups | San Marzano preferred |
| Whole Milk Ricotta Cheese 🧀 | 15 oz | Full-fat for creaminess |
| Mozzarella Cheese 🧀 | 2 cups | Fresh, shredded |
| Parmesan Cheese 🧀 | 1 cup | Freshly grated |
| Large Eggs 🥚 | 2 whole | Room temperature |
| All-Purpose Flour 🌾 | ½ cup | For binding ricotta |
| Dried Basil 🌿 | 1 tbsp | Or 1 tbsp fresh |
| Ground Black Pepper 🌶️ | ½ tsp | Freshly cracked |
| Salt 🧂 | 1 ½ tsp | Kosher or sea salt |
| Unbaked Manicotti Shells 🍝 | 12 whole | Large size preferred |
| Extra-Virgin Olive Oil 🫒 | 2 tbsp | For crispy top |
| Marinara Sauce 🍅 | 3 cups | For serving |
The beef is non-negotiable here—80% lean ground chuck gives you that perfect balance of flavor and tenderness. Costco or butcher shops usually have the best quality, but any grocery store's pre-ground works in a pinch. For the garlic, freshly minced makes all the difference—don't use the jarred stuff. The ricotta needs to be full-fat for that creamy texture, and Trader Joe's often has the best-priced tubs. If you're feeling fancy, grab a wedge of Parmesan to grate yourself—pre-grated gets clumpy and lacks that sharp flavor.
No ricotta? Cottage cheese blended smooth works in a bind, though it won't be as creamy. Fresh basil unavailable? Dried basil at half the amount gets you close. For the manicotti shells, store-bought is fine—no need to make fresh pasta unless you're committed. The marinara can be jarred (I like Rao's) or homemade—just make sure it's not too watery. If your tomato sauce is thin, simmer it down first. The mozzarella should be fresh—low-moisture shredded from a block works too, but avoid the pre-shredded kind with anti-caking agents.
Assemble the manicotti ahead of time and refrigerate for up to 24 hours—this helps the cheese set better. Bake straight from the fridge for that perfect crispy top. Leftovers reheat beautifully—cover with foil and warm in the oven at 350°F (175°C) for 10-15 minutes. For make-ahead dinners, assemble and freeze unbaked—just add 10 minutes to baking time. The cheese layers stay gooey when reheated properly, so don't skip the foil step.
Why You'll Love This Recipe
- No-Fuss Assembly: I swear by this recipe because it’s the kind of dish where you can actually multitask. Brown the ground beef and onions in one pan while you boil the noodles—no juggling three pots or last-minute scrambling. Honestly, the ricotta filling comes together in five minutes with a fork, and the sauce? Just dump, stir, and let it simmer. That’s it.
- Rich, Meat-Packed Comfort: Between us, this isn’t your average veggie manicotti. The ground beef gives it a hearty, savory depth that pairs perfectly with the creamy ricotta—like a hug in pasta form. The garlic and tomato sauce add just enough brightness to cut through the richness, so it’s never heavy. (Yes, even on a Tuesday night.)
- Leftovers That Don’t Suck: I make a double batch because reheating this is chef’s kiss—the cheese doesn’t turn rubbery, and the layers stay intact. Pack it for lunches or freeze portions for those nights when you’d rather binge a show than cook. Pro tip: The next day, a quick broil with extra cheese on top makes it feel like a whole new dish.
- Budget-Friendly Crowd Pleaser: Ground beef and canned sauce keep costs low, but the ricotta and mozzarella make it feel special. It feeds six for under $15, and everyone—kids included—will ask for seconds. (My daughter picks out the onions, but still devours hers.) Plus, the ingredients are pantry staples, so you’re not scrambling for obscure items.
Step-by-step instructions for beef and cheese manicotti
Master the art of layered, crisp-topped manicotti with this foolproof method.
👨🍳 Step 1: Brown the Beef and Sauté Aromatics
Heat 2 tablespoons extra-virgin olive oil in a large skillet over medium-high heat. Add the 1.5 lb ground beef and cook, breaking it apart with a wooden spoon, until it loses its raw color and begins to brown—about 5-6 minutes. This step develops deep flavor through the Maillard reaction.
Drain excess fat, leaving about 1 tablespoon in the pan. Add the 1 whole yellow onion and 4 cloves garlic cloves, cooking for 3-4 minutes until softened and fragrant. Stir in 1.5 cups canned tomato sauce, 1 tbsp dried basil, 0.5 tsp ground black pepper, and 1.5 tsp salt, simmering for 5 minutes until slightly thickened. Let cool completely before mixing with the cheese filling.
🥘 Step 2: Prepare the Cheese Filling
In a large mixing bowl, combine the cooled beef mixture with 15 oz whole milk ricotta cheese, 2 cups mozzarella cheese, 1 cup parmesan cheese, 2 whole large eggs, and 0.5 cup all-purpose flour. Mix gently with a rubber spatula until just combined—overmixing develops gluten and makes the filling tough.
Here's the thing—this filling needs to be thick but pipeable. If it's too loose, refrigerate for 15 minutes to firm up. The mixture should hold its shape when dropped from a spoon but still be spreadable. Taste and adjust seasoning if needed—this is your last chance before assembly.
🔥 Step 3: Assemble and Bake the Manicotti
Preheat your oven to 375°F. Spread 1 cup marinara sauce evenly in a 9x13-inch baking dish. Working quickly, fill each of the 12 unbaked manicotti shells with about ¼ cup of the cheese mixture, then place them seam-side up in the dish. Spoon remaining sauce over the top, then sprinkle with any remaining mozzarella.
Drizzle 2 tablespoons extra-virgin olive oil evenly over the top—this creates that coveted crispy crust. Bake uncovered for 25-30 minutes until the edges are golden brown and the cheese is bubbling. The oil helps form a crispy lattice on top while keeping the pasta tender.
⏰ Step 4: Rest and Serve for Maximum Enjoyment
Remove from the oven and let rest for 10 minutes before serving. This resting period allows the layers to set and prevents a runny filling. The top should be crispy enough to crackle, with melted cheese peeking through.
Serve with the remaining 2 cups marinara sauce on the side. Each bite should deliver tender pasta, rich beef flavor, and layers of melted cheese with that perfect crispy top. For extra presentation, garnish with fresh basil leaves and additional grated parmesan.
Pro Tips For Making Beef And Cheese Manicotti
- Cook the beef low and slow: I used to blast the ground beef on high heat and end up with a dry, rubbery filling—no one wants that. Instead, keep the heat at medium-low and let it simmer for 8-10 minutes until it’s fully browned but still moist. The onions and garlic will caramelize properly, and the sauce will absorb better later.
- Drain and squeeze the ricotta: Store-bought ricotta is watery, and no one wants a soggy manicotti. After mixing it with the egg and Parmesan, spread it on a paper towel, cover it with another, and gently press down for 5-10 minutes. This removes excess moisture without making the filling dense—trust me, your layers will thank you.
- Pre-bake the noodles briefly: Skipping this step is how you end up with a waterlogged casserole. After assembling the manicotti, bake it uncovered at 375°F (190°C) for 10 minutes. The noodles will firm up, and the cheese won’t leak out when you add the sauce later. (Yes, even if you’re impatient like me.)
- Use a mix of mozzarella and Parmesan: All mozzarella makes the filling too stretchy, and all Parmesan makes it dry. Split the cheese—about 70% shredded mozzarella (for meltiness) and 30% finely grated Parmesan (for flavor and structure). Sprinkle the Parmesan last before baking so it gets that perfect golden crust.
Pro cooking tips for this recipe
Cheese Filling Mastery
The ricotta-egg-cheese blend is where the magic happens. I always mix the 15 oz ricotta with 2 eggs and ½ cup flour first—this creates a stable base before adding the heavier cheeses. For extra creaminess, I fold in 2 cups mozzarella and 1 cup parmesan gently with a spatula, keeping the mixture smooth but thick. If the filling feels too loose, pop it in the fridge for 15 minutes to firm up before assembly. 🧀
Beef Browning Secrets
Never skip browning the beef—this step builds deep flavor through the Maillard reaction. I use 80% lean ground chuck because it browns beautifully while staying tender. Cook it in batches if needed to avoid steaming. After browning, drain all but 1 tablespoon fat—this prevents a greasy filling. The aromatics (onion and garlic) should cook until soft but never browned, or they'll turn bitter. 🥩
Crispy Top Technique
The golden, crackly top is all about the olive oil drizzle. After assembling the manicotti, spread 2 tablespoons extra-virgin olive oil evenly over the top—this creates a crispy lattice effect. Bake uncovered at 375°F for 25-30 minutes until edges are golden. For extra crunch, broil for 1-2 minutes at the end, but watch closely to avoid burning. 🔥
Assembly Pro Tips
Work quickly when filling the shells—ricotta filling can get messy! I like to pipe the mixture into the shells using a spoon or piping bag for even distribution. Place them seam-side up in the baking dish to prevent leaks. For extra insurance, press a small piece of mozzarella over each filled shell before adding sauce. This keeps the filling contained during baking. 🍝
Sauce Layering
Spread 1 cup marinara sauce on the bottom of your baking dish first—this prevents sticking and adds flavor. After assembling the manicotti, add another layer of sauce on top. For a richer finish, I sometimes mix ½ cup beef sauce (from Step 1) into the top sauce layer. This ties all the flavors together beautifully. 🍅
Resting for Perfection
Never skip the 10-minute rest after baking! This lets the cheese set properly and prevents a runny filling. The crispy top will soften slightly, but the layers will hold together perfectly. Serve with extra marinara for dipping, and garnish with fresh basil or grated parmesan for a restaurant-worthy finish. 💫
Nutrition facts
Frequently asked questions
Can I use store-bought manicotti shells instead of homemade? Store-bought shells work perfectly and save time. Look for large, unbaked shells—they're easier to fill and hold more cheese. Just
Why did my manicotti filling leak out during baking?
Leaking usually happens when the filling is too loose or the shells aren't placed seam-side up. To fix this, chill your filling for 15 minutes before assembling, and press a small piece of mozzarella over each filled shell before adding sauce. This creates a seal that keeps everything contained.
Can I make this recipe ahead of time?
Yes! Assemble the manicotti up to 24 hours ahead and refrigerate. Bake straight from the fridge for the best crispy top. For freezing, assemble unbaked and freeze—just add 10 minutes to baking time when ready to serve. The cheese layers stay gooey when reheated properly.
What's the best way to reheat leftovers?
Cover with foil and warm in the oven at 350°F (175°C) for 10-15 minutes. This keeps the pasta tender and prevents the cheese from drying out. Avoid microwaving—it makes the top soggy and ruins the crispy texture.
Can I substitute ricotta with cottage cheese?
You can, but it won't be as creamy. Blend cottage cheese until smooth to remove lumps, then use it 1:1. For best results, stick with ricotta—it has a higher fat content that creates that perfect melt. If you're in a pinch, adding 1 extra egg helps bind the mixture better.