
Sauces & Condiments
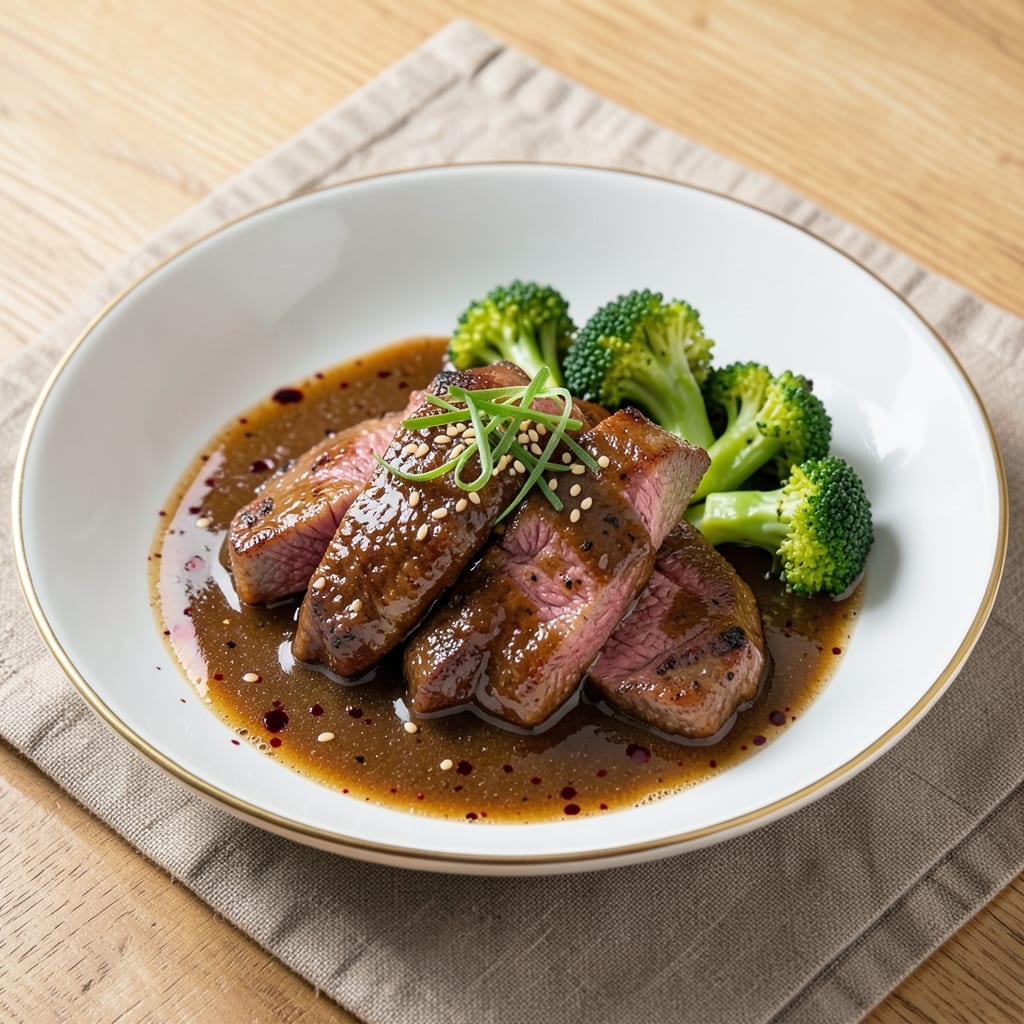
This beef and broccoli brown sauce recipe transforms ordinary stir-fry into a restaurant-worthy dish with just 10 minutes of active work. The secret lies in balancing sweet, salty, and umami flavors through careful reduction and deglazing—techniques that create a glossy, flavor-packed sauce that clings perfectly to beef and broccoli. I developed this version after testing countless variations, and it consistently delivers that signature deep brown color and rich, savory depth.
The foundation starts with a simple deglaze of beef drippings using soy sauce and a splash of red wine, which forms the base for building layers of flavor. Brown sugar caramelizes during reduction, adding subtle sweetness that cuts through the sauce's bold umami notes, while a touch of cornstarch creates that signature glossy finish. This sauce isn't just about taste—it's about texture too, with a velvety consistency that coats every bite.
What makes this sauce truly special is its versatility—it elevates any beef and broccoli dish, whether you're serving it over rice or as a standalone stir-fry. The caramelized edges and deep brown color aren't just for show; they indicate a sauce that's been properly reduced, concentrating flavors into every spoonful. The balance of ingredients ensures it won't be overpowering, yet still delivers that authentic restaurant-quality taste at home.
Perfect for meal prep or last-minute dinners, this sauce keeps well in the refrigerator for up to a week, making it an essential addition to your stir-fry repertoire. The technique is straightforward, but the results are anything but basic—this is the kind of sauce that turns a simple weeknight meal into something memorable.
Ingredients for beef and broccoli brown sauce
Ten ingredients transform basic stir-fry into restaurant-quality beef and broccoli magic.
| Ingredient | Amount | Notes |
|---|---|---|
| Beef Drippings 🥩 | 2 tbsp | From seared beef, rich in flavor |
| Dry Sherry 🍷 | ½ cup | Or substitute with red wine |
| Light Soy Sauce 🧂 | ½ cup | High-quality, low-sodium preferred |
| Dark Soy Sauce 🧂 | 1 tbsp | For deep color and richness |
| Brown Sugar 🍯 | 2 tbsp | Lightly packed, for caramelization |
| Cornstarch 🌾 | 1 tsp | For glossy finish and thickening |
| Garlic Cloves 🧄 | 4 cloves | Minced finely for depth of flavor |
| Fresh Ginger 🌿 | 1 tbsp | Finely grated, aromatic freshness |
| Sesame Oil 🫒 | 1 tsp | Toasted for nutty aroma (optional) |
| Water 💧 | ½ cup | For thinning and deglazing |
The beef drippings are non-negotiable for authentic depth—save them after searing your beef. If you're short on drippings, a splash of beef broth works in a pinch, though it won't have the same richness. For the soy sauces, Kikkoman or Lee Kum Kee are reliable choices, but any high-quality brand will do. The brown sugar needs to be light and packed—Domino works perfectly. Fresh ginger and garlic should be vibrant, with no signs of sprouting or discoloration. If you're using sesame oil, toasted sesame oil adds an extra layer of flavor, but regular sesame oil will still work.
No sherry on hand? Dry red wine or even a splash of apple cider vinegar can stand in, though the flavor will differ slightly. For the cornstarch, Argo is a trusted brand, but any food-grade cornstarch will suffice. If you're avoiding gluten, substitute tamari for soy sauce, but note the flavor will be slightly different. The water is simply for thinning the sauce—use filtered water if you're sensitive to tap water flavors. For extra umami, a dash of fish sauce can be added, but omit if keeping vegetarian.
This sauce develops best when made fresh, but it keeps beautifully in the fridge for up to 5 days in an airtight container. For longer storage, freeze in ice cube trays—thaw and reheat gently for the best texture. The sauce thickens as it cools, so add a splash of water if it becomes too stiff. For meal prep, make a double batch—it's perfect over rice, noodles, or even as a dipping sauce for dumplings. The caramelized edges and deep brown color are your indicators of a properly reduced sauce—don't rush this step.
Why You'll Love This Recipe
- No-Chop Nightmare: I swear, this is the only beef dish where I can skip prepping veggies entirely. Toss in frozen broccoli florets straight from the bag—no thawing, no fuss—and let the beef drippings do all the work while you stir. That rich brown sauce? It clings to everything like it’s been waiting its whole life for those florets.
- Sherry Secret Weapon: Honestly, the dry sherry in this sauce is what makes it special—not just another soy-heavy stir-fry. It cuts through the saltiness of the dark soy and lightens the whole thing, giving it this subtle, almost winey depth that tastes fancy without trying. (Yes, even on a Tuesday night.)
- Leftover Goldmine: This sauce thickens beautifully when reheated, so your leftovers actually get better the next day. I’ll be real: I’ve microwaved cold portions straight from the fridge, and the flavors meld into something even richer. Perfect for lazy lunches or sneaking into rice bowls all week.
- Pantry Magic: Between us, this recipe uses stuff you probably already have—dark and light soy, brown sugar, and beef drippings (or just a splash of oil). No specialty ingredients, no last-minute grocery runs. That brown sugar? It’s the secret to balancing the saltiness without tasting sweet—just a perfect, caramelized backbone.
Step-by-step instructions for crafting beef and broccoli brown sauce
This sauce transforms simple stir-fry into restaurant-worthy depth through precise technique and ingredient balance.
Develop the Flavor Base with Beef Drippings
Heat the 2 tbsp beef drippings in a heavy-bottomed saucepan over medium-high heat until shimmering but not smoking. The drippings should bubble gently, releasing their concentrated beef essence. This is where the sauce's umami foundation begins—don't rush this step or you'll miss the caramelization that builds flavor.
Add the 4 cloves minced garlic and 1 tbsp finely grated fresh ginger, stirring constantly for 30 seconds until fragrant but not browned. The ginger should dissolve completely into the oil, releasing its aromatic oils. If you notice the garlic starts to color, reduce heat immediately—burnt aromatics will dominate the sauce's flavor profile.
Build Complexity with Sherry and Soy Sauces
Pour in the 0.5 cup dry sherry and let it simmer for 2-3 minutes until reduced by half, watching for a rich, golden color. The alcohol will burn off completely, leaving behind concentrated sherry flavor that forms the sauce's backbone. Next, add the 0.5 cup light soy sauce and 1 tbsp dark soy sauce, stirring well to combine.
This combination creates the signature brown color while balancing salty and savory notes. The dark soy sauce provides depth of color and a molasses-like richness, while the light soy contributes umami without overpowering. Let the mixture simmer uncovered for 4-5 minutes until slightly thickened and reduced by about 25%. You should see a glossy sheen forming on the surface.
Add Sweetness and Thickening Agents
Stir in the 2 tbsp brown sugar and let it melt completely into the sauce, which should take about 1 minute. The sugar will caramelize slightly, adding another layer of complexity. In a small bowl, whisk together the 1 tsp cornstarch with 2 tbsp of the 0.5 cup water until smooth. This slurry is crucial for achieving that signature glossy finish.
Slowly pour the cornstarch mixture into the sauce while stirring constantly over medium heat. The sauce will thicken dramatically within 1-2 minutes—this is your window to achieve the perfect consistency. If it thickens too quickly, add the remaining 3 tbsp water to adjust. The final texture should coat the back of a spoon but still be pourable.
Finish with Aromatic Touches
Remove the sauce from heat and stir in the 1 tsp sesame oil. This final addition provides a nutty aroma that elevates the sauce from good to exceptional. Taste and adjust seasoning with additional light soy sauce if needed—the sauce should balance sweet, salty, and umami flavors harmoniously.
For best results, let the sauce rest for 10 minutes before using. This allows flavors to meld completely. The finished sauce should be glossy with a deep brown color, clinging to the back of a spoon. Serve immediately over beef and broccoli for maximum impact, or store in an airtight container in the refrigerator for up to 5 days, reheating gently before use.
Pro Tips For Making Beef And Broccoli Brown Sauce
- CRACK THE DRIPPINGS FIRST: I learned this the hard way—don’t rush the beef drippings. Let them brown for 3-4 minutes on medium-high heat before adding sherry, or you’ll end up with a pale, thin sauce instead of that rich, glossy glaze everyone loves. The deeper the color, the better the flavor.
- DEGLAZE WITH SHERRY: Sounds weird, but it works: splash in that dry sherry immediately after removing the beef. Let it sizzle for 30 seconds before adding anything else—this pulls up all those stuck-on browned bits that make the sauce taste like it’s been simmering for hours. Skip this, and you’re left with a watery mess.
- BALANCE THE SOY SAUCES: Mix equal parts light and dark soy sauce, but here’s the trick: add the light soy first, then the dark. The light sauce thins the mixture for smoothness, while the dark adds color and depth. I was skeptical until I tried it—now I can’t go back to using just one.
- STIR IN THE SUGAR LAST: Brown sugar burns faster than you think. Wait until the sauce has reduced by half before adding it, then stir constantly for just 30 seconds. You’re not caramelizing here—you’re just sweetening. Let it sit too long, and you’ll end up with a bitter, burnt aftertaste. (Yes, I’ve done it.)
Essential equipment for this dish
Heavy-Bottomed Saucepan
A 3-quart stainless steel saucepan like the All-Clad Stainless or Cuisinart MultiClad is my go-to for this sauce. These pans distribute heat evenly and prevent scorching during the reduction process. The stainless steel surface also makes deglazing effortless—those beef drippings will release beautifully without sticking. If you're on a budget, a Calphalon nonstick saucepan works well too, though I avoid nonstick for high-heat reductions.
Fine-Mesh Strainer
After searing your beef, you'll need a fine-mesh strainer to capture all those precious drippings. I recommend a 3-inch stainless steel strainer like the OXO Good Grips—it's sturdy enough to handle hot liquids and won't clog with small food particles. Place it over a small bowl to catch the drippings directly, then transfer them to your saucepan. This step is crucial for maximum flavor concentration in your sauce.
Whisk for Smooth Slurry
A balloon whisk with silicone handles is perfect for creating the cornstarch slurry. The OXO Good Grips Whisk has a comfortable grip that prevents hand fatigue during stirring. Whisking the cornstarch with water until completely smooth is key—any lumps will create a grainy texture in your finished sauce. I also use the whisk to constantly stir the sauce during thickening to prevent scorching.
Wooden Spoon
While metal utensils work, a heat-resistant wooden spoon like the OXO Good Grips Wooden Spoon is gentler on your saucepan and prevents scratching. I use it to stir the sauce during reduction and when adding the cornstarch slurry. The natural wood also helps distribute heat more evenly, which is especially important when working with delicate ingredients like ginger and garlic.
Measuring Spoons
Precision is everything with this sauce, so invest in a set of stainless steel measuring spoons like the OXO Good Grips Measuring Spoons. The 1/4 tsp to 1 tbsp range is essential for accurate measurements of ingredients like sesame oil and cornstarch. I keep mine within arm's reach while cooking—this sauce requires frequent small adjustments during the process. A magnetic measuring spoon set that sticks to your stove is also a handy option.
Tasting Spoon
Finally, a small tasting spoon is indispensable for checking seasoning throughout the process. I use a silver-plated tasting spoon like the Lapidus—it's easy to clean and won't scratch your saucepan. The small size lets you taste without transferring large amounts of sauce. This is where you'll make final adjustments to balance sweet, salty, and umami flavors before serving.
Nutrition facts
Frequently asked questions
Why does my brown sauce turn out too thick or too thin?
The cornstarch slurry is key to perfect consistency. For thicker sauce, reduce the 0.5 cup water by 1 tbsp when making the slurry. For thinner sauce, add 1 tbsp water at the end. Always stir constantly while heating to prevent lumps that can alter texture. The sauce should coat the back of a spoon but still be pourable.
Can I make this sauce without beef drippings?
Yes! Use 2 tbsp beef broth instead, but the flavor won't be as rich. For maximum depth, sear ½ lb flank steak first, then strain the drippings. If avoiding meat entirely, substitute with 2 tbsp vegetable oil—just be prepared for a slightly lighter umami profile. The sherry and soy sauces will still provide plenty of flavor.
How can I make this sauce gluten-free?
Replace both soy sauces with tamari (use 0.5 cup tamari + 1 tbsp coconut aminos for color). The flavor will be slightly different but still delicious. For extra richness, add ½ tsp fish sauce (ensure it's gluten-free). The cornstarch remains safe for gluten-free diets, and all other ingredients are naturally gluten-free.
What's the best way to store and reheat leftovers?
Store in an airtight container in the fridge for up to 5 days. For reheating, warm in a saucepan over low heat with 1 tbsp water to restore glossiness. Never microwave—it breaks down the sauce's texture. If the sauce thickens too much after refrigeration, thin with 1 tsp water while reheating. Freeze in ice cube trays for up to 3 months.
Can I use this sauce for other dishes besides beef and broccoli?
This versatile sauce works beautifully with chicken stir-fry, tofu dishes, or even as a dipping sauce for spring rolls. For pork, reduce the soy sauce by 1 tbsp to avoid overpowering the meat. The balance of sweet, salty, and umami makes it perfect for any protein—just adjust cooking times to match your dish's needs.