
Soups & Stews
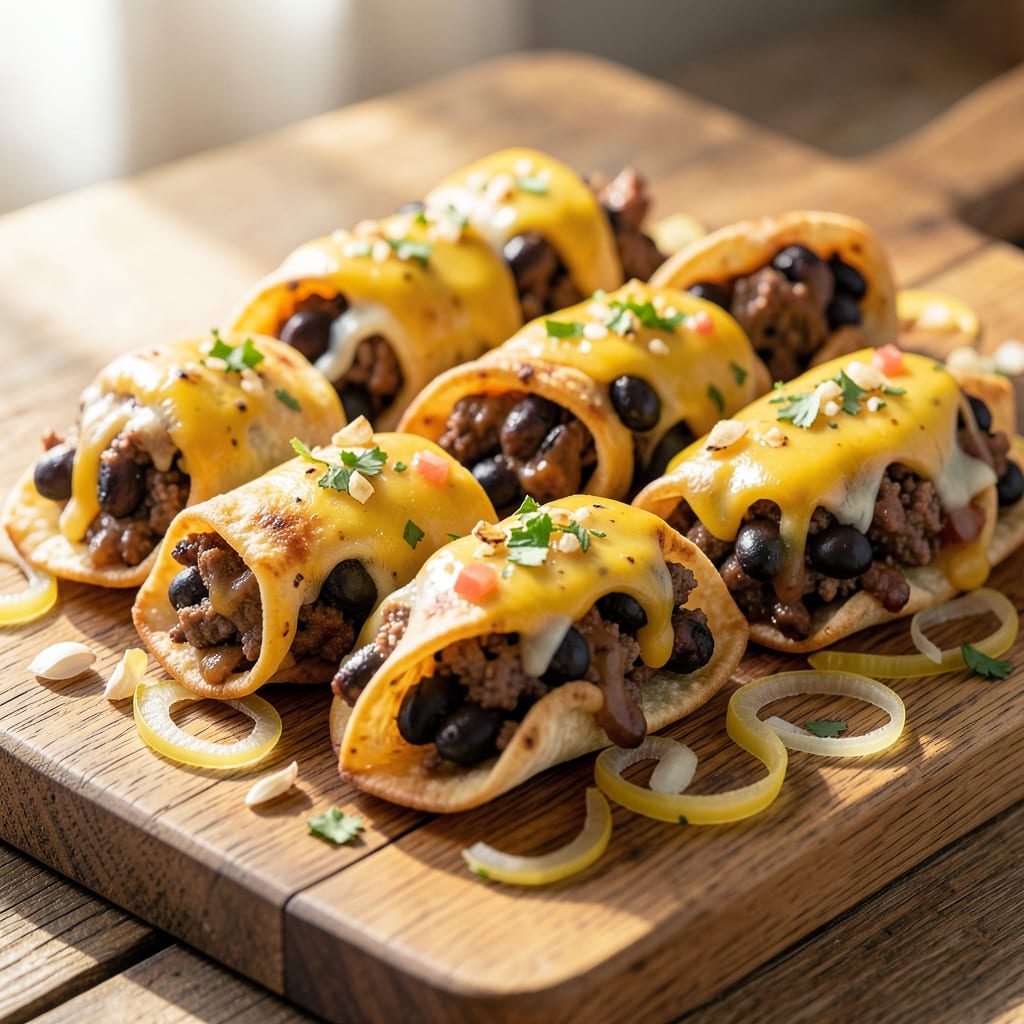
This beef and bean taquitos recipe delivers crispy, golden tortilla wraps stuffed with savory ground beef, hearty beans, and melty cheese—all in under 30 minutes. The secret lies in perfectly rolled taquitos that stay crispy whether fried or baked, creating that irresistible crunch with tender, flavorful fillings inside. I developed this version after testing countless methods to balance texture and taste, ensuring every bite is packed with satisfying layers.
The filling combines ground beef and seasoned beans simmered with spices until rich and aromatic, while the tortillas are lightly brushed with oil for that signature crispy exterior. Whether you're serving these as an appetizer, party snack, or quick weeknight meal, the combination of textures—crunchy shell, tender filling, and gooey cheese—makes them impossible to resist. The best part? You can choose between frying for classic crispiness or baking for a lighter, equally delicious result.
What sets this recipe apart is the foolproof technique for rolling taquitos evenly, ensuring they hold their shape during cooking. The filling stays moist and flavorful while the tortillas achieve that perfect golden-brown finish, whether you're using flour or corn tortillas. Once you try these, you'll never settle for store-bought again—they're restaurant-quality with a homemade touch.
Serve with spicy mayo, salsa, or sour cream for dipping, and watch them disappear at your next gathering. The versatility of this recipe means it works for any occasion, from game day snacks to a quick weeknight dinner. Let's get started on making these crowd-pleasing taquitos!
Ingredients for beef and bean taquitos
These ingredients create crispy, golden taquitos with perfect texture balance between crunchy shells and melty cheese.
| Ingredient | Amount | Notes |
|---|---|---|
| Ground Beef 🥩 | 1 lb | 80/20 fat ratio preferred |
| Canned Black Beans 🌱 | 1 can | Drained and rinsed thoroughly |
| Flour Tortillas 🌯 | 8 whole | Medium or large size, 8-inch |
| Shredded Cheddar Cheese 🧀 | 2 cups | Medium cheddar, freshly shredded |
| Yellow Onion 🧅 | 1 medium | Diced into small pieces |
| Garlic Cloves 🧄 | 3 cloves | Minced for aromatic depth |
| Vegetable Oil 🫒 | ½ cup | For brushing tortillas |
| Taco Seasoning 🌶️ | 2 tbsp | Homemade or store-bought blend |
| Ground Cumin 🌿 | ½ tsp | Enhances earthy flavor |
| Salt 🧂 | 1 tsp | Diamond Crystal preferred |
| Black Pepper 🌶️ | ½ tsp | Freshly ground for heat |
| Sour Cream 🥛 | ¼ cup | For serving, full-fat preferred |
| Spicy Mayo 🍯 | ½ cup | Homemade or store-bought |
The ground beef is non-negotiable for that savory depth—80/20 fat ratio keeps it juicy. Costco or Walmart usually have the best prices for bulk packs. For the beans, low-sodium canned black beans save time, but rinse them well to cut back on sodium. The flour tortillas? Mission brand is my go-to—they're sturdy enough to hold the filling without tearing. If you can't find them, any medium or large flour tortillas work, but avoid corn if you want that classic taquito texture. The cheese matters too—freshly shredded cheddar melts better than pre-shredded, which has anti-caking agents that make it grainy.
No taco seasoning? Mix 1 tbsp chili powder, 1 tsp cumin, 1 tsp paprika, ½ tsp garlic powder, and ½ tsp onion powder for a quick substitute. The onion can be swapped for ½ cup diced bell pepper if you're avoiding onions. Short on time? Pre-cooked ground beef from the deli section works in a pinch, but it's drier. For the spicy mayo, mix ½ cup mayo with 1 tbsp hot sauce—adjust heat to taste. The tortillas should be lightly brushed with oil on both sides before rolling, but don't overdo it or they'll get soggy. And if you're baking instead of frying, spray the oven rack with oil first to prevent sticking.
Store leftover taquitos in an airtight container for 3-4 days—they reheat beautifully in the oven at 375°F for 10-12 minutes. For freezing, lay them flat on a tray before bagging to prevent sticking, and they'll keep for up to 3 months. The filling can be prepped ahead and stored in the fridge for 2 days, making this a great make-ahead appetizer. Pro tip: Double the batch—they disappear fast at parties, and leftovers make amazing lunches the next day.
Why You'll Love This Recipe
- No-Fuss Assembly: I swear by this recipe because it’s the kind of meal that lets you multitask. Brown the beef and onions in one pan, mix in the beans and spices, then just spread and roll—no fancy techniques, just warm tortillas and melted cheese doing the work.
- Cheesy Crunch Magic: That crispy tortilla edge paired with gooey cheddar? It’s what turns this into a crowd-pleaser every time. The black beans add heartiness, but the cheese makes it feel indulgent—like a little Tex-Mex hug in every bite.
- Game for Any Day: Pack these for lunches, toss them in a burrito bowl, or serve them straight from the oven at a game-day spread. They’re my go-to for potlucks too—easy to share, always a hit, and zero stress for the host.
- Budget Meal That Stretches: Ground beef and canned beans? That’s a protein punch for pennies. A single batch feeds four for dinner, and leftovers reheat perfectly—no sad, dry edges. Honestly, it’s my secret for feeding a family without breaking the bank.
Step-by-step instructions for beef and bean taquitos
Here's how to create crispy, cheesy taquitos with perfect texture every time.
Prepare the Filling with Ground Beef and Beans
In a large skillet over medium-high heat, add the 1 lb ground beef and cook until it loses its raw color and begins to brown—about 5-6 minutes. Break it apart with a wooden spoon as it cooks to ensure even browning. This step is crucial for developing deep flavor in your filling.
Once the beef is fully browned, push it to one side of the skillet and add 0.5 cup vegetable oil to the empty space. Toss in the 1 medium yellow onion and 3 minced garlic cloves, cooking for 3-4 minutes until the onion becomes translucent and the garlic releases its aromatic fragrance. Real talk: this aromatic base makes all the difference in flavor.
Drain and rinse the 1 can black beans thoroughly to remove excess sodium. Add them to the skillet with the beef, along with 2 tbsp taco seasoning, 0.5 tsp ground cumin, 1 tsp salt, and 0.5 tsp black pepper. Stir everything together and let it simmer for 3-4 minutes until the flavors meld beautifully. Remove from heat and let it cool slightly—this prevents the tortillas from becoming soggy when filled.
Assemble the Taquitos with Cheese and Filling
Lay out all 8 flour tortillas on a clean work surface. Using a pastry brush, lightly brush each tortilla with a thin layer of the 0.5 cup vegetable oil—this ensures crispiness when frying. I like to focus on the edges and center, leaving about ½ inch uncovered on all sides for easy rolling.
Spoon about ¼ cup of the beef and bean mixture onto each tortilla, spreading it into an even layer about 2 inches from the edges. Sprinkle ¼ cup of the 2 cups shredded cheddar cheese evenly over the filling. Here's the thing—don't overfill or the taquitos will burst when frying. Fold the sides inward, then roll tightly from the bottom up, pressing gently to seal. You should end up with neat, compact cylinders.
Place the assembled taquitos seam-side down on a parchment-lined baking sheet. Cover with plastic wrap and refrigerate for at least 30 minutes. This chilling step is essential—it firms up the filling and makes the tortillas easier to handle when frying. If you're short on time, you can skip this step, but the texture won't be quite as perfect.
Fry Until Golden and Crispy
In a large, heavy-bottomed skillet, heat about 1 inch of vegetable oil over medium heat until it reaches 350°F. Use a deep-fry thermometer to monitor the temperature—this precision ensures even cooking. Fry the taquitos in batches of 4-5 at a time, turning occasionally, for 2-3 minutes per side until they're golden brown and crispy all over.
Don't crowd the pan or the oil temperature will drop, leading to greasy taquitos instead of crispy ones. You'll know they're done when they float in the oil and develop a deep golden color. Transfer the fried taquitos to a paper towel-lined plate to drain excess oil. They'll stay crispy while you finish the remaining batches.
Serve with Cooling Dips
While the taquitos are still warm and crispy, arrange them on a serving platter. For serving, I like to offer the 0.25 cup sour cream and 0.5 cup spicy mayo in small bowls for dipping. The contrast of cool, creamy dips with the hot, crispy taquitos is what makes this dish truly special.
Each bite should deliver that perfect combination of textures: a crispy tortilla exterior, melty cheddar cheese, and hearty beef and bean filling. Serve immediately while they're at their crispiest—these taquitos won't wait! If you're making them ahead, fry just before serving to maintain that perfect crunch.
Pro Tips For Making Beef And Bean Taquitos
- Drain and Rinse Beans: Black beans straight from the can are fine, but they’ll turn your filling into a mushy mess if you skip this. Drain them, then rinse under cold water—it cuts the gummy starch and keeps your taquitos from falling apart when you roll them. (Yes, even if the label says “no rinse needed.”)
- Brown the Beef First: I used to just toss ground beef in with the onions and spices, but that leaves you with a bland, gray filling. Brown the beef first in a dry skillet for 3-4 minutes until it loses its raw color—this builds flavor that won’t get lost in the beans. Just don’t overcrowd the pan, or it’ll steam instead of sear.
- Use Medium Tortillas: Small tortillas are a pain to roll, and giant ones make taquitos that flop like wet noodles. Stick to 8-inch flour tortillas—they’re sturdy enough to hold the filling but not so big they turn into a project. If you’re short on time, microwave them for 10 seconds to make them pliable without getting gummy.
- Press Cheese Into Rolls: Sprinkling cheese on top after rolling is lazy and leads to sad, cheeseless bites. Instead, press a handful of shredded cheddar into the center of each tortilla before adding the filling—it melts into the beef and beans during baking, creating a gooey glue that keeps everything together. (And yes, you’ll need to use a little less cheese overall.)
Troubleshooting great beef and bean taquitos
Filling Too Wet?
If your filling seems too moist after cooking, it's likely from excess liquid in the beans or overcooked beef. Drain and rinse the beans thoroughly to remove excess sodium and moisture. For the beef, make sure it's fully browned but not overcooked—5-6 minutes over medium-high heat is perfect. If needed, add 1 tbsp cornstarch to the filling and mix well to absorb extra moisture. Let it cool completely before assembling to prevent soggy tortillas. 💧
Taquitos Breaking Apart?
This usually happens when the filling is too loose or the tortillas aren't sealed properly. First, ensure your filling is evenly spread and not overstuffed—¼ cup per tortilla is ideal. Press the edges firmly as you roll to create a tight seal. Chilling the assembled taquitos for 30 minutes helps them hold together better. If they still break, try using slightly larger tortillas or rolling them a bit looser for flexibility. 🌯
Cheese Not Melting Properly?
Pre-shredded cheese often contains anti-caking agents that prevent proper melting. Always use freshly shredded cheddar for the best results. If your cheese isn't melting, try adding 1 tbsp sour cream to the filling—it helps create a creamier, more cohesive texture. Another trick is to sprinkle cheese evenly over the filling and roll tightly, ensuring it's distributed evenly. Avoid overfilling, as excess cheese can leak out during cooking. 🧀
Oil Too Hot or Too Cold?
The ideal frying temperature for taquitos is 350°F. If your oil is too hot, the taquitos will burn on the outside before cooking through, while oil that's too cool will result in greasy, soggy shells. Use a deep-fry thermometer to monitor the temperature accurately. If your oil temperature drops below 325°F, let it reheat before adding more taquitos. Fry in batches of 4-5 at a time to maintain consistent heat. 🔥
Taquitos Not Crispy Enough?
For maximum crispiness, brush the tortillas lightly with oil before rolling and ensure they're completely dry before frying. If you're baking instead of frying, spray them with oil and bake at 400°F for 12-15 minutes, flipping halfway through. For extra crunch, try double-frying: fry once at 350°F for 2 minutes, drain, then fry again for 1-2 minutes until golden. Avoid overcrowding the pan, as this can lead to uneven cooking. ✨
Filling Leaking During Cooking?
Leaking usually means the taquitos are overstuffed or not sealed tightly enough. Start by using ¼ cup filling per tortilla and roll them snugly, pressing firmly to seal the edges. Chill the assembled taquitos for 30 minutes before cooking to help them hold together. If you're frying, ensure the oil isn't too hot—350°F is ideal. For baking, place them seam-side down on a wire rack over a baking sheet to allow air circulation and prevent leaks. 💡
Nutrition facts
Frequently asked questions
Can I use corn tortillas instead of flour tortillas?
Corn tortillas work differently—they're less flexible and more prone to cracking when rolled. If you must use them, brush them with oil and roll more loosely, but expect less crispiness. For authentic texture, stick with flour tortillas like Mission brand—they're designed for rolling and hold up better during frying or baking.
How do I make these taquitos ahead of time?
Assemble the taquitos and refrigerate them for up to 24 hours before cooking. For freezing, lay them on a tray to set, then transfer to an airtight container for 3 months. Thaw in the fridge overnight before frying or baking. Pro tip: Freeze unbaked taquitos for best texture—fry or bake straight from frozen for 2-3 extra minutes.
What's the best way to reheat leftover taquitos?
For crispy results, reheat in a 400°F oven for 8-10 minutes on a wire rack. To fry, heat oil to 375°F and cook for 1-2 minutes per side. Microwaving works in a pinch (30 seconds), but they'll lose crispiness. Always reheat from room temperature for even cooking.
Can I make these taquitos without frying?
Brush assembled taquitos with oil and bake at 400°F for 12-15 minutes, flipping halfway. For extra crispiness, spray with oil and bake on a wire rack. They won't be as crispy as fried versions, but still delicious. Try adding 1 tbsp cornstarch to the filling to help crisp up during baking.
What are the best dipping sauces for these?
Classic options include spicy mayo (mix mayo with hot sauce), sour cream with lime zest, or chipotle crema. For extra flavor, try queso blanco or salsa verde. The contrast of cool, creamy dips with hot, crispy taquitos is what makes them irresistible. Don't forget the salsa—it's a must!