
Soups & Stews
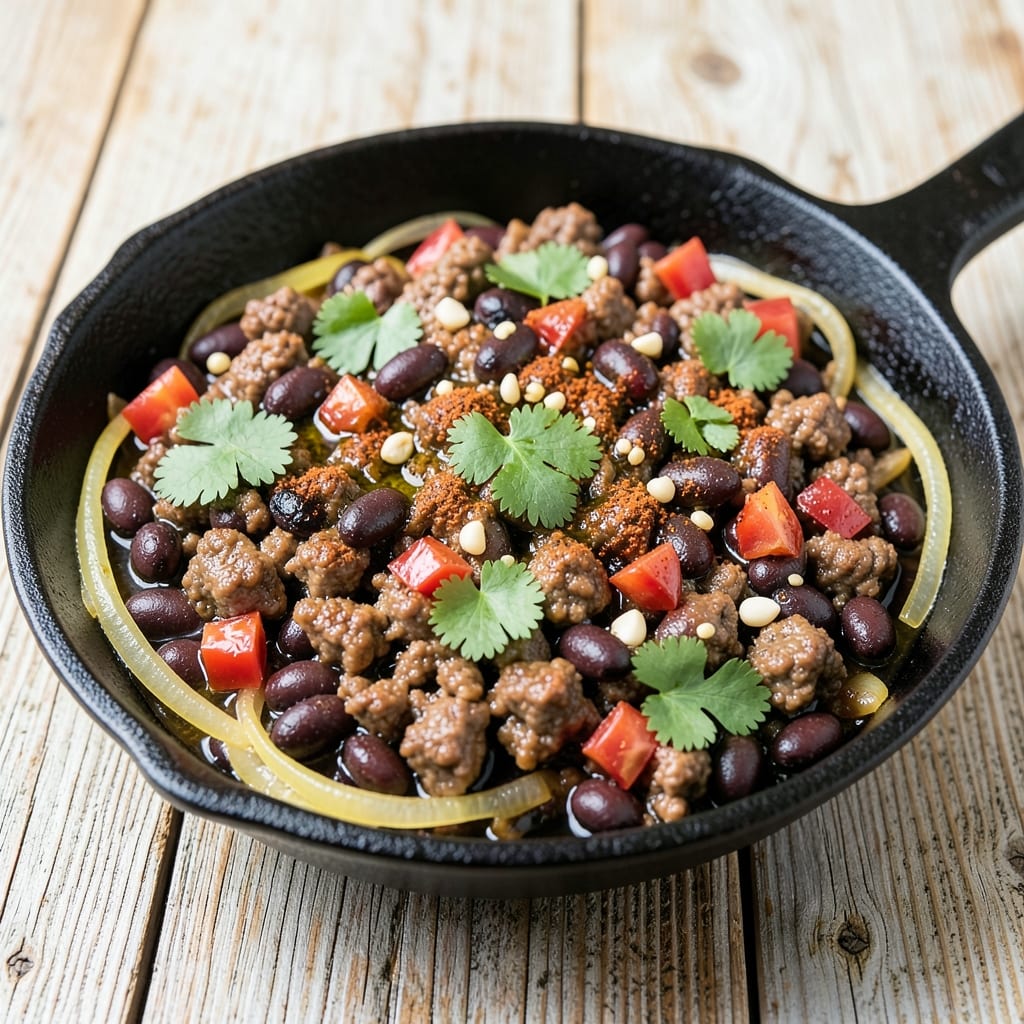
This beef and bean taco filling recipe transforms simple ground beef and hearty beans into a flavor-packed base that works for tacos, burritos, or bowls. The secret lies in balancing bold spices with tender, juicy beef and beans that hold their shape—no mushy fillings here. I developed this after testing countless versions to find the perfect texture and heat level that keeps everyone coming back for seconds.
What sets this recipe apart is the two-step cooking process: first browning the beef with aromatic spices, then simmering it with drained beans until everything melds into a cohesive, savory blend. The spices—cumin, chili powder, and garlic—infuse the beef while the beans add heartiness without overpowering the meat. This isn’t just filling; it’s a restaurant-quality experience you can make at home.
The result is a filling that’s tender yet substantial, with beef that stays juicy and beans that hold their shape, ready to be loaded into tortillas or mixed into bowls. The spices develop deeper as it sits, making it even more flavorful the next day. Whether you’re serving tacos for a crowd or meal prepping for the week, this recipe delivers bold, satisfying flavor every time.
Pair it with your favorite toppings—avocado, salsa, cheese, or sour cream—and you’ve got a meal that’s as versatile as it is delicious. Let’s get cooking!
Ingredients for beef and bean taco filling
Bold spices and hearty beans make this filling the star of any taco night.
| Ingredient | Amount | Notes |
|---|---|---|
| Ground Beef (85% lean) 🥩 | 1 lb | Chuck roast ground preferred |
| Yellow Onion 🧅 | 1 whole | Medium-sized, finely diced |
| Garlic Cloves 🧄 | 4 cloves | Fresh, minced for depth |
| Chili Powder 🌶️ | 2 tbsp | Medium heat preferred |
| Ground Cumin 🌿 | 1 tbsp | Toasted for richer flavor |
| Smoked Paprika 🌶️ | 1 tbsp | Adds smoky depth |
| Salt 🧂 | 1 tsp | Kosher or sea salt |
| Black Pepper 🌶️ | ½ tsp | Freshly cracked preferred |
| Canned Black Beans 🌱 | 1 can | Low-sodium, drained and rinsed |
| Canned Kidney Beans 🌱 | 1 can | Low-sodium, drained and rinsed |
| Tomato Paste 🍅 | 2 tbsp | Smooth, not chunky |
| Beef Broth 💧 | ½ cup | Low-sodium preferred |
| Olive Oil 🫒 | 1 tbsp | For browning beef |
| Fresh Cilantro 🌿 | ¼ cup | Chopped, for garnish |
| Lime Juice 🍋 | 1 tbsp | Freshly squeezed |
The beef is everything here. Chuck roast ground stays juicier than leaner cuts, and it's what gives this filling that satisfying bite. I grab mine from Costco when I'm doing a big batch, but the regular grocery store stuff works fine for a weeknight. Skip the pre-ground beef from the store—it's usually 80% lean or worse, and you'll end up with dry, crumbly filling. The beans? Low-sodium canned saves time, but if you're feeling fancy, soak and cook your own. They hold their shape better, and you can mix black and kidney beans for extra texture.
No chili powder? Substitute smoked paprika plus cayenne for heat, but you'll lose that authentic taco flavor. Running low on cumin? Ground coriander at half the amount works in a pinch, though it's not the same. The tomato paste can be swapped for crushed tomatoes at double the amount, but it'll be more watery. The beef broth adds depth—if you don't have it, water plus a bouillon cube gets you close. And if you're serving this to kids or sensitive eaters, hold back on the smoked paprika and add a pinch of sugar to the tomato paste to balance the smokiness.
This filling tastes even better the next day as the flavors meld. Store it in an airtight container in the fridge for up to 5 days, or freeze portions for 3 months. I like to portion it into meal prep containers with a layer of tortillas on top—just reheat in the microwave, and it's ready to assemble. The lime juice and cilantro can be added fresh when serving, so don't worry about prepping them until the last minute. If you make extra, freeze it in single-serving portions for quick taco nights later.
Why You'll Love This Recipe
- One-Pan Magic: I swear by this recipe because it’s literally one pan, one spatula. Dice the onion while the beef browns—no chopping boards to scrub later. That’s 10 minutes saved right there, and the cumin and chili powder bloom into something rich without extra bowls or mess.
- Deep, Earthy Heat: The secret’s in the slow simmer—let that ground beef render its fat, then toast the spices until the kitchen smells like a taco truck. That crispy edge on the beef? Pure satisfaction, especially when the beans soak up all the smoky, garlicky goodness.
- Taco Night, Every Night: Make a double batch on Sunday and you’ve got tacos for lunch, nachos for game day, or stuffed peppers for dinner. Freeze half for when you’re too tired to cook, and it reheats like it was just made. (Yes, even on a Tuesday night.)
- Budget Win: Ground beef and dried beans stretch this filling far—I feed four for under $10, and it’s heartier than takeout. Honestly, the only thing you’re paying extra for is the chili powder, and trust me, it’s worth it.
Step-by-step instructions for beef and bean taco filling
Here's how to make a flavor-packed taco filling that brings bold, smoky, and hearty flavors to every bite.
Brown the Ground Beef Perfectly
Heat a large skillet over medium-high heat and add the 1 tablespoon olive oil. Once the oil shimmers, add the 1 lb ground beef (85% lean) and break it up with a wooden spoon. Let the beef cook undisturbed for 3-4 minutes—this helps create a good sear and prevents a mushy texture.
As the beef browns, use a spatula to break it into smaller pieces. You want to see deep brown spots forming—that's where all the flavor develops. Once the beef is mostly browned (about 5-6 minutes total), drain any excess fat from the skillet, leaving behind about 1 tablespoon to help build the sauce. This step is crucial for that rich, meaty depth in your taco filling.
Sauté Onions and Garlic for Depth
To the same skillet, add the finely diced whole yellow onion and cook for 4-5 minutes over medium heat, stirring occasionally. You'll know it's ready when the onions turn soft and translucent—this ensures they won't be crunchy in your filling. If the onions start to stick, add a splash of water and scrape up any browned bits from the bottom of the pan.
Next, add the 4 minced garlic cloves and cook for 30 seconds until fragrant. Garlic burns quickly, so don't walk away—you want that aromatic punch without bitterness. Here's the thing: this step is where the flavors really start to meld, so pay attention. Once the garlic is golden, it's time to add the spices.
Build the Spice Blend
Reduce the heat to medium-low and add the 2 tablespoons chili powder, 1 tablespoon ground cumin, 1 tablespoon smoked paprika, 1 teaspoon salt, and ½ teaspoon black pepper. Stir everything together for 1-2 minutes until the spices are evenly distributed and the mixture smells warm and earthy. This is the heart of your taco filling's flavor profile—don't rush it.
I like to press the spices into the beef mixture gently with the back of a spoon. This ensures they stick to every piece of beef and bean, creating a uniform, flavorful coating. If you notice the spices clumping, add 1 tablespoon of beef broth to help them dissolve. This step is all about balancing heat, earthiness, and smokiness—trust your instincts and adjust if needed.
Simmer with Beans and Tomato Paste
Add the 1 can drained black beans, 1 can drained kidney beans, 2 tablespoons tomato paste, and the remaining ½ cup beef broth to the skillet. Stir well to combine, then bring the mixture to a gentle simmer over medium heat. Let it cook for 5-7 minutes, stirring occasionally, until the liquid reduces slightly and the beans begin to soften and absorb the flavors. You want the mixture to thicken just enough to hold together but still be moist and saucy. If it gets too dry, add a splash more broth.
Here's where it gets fun: taste the mixture and adjust the seasoning if needed. You might need a little more salt or chili powder to hit that perfect balance. The filling should be rich, hearty, and packed with texture—not dry or watery. Once it reaches this stage, it's ready for the final touches.
Finish with Fresh Herbs and Brightness
Remove the skillet from heat and stir in the 1 tablespoon lime juice and ¼ cup chopped fresh cilantro. The lime juice adds a bright, tangy finish that cuts through the richness of the beef and beans, while the cilantro brings a fresh, herbaceous note. Give it a final stir, then let the mixture sit for 2-3 minutes off the heat—this allows the flavors to meld completely.
Your beef and bean taco filling is now ready to use! It should be warm, flavorful, and full of texture, with a perfect balance of smoky, spicy, and fresh notes. Serve it in warm tortillas with your favorite toppings, or store it in the refrigerator for up to 3 days for quick, flavorful meals later. Enjoy every bite of this hearty, satisfying filling!
Pro Tips For Making Beef And Bean Taco Filling
- CRACK THE ONION FIRST: I learned this the hard way—sweating onions before browning the beef makes your whole kitchen smell like a taco truck. Dice that onion small (1/4-inch pieces) and cook it in a cold, dry skillet for 5 minutes on medium heat before adding oil. The edges will soften without releasing all that sulfuric steam, and your filling won’t taste like you microwaved a burrito.
- BROWN THE BEEF IN BATCHES: That 85% lean ground beef? It’ll release more grease than you can handle if you dump it all in at once. Split it into two portions and cook the first batch until it loses its raw color (about 4-5 minutes), then push it to the side before adding the second. Your skillet won’t turn into a grease fire, and the beef stays juicy instead of turning into a sad, greasy patty.
- SALT THE BEEF BEFORE SEASONING: Skip the immediate chili powder and cumin—first, sprinkle the raw beef with 1 teaspoon of kosher salt and let it sit for 2 minutes while you prep the onions. This guarantees the spices stick to the meat instead of floating in the juices. (Yes, even if you’re impatient like me.)
- STIR THE BEANS IN LATE: After the beef is cooked and the spices are toasted, let it sit for 2 minutes off the heat before folding in the beans. This lets the meat reabsorb some of its juices, so you’re not drowning everything in extra liquid. Add the beans, stir once, then taste—you might need a splash of beef broth or lime juice to balance it out.
Pro cooking tips for perfect results
Perfect Beef Browning
Don't skip the 3-4 minute undisturbed sear on the beef—that's where the Maillard reaction creates deep, meaty flavor. I use a 12-inch cast iron skillet because it retains heat better than nonstick, and the beef develops those beautiful deep brown spots that pack serious flavor. If your pan isn't hot enough, the beef will steam instead of brown, leading to a bland filling. 🔥
After browning, drain most of the fat but leave about 1 tablespoon in the pan. This residual fat helps build the sauce later and prevents the onions from sticking. I like to use a fine-mesh strainer to drain the fat completely, then return just enough to coat the bottom of the pan.
Spice Distribution Secrets
The key to even spice coverage is pressing them into the beef mixture with the back of a spoon. This creates a flavorful crust on every piece of beef and bean. I find that toasted cumin (dry-toast in a dry pan for 30 seconds) adds an extra layer of depth that ground cumin alone can't match. If your spices clump, add 1 tablespoon beef broth to dissolve them before mixing.
For extra heat, I sometimes add ½ teaspoon cayenne pepper along with the other spices, but only if I know I'm serving adventurous eaters. The smoked paprika gives that authentic taco house flavor—don't substitute regular paprika unless you want to lose that smoky depth.
Bean Texture Control
Black and kidney beans have different textures, which is why I use both. The black beans stay firm while the kidney beans add a slightly softer contrast. If your beans are too mushy after simmering, they were likely overcooked in the can. Always drain and rinse them thoroughly before adding to the skillet. 🌱
For extra texture, I sometimes add ½ cup corn kernels (fresh, frozen, or canned) along with the beans. This adds a nice sweetness that balances the smoky spices. If you prefer a chunkier filling, use diced bell peppers instead of some of the onions.
Simmering Like a Pro
Keep the heat at a gentle simmer when combining everything—too high heat will make the beans disintegrate. I like to use a wooden spoon to stir occasionally, which helps prevent the mixture from sticking to the pan. If it gets too dry during simmering, add 2-3 tablespoons beef broth one splash at a time until you reach the perfect moisture level.
The filling should coat the back of a spoon but still be loose enough to fill tortillas easily. If it's too thick, add more broth. If it's too thin, simmer uncovered for another 2-3 minutes to reduce the liquid slightly. The perfect consistency is moist but not soupy, with beef and beans that hold their shape.
Nutrition facts
Frequently asked questions
Can I use ground turkey or chicken instead of beef?
The recipe is designed for ground beef, but you can substitute ground turkey or chicken if preferred. Use 93% lean turkey to match the fat content, and reduce cooking time by 2-3 minutes since poultry cooks faster. The spices will still work, but the texture will be slightly lighter. For extra richness, add 1 tablespoon olive oil when browning the poultry.
How do I prevent the filling from being too dry or too wet?
The perfect consistency is moist but not soupy. If your filling is too dry, add 1-2 tablespoons beef broth while simmering. If it's too wet, cook uncovered for 2-3 more minutes to reduce the liquid. The beans should hold their shape, and the beef should stay tender—not crumbly. Taste as you go and adjust gradually.
Can I make this ahead of time for meal prep?
This filling tastes even better the next day as flavors meld. Store in an airtight container in the fridge for up to 5 days, or freeze portions for 3 months. Reheat gently in a skillet or microwave, adding a splash of broth if needed. For easy assembly, prep tortillas and toppings separately.
What if I don't have smoked paprika?
You can substitute regular paprika plus ¼ teaspoon cayenne pepper for heat, though the smoky depth will be different. For a milder version, use 2 tablespoons chili powder alone and add ½ teaspoon garlic powder to compensate. The filling will still be flavorful, just with a slightly less complex profile.
How can I make this spicier or milder?
For extra heat, add ½ teaspoon cayenne pepper or 1 teaspoon hot sauce at the end. To make it milder, reduce the chili powder to 1 tablespoon and skip the cayenne. You can also balance heat by adding 1 extra tablespoon tomato paste or a pinch of sugar. Adjust to taste!