
Main Courses
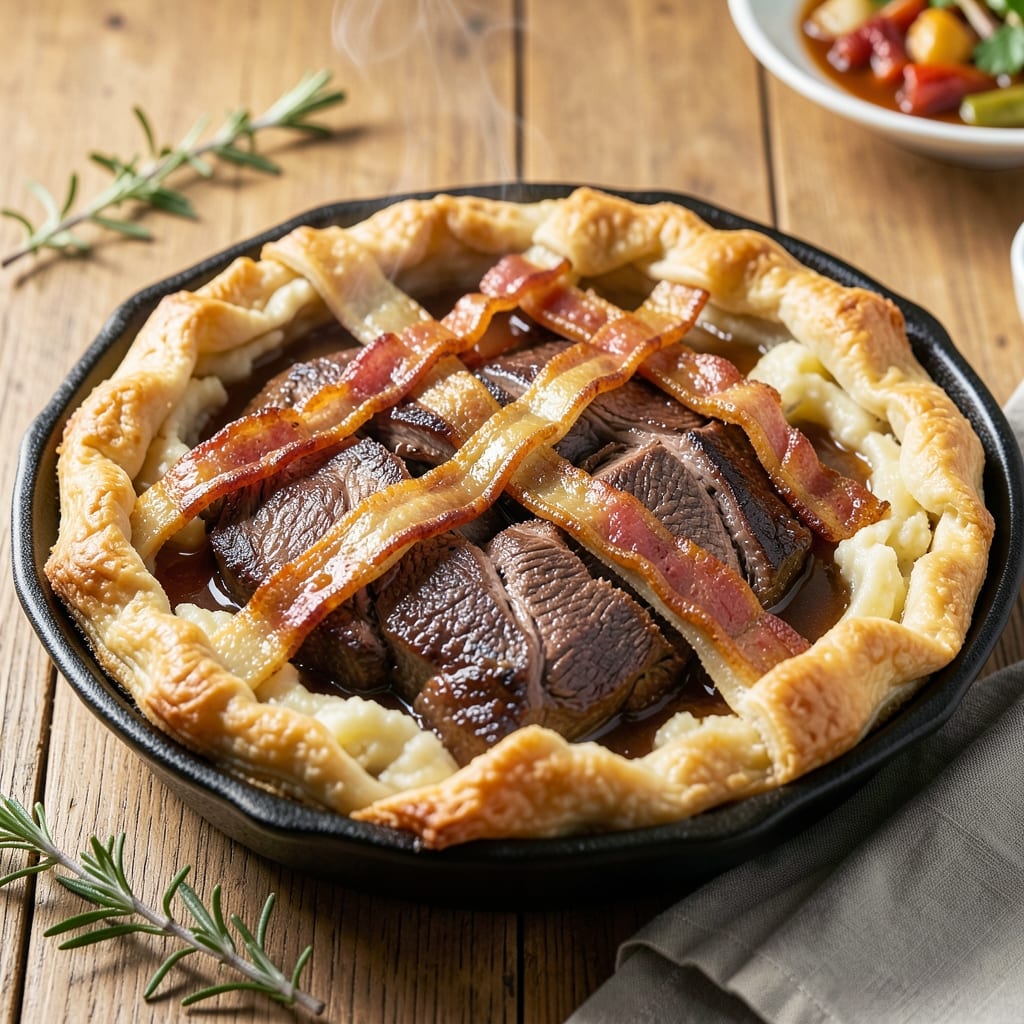
This beef and bacon pie recipe delivers the ultimate comfort food experience with a flaky crust that encases tender beef, crispy bacon, and rich gravy in perfect harmony. The secret to achieving that signature golden-brown crust lies in the cold butter method—a technique that creates layers of delicate pastry without requiring advanced skills. I've perfected this recipe over years of testing, ensuring the filling stays moist while the crust achieves that irresistible crispness.
The filling is where the magic happens: slow-cooked beef and smoky bacon create a deeply flavorful base that's elevated by a velvety gravy made from the pan drippings. What sets this recipe apart is the balance of textures—tender meat, crisp bacon, and a crust that's both sturdy and delicate. The long baking time allows all the flavors to meld together, resulting in a pie that's hearty enough for a family dinner but impressive enough for company.
By the time it emerges from the oven, you'll have a pie with a golden, shatteringly crisp crust that gives way to layers of savory filling. The aroma alone will have everyone gathering around the table, and the first bite delivers that perfect combination of textures and flavors. This is comfort food at its finest—a dish that feels like a warm hug on a chilly day.
Perfect for Sunday suppers, holiday gatherings, or when you simply crave a classic meat pie. The recipe includes step-by-step instructions for both the filling and crust, with tips to ensure success even for beginners. Let's get started on creating this timeless dish that brings warmth and satisfaction to any meal.
Ingredients for beef and bacon pie
The secret to this ultimate comfort pie lies in these 14 ingredients—each playing a crucial role in that golden crust and savory filling.
| Ingredient | Amount | Notes |
|---|---|---|
| Beef Chuck Roast 🥩 | 2 lb | Cut into 1-inch cubes |
| Thick-Cut Bacon 🥓 | 12 oz | Cut into 1-inch pieces |
| All-Purpose Flour 🌾 | 3 cups | For crust and gravy |
| Cold Unsalted Butter 🧈 | 1 cup | Cut into cubes, chilled |
| Ice Water 💧 | ½ cup | For crust consistency |
| Beef Broth 🍲 | 1 ½ cups | Low-sodium preferred |
| Whole Milk 🥛 | ½ cup | For gravy richness |
| Yellow Onion 🧅 | 1 whole | Diced, medium size |
| Garlic Cloves 🧄 | 4 cloves | Minced for flavor |
| Fresh Thyme Leaves 🌿 | 2 tbsp | Or 2 tsp dried thyme |
| Worcestershire Sauce 🍶 | 1 tbsp | For umami depth |
| Salt 🧂 | 1 ½ tsp | Kosher or sea salt |
| Ground Black Pepper 🌶️ | 1 tsp | Freshly cracked |
| Allspice Berries 🌿 | ½ tsp | Crushed for warmth |
The beef chuck roast is non-negotiable—its rich marbling melts into tender, flavorful chunks during slow cooking. Grab it from the butcher counter if possible, or the pre-cut section at Kroger works perfectly. For bacon, thick-cut is key—it stays crispy longer and adds that smoky punch. Costco often has great deals on both, but any grocery store's deli section will have what you need. The flour should be King Arthur or Gold Medal—they hold up better to the cold butter method for that signature flaky texture. Don't skip the ice water—it's what activates the gluten for that sturdy yet tender crust.
No beef broth? Chicken broth with a splash of soy sauce works in a pinch, but the beef flavor is essential. Running short on thyme? Dried thyme at one-third the amount gets you close, but fresh has that bright aroma. The Worcestershire sauce adds depth—if you're avoiding it, soy sauce plus a pinch of sugar mimics the umami. For the crust, shortening instead of butter makes it extra flaky, though butter gives that rich flavor. The allspice might be hard to find—nutmeg at half the amount works if you're in a bind. And if you're making this ahead, pre-cook the filling and refrigerate it overnight for even deeper flavors.
The bacon and beef filling keeps beautifully for 3 days in the fridge—just reheat gently before assembling. The crust components (flour, butter, water) can be prepped 2 days ahead and stored in the fridge. Once baked, this pie reheats like a dream—350°F for 20 minutes with foil over the top. For leftovers, portion into slices and freeze between parchment layers for up to 3 months. Trust me, the second day is even better as all those flavors meld together.
Why You'll Love This Recipe
- No-Fuss Crust: I swear by the butter-and-flour crust here—just mix, chill, roll. No rolling pins, no stress. That cold butter and ice water keep it tender but sturdy enough to hold the rich filling without cracking.
- Smoky-Savory Magic: The thick-cut bacon renders into crispy shards while the beef chuck roast melts into tender, juicy perfection. Honestly, the first bite—when that crispy bacon meets the herby, slow-cooked beef—is like a hug for your taste buds.
- Budget Booster: Beef chuck roast and bacon stretch across multiple meals without breaking the bank. One pie feeds a crowd but also reheats beautifully for lunches—meaning fewer takeout runs and more money saved.
Step-by-step instructions for beef and bacon pie
Here's how to create a showstopping pie with layers of flavor and that perfect flaky crust.
Brown the Bacon and Beef for Deep Flavor
In a large skillet over medium-high heat, cook the 12 oz thick-cut bacon in batches until crispy, about 8-10 minutes per batch. Drain on paper towels, reserving 2 tablespoons of the bacon fat in the skillet. This fat becomes your flavor foundation.
In the same skillet, add the 2 lb beef chuck roast cut into 1-inch cubes and brown on all sides for 3-4 minutes per side. You want those pieces to develop a rich crust—this is where the meat releases its natural juices that will later form the gravy. Remove the beef and set aside, leaving all the browned bits in the skillet.
Build the Savory Filling
In the same skillet with the browned bits, add the 1 whole yellow onion diced into ½-inch pieces and cook for 5 minutes until softened. Add the 4 cloves garlic cloves minced and cook for another 30 seconds until fragrant. Stir in the 2 tbsp fresh thyme leaves, 1 tbsp Worcestershire sauce, 1.5 tsp salt, 1 tsp ground black pepper, and 0.5 tsp crushed allspice berries.
Return the browned beef and bacon to the skillet, tossing everything together. Pour in the 1.5 cups beef broth and scrape up all the browned bits from the bottom. Bring to a simmer and cook for 10 minutes until the beef is tender but still holds its shape. Remove from heat and let cool slightly.
Prepare the Flaky Pie Crust
In a large bowl, combine the 3 cups all-purpose flour, 1.5 tsp salt, and cut the 1 cup cold unsalted butter into the flour using a pastry cutter or your fingers until the mixture resembles coarse crumbs with pea-sized butter pieces. Sprinkle over the 0.5 cup ice water and gently mix with a fork until just combined—don't overwork the dough.
Divide the dough into two equal portions. Shape each into a disk, wrap in plastic wrap, and refrigerate for 30 minutes. This chilling step is crucial—it prevents the crust from shrinking and ensures that beautiful flaky layers. While the dough chills, preheat your oven to 375°F.
Assemble and Bake the Pie
Roll out one dough disk on a lightly floured surface to fit a 9-inch pie dish, about ⅛-inch thick. Transfer to the dish, trim the edges, and crimp the crust. Pour in the cooled beef and bacon filling, then roll out the second dough disk to create a top crust. Cut a few slits in the top crust for steam to escape.
Brush the top crust with a beaten egg (optional for golden color) and bake for 45-50 minutes until the crust is deep golden brown and the filling is bubbling. For extra richness, remove the pie from the oven and stir the 0.5 cup whole milk into the gravy in the pie dish, then return to the oven for 5-10 minutes to thicken.
Rest and Serve
Let the pie rest for 15 minutes before slicing—this allows the filling to set and makes it easier to serve. The crust should be crisp and flaky, the gravy rich and glossy, and each bite should deliver layers of savory beef, smoky bacon, and aromatic thyme. Serve with a simple green salad or steamed vegetables for a complete meal.
Pro Tips For Making Beef And Bacon Pie
- SEAR THE BACON FIRST: That crispy bacon flavor isn’t just for show—it’s the foundation. Cook the thick-cut slices until they’re deep brown and the fat renders out completely before adding them to the beef. I used to skip this and ended up with bacon that was barely cooked and soggy in the pie. Trust me, the extra 10 minutes upfront makes the whole dish taste richer.
- USE A THIN BACON LAYER: Piling bacon on top like a tower? Bad idea. Spread the cooked slices evenly in a single layer over the beef—just enough to cover it completely. This ensures every bite gets that smoky bacon flavor without turning the pie into a bacon-heavy brick. (Yes, I’ve made that mistake.)
- CHILL THE PASTRY DISCS: Cold butter, cold water, cold discs—this isn’t just a recipe requirement, it’s a non-negotiable for flaky layers. Wrap the shaped pastry in plastic and refrigerate for at least 30 minutes before baking. I learned this after my first attempt turned out tough and greasy. The cold slows the butter from melting too fast, giving you that perfect crispness.
- REST THE BEEF AFTER SEARING: You sear that chuck roast, dump it in the pot, and immediately add the liquid? Don’t. Let it rest for 5 minutes under foil—even if it’s still hot. This keeps the juices from spilling out when you add the broth, so your filling stays moist and tender. I used to rush this, and the beef always ended up dry. (Your future self will notice the difference.)
Dietary considerations for this recipe
Gluten-Free Adaptation
Swap the all-purpose flour for a 1:1 gluten-free flour blend like King Arthur Measure for Measure, which mimics all-purpose flour's behavior. Replace the 3 cups all-purpose flour in the crust with 3 cups gluten-free blend and add 1 extra tbsp xanthan gum for structure. For the gravy, use cornstarch or arrowroot powder instead of flour to thicken. 🌾
Dairy-Free Options
For a dairy-free crust, replace the 1 cup cold butter with 1 cup dairy-free shortening like Crisco All-Vegetable Shortening or Miyoko's Vegan Butter. Use unsweetened almond milk instead of whole milk for the gravy—add ½ cup almond milk in the final baking step. The crust will still achieve that flaky texture without dairy.
Lower-Carb Version
Reduce the crust carbs by using a low-carb crust mix like Ruffles Low-Carb Pie Crust or making your own with almond flour and coconut oil. For the filling, keep the beef and bacon but replace the beef broth with bone broth (low-carb) and omit the milk in the gravy. This cuts carbs while maintaining rich flavor. 🥩
Vegetarian Substitutes
Replace the beef with mushrooms and lentils for texture. Use 12 oz cremini mushrooms (chopped) and 1 cup cooked lentils mixed with the bacon and onions. Boost umami with 1 tbsp soy sauce instead of Worcestershire. The crust and gravy remain unchanged, creating a satisfying vegetarian pie with hearty filling.
Allergen-Friendly Tips
For nut-free kitchens, ensure your gluten-free flour blend is nut-free (check labels). If using almond milk, opt for oat or coconut milk instead. Always verify bacon packaging for cross-contamination warnings if allergies are severe. Keep ingredients separate to avoid accidental mixing during prep. 💛
Nutrition facts
Frequently asked questions about beef and bacon pie
Why does the crust need to be cold when making the dough?
The cold butter in chilled dough prevents it from melting during handling, which is key for creating those signature flaky layers. When you cut the cold butter into the flour, it stays intact until the dough bakes, creating steam pockets that puff up the crust. Never skip this chilling step—it's what makes the difference between a tough crust and a delicate, golden one.
Can I make this pie ahead of time?
Assemble the pie (without baking) and refrigerate it overnight. When ready to bake, add 10-15 minutes to your baking time. For even better flavor, cook the filling a day ahead and refrigerate it separately, then assemble and bake fresh. The flavors develop beautifully over time.
What's the best way to reheat leftover beef and bacon pie?
Preheat your oven to 350°F and place slices on a baking sheet. Cover loosely with foil and heat for 15-20 minutes until warmed through. For microwave reheating, cover with a damp paper towel and heat for 1-2 minutes at 50% power. The oven method keeps the crust crispy while the microwave softens it.
Can I use ground beef instead of beef chuck roast?
While you can use ground beef, it won't have the same tender texture or rich flavor as chuck roast. If you must substitute, use 80/20 ground chuck and brown it thoroughly. The fat content helps create that savory gravy, but you'll miss the melt-in-your-mouth quality of properly cooked roast beef.
How do I prevent a soggy bottom crust?
Prevent soggy bottoms by baking the pie on a preheated baking sheet lined with parchment paper. This creates a barrier between your pie dish and oven heat. Also, chill the assembled pie for 30 minutes before baking to help the crust firm up. For extra insurance, blind-bake the bottom crust for 5 minutes before adding filling.