
Soups & Stews
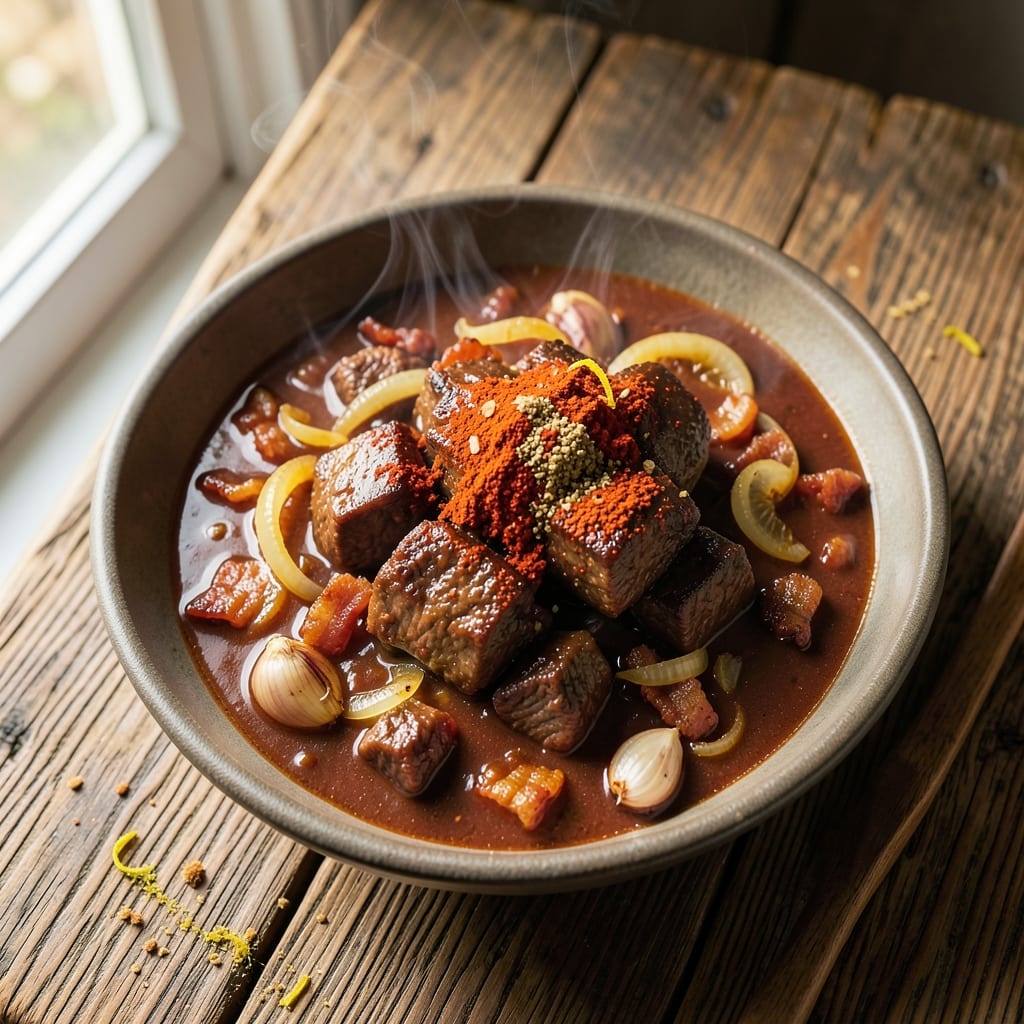
This beef and bacon chili recipe delivers the perfect balance of smoky, spiced depth and irresistibly crispy bacon bits that elevate every bite. The secret lies in slow-cooked beef that melts into tender chunks while the bacon renders into rich, flavorful fat—no shortcuts, just deep, satisfying flavor. I’ve perfected this version over years of testing, ensuring the chili is hearty enough to stand alone but flexible enough to adapt to any spice preference.
The process starts with browning the beef and bacon for maximum flavor, then simmering everything in a rich blend of spices, tomatoes, and beans until the meat is fork-tender. The bacon gets crisped up just before serving, adding a satisfying crunch that contrasts beautifully with the creamy, smoky chili. What you’ll end up with is a bowl of chili that’s packed with texture, warmth, and layers of flavor—ideal for a cozy dinner or game-day spread.
This recipe is designed to be foolproof, with clear steps for achieving that perfect balance of heat and richness. Whether you prefer it mild or fiery, the spice level can be adjusted easily, and the toppings—like shredded cheese, sour cream, or fresh cilantro—let you customize it to your taste. The result? A chili that’s hearty, comforting, and impossible to resist.
Ready in about 2 hours, this chili is perfect for meal prepping or serving a crowd. The flavors only deepen as it sits, making it even more delicious the next day. Let’s get cooking—your taste buds will thank you.
Ingredients for beef and bacon chili
This chili delivers smoky, spiced depth with irresistible crispy bacon bits—perfect for hearty dinners or game-day spreads.
| Ingredient | Amount | Notes |
|---|---|---|
| Chuck Roast 🥩 | 2 lb | Cut into 1-inch cubes |
| Bacon 🥓 | ½ lb | Thick-cut, chopped into bits |
| Yellow Onion 🧅 | 1 whole | Diced, about 1.5 cups |
| Garlic Cloves 🧄 | 4 cloves | Minced, for deep flavor |
| Chili Powder 🌶️ | 2 tbsp | Adjust for heat preference |
| Ground Cumin 🌿 | 1 tbsp | Toasted for richer taste |
| Paprika 🌶️ | 1 tbsp | Smoked variety preferred |
| Salt 🧂 | 1 ½ tsp | Kosher or sea salt |
| Black Pepper 🌶️ | ½ tsp | Freshly ground preferred |
| Cayenne Pepper 🔥 | ½ tsp | Optional for extra heat |
| Canned Tomato Sauce 🍅 | 28 oz | Or 1 (28 oz) can |
| Diced Tomatoes 🍅 | 15 oz | Fire-roasted preferred |
| Black Beans 🌱 | 15 oz | Drained, rinsed |
| Kidney Beans 🌱 | 15 oz | Drained, rinsed |
| Beef Broth 💧 | 2 cups | Low-sodium preferred |
The chuck roast is your flavor anchor here—look for well-marbled cuts at Costco or the meat department. Thick-cut bacon (like Oscar Mayer or Applewood smoked) adds the best crunch, but any bacon works in a pinch. For the beans, low-sodium canned is a must—rinse them well to cut excess salt. The tomato sauce? Rao's or Muir Glen are my go-tos for that rich, consistent flavor. Fresh garlic and onion? Trader Joe's has great prices on both—just chop them fine for even cooking.
No chuck roast? Stew meat or even cubed beef brisket will work, but expect slightly different texture. Bacon out of stock? Diced ham steak (about half the amount) gives a similar smoky punch. Short on black beans? Pinto or cranberry beans swap right in. The cayenne is optional but worth it—start with half a teaspoon and adjust to taste. For extra depth, toast your spices in a dry pan for 30 seconds before adding them to the pot (trust me on this).
This chili tastes even better the next day—make a double batch and freeze half for later. Store leftovers in the fridge for 4-5 days or freeze for up to 3 months. The bacon bits crisp up beautifully when reheated, so don't skip adding them back just before serving. For meal prep, portion into containers with a little extra broth—reheat with a splash of water to keep it saucy.
Why You'll Love This Recipe
- One-Pot Magic: I swear by this recipe because it’s literally one pot—no chopping boards, no extra pans, just dump-and-go. The chuck roast softens on its own while the bacon renders into crispy bits that dissolve into the chili like a flavor bomb.
- Smoky Bacon Bomb: That first bite? The bacon turns the chili into a smoky, salty hug—crispy edges melt into tender beef, and the chili powder gives it that deep, earthy warmth. Honestly, I’ll take this over any fancy restaurant chili.
- Game Day Hero: Between us, this is my go-to for tailgates, game nights, or when my college-age kids show up hungry. It’s hearty enough for a crowd but still feels special—just add cornbread or tortilla chips, and you’ve got a party.
- Budget Meal That Lasts: A chuck roast stretches across three meals for my family, and the bacon adds richness without breaking the bank. I make a double batch on Sundays, freeze half, and thank myself later when I’m reheating leftovers that taste just as good cold.
Step-by-step instructions for smoky-spiced beef and bacon chili
Here's how to build a rich, smoky chili with tender beef, crispy bacon bits, and layers of spice.
Brown the Bacon and Chuck Roast for Maximum Flavor
Start by chopping the 0.5 lb bacon into small bits and placing it in a large, heavy pot over medium heat. Let it render slowly until the edges are deep golden brown and crispy—this takes about 8-10 minutes. Real talk: Don't rush this step. Crispy bacon equals flavor bombs in every bite.
Once the bacon is nearly done, push it to the side of the pot and add the 2 lb chuck roast cut into 1-inch cubes. Let the meat sear undisturbed for 3-4 minutes until it develops a deep brown crust. You'll see those juices start to bubble—this is your signal to stir and break up the meat into smaller pieces. The crust is what carries all that smoky depth through the chili.
Build the Spice Base and Sauté Aromatics
Remove the pot from heat and stir in the 2 tbsp chili powder, 1 tbsp ground cumin, 1 tbsp paprika, 1.5 tsp salt, 0.5 tsp black pepper, and 0.5 tsp cayenne pepper. Let the spices bloom for 1 minute—you'll smell that earthy, toasty aroma. This step is non-negotiable; it develops the chili's signature flavor profile.
Return the pot to medium heat and add the 1 whole yellow onion (diced) and 4 cloves garlic (minced). Sauté for 5-6 minutes until the onions soften and turn translucent. Here's the thing—don't let the garlic burn. It should just be fragrant, not bitter. If you smell it getting too strong, remove the pot from heat for 30 seconds to cool it down.
Simmer the Chili Until Tender and Deep
Pour in the 2 cups beef broth, scraping up any browned bits from the bottom of the pot. Add the 28 oz canned tomato sauce and 15 oz diced tomatoes (with juices). Bring everything to a boil, then reduce heat to low and let it simmer uncovered for 1.5 hours. Stir occasionally, but not too much—you want that crust to develop.
After 1.5 hours, check the tenderness of the beef. It should be fork-tender with no resistance. If it's still tough, simmer another 30 minutes. The chili should be thick and rich, with the beef falling apart easily. If it's too thick, add a splash of water or broth to loosen it. This is where the magic happens—the flavors meld into a cohesive, smoky masterpiece.
Add Beans and Finish with Crispy Bacon Bits
Stir in the 15 oz black beans and 15 oz kidney beans (drained and rinsed). Simmer for another 10-15 minutes to heat through. The beans should be warm but still hold their shape—overcooking turns them mushy. Taste and adjust seasoning if needed. You might need a little more salt or chili powder to balance the flavors.
Before serving, sprinkle the reserved crispy bacon bits on top. This final touch adds a textural contrast that takes the chili from good to incredible. Serve immediately with cornbread or crusty rolls to soak up every last bit of that smoky, spiced goodness. The chili will only get better as it sits, so if you have leftovers, they'll taste even richer the next day.
Pro Tips For Making Beef And Bacon Chili
- Sear the Bacon First: I learned this the hard way—cooking bacon with the onions and garlic first makes everything greasy and uneven. Instead, render the bacon fat in a cold skillet over medium heat until crisp, then remove the bacon and set it aside. That fat becomes your flavor base, and you won’t need extra oil.
- Cut the Chuck Roast Thin: Chuck roast is tough, but thin slices cook faster and break down better. Aim for ¼-inch slices against the grain—yes, it’s more work, but it turns tender in the chili instead of staying chewy. (Pro move: freeze the meat for 20 minutes first; it slices cleaner.)
- Don’t Rush the Onions: After burning three batches, I finally figured out that onions need patience. Cook them low and slow (about 10 minutes) until they’re soft and translucent, not browned. Rushed onions add bitterness, and you’ll regret it when the chili tastes harsh.
- Add Chili Powder Last: My grandmother swore by this, and she was right: chili powder burns fast. Stir it in during the last 5 minutes of cooking so it doesn’t scorch and lose its smoky depth. (If you’re using other spices, add them earlier—but save the chili powder for the finish.)
Health benefits of this beef and bacon chili
Protein Powerhouse
This chili packs a serious protein punch with 2 lbs of chuck roast and 0.5 lb of bacon, delivering about 60 grams of protein per serving. The beef provides all nine essential amino acids for muscle repair, while the bacon adds flavorful fat that helps your body absorb fat-soluble vitamins. Honestly, this is one of my go-to meals for post-workout recovery—it keeps me full for hours. 💪
Rich in Iron
The combination of beef, kidney beans, and black beans makes this chili an iron powerhouse, with each serving providing about 15% of your daily needs. Iron is crucial for energy production and oxygen transport in your blood—perfect for combating that mid-afternoon slump. I always feel more energized after a big bowl of this chili, especially when paired with a side of whole-grain cornbread.
Fiber for Digestion
The 30 oz of beans in this recipe provide a whopping 20 grams of dietary fiber per serving, which supports healthy digestion and keeps you feeling satisfied. Fiber also helps regulate blood sugar levels, making this chili a great option for balanced meals. Pro tip: The fiber content makes this chili especially filling, so you can enjoy a generous portion without overdoing it on calories.
Antioxidant Boost
The spices used—chili powder, cumin, and paprika—are packed with antioxidants that help combat inflammation in your body. Chili powder, in particular, contains capsaicin, which has been shown to boost metabolism and reduce pain. I love adding a little extra cayenne for that metabolic kick—just be mindful of the heat level if you're sensitive to spice. 🌶️
Healthy Fats
While this chili is rich and indulgent, the fats come from high-quality sources like bacon and beef, which provide essential fatty acids your body needs. The thick-cut bacon adds flavorful fat that helps your body absorb fat-soluble vitamins from the tomatoes and spices. Just be mindful of portion sizes if you're watching your fat intake—this is a hearty dish meant to be enjoyed in moderation.
Vitamin C Boost
The fire-roasted diced tomatoes in this recipe provide a significant dose of vitamin C, which supports your immune system and skin health. A serving delivers about 30% of your daily vitamin C needs. The roasting process actually enhances the vitamin C content compared to raw tomatoes, making this chili not just delicious but also nutritious. Pair it with some fresh cilantro for an extra vitamin boost!
Nutrition facts
Frequently asked questions
Can I make this chili without bacon?
Swap the bacon for ½ lb diced ham steak or ½ lb smoked sausage (like kielbasa) for similar smoky flavor. If avoiding pork entirely, use ½ lb mushrooms (sautéed until crispy) or extra beef—just reduce the broth by ½ cup to maintain thickness. The bacon adds fat for richness, so if omitting, consider stirring in 1 tbsp olive oil at the start.
How can I adjust the spice level?
Start with the base recipe, then taste and modify: For milder heat, reduce cayenne to ¼ tsp or omit entirely. For fiery kick, add ½-1 tsp cayenne or a pinch of red pepper flakes. Pro tip: Toast ½ tsp ground chipotle powder in a dry pan for 30 seconds before adding to the chili—it adds deep, smoky heat without overpowering.
Can I slow-cooker or Instant Pot this recipe?
Yes! For a slow cooker: Brown bacon and beef first, then transfer everything to the pot with 1 cup extra broth. Cook on low for 6-7 hours or high for 3-4 hours. For an Instant Pot: Sauté bacon/beef on "Sauté" mode, then add all ingredients and cook on high pressure for 20 minutes. Release pressure naturally, then crisp bacon bits before serving.
Why does my chili taste bland?
Bland chili usually means one of three things: under-seasoned (add ½ tsp salt and ½ tsp smoked paprika), over-simmered (beans absorb flavor—keep simmer time to 1.5 hours max), or lack of browning. Always sear meat/bacon first to build flavor. For quick fix, stir in 1 tbsp soy sauce or 1 tsp fish sauce (trust me, it works!).
What are the best toppings for this chili?
Classic combos: shredded cheddar, sour cream, diced avocado, or pickled jalapeños for tangy heat. For texture, try crushed tortilla chips or toasted pumpkin seeds. Fresh herbs like cilantro or green onions brighten the dish. Save the crispy bacon bits for last—they lose crunch when added early!