
Tips
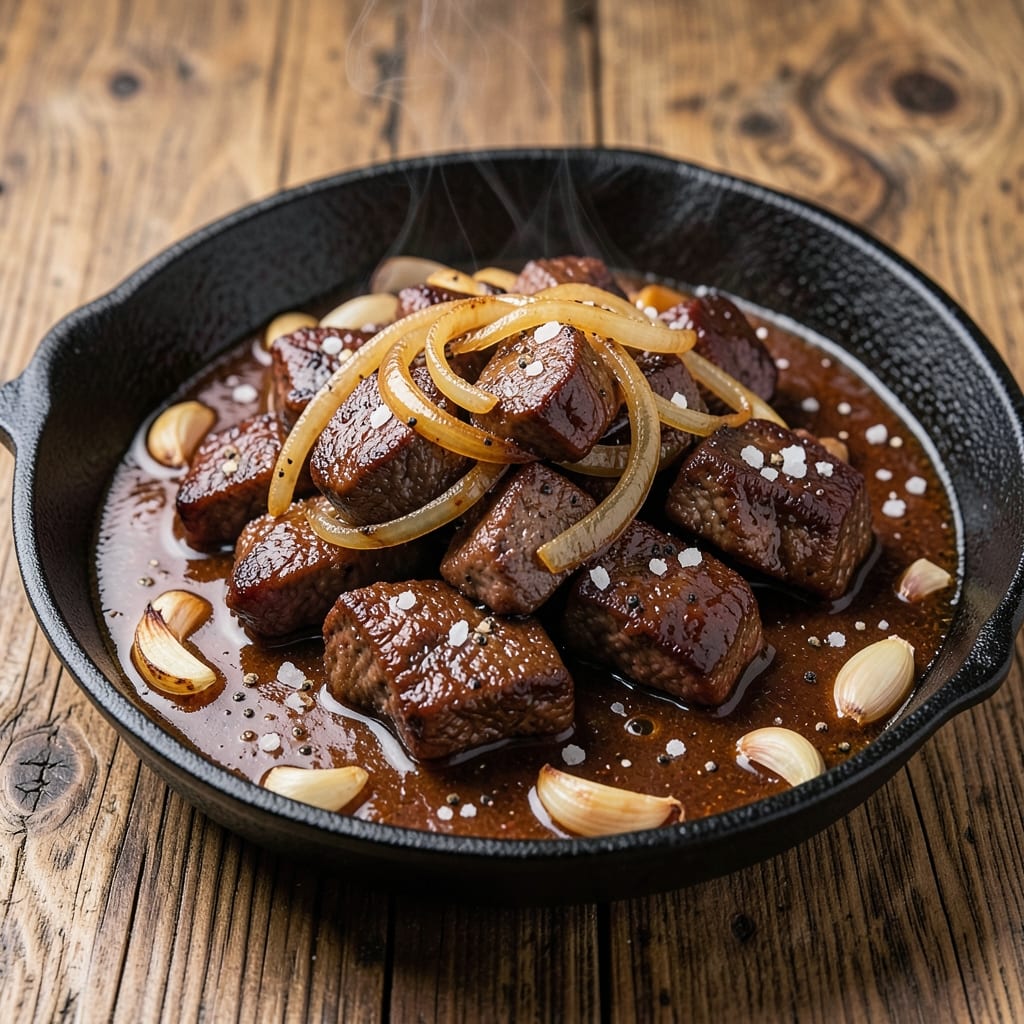
This BBQ beef tips recipe delivers restaurant-quality smoky bites in just 30 minutes, transforming simple ingredients into tender, caramelized perfection. The secret lies in high-heat searing followed by a quick braise in homemade BBQ sauce—no slow cooking required. I developed this method after years of perfecting the balance between tender beef and that signature sticky glaze, and it never fails to impress.
The process is straightforward: thinly sliced beef tips brown quickly in a hot skillet, locking in juices before a 5-minute deglaze transforms them into tender morsels. A simple homemade BBQ sauce (just 5 ingredients) adds depth without overwhelming the beef's natural flavor. The result? Bites that are crisp at the edges, tender inside, and coated in a glossy, smoky-sweet sauce that clings perfectly.
What makes this recipe stand out is how it delivers restaurant-quality results with minimal effort. No special equipment needed—just a skillet and a few pantry staples. Serve these beef tips over mashed potatoes for a comforting meal, alongside crisp coleslaw for balance, or straight from the pan for a quick weeknight dinner. The sauce's versatility means you can adjust sweetness or smokiness to your taste.
Once you try this method, you'll never settle for store-bought beef tips again. The technique is foolproof, the flavors are bold, and the process moves fast enough to keep dinner on track even on busy nights. Let's get cooking—your taste buds will thank you.
Ingredients for bbq beef tips
Restaurant-quality BBQ beef tips start with these 14 ingredients—simple yet transformative for bold, smoky flavor.
| Ingredient | Amount | Notes |
|---|---|---|
| Beef Tips 🥩 | 1 ½ lb | Thinly sliced, 1/4-inch thick |
| Yellow Onion 🧅 | 1 whole | Medium size, sliced into strips |
| Garlic Cloves 🧄 | 4 cloves | Minced, fresh preferred |
| Kosher Salt 🧂 | 1 ½ tsp | Diamond Crystal preferred |
| Black Pepper 🌶️ | 1 tsp | Freshly ground, coarse |
| Vegetable Oil 🫒 | 2 tbsp | High smoke point preferred |
| Tomato Paste 🍅 | 2 tbsp | San Marzano preferred |
| Apple Cider Vinegar 🍎 | ½ cup | For tangy depth |
| Brown Sugar 🍚 | ½ cup | Packed, light or dark |
| Smoked Paprika 🌶️ | 1 tbsp | For authentic smokiness |
| Worcestershire Sauce 🍶 | 1 tbsp | Anchovy-free preferred |
| Beef Broth 🍲 | ½ cup | Low-sodium preferred |
| Honey 🍯 | 1 tbsp | For subtle sweetness |
| Fresh Thyme Leaves 🌿 | 1 tbsp | Or 1 tsp dried thyme |
The beef is non-negotiable—chuck or sirloin tips work best, cut thinly for even cooking. I source mine from Costco or Whole Foods for consistent quality. Look for good marbling, as this renders into flavor during cooking. The San Marzano tomato paste elevates the sauce, but any quality paste will do. For the vinegar, Bragg or Heinz are reliable choices, but apple cider vinegar adds a fruity depth that store-bought BBQ sauces often lack. Fresh thyme is ideal, but dried works at one-third the amount—just crush the leaves between your fingers before adding.
No Worcestershire sauce? Soy sauce or coconut aminos provide umami depth, though the anchovy-free version is preferable for dietary flexibility. Substituting brown sugar? Maple syrup or coconut sugar work equally well, though the flavor profile shifts slightly. The beef broth can be swapped for vegetable broth if needed, though the beef flavor will be less pronounced. For a quicker prep, use pre-minced garlic and onion from the produce section—just drain well to avoid excess moisture. The smoked paprika is essential for that authentic BBQ flavor; if unavailable, liquid smoke at 1/2 teaspoon can mimic it, though with less complexity.
Store the beef in the coldest part of your fridge and use within 2 days for optimal tenderness. The sauce ingredients keep well—brown sugar and tomato paste last 6-12 months in a pantry, while vinegar and Worcestershire sauce are shelf-stable indefinitely. For leftovers, store the beef tips and sauce separately. The sauce reheats beautifully, and the beef tips can be frozen for 3 months—thaw in the fridge overnight before reheating. Double the sauce if you plan to use it for other dishes; it’s versatile for sandwiches, tacos, or even a quick glaze for grilled veggies.
Why You'll Love This Recipe
- Five-Ingredient Magic: The pantry already has these staples—no fancy shopping trip needed. I swear by this combo: beef tips, onions, garlic, salt, and pepper. That’s it. The simplicity means I’m never stuck staring at a fridge full of forgotten ingredients.
- Smoky Depth in Minutes: The key? Searing the beef first, then letting the onions caramelize with garlic until the kitchen smells like a summer cookout. That crispy edge on the beef with the sweet-savory sauce? It’s the kind of flavor that makes people ask for seconds before dessert.
- Game for Any Occasion: Slap these on toasted buns for a quick lunch, pile them over mashed potatoes for a hearty dinner, or serve them cold in tacos the next day. Honestly, I’ve even used them as a pizza topping when I was feeling wild. The sauce clings perfectly, so they’re always the star.
- Leftovers That Don’t Suck: Unlike some recipes, these beef tips actually improve the next day. The flavors meld even more, and reheating them in a skillet with a splash of water keeps them juicy. I keep a batch in the fridge for lazy nights—just microwave, eat, repeat. No sad, dry meat here.
Step-by-step instructions for smoky caramelized beef tips
Master this technique and you'll achieve perfectly tender beef tips with a glossy, caramelized glaze every time.
Sear the Beef Tips to Develop Deep Flavor
Heat a large skillet over medium-high heat until it's smoking hot. Add the 2 tablespoons vegetable oil and swirl to coat the pan evenly. Working in batches to avoid crowding, add the 1.5 pounds beef tips and sear for 2-3 minutes per side until they develop a deep golden-brown crust.
This initial sear is critical—it locks in juices and creates the Maillard reaction that forms those rich, caramelized flavors. You'll know they're ready when they release easily from the pan and have developed a crust. Transfer the seared beef tips to a plate and set aside, leaving the rendered fat in the pan.
Build the Flavor Base with Onions and Garlic
Reduce the heat to medium and add the sliced 1 whole yellow onion and minced 4 cloves garlic to the same skillet. Cook for 4-5 minutes until the onions are softened and beginning to caramelize at the edges. Stir occasionally to prevent burning.
The onions should release their moisture and reduce down, creating a sweet, jammy base for your sauce. Here's where the flavor really starts to develop—don't rush this step. The onions should be tender but still hold their shape, with just the slightest caramelization beginning.
Create the Glazing Sauce with Vinegar and Sugar
Add the 2 tablespoons tomato paste, stirring to combine with the onions. Cook for 1 minute until it darkens slightly, then pour in the 0.5 cup apple cider vinegar. Let it simmer for 2 minutes until the vinegar reduces by half and the mixture thickens slightly.
Next, add the 0.5 cup brown sugar, 1 tablespoon smoked paprika, 1 tablespoon Worcestershire sauce, 0.5 cup beef broth, and 1 tablespoon honey. Stir well to combine all ingredients. The mixture should bubble gently as it comes together—this is where the magic happens as the sugars caramelize and the flavors meld.
Finish with Thyme and Simmer to Perfection
Return the seared beef tips to the skillet, spooning the sauce over them to coat evenly. Add the 1 tablespoon fresh thyme leaves, 1.5 teaspoons kosher salt, and 1 teaspoon black pepper. Bring to a gentle simmer and cook for 5-6 minutes until the sauce thickens and the beef tips are fork-tender.
You'll know it's ready when the sauce has reduced to a glossy consistency that coats the back of a spoon. The beef tips should be tender enough to pierce easily with a fork but still hold their shape. Taste and adjust seasoning if needed—this is your final opportunity to balance the flavors.
Rest and Serve with Perfect Texture
Transfer the beef tips to a serving platter and let them rest for 3-5 minutes. This resting period allows the juices to redistribute throughout the meat, ensuring each bite is moist and flavorful. Serve immediately while the sauce is still glossy and the beef tips are warm.
The result should be perfectly tender beef tips with a beautiful caramelized glaze that's neither too sweet nor too tangy. Each bite should deliver a balance of smoky, sweet, and savory flavors that make this dish irresistibly comforting. Pair with crusty bread or roasted potatoes to soak up every last bit of that delicious sauce.
Pro Tips For Making Bbq Beef Tips
- SEAR IN BATCHES: Don’t overload the pan—crowding steams the beef instead of searing it. Two minutes per side max, with just enough room to shake the pan without sloshing. I learned this the hard way when my first batch turned out gray and sad.
- MINCE THAT ONION: Tiny, even pieces caramelize faster and sweeten the sauce without turning mushy. Use a sharp knife and chop until you’re basically making onion confit—this isn’t the time to be lazy. (Yes, even if you’re impatient like me.)
- SALT THE BEEF TWICE: First when you trim the fat, then again right before searing. The initial salt starts breaking down the proteins, and the second layer locks in flavor. Skip this, and your beef tips will taste bland no matter how long you cook them.
- DEGLAZE HOT, NOT LUKEWARM: Right after searing, add a splash of beef broth or BBQ sauce to the screaming-hot pan. The residue sticks instantly, building a richer base for your sauce. Let it cool even a little, and you’ll end up with a thin, watery mess.
Common mistakes when making this dish
Overcrowding the Pan
This is my biggest pet peeve—packing too many beef tips into the skillet at once. When you overcrowd, the meat steams instead of searing, resulting in soggy, flavorless bites. I always work in batches, keeping the pan hot and the beef moving. A good rule of thumb is to leave at least ½ inch of space between each piece. If your skillet isn't big enough, cook in two rounds. Trust me, crispy edges are worth the extra minute. 🔥
Skipping the Resting Time
I see this mistake all the time—people can't wait to dig in and serve the beef tips immediately after cooking. That 3-5 minute rest is non-negotiable. It lets the juices redistribute, preventing dry, stringy meat. I've learned this the hard way—skipping the rest means losing those precious juices that make the dish truly tender. Serve it hot, but give it that brief rest first.
Using Low-Quality Beef
The beef tips are the star of this dish, so don't skimp on quality. I always recommend chuck or sirloin tips with good marbling. Cheaper cuts with less fat will dry out during cooking, no matter how carefully you follow the recipe. Look for beef with visible fat streaks—this renders into flavor during cooking. If you're unsure, ask your butcher for tips on selecting the best cut for quick-cooking dishes.
Rushing the Onion Cooking
I can't emphasize enough how important this step is—rushing the onions means missing out on that sweet, jammy base that forms the foundation of the sauce. Cook them until they're softened and just beginning to caramelize at the edges. This takes 4-5 minutes, but it's worth every second. The deeper flavor from properly caramelized onions transforms the entire dish. Don't be tempted to speed this up—patience pays off here. 🧅
Ignoring the Vinegar Reduction
Many home cooks pour in the vinegar and immediately add all the other ingredients, but that's a missed opportunity. The vinegar needs to reduce by half to mellow its sharpness and concentrate its flavor. Let it simmer for those 2 minutes before adding the sugar and other ingredients. This step is what balances the sweet and tangy elements in the sauce. Skipping it means ending up with a sauce that's either too acidic or too cloying.
Over-Simulating the Final Sauce
Once you've added the beef tips back to the skillet, keep the heat at a gentle simmer—not a rolling boil. Boiling the sauce too vigorously can cause it to separate or become grainy. A gentle simmer ensures the sauce coats the beef evenly and thickens properly. I aim for small, gentle bubbles rather than a vigorous boil. This final step is where the sauce comes together, so give it the attention it deserves. 💫
Nutrition facts
Frequently asked questions
Can I make this recipe with frozen beef tips?
Fresh beef tips work best for this recipe, but if you must use frozen, thaw them completely in the refrigerator overnight. Never thaw at room temperature, as this can promote bacterial growth. Pat them dry thoroughly before searing to ensure a good crust forms. The cooking time may increase slightly since frozen meat releases moisture more slowly.
How do I adjust the sweetness in the BBQ sauce?
Start with the 0.5 cup brown sugar and 1 tablespoon honey as written, then taste the sauce before serving. For less sweetness, reduce the brown sugar to 0.3 cup and omit the honey. If you prefer more sweetness, add an extra 1 tablespoon honey or 1 tablespoon maple syrup at the end. Adjust gradually to avoid overwhelming the beef's flavor.
Can I use this sauce for other dishes?
This versatile sauce works beautifully on grilled chicken, pork chops, or even roasted vegetables. For grilled meats, brush it on during the last 5 minutes of cooking. For vegetables, toss them in the sauce and roast at 400°F for 15-20 minutes. Store leftovers in the fridge for up to 5 days or freeze for 3 months—it reheats perfectly.
Why did my beef tips turn out dry?
Dry beef tips usually happen from overcooking or skipping the resting time. Sear them just until golden (2-3 minutes per side) and simmer gently for 5-6 minutes total after adding the sauce. Always let them rest for 3-5 minutes before serving. Also, ensure you're using a quality cut with marbling—cheaper cuts with less fat dry out faster.
What's the best way to reheat leftovers?
Reheat beef tips gently in a skillet over low-medium heat with a splash of beef broth or water to prevent drying. Add just enough liquid to deglaze the pan and keep the sauce from sticking. Warm for 3-4 minutes until heated through. For the sauce alone, reheat in a saucepan over medium-low heat, stirring frequently to prevent scorching. Microwaving isn't recommended as it can make the sauce grainy.