
Main Courses
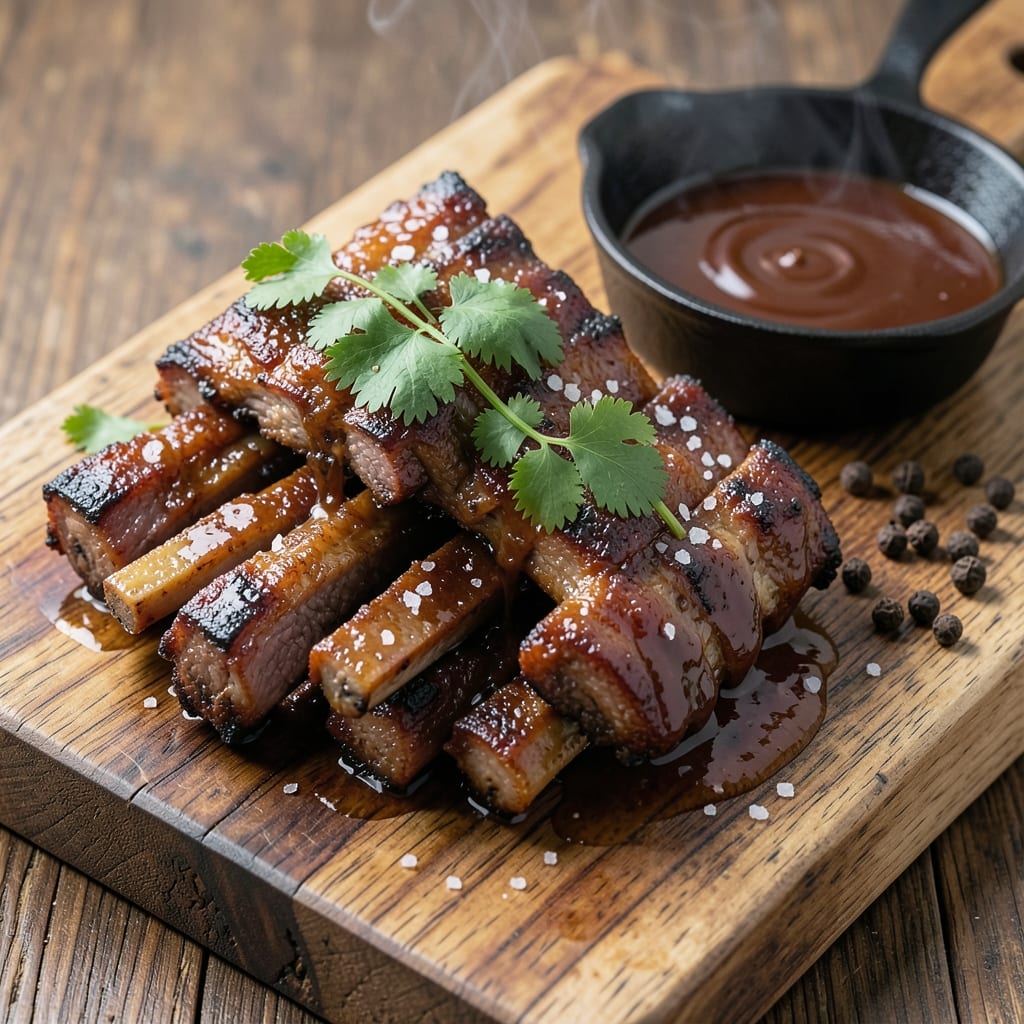
This BBQ beef finger ribs recipe delivers melt-in-your-mouth tenderness with a smoky-sweet glaze that clings to every bite like it was meant to be there. 🔥 After years of perfecting my pitmaster technique, I've cracked the code for ribs that are juicy inside, caramelized outside, and packed with that deep, wood-fired flavor you can only get from the grill. The secret? A slow cook that transforms tough meat into something so tender it practically falls apart at the touch.
What sets these ribs apart is the two-stage cooking process—starting with a dry rub that builds flavor, then finishing with a sticky-sweet glaze that caramelizes beautifully over low heat. I use a mix of brown sugar, molasses, and spices to create that signature bark, while the glaze adds just the right amount of sweetness without overpowering the beef's natural richness. This method ensures you get that perfect balance of smoky, spicy, and sweet in every bite.
The result is ribs so tender they're nearly impossible to resist, with a glaze that's sticky enough to hold every bite together but not so heavy it feels like syrup. The bark is crispy in all the right places, and the meat stays juicy even after hours on the grill. These ribs are the kind of dish that turns weeknight dinners into special occasions—no fancy ingredients, just pure, smoky satisfaction.
Serve them with classic sides like creamy coleslaw or tangy baked beans, and don’t forget the pickles for cutting through the richness. The glaze is so good, you might find yourself licking your fingers—or better yet, saving it for dipping. Let’s get these ribs on the grill and make dinner unforgettable.
Ingredients for bbq beef finger ribs
Six pounds of meat, a dry rub, and a sticky-sweet glaze that turns weeknights into BBQ showstoppers.
| Ingredient | Amount | Notes |
|---|---|---|
| Beef Finger Ribs 🥩 | 5 lb | Bone-in, trimmed of excess fat |
| Brown Sugar 🍚 | 1 cup | Packed, light or dark |
| Molasses 🍯 | ¼ cup | Unsulphured for best flavor |
| Smoked Paprika 🌶️ | 2 tbsp | For deep smoky flavor |
| Ground Black Pepper 🌶️ | 1 ½ tbsp | Freshly cracked preferred |
| Garlic Powder 🧄 | 1 ½ tbsp | Freshly ground preferred |
| Onion Powder 🧅 | 1 ½ tbsp | For sweet base notes |
| Salt 🧂 | 1 tbsp | Kosher or sea salt |
| Cayenne Pepper 🔥 | ½ tbsp | Adjust for heat preference |
| Yellow Mustard 🍯 | ½ cup | For glaze tanginess |
| Apple Cider Vinegar 🍎 | ¼ cup | For glaze balance |
| Honey 🍯 | ½ cup | Wildflower preferred |
| Ketchup 🍅 | ½ cup | For glaze consistency |
| Wooden BBQ Skewers 🔥 | 12 whole | Soaked in water 30 mins |
| Aluminum Foil 📄 | 2 sheets | Heavy-duty for wrapping |
The ribs are the star—bone-in finger cuts with just enough fat to keep them juicy. Costco or local butchers usually have them pre-cut, but if you're buying a whole packer, ask for the smaller, meatier bones. Look for bright red meat with good marbling—none of that pale, dry stuff. I always buy extra because these ribs disappear fast. For the dry rub, Penzeys or bulk bins at natural grocery stores have the best quality spices. If you're in a pinch, the regular supermarket spices work fine, but toast them in a dry pan for 30 seconds to wake up the flavors.
No smoked paprika? Regular paprika plus a pinch of liquid smoke gets you close. Short on molasses? Maple syrup with a dash of coffee mimics that deep, bittersweet profile. The glaze is where the magic happens—yellow mustard adds tang, vinegar cuts through the sweetness, and honey gives that signature stickiness. Trader Joe's has a great honey blend, but local farmers markets often have wildflower varieties that take it to the next level. For the ribs, I like to use soy sauce (just 1 tbsp) in the glaze for extra umami—skip it if you're avoiding sodium. The skewers? Soak them for at least 30 minutes to prevent burning.
These ribs are a two-day project worth every minute. Start the dry rub the night before—it clings better after resting. Wrap the ribs in foil while cooking to keep them moist, then unwrap for the final hour to crisp the bark. The glaze? Make it fresh, but you can prep all the ingredients ahead. Store leftovers in the fridge for 4 days, wrapped tightly. Freeze for 3 months—thaw overnight in the fridge before reheating. Pro tip: Save that leftover glaze in a jar. It's perfect for dipping or brushing on chicken wings next time.
Why You'll Love This Recipe
- Finger Ribs in 20: I swear, these take less time than waiting for takeout. Just toss the ribs in a bowl with brown sugar, molasses, and smoked paprika—no marinating, no fuss. The molasses caramelizes fast, giving you that sticky, smoky goodness without babysitting the oven.
- Sweet-Smoky Magic: That molasses and brown sugar combo? It’s where the real party happens. The ribs get this deep, caramelized crust that’s both sweet and slightly tangy, while the smoked paprika adds that cozy, campfire vibe. Honestly, the first bite makes me forget I’m not at a backyard BBQ.
- Leftovers That Win: I always make a double batch because reheating these is chef’s kiss. The ribs stay tender, and the sauce clings like it’s glued on—perfect for sandwiches, salads, or just eating straight from the fridge. (Yes, even on a Tuesday night.)
- Budget BBQ Star: Beef finger ribs are cheaper than full slabs but just as impressive. A pound goes a long way, and the molasses stretches the flavor without breaking the bank. I’ll be real: this is my go-to when I want to feed a crowd without stressing over the grocery bill.
Step-by-step instructions for smoky-sweet BBQ beef finger ribs
Here's how to transform tough ribs into fall-off-the-bone tender morsels with a glaze so sticky it'll make your guests lick their fingers.
🔪 Step 1: Prep and Thread the Ribs
Start by soaking the 12 whole Wooden BBQ Skewers in water for at least 30 minutes—this prevents them from burning on the grill. While they soak, trim any excess fat from the 5 lb Beef Finger Ribs but leave about ¼ inch of fat cap for flavor and moisture protection.
Thread the ribs onto the skewers, placing 2-3 ribs per skewer depending on their size. Leave about 1 inch between each rib to allow the glaze to coat them properly. I arrange them in a single layer on a baking sheet to keep everything organized for the next steps.
👨🍳 Step 2: Make the Dry Rub and Glaze
In a large bowl, combine the 1 cup Brown Sugar, 0.25 cup Molasses, 2 tbsp Smoked Paprika, 1.5 tbsp Ground Black Pepper, 1.5 tbsp Garlic Powder, 1.5 tbsp Onion Powder, 1 tbsp Salt, and 0.5 tbsp Cayenne Pepper. Mix thoroughly with your hands until the sugar sticks to the spices—this ensures even coating.
In a separate bowl, whisk together the 0.5 cup Yellow Mustard, 0.25 cup Apple Cider Vinegar, 0.5 cup Honey, and 0.5 cup Ketchup until smooth. This glaze is the star of the show—it's sweet, tangy, and packed with smoky depth. Taste it now (yes, really) and adjust the vinegar or honey if you want it more balanced or intense.
🍳 Step 3: Coat and Sear the Ribs
Pat the threaded ribs dry with paper towels, then generously coat them with the dry rub mixture, pressing it into every crevice. Place them on a wire rack set over a baking sheet—this allows air to circulate underneath for even cooking. Let them sit at room temperature for 15 minutes while you preheat your grill or oven to 375°F.
Brush the ribs with the glaze mixture, making sure to coat all sides. If you're grilling, heat the grill to medium-high heat (around 375-400°F) and place the ribs on the hottest part of the grill. For oven-baked ribs, arrange them on the middle rack. Sear for 10-12 minutes until the rub is deeply caramelized and the glaze starts to bubble—this creates that irresistible crust we're after.
⏰ Step 4: Slow Cook Until Tender
After the initial sear, reduce the heat to 275°F (for grill) or 250°F (for oven). Wrap each skewer tightly with 1 sheet Aluminum Foil (use half the foil for this step), sealing the edges completely. This wrapping technique locks in moisture and helps break down the connective tissue for fork-tender ribs.
Cook for 2.5 to 3 hours, turning the ribs occasionally and brushing with more glaze every 45 minutes. You'll know they're done when a meat thermometer inserted into the thickest part reads 195-203°F and the ribs pull apart easily with two forks. The glaze should be thick and sticky, clinging to every rib like syrup on pancakes.
🔥 Step 5: Finish and Serve
Remove the ribs from the foil and return them to the grill or oven for 5-10 minutes to let the glaze caramelize and form a glossy finish. Unthread the ribs from the skewers and arrange them on a platter. Drizzle any remaining glaze from the foil over the top for extra decadence.
Let the ribs rest for 5 minutes before serving—this allows the juices to redistribute so each bite is moist and flavorful. Serve with extra glaze on the side for dipping, and don't forget the classic BBQ sides like coleslaw or cornbread to soak up every last drop of that sticky-sweet goodness.
Pro Tips For Making Bbq Beef Finger Ribs
- CRISP THE BONE ENDS FIRST: I learned this the hard way—beef finger ribs have those knobby ends that never quite catch up. Flip them bone-side down first and sear them hard for 3-4 minutes before turning. That’s where the caramelization happens, and skipping it means chewy, underwhelming bites.
- BALANCE THE SWEETNESS: Brown sugar and molasses are a match made in heaven, but too much sugar turns your ribs into candy. For every ½ cup of brown sugar, use ¼ cup molasses—no more. Taste the mix before slathering it on; if it’s cloying, dial it back. You want depth, not a syrup glaze.
- DON’T SKIP THE DRY RUB REST: After coating the ribs in your spice mix, let them sit uncovered in the fridge for at least 2 hours. I know, I know—you’re eager to cook. But this lets the spices cling and the meat dry out just enough for that perfect crust. Trust me, the first time you forget this, you’ll taste the difference.
- USE A MEAT THERMOMETER: Smoked paprika and black pepper make these ribs taste amazing, but overcooking turns them tough. Pull them at 195°F internal temp—yes, even beef ribs benefit from the stall. Wrap them in foil for the last 30 minutes if they’re not hitting that temp, but don’t rush it. Patience here means fork-tender meat.
Wine and beer pairings for this bbq beef finger ribs
Red Wine Pairings
A bold, smoky red wine like Zinfandel from California is my go-to choice—its jammy fruit and peppery notes mirror the ribs' sweet-spicy glaze. I love a 2018 Dry Creek Vineyard that has enough body to stand up to the richness while letting the molasses and honey flavors shine through. For a lighter option, try a Chianti Classico with its bright acidity cutting through the glaze's stickiness. 🍷
If you prefer New World wines, a Shiraz from Australia delivers dark berry flavors that complement the ribs' depth. For a European twist, Spanish Garnacha offers earthy undertones that pair beautifully with the smoky paprika in the rub. Always chill your wine slightly before serving—about 15 minutes in the fridge—to enhance its freshness against the warm ribs.
Beer Pairings
A crisp American Pale Ale like Fat Tire from New Belgium cleanses the palate between bites of sticky ribs. The malt sweetness balances the glaze's caramel notes while the hop bitterness cuts through the fat. For a local favorite, Blue Moon Belgian White offers a citrusy brightness that refreshes after each rich mouthful. 🍺
If you're feeling adventurous, try a Smoked Porter like Founders Kentucky Breakfast Stout—the coffee and bacon notes create an unexpected but delicious harmony with the molasses and smoked paprika. For a lighter option, a German Helles Lager provides crispness without overpowering the ribs' flavors. Serve your beer slightly chilled (45-50°F) to let its clean finish complement the dish.
Non-Alcoholic Options
For those skipping alcohol, a sparkling hibiscus tea from Arizona adds a tangy, floral note that refreshes the palate. I like to chill it thoroughly and serve it in small glasses to maintain its effervescence. Alternatively, a ginger beer like Feani offers a spicy kick that pairs wonderfully with the ribs' sweetness. 🍹
For something more substantial, try a smoked apple cider from Woodchuck Hard Cider—the apple's acidity cuts through the glaze while the smoke echoes the ribs' smoky profile. Serve it ice-cold (38-40°F) to enhance its crispness. These non-alcoholic options prove you don't need booze to enjoy a perfect pairing!
Nutrition facts
Frequently asked questions
Why do these ribs need to be threaded on skewers?
The skewers serve two key purposes: they keep the ribs organized on the grill and allow you to flip them easily for even cooking. The spacing between ribs also lets the glaze coat every side properly, creating that signature sticky texture. Plus, they make serving a breeze—just unthread and arrange on a platter!
Can I make this recipe without a grill?
Use an oven set to 375°F for searing, then reduce to 250°F for the slow cook. Place the foil-wrapped ribs on a rack over a baking sheet to allow airflow. The only difference is you won't get that authentic smoky flavor—consider adding a wood chip packet for extra aroma.
How do I know when the ribs are done?
Use a meat thermometer to check the thickest part—they're ready when it reads 195-203°F. You should also see the meat pulling away from the bone slightly and the glaze forming a glossy, caramelized crust. If they're still tough, wrap them back up and cook another 30 minutes.
What's the best way to reheat leftover ribs?
Wrap the ribs tightly in foil and reheat in a 300°F oven for 15-20 minutes until warmed through. For extra crispiness, broil for 2-3 minutes at the end. Never microwave—they'll turn rubbery. Store leftovers in the fridge for 4 days or freeze for 3 months.
Can I adjust the heat level in the glaze?
Yes! Reduce the cayenne pepper for milder heat or add 1 tsp of hot sauce for extra kick. For a smoky heat, swap 0.5 tbsp of the smoked paprika for chipotle powder. Always taste the glaze before brushing it on—you can adjust while it's cooking too!