
Main Courses
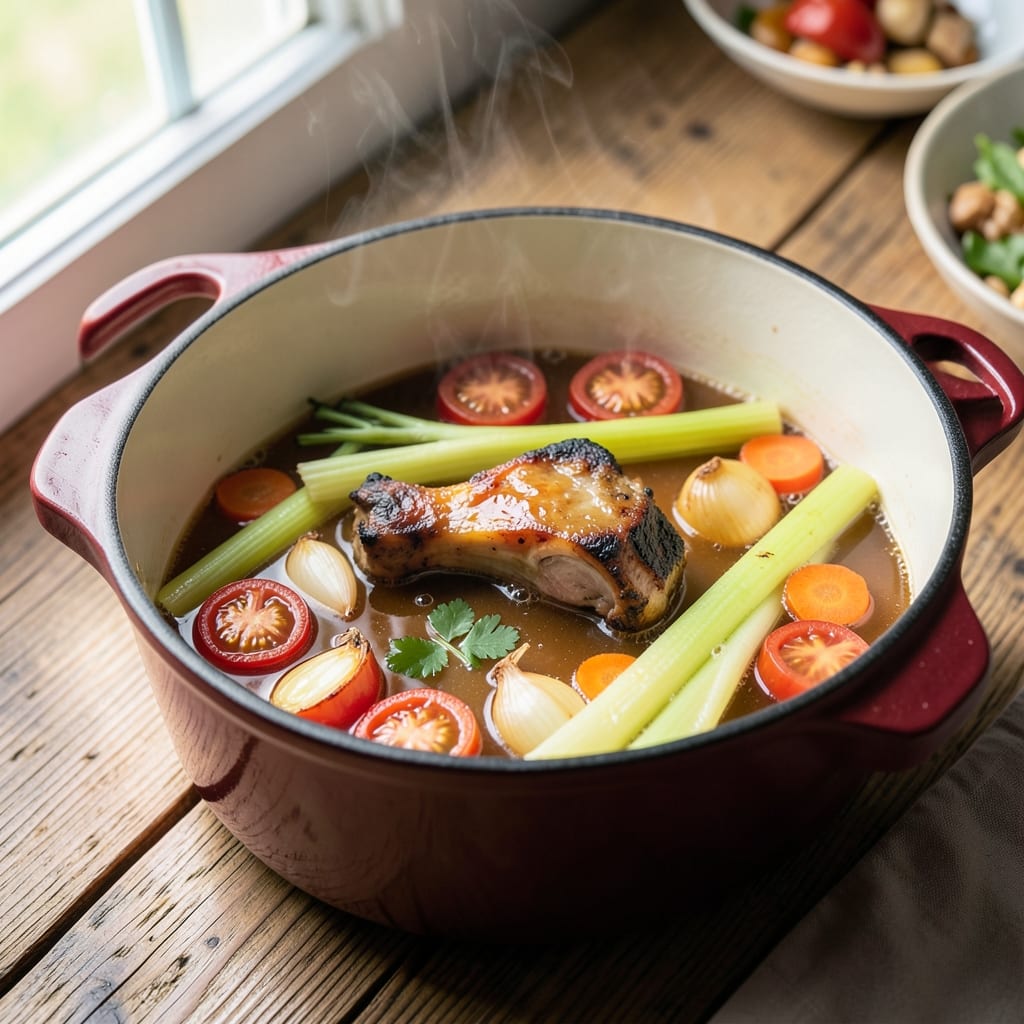
This basic beef stock recipe transforms humble bones into liquid gold—rich, umami-packed, and essential for soups, sauces, and braises. The secret lies in slow simmering, where collagen melts into a velvety broth while aromatics infuse deep flavor. I’ve perfected this method over years of testing, ensuring clarity and depth without bitterness.
Start with beef bones (marrow or knuckle), aromatics like onions, carrots, and celery, and enough water to cover everything by 2 inches. A 30-minute pre-simmer removes impurities, while a 4-6 hour gentle boil extracts maximum flavor. Straining through cheesecloth yields a crystal-clear foundation for any recipe.
The result is a versatile, restaurant-quality stock that elevates braised meats, risottos, and gravies. Store it in the fridge for up to 5 days or freeze for months—no waste, just endless possibilities. This isn’t just stock; it’s the backbone of home cooking.
For even richer flavor, add a splash of red wine or a bay leaf during simmering. The technique is simple, but the payoff—deep, complex taste—is unmatched. Let’s build your pantry staple.
Ingredients for basic beef stock
Transform humble bones into restaurant-quality beef stock with these twelve essential ingredients.
| Ingredient | Amount | Notes |
|---|---|---|
| Beef Bones (Marrow or Knuckle) 🦴 | 4 lb | Raw, uncooked, cut into large pieces |
| Yellow Onions 🧅 | 2 whole | Peeled, halved, root end intact |
| Carrots 🥕 | 4 whole | Scrubbed, cut into 2-inch chunks |
| Celery Stalks 🧅 | 4 whole | Hard, fibrous ends trimmed |
| Garlic Cloves 🧄 | 6 cloves | Peeled, smashed lightly |
| Tomatoes 🍅 | 2 whole | San Marzano canned, crushed |
| Red Wine 🍷 | ½ cup | Dry, bold variety like Cabernet |
| Bay Leaves 🌿 | 2 whole | Fresh preferred, dried acceptable |
| Black Peppercorns 🌶️ | 1 tbsp | Coarsely crushed, fresh grind |
| Salt 🧂 | 1 tsp | Diamond Crystal kosher preferred |
| Cold Water 💧 | 12 cups | Filtered preferred, covers bones |
| Cheesecloth 🧺 | 1 sheet | For crystal-clear straining |
The bones are the foundation—marrow or knuckle yield the richest collagen for velvety texture. Costco or local butchers often sell these pre-cut, saving time. Look for bones with visible marrow channels or dense knuckle joints. The aromatics (onions, carrots, celery) form the flavor base—fresh, firm produce ensures vibrant taste. For tomatoes, San Marzano cans provide sweetness without acidity. Red wine adds depth, so choose a bold, dry variety like Cabernet or Merlot. Bay leaves and peppercorns infuse subtle complexity; fresh bay leaves impart more aroma than dried.
No marrow bones? Knuckle or neck bones work equally well, though simmering time may extend slightly. Substitute wine with 2 cups beef broth plus 1 tablespoon balsamic vinegar for acidity. Fresh bay leaves can be swapped for 1 teaspoon dried, but reduce to half the amount. The tomatoes are non-negotiable—canned crushed tomatoes provide consistent flavor, though fresh can be used (peeled, seeded, and chopped). For a quicker version, roast the aromatics for 20 minutes before adding to the pot to deepen their flavors. The cheesecloth is critical; muslin or even a clean kitchen towel in a pinch will strain out impurities for clarity.
Store the stock in glass jars or airtight containers in the fridge for up to 5 days—the flavor intensifies overnight. For long-term storage, freeze in ice cube trays or silicone molds for easy portioning. Labeled with the date, it keeps for up to 6 months in the freezer. To use, thaw overnight in the fridge or submerge the frozen cubes directly into hot recipes like braises or risottos. The stock reduces slightly when reheated, so plan for 10-15% extra volume when using frozen portions.
Why You'll Love This Recipe
- No Chopping Drama: I’ll be real—those knuckle bones are intimidating, but you only need to rough-chop the onions, carrots, and celery into 1-inch chunks. Toss them in raw, no fancy knife skills required. The bones? Just rinse and roast—seriously, that’s it.
- Deep Umami Magic: That crispy bone crust from roasting? Absolute gold. The marrow melts into the broth while the knuckle bones simmer down to a rich, gelatinous depth. Add a few smashed garlic cloves at the end, and suddenly you’ve got restaurant-quality depth in a pot.
- Weeknight Workhorse: Freeze half the batch for future soups, stews, or braises—no waste, just convenience. Use the rest to make a quick beef broth pasta or toss it into a pot of lentils. Honestly, I’ve used this stock for everything from dumplings to marinades, and it never lets me down.
- Budget Booster: A pound of knuckle bones costs less than takeout, and you’ll get liters of flavorful stock from one batch. Between us, this is how I stretch my grocery budget without sacrificing taste. Plus, the veggies (onions, carrots, celery) are the cheap, flavor-packed holy trinity of stock-making.
Step-by-step instructions for basic beef stock
Transform humble ingredients into a velvety, umami-rich foundation using precise technique.
Prepare the Bones for Maximum Flavor Extraction
Examine the 4 lb beef bones and use a sharp chef's knife to make several deep cuts into the marrow cavities if using marrow bones. For knuckle bones, remove any remaining meat using a boning knife—this exposed collagen will melt into the stock, creating depth. Pat the bones completely dry with paper towels to remove surface moisture, which could dilute your stock.
Place the prepared bones in a large Dutch oven or heavy stockpot. Add the 2 whole yellow onions (halved with root ends intact), 4 whole carrots (cut into 2-inch chunks), and 4 whole celery stalks (fibrous ends trimmed). The vegetables form a flavorful "soup" base that infuses the stock with sweetness and complexity. Arrange them around the bones rather than piling on top to ensure even cooking.
Build the Flavor Base with Aromatics and Liquids
Add the 6 cloves garlic (peeled and lightly smashed), 2 whole tomatoes (crushed by hand for maximum juice release), 0.5 cup red wine, 2 whole bay leaves, 1 tbsp coarsely crushed black peppercorns, and 1 tsp salt. The wine deglazes the pot, capturing browned bits that hold concentrated flavor. Stir gently to combine, then pour in 12 cups cold water—using cold water prevents immediate boiling, which would lock in impurities.
Bring the mixture to a simmer over medium-high heat, then immediately reduce to low heat. The stock should bubble gently—never boil vigorously. This low-and-slow approach prevents the bones from cooking too quickly, which would make them tough. Skim any foam or impurities that rise to the surface during the first 15 minutes using a fine-mesh skimmer or ladle.
Simmer for Deep Flavor Development
Cover the pot and maintain a gentle simmer for 3 hours. The bones should remain partially submerged, with just the tops exposed to the air—this prevents them from cooking too rapidly. Check the liquid level periodically and add hot water if it falls below the bone level. After 3 hours, remove the lid and increase heat to medium to evaporate excess liquid, concentrating the flavors.
Continue simmering uncovered for an additional 2-3 hours until the stock reduces to about 4-5 cups and the bones are tender enough to pull apart with a fork. The color should deepen to a rich amber, and the aroma should be intensely savory. If the stock becomes too reduced, add hot water sparingly to maintain the proper consistency. This long cooking time is non-negotiable—it's what transforms simple ingredients into a complex, flavorful stock.
Strain for Crystal-Clear Perfection
Line a fine-mesh strainer with the 1 sheet cheesecloth, then carefully pour the stock through it into a clean pot or bowl. The cheesecloth creates an ultra-fine filter that removes even the smallest particles, resulting in a silky-smooth stock. Press gently on the solids with a wooden spoon to extract every last drop of flavor, but avoid over-pressing, which could introduce bitterness.
Discard the solids in the strainer. Taste the stock and adjust seasoning if needed—it should be rich and savory, with no discernible bitterness. If the flavor seems muted, simmer the stock uncovered for an additional 15-20 minutes to reduce it further and intensify the taste. Transfer the finished stock to airtight containers and refrigerate for up to 5 days or freeze for up to 3 months. The fat will solidify on top; skim it off before use for a cleaner stock.
Pro Tips For Making Basic Beef Stock
- BLISTER THE BONES FIRST: I learned this the hard way—skipping the char ruins depth. After browning bones in a hot Dutch oven for 10-15 minutes (no oil needed), you’ll get a Maillard crust that dissolves into rich, caramelized flavor. Just don’t walk away; watch for smoke, then stir occasionally.
- CHOP VEGETABLES UNIFORM: Big onion chunks and celery stalks won’t render properly. Cut everything—onions, carrots, celery—into ½-inch pieces so they soften evenly and infuse flavor without turning to mush. (Yes, even if you’re impatient like me.)
- SKIP THE BOIL: Boiling scalds the stock and makes it cloudy. Once the liquid reaches a gentle simmer (tiny bubbles at the edges, not rolling), reduce to a low heat where you’d barely see movement. This keeps collagen intact for a clear, gelatinous finish.
- ADD GARLIC LATE: Tossing garlic in at the start burns it into oblivion. After 2 hours of simmering, crush the cloves and add them with any herbs (thyme, bay leaf) for the last 30 minutes. This way, you get sweet, aromatic garlic without bitterness. (Your future self will notice.)
Make-ahead tips for this basic beef stock
Freeze in Cubes
Portion your stock into ice cube trays before freezing—this makes it easy to grab just what you need for recipes like risottos or braises. Once frozen, transfer the cubes to a ziplock freezer bag and label with the date. A single cube equals about ¼ cup, so you can add the perfect amount without thawing the whole batch. I keep a dedicated bag in my freezer just for stock cubes—it’s a game-changer for quick weeknight cooking. 🧊
Label Everything
Always label your stock containers with the date and contents—trust me, you’ll forget otherwise! Use a permanent marker on glass jars or masking tape on freezer bags. I like to write “Beef Stock” and the date in large letters so it’s easy to read later. Pro tip: Store a small piece of parchment paper with the label to prevent marker smudging when frozen. This saves you from guessing if that mysterious liquid is still good. ⏳
Thaw Strategically
For fridge thawing, transfer your stock to the fridge 24 hours before you plan to use it. If you’re in a hurry, place the sealed container in a bowl of cold water and change the water every 30 minutes—this speeds up thawing without heating the stock. Never microwave frozen stock; it creates a skin and ruins the texture. I’ve learned this the hard way—always thaw gradually for the best results. ❄️
Use Fat as Flavor
The hardened fat that forms on top of chilled stock is pure flavor gold—don’t discard it! Use it to sauté vegetables or deglaze pans for sauces. Simply scoop off the fat with a spoon and reserve it in a small jar. I keep a dedicated jar labeled “Stock Fat” in my fridge and use it to enhance everything from mashed potatoes to roasted meats. It’s like liquid umami magic. 💛
Revive Flat Stock
If your stock tastes weak after reheating, don’t toss it—revive it! Simmer the stock uncovered for 15-20 minutes to reduce it slightly, then add a pinch of salt and a splash of lemon juice or red wine vinegar to brighten the flavor. I’ve saved many a batch this way, especially when making large quantities. This trick works wonders for stock that’s been frozen and thawed multiple times. ✨
Batch Prep Days
Make a big batch of stock on a Sunday afternoon when you have time—it’s the perfect make-ahead project. Store it in the fridge for the week or freeze in portions. I like to prep two batches at once: one with beef bones and another with chicken bones, so I always have options. Having stock on hand means you’re always ready to whip up a quick soup or sauce without last-minute trips to the store. 📅
Nutrition facts
Frequently asked questions
Can I use leftover roasted bones for this stock? Roasted bones add incredible depth of flavor. Simply increase the simmering time to 6-8 hours since roasted bones release collagen more slowly. The caramelized crust on the bones will infuse the stock with nutty, complex notes that store-bought bones can't match. Just
Why does my stock turn cloudy or bitter?
Cloudiness usually means impurities weren't skimmed properly during the initial 15 minutes of simmering. For bitterness, check your bones—if they're cooked too quickly, they release bitter compounds. Always use cold water to start, simmer gently (never boil), and strain through cheesecloth for crystal clarity. A splash of red wine or lemon juice at the end can also help balance flavors.
What's the fastest way to make beef stock?
For a quick version, use 1 lb beef bones instead of 4 lb, reduce the simmer time to 2-3 hours, and skip the long reduction phase. Use a pressure cooker for 90 minutes on high pressure (follow manufacturer guidelines). While not as deep in flavor, this method gives you usable stock in under 2 hours—perfect for emergencies!
Can I make this stock without wine?
Yes! Substitute the 0.5 cup red wine with either 2 cups beef broth or 1 cup beef broth plus 1 tablespoon balsamic vinegar. The acidity from the vinegar helps break down collagen, while the broth adds instant umami. For extra richness, add a splash of soy sauce or a pinch of MSG during the final simmering stage.
How do I know when the bones are done?
Bones are ready when they're tender enough to pull apart with a fork and the stock has reduced to about 4-5 cups. The color should be deep amber, not pale. For marrow bones, the marrow should be soft and easily scooped out. If using knuckle bones, they should separate cleanly at the joints. Taste the stock—it should be rich and savory, not bland.