
Main Courses
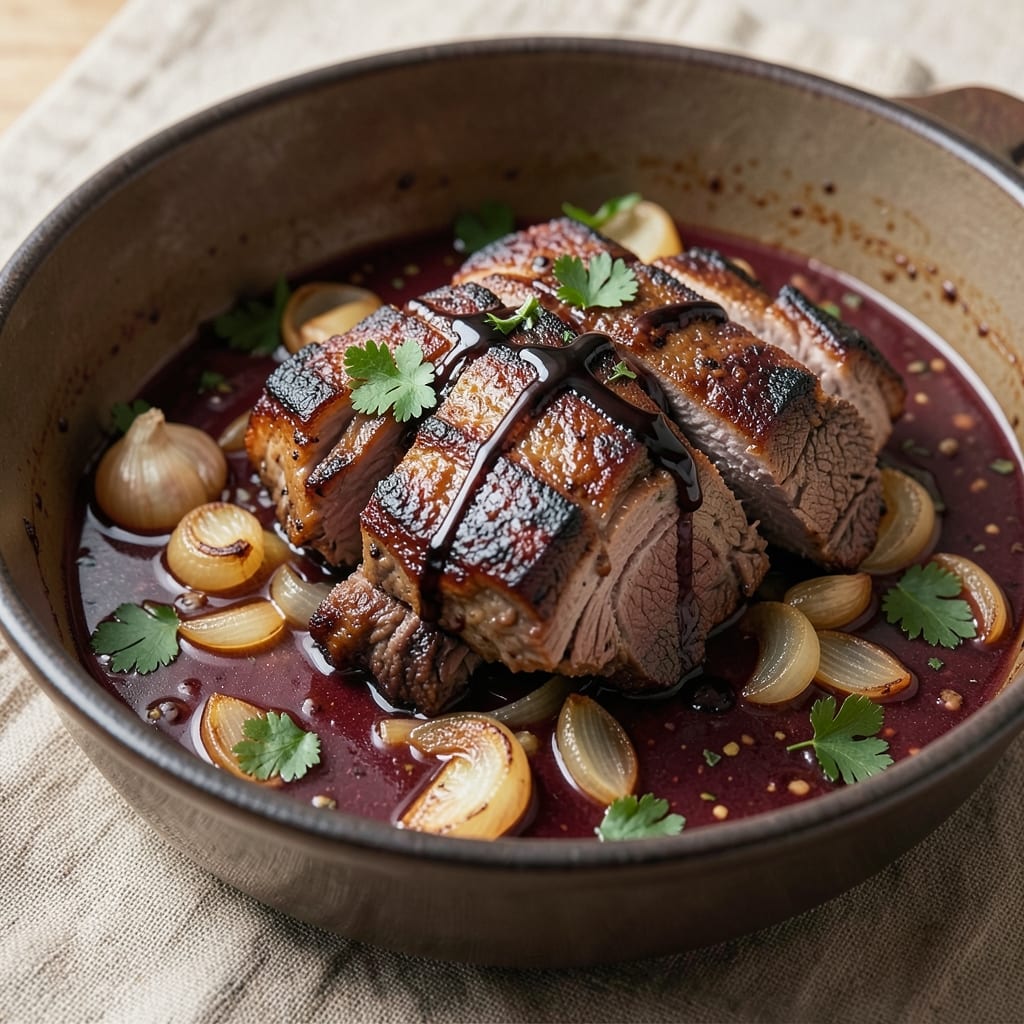
This balsamic braised beef recipe transforms tough cuts into melt-in-your-mouth perfection with just one pot and a few hours of hands-off time. The secret lies in the slow cooking process, where rich red wine and balsamic vinegar break down the meat while creating a velvety sauce that clings to every bite. I've perfected this technique over years of testing, ensuring the beef is tender enough to fall apart with minimal effort.
The beauty of this dish is its simplicity—no fancy equipment required beyond a heavy pot or Dutch oven. You'll start with a quick sear to build flavor, then deglaze with wine to create the foundation for that signature balsamic sauce. The low-and-slow cooking method (about 3 hours) allows the beef to absorb all those deep, wine-infused flavors while maintaining a perfect texture.
What you'll end up with is a restaurant-quality main course that's rich, aromatic, and impossibly tender. The sauce reduces to a glossy consistency that coats each bite, balancing sweetness from the balsamic with the depth of red wine. This dish pairs beautifully with creamy polenta, roasted root vegetables, or crusty bread to soak up every last drop of that luxurious sauce.
Perfect for special occasions or cozy weeknight dinners, this recipe delivers professional results with minimal fuss. The aroma alone will have everyone gathering at the table, eager for a taste of this deeply satisfying meal. Let's get started on creating your most tender beef yet.
Ingredients for balsamic braised beef
Here's what you need to create melt-in-your-mouth balsamic braised beef with deep wine flavors.
| Ingredient | Amount | Notes |
|---|---|---|
| Beef Chuck Roast 🥩 | 3 lb | Cut into 2-inch chunks |
| Red Wine 🍷 | 1 cup | Bold, dry variety like Cabernet Sauvignon |
| Balsamic Vinegar 🍶 | ½ cup | Aged, high-quality preferred |
| Beef Broth 🥫 | 2 cups | Low-sodium preferred |
| Onion 🧅 | 1 whole | Yellow, chopped |
| Garlic Cloves 🧄 | 4 cloves | Minced |
| Carrots 🥕 | 2 whole | Peeled, sliced into rounds |
| Tomato Paste 🍅 | 2 tbsp | Squeeze tube or canned |
| Olive Oil 🫒 | 2 tbsp | Extra-virgin for richness |
| Fresh Thyme 🌿 | ¼ cup | Leaves only, chopped |
| Bay Leaves 🌿 | 2 whole | Dried |
| Salt 🧂 | 1 ½ tsp | Kosher or sea salt |
| Black Pepper 🌶️ | 1 tsp | Freshly ground |
| All-Purpose Flour 🌾 | 2 tbsp | For dredging beef |
The beef is the star here—chuck roast is ideal because it's tough enough to benefit from the long braise but tenderizes beautifully. Grab a 3-pound roast from the store's meat counter, or ask for it pre-cut if you're short on time. Costco or Trader Joe's usually have great prices, but any grocery store with a butcher section will work. Look for good marbling—those little white flecks of fat mean more flavor. If you can't find chuck, sirloin or round roast will work, but they'll need a bit more time to become tender. Cut the beef into 2-inch chunks before you start cooking, and pat them dry with paper towels—this helps the sear develop better.
No red wine? Beef broth with a splash of balsamic gets you close—just add 2 tbsp of balsamic to the broth for depth. Fresh thyme is ideal, but dried thyme at one-third the amount works in a pinch. The tomato paste can be from a squeeze tube (like Trader Joe's brand) or a can—just make sure it's smooth, not chunky. If you're using dried bay leaves, toast them lightly in a dry pan for 30 seconds to bring out their flavor. The carrots can be baby carrots if that's what's in the fridge, but regular carrots peeled and sliced into rounds work too. For the wine, any bold, dry red will do—Cabernet Sauvignon, Merlot, whatever's open. Avoid sweet wines like Zinfandel, or the sauce will taste off.
This dish tastes even better the next day, so make extra if you can. Store leftovers in an airtight container in the fridge for up to 5 days, or freeze for 3 months. The sauce thickens as it cools, so you might need to add a splash of water or broth when reheating. If you're prepping ahead, you can sear the beef and deglaze the pan, then refrigerate the raw mixture in a sealed container. Finish cooking it when you're ready to serve—just add the liquid and simmer until done. The aroma alone will have everyone at the table waiting for dinner.
Why You'll Love This Recipe
- I’ll be real: this recipe actually improves the next day. The beef gets even more tender, and the sauce thickens into this glossy, glossy glaze. Pack it for lunches, freeze portions for busy weeks, or just reheat a slab for a lazy dinner—no one will guess it’s not fresh.
- Deep Umami Magic: Between us, that combo of red wine and balsamic vinegar? It’s like flavor alchemy. The wine softens the beef into melt-in-your-mouth perfection, while the balsamic adds this tangy depth that makes every bite ridiculously satisfying. (Yes, even on a Tuesday night.)
- Leftovers That Shine: I’ll be real: this recipe actually improves the next day. The beef gets even more tender, and the sauce thickens into this glossy, glossy glaze. Pack it for lunches, freeze portions for busy weeks, or just reheat a slab for a lazy dinner—no one will guess it’s not fresh.
- Budget-Friendly Feast: A beef chuck roast stretches across multiple meals without breaking the bank, and the ingredients here are all pantry staples. You’re getting restaurant-quality richness for a fraction of the cost, plus the kind of leftovers that make you feel like you’ve won the week.
Step-by-step instructions for balsamic braised beef
Here's how to transform tough chuck roast into melt-in-your-mouth perfection using just one pot.
Prepare and Sear the Beef
Cut the 3 lb beef chuck roast into 2-inch chunks and pat them dry with paper towels. This step is crucial—wet beef steams instead of searing. Place the flour in a shallow dish and dredge each beef chunk thoroughly, shaking off any excess. This creates a golden crust that locks in juices.
Heat 1 tablespoon of the olive oil in a large Dutch oven over medium-high heat until shimmering. Working in batches, add the beef chunks and sear for 3-4 minutes per side until deeply browned. Don't crowd the pan—this prevents proper browning. Transfer the seared beef to a plate as you work. You want those chunks to develop a rich, caramelized crust that forms the flavor foundation for your braise.
Build the Flavor Base
In the same Dutch oven, add the remaining 1 tablespoon olive oil and reduce heat to medium. Add the chopped onion and cook for 5 minutes until softened and translucent. Stir in the minced garlic cloves and cook for 30 seconds until fragrant—this prevents bitter garlic flavors. Add the sliced carrots, tomato paste, and the 0.25 cup chopped fresh thyme leaves, stirring to combine.
Pour in the 1 cup red wine and scrape up any browned bits from the bottom of the pot. These bits, called fond, are packed with flavor. Let the wine simmer for 3-4 minutes until reduced by half. This concentration deepens the wine's richness in your final dish. The aroma should be intense and inviting at this point.
Braise to Perfect Tenderness
Return all the beef to the Dutch oven along with the 2 whole bay leaves. Pour in the 2 cups beef broth and 0.5 cup balsamic vinegar. The liquid should come about halfway up the beef chunks. Sprinkle with the 1.5 teaspoons salt and 1 teaspoon black pepper, then give everything a good stir.
Bring the mixture to a gentle simmer, then cover with a tight-fitting lid. Reduce heat to low and let it cook for 2.5 to 3 hours. The key here is patience—the longer it braises, the more tender the beef becomes. Check occasionally to ensure liquid hasn't evaporated completely, adding a splash of water if needed. You'll know it's ready when the beef easily pulls apart with a fork and the sauce has thickened into a glossy consistency.
Finish and Serve
Once the beef is fork-tender, remove the bay leaves and adjust the seasoning if needed. For a thicker sauce, uncover the pot and simmer for an additional 10-15 minutes until the liquid reduces to your desired consistency. The sauce should coat the back of a spoon and cling beautifully to the beef.
Serve the braised beef directly from the Dutch oven, spooning the rich sauce over each portion. This dish tastes even better the next day as the flavors continue to meld. Pair it with crusty bread to soak up every last bit of that luscious balsamic-wine sauce. The beef should be so tender it practically melts in your mouth, with a perfect balance of wine acidity, sweet balsamic notes, and rich beef flavor.
Pro Tips For Making Balsamic Braised Beef
- SEAR THE CHUCK HARD: I learned this the hard way—skipping a deep sear means your beef won’t develop that rich, caramelized crust that holds up through hours of braising. Use a heavy pot (Dutch oven if you’ve got one) and let those sides get dark brown, even if it takes 10 minutes. Yes, it’ll look scary, but that’s the foundation of flavor.
- DEGLAZE WITH WINE IMMEDIATELY: Don’t let that browned beef sit—pour in the red wine the second you remove the meat, and scrape every last bit of fond from the bottom. I used to wait, and the sauce would never be as deep or complex. The alcohol burns off during the braise, but that initial burst of flavor is non-negotiable.
- SIMMER LOW AND COVERED: Balsamic braising isn’t a rush job. After the initial sear and deglaze, drop the heat to a bare simmer (tiny bubbles, not a rolling boil) and keep the lid on tight. I’ve seen people crank the heat to speed it up, but that just steams the beef instead of tenderizing it—aim for 2.5–3 hours minimum, or until the meat falls apart.
- ADD BALSAMIC LATE: Balsamic vinegar is acidic, and adding it too early will make your beef tough. Wait until the last 30 minutes of cooking, then stir in ¼–½ cup (depending on how tangy you like it). If you’re using aged balsamic reduction, even better—it adds sweetness and depth without overpowering. Trust me, your sauce will thank you.
Make-ahead tips for this recipe
Prep Ahead Strategy
Start by searing the beef and deglazing the pan up to 2 days in advance. Store the raw mixture in a sealed container in the fridge. When ready to cook, simply add the liquid ingredients and simmer until the beef is tender. This method saves time on busy weeknights while keeping flavors intact. 📅
Freezer-Friendly Components
Freeze the seared beef chunks in a single layer on a tray for 1 hour, then transfer to a freezer bag for up to 3 months. When ready to braise, thaw overnight in the fridge and proceed with the recipe. The slow thawing preserves texture better than microwave defrosting. ❄️
Sauce Pre-Reduction
Make the sauce base ahead by combining wine, balsamic, broth, and aromatics in a pot. Simmer uncovered until reduced by half, then cool and store in the fridge for up to 3 days. Reheat gently before adding the beef to finish cooking. This shortcut cuts 30 minutes off your active prep time. 💡
Leftovers Reinvention
Use leftover braised beef to make beef empanadas or stuffed peppers—just mix with a little cornstarch to thicken the sauce. For sandwiches, pile on crusty bread with caramelized onions. The tender beef transforms into completely new meals with minimal effort. 🌟
Slow Cooker Adaptation
Transfer the seared beef, veggies, and sauce ingredients to a 6-quart slow cooker. Cook on low for 8 hours or high for 4 hours, then thicken the sauce on the stovetop. This hands-off method is perfect for busy schedules while delivering the same rich results. ⏰
Sauce Thickening Hack
For a glossier sauce when reheating, whisk in 1 tablespoon cornstarch mixed with 1 tablespoon water per cup of sauce. Simmer for 2-3 minutes until thickened. This trick works especially well for leftovers that have separated overnight. The sauce will coat your beef beautifully again. 🔥
Nutrition facts
Frequently asked questions
Can I use a different cut of beef for this recipe?
Yes, but chuck roast is ideal because its connective tissue breaks down beautifully during braising. For similar results, try brisket or short ribs—they'll need the full 3 hours of cooking time. Avoid lean cuts like sirloin, as they'll dry out. If using round roast, increase cooking time by 30-45 minutes to ensure tenderness.
How do I know when the beef is fully tender?
The beef is ready when it easily separates with a fork and pulls apart into shreds. Insert a fork into the largest piece—if it slides in effortlessly with no resistance, it's done. The sauce should also thicken noticeably, coating the back of a spoon. For extra assurance, check at 2.5 hours and finish if needed.
What if my sauce is too thin after braising?
Simmer the sauce uncovered for an additional 10-15 minutes to reduce it naturally. For quicker results, whisk in 1 tablespoon cornstarch mixed with 1 tablespoon cold water per cup of sauce, then simmer for 2-3 minutes until thickened. Avoid over-reducing, as this can make the sauce too concentrated.
Can I make this recipe in an Instant Pot?
Sear the beef as directed, then transfer everything to the Instant Pot. Add 1 cup liquid (instead of 2.5 cups) and cook on high pressure for 60 minutes. Natural release for 15 minutes, then thicken the sauce on the stovetop if needed. The pressure cooker cuts total time to about 90 minutes while keeping the beef tender.
Why does my balsamic braised beef taste bitter?
Bitter flavors often come from overcooking the wine or using low-quality vinegar. Ensure you reduce the wine by only half (3-4 minutes of simmering) and use aged balsamic vinegar. If the bitterness persists, balance it with a pinch of sugar or more beef broth. Avoid adding salt too early, as this can enhance bitterness.