
Main Courses
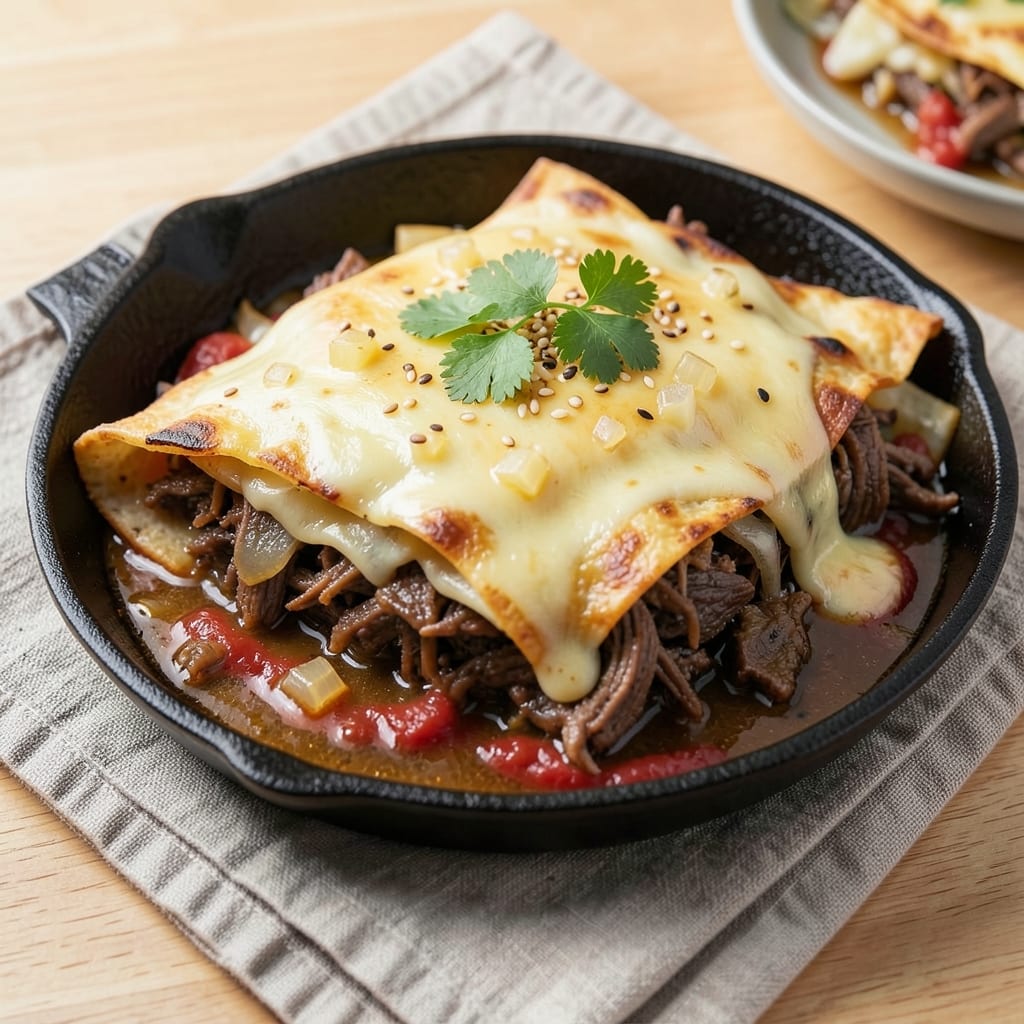
This baked shredded beef chimichanga recipe transforms a classic Tex-Mex staple into a crispy, cheesy masterpiece without the deep-fryer. The secret lies in layering tender, slow-cooked beef with melted cheese and warm tortillas, then baking until golden and irresistible. I developed this method after craving that perfect crunch and melty goodness—no greasy mess, just restaurant-quality results at home.
The beauty of this recipe is its versatility. You start with a simple beef mixture that simmers until fork-tender, then assemble it with tortillas and cheese in a way that guarantees a crispy exterior and gooey interior. No special equipment needed—just a baking dish and oven. The tortillas stay soft inside while developing that satisfying crunch, and the cheese pulls together into a stretchy, savory blanket over the filling.
What makes this dish truly special is the balance of textures and flavors—crispy edges, tender beef, and melty cheese that pulls apart with every bite. It’s hearty enough for a weeknight dinner but impressive enough for gatherings, and the leftovers reheat beautifully. Serve with sour cream, guacamole, or salsa for the full experience.
Whether you're avoiding deep-frying or simply want a healthier take on chimichangas, this baked version delivers all the comfort and satisfaction of the original—just with a lighter twist. Let’s get started on creating your crispy, cheesy masterpiece.
Ingredients for baked shredded beef chimichanga
Eight tortillas, tender beef, and melty cheese—everything you need for crispy, cheesy chimichangas without the fryer.
| Ingredient | Amount | Notes |
|---|---|---|
| Chuck Roast 🥩 | 1 ½ lb | Cut into 1-inch cubes |
| Large Flour Tortillas 🌯 | 8 whole | Flour, not corn, for crispiness |
| Shredded Monterey Jack Cheese 🧀 | 2 cups | Freshly shredded preferred |
| Beef Broth 💧 | 1 ½ cups | Low-sodium preferred |
| Tomato Paste 🍅 | ¼ cup | No sugar added |
| Yellow Onion 🧅 | 1 whole | Diced, medium size |
| Garlic Cloves 🧄 | 4 cloves | Minced, fresh preferred |
| Ground Cumin 🌿 | 1 tbsp | Toasted for depth |
| Chili Powder 🌶️ | 1 tbsp | Smoked variety preferred |
| Salt 🧂 | 1 ½ tsp | Diamond Crystal preferred |
| Black Pepper 🌶️ | ½ tsp | Freshly ground |
| Olive Oil 🫒 | 1 tbsp | For searing beef |
| Sour Cream 🥛 | ½ cup | For serving |
The chuck roast is your secret weapon here—it stays tender when slow-cooked and shreds beautifully. Costco sells it pre-cut for convenience, but if you're buying a whole roast, ask the butcher to cube it for you. The tortillas make all the difference: Mission or La Tortilla Factory flour tortillas hold up best to baking. I always grab extra because nothing's worse than running out halfway through assembly. For the cheese, freshly shredded melts better than pre-shredded—trust me on this. If you're short on time, Kraft 2% Mexican Blend from the store works in a pinch.
No cumin? Mexican oregano at half the amount gives you that earthy depth. Short on tomato paste? Crushed tomatoes at double the quantity will work, but strain out the seeds first. The beef broth can be swapped for water plus a bouillon cube if you're in a bind, but the flavor won't be as rich. For extra crispiness, brush the assembled chimichangas with a little olive oil or melted butter before baking. And if you're feeling fancy, add a sprinkle of smoked paprika to the beef mixture—game changer.
The beef mixture keeps well for 3 days in the fridge, so make extra if you're hosting. Tortillas stay fresh for 1 week in a sealed bag, but I usually use them within 3 days for best results. Assemble the chimichangas up to 24 hours ahead and refrigerate—just add 5-10 minutes to baking time. For leftovers, reheat at 350°F for 10 minutes until crispy again. These freeze beautifully too: wrap individually in foil and bake straight from frozen for 20-25 minutes.
Why You'll Love This Recipe
- One-Pan Magic: I swear by this trick—just toss the chuck roast with tomato paste and beef broth, bake it until it falls apart, then wrap it in tortillas with cheese. No skillets, no mess, just hands-off perfection while you stir a pot of rice or chop veggies.
- Deep, Rich Taste: That tomato paste and beef broth combo? It’s like a slow-cooked secret weapon—tender, saucy beef with a hint of smoky sweetness. The Monterey Jack melts into gooey layers when baked, and honestly, it’s the kind of flavor that makes you forget takeout exists.
- Lunchbox Hero: Between us, these reheat like a dream—crispy edges, melty cheese, and that shredded beef stays moist. Pack a couple for work or school, and you’ll be the office star (or the kid who actually eats their lunch).
- Budget Stretch: A chuck roast feeds a crowd for less than half the price of pre-shredded beef, and tortillas? Cheaper than takeout menus. Plus, leftovers taste just as good the next day—so you’re basically getting two meals for the price of one.
Step-by-step instructions for baked shredded beef chimichanga
Here's how to transform simple ingredients into restaurant-worthy chimichangas with irresistible crispy edges.
Sear and Braise the Chuck Roast Until Tender
Heat 1 tablespoon olive oil in a Dutch oven over medium-high heat. Add the 1.5 lb chuck roast cut into 1-inch cubes and sear until deeply browned on all sides—about 5-6 minutes. This step builds deep flavor through the Maillard reaction.
Remove the beef and set aside. In the same pot, add the diced yellow onion and cook for 3 minutes until softened. Stir in the 4 minced garlic cloves, 1 tablespoon ground cumin, 1 tablespoon chili powder, 1.5 teaspoons salt, and 0.5 teaspoon black pepper, cooking for 30 seconds until fragrant. Pour in the 1.5 cups beef broth and 0.25 cup tomato paste, scraping up any browned bits from the bottom.
Return the beef to the pot, bring to a simmer, cover, and transfer to a 350°F oven. Braise for 2.5-3 hours until the beef shreds easily with two forks. The sauce should reduce to a thick, glossy consistency—this is your chimichanga filling.
Shred the Beef and Prepare the Filling
Remove the Dutch oven from the oven and let it rest for 10 minutes. Using two forks, shred the beef directly in the pot, breaking it into fine, even strands. Taste and adjust seasoning—you want a balance of smoky, spicy, and savory flavors that'll shine through the crispy tortillas.
Here's the thing—don't drain the sauce. That liquid is packed with flavor and will keep your filling moist while baking. If the sauce seems too thin after shredding, uncover and simmer for 5-10 minutes to reduce it slightly. The filling should be thick enough to hold its shape when packed into tortillas but still juicy.
Assemble the Chimichanga Stacks
Preheat your oven to 400°F and line a baking sheet with parchment paper. Lay out 4 of the large flour tortillas and divide the shredded beef mixture evenly among them, spreading it into a ¼-inch thick layer in the center of each tortilla. Sprinkle ½ cup shredded Monterey Jack cheese over each beef layer.
Fold the tortillas tightly into thirds, then roll them up like burritos. Place them seam-side down on the prepared baking sheet. The flour tortillas will crisp beautifully while keeping the filling contained—this is why we specified flour over corn tortillas in the ingredients.
Bake Until Golden and Bubbly
Bake the chimichangas for 18-22 minutes until the tortillas are deep golden brown and the cheese is fully melted and bubbling. The edges should be crispy enough to stand up to a fork, while the centers remain tender. Real talk: resist the urge to open the oven early—they need that hot air circulation to crisp properly.
For extra crispiness, I like to broil for 1-2 minutes at the end, watching carefully to prevent burning. The moment the cheese is melted and the tortillas are golden, remove them from the oven. Let them rest for 5 minutes before serving—this prevents cheese from oozing out when you cut in.
Serve with Cooling Sour Cream
Slice each chimichanga into 1-inch thick pieces and arrange on a platter. The contrast of crispy tortilla with tender, saucy beef and melted cheese is what makes these irresistible. Serve immediately with the remaining 0.5 cup sour cream on the side for cooling contrast.
This is the moment that matters: watch as the first bite delivers that perfect combination of textures—crunchy exterior, gooey cheese, and perfectly seasoned beef. The sour cream ties it all together, balancing the rich, spicy flavors. Save any leftovers for the next day—they reheat beautifully in a 350°F oven for 10 minutes.
Pro Tips For Making Baked Shredded Beef Chimichanga
- Sear the Chuck First: Before slow-cooking that chuck roast, hit it with a quick sear in a hot Dutch oven—2 minutes per side—until deep brown. I learned this the hard way: skipping the sear means flavor gets stuck in the pan instead of the meat. Use beef broth to deglaze afterward; that’s where half the depth comes from.
- Preheat Tortillas Properly: Stack your flour tortillas, cover with a damp towel, and microwave for 30 seconds. This relaxes the gluten so they don’t crack when stuffed. I used to just warm them in the dry oven, and they’d shatter like brittle chips when I rolled them.
- Layer Cheese Strategically: Sprinkle half the Monterey Jack on the bottom of the baking dish, then add the beef-tortilla mix, and top with the rest. The cheese on the bottom melts first, creating a glue-like seal that keeps everything from sliding around—especially important if your dish has uneven edges.
- Bake in Two Stages: Start at 425°F for 15 minutes to get the tortillas golden and crispy, then drop to 350°F for the last 10–15 minutes. The high heat kickstarts the browning, while the lower temp finishes without burning. I was skeptical until I tried it—now I never skip it.
Troubleshooting your baked shredded beef chimichanga
Soggy Tortillas
If your tortillas turn out soggy instead of crispy, it’s usually because the filling was too wet or the oven temperature wasn’t high enough. To fix this, make sure your beef mixture is thick enough—simmer it uncovered for 5-10 minutes to reduce excess liquid before assembling. Also, preheat your oven to 400°F and use a wire rack on a baking sheet to allow air to circulate underneath. This helps crisp the bottoms too. 🌯
Cheese Not Melting
Cheese that stays solid or clumps instead of melting smoothly often means it wasn’t hot enough or wasn’t the right type. Use freshly shredded Monterey Jack cheese (pre-shredded varieties contain anti-caking agents that prevent melting). Bake at 400°F for the full 18-22 minutes—don’t rush it! If your oven runs hot, reduce the temperature to 375°F and add 2-3 minutes to the baking time. 🧀
Filling Leaking Out
Leaky chimichangas usually happen when the tortillas aren’t sealed tightly enough or the filling is too loose. Pack the beef mixture firmly into the center of each tortilla, leaving a ½-inch border around the edges. Fold the tortillas tightly into thirds, then roll them up like burritos—this creates a secure seal. If the filling still leaks, try using slightly smaller tortillas or adding an extra layer of cheese to help bind the filling together. 🔄
Beef Too Dry
If your shredded beef turns out dry, it likely didn’t braise long enough or the sauce reduced too much. The beef should be fork-tender after 2.5-3 hours of braising. If it’s still tough, add ¼ cup beef broth and simmer uncovered for another 10-15 minutes to restore moisture. Avoid over-reducing the sauce—it should coat the back of a spoon but still be juicy enough to hold the tortillas together. 💧
Uneven Browning
For uneven browning, rotate your chimichangas halfway through baking and use a baking sheet with high edges to prevent spillage. If the top isn’t browning enough, broil for 1-2 minutes at the end, keeping a close eye to avoid burning. For extra crispiness, brush the assembled chimichangas lightly with olive oil before baking. This helps create a golden, crispy crust. 🔥
Tortillas Burning
Burnt tortillas usually mean the oven was too hot or the chimichangas were left in too long. Stick to 400°F and monitor closely after 18 minutes. If they’re browning too quickly, reduce the heat to 375°F and check every 2 minutes** after that. For a foolproof method, bake on the middle rack where heat is most even. 🌡️
Nutrition facts
Frequently asked questions
Can I make chimichangas without flour tortillas?
Yes! For a gluten-free option, use large corn tortillas (10-inch size) and bake at 375°F for 20-25 minutes—they'll be softer but still delicious. If you prefer a crispier texture, try low-carb tortillas or even lettuce wraps for a lighter version. Just reduce the baking time to 15 minutes to avoid burning.
How do I prevent the chimichangas from falling apart when slicing?
Let them rest for 5 minutes after baking—this helps the cheese set and the tortillas firm up. For extra stability, add a ¼-inch layer of cooked rice between the beef and cheese before rolling. Also, use a sharp knife and cut through the seam first to guide the slice cleanly.
Can I make these ahead of time?
Assemble the chimichangas up to 24 hours ahead and refrigerate. Bake straight from the fridge, adding 5-10 minutes to the baking time. For freezing, wrap each chimichanga individually in foil and freeze for up to 3 months. Bake from frozen at 375°F for 25-30 minutes until golden.
What's the best way to reheat leftovers?
Reheat in a 350°F oven for 10-12 minutes to restore crispiness. For the microwave, cover with a damp paper towel and heat in 30-second bursts until warm—this prevents sogginess. The oven method gives the best texture, though! Leftovers keep well for 3 days in the fridge.
Can I use ground beef instead of chuck roast?
Yes, but the texture will be different. Use 1 lb lean ground beef and brown it with the onions and spices. Since ground beef cooks faster, simmer it uncovered for 15-20 minutes to reduce excess liquid. The result will be more like a beefy enchilada filling but still work beautifully in chimichangas!