
Main Courses
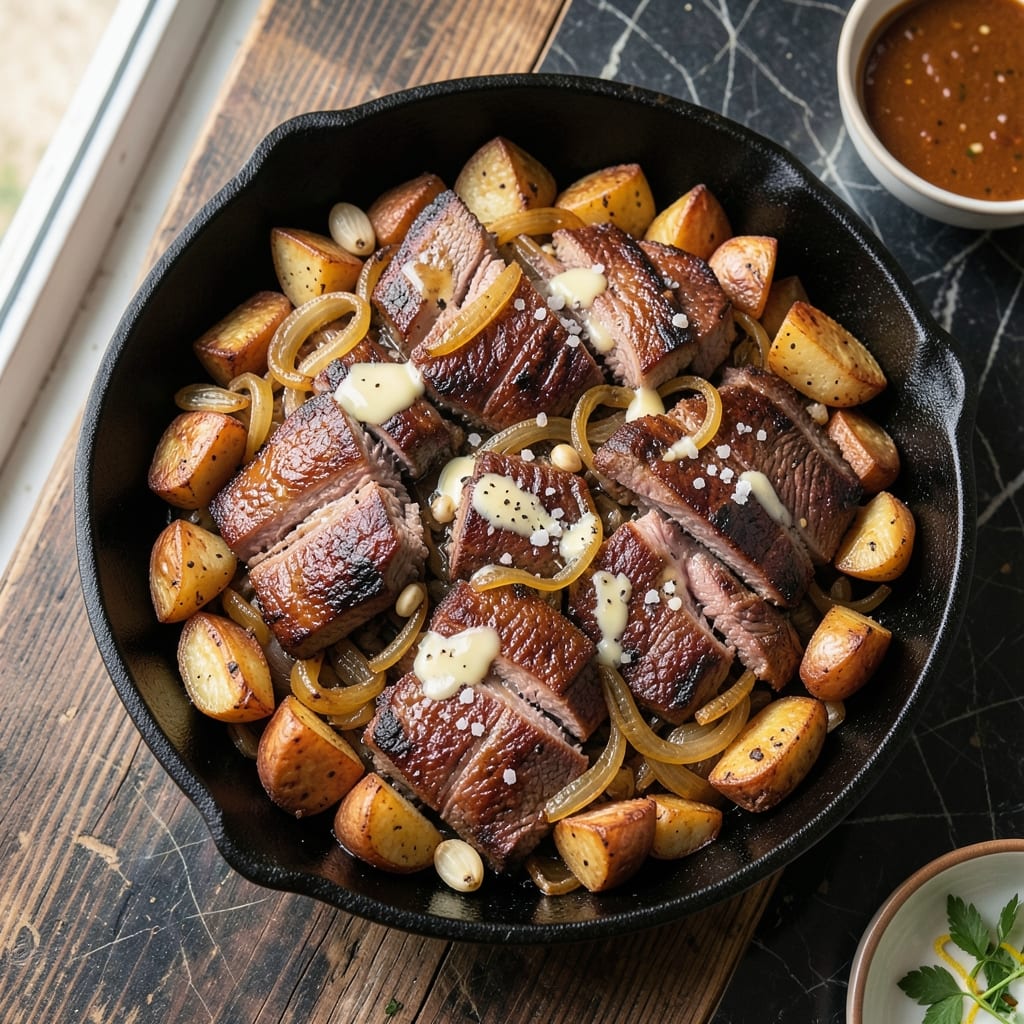
This baked roast beef hash recipe transforms leftover roast beef into a hearty, crisp-topped masterpiece that rivals diner classics. The secret lies in layering thinly sliced potatoes and onions with tender meat, then baking until the edges turn golden and the crust crackles with each bite. I developed this method after burning through three batches of soggy hash—now it’s foolproof for weeknight dinners or holiday leftovers.
The magic happens in the baking: high heat creates a crispy potato crust while keeping the meat juicy and flavorful. You’ll need just 5 ingredients beyond the roast beef—potatoes, onions, salt, pepper, and optional herbs—but the technique ensures restaurant-quality results every time. This isn’t your grandmother’s hash; it’s a modern twist with a satisfying crunch that elevates humble leftovers into a showstopper.
By the time it emerges from the oven, you’ll have a dish with a crispy potato crust that shatters at the touch, savory meat bites infused with garlic and herbs, and tender potatoes that soak up all the flavors. The aroma alone will have everyone at the table asking for seconds. Serve with a dollop of sour cream or hot sauce for the full experience—this hash is hearty enough to stand alone or pair with a simple salad.
Perfect for feeding a crowd or using up roast beef leftovers, this recipe scales effortlessly. The method is simple but delivers professional results, making it ideal for both beginners and home cooks looking to elevate their weeknight meals. Let’s get started—your taste buds (and dinner guests) will thank you.
Ingredients for baked roast beef hash
Five simple ingredients plus leftover roast beef—this hash delivers crispy crust and savory meat bites.
| Ingredient | Amount | Notes |
|---|---|---|
| Leftover Roast Beef 🥩 | 2 cups | Thinly sliced, chilled overnight |
| Russet Potatoes 🥔 | 2 lb | Cut into 1/4-inch slices, peeled |
| Yellow Onions 🧅 | 1 whole | Thinly sliced, white or red |
| Unsalted Butter 🧈 | ½ cup | Melted, full-fat preferred |
| Garlic Cloves 🧄 | 4 cloves | Minced, fresh preferred |
| Kosher Salt 🧂 | 1 ½ tsp | Diamond Crystal preferred |
| Ground Black Pepper 🌶️ | ½ tsp | Freshly cracked |
| Fresh Thyme Leaves 🌿 | ¼ cup | Or 1 tsp dried thyme |
| All-Purpose Flour 🌾 | 1 tbsp | For dusting potatoes |
| Vegetable Oil 🫒 | 1 tbsp | For greasing pan |
The potatoes make or break the texture here. Russet potatoes are ideal—they’re starchy enough to crisp up beautifully. Grab the smaller ones at the grocery store; they’re more uniform and slice evenly. If you can’t find Russets, Yukon Golds work in a pinch, but they’ll be slightly less crisp. The key is slicing them paper-thin—a mandoline makes this job a breeze, but a sharp knife works too. Chill the slices for 20 minutes before layering; this prevents them from releasing too much moisture and keeps the crust crisp. For the onions, yellow or red both work, but yellow has a slightly sweeter flavor that pairs well with beef.
No fresh thyme? Dried thyme at one-third the amount gets you close, though fresh has a brighter flavor. The butter matters here—full-fat is non-negotiable for that rich, savory flavor. If you’re watching calories, you can use half butter and half olive oil, but trust me on the full-fat version. For the roast beef, thinly sliced chilled slices are essential; they’ll warm through evenly without turning mushy. If your meat is still warm, pop it in the freezer for 15 minutes first. The garlic can be minced with a knife, but a garlic press saves time and ensures even distribution. And if you’re feeling fancy, add a pinch of smoked paprika to the meat layer for extra depth.
This hash reheats beautifully—honestly tastes better the next day once everything melds. Store leftovers in an airtight container for up to 4 days in the fridge. For longer storage, freeze portions in single-serving containers for up to 3 months. To reheat, cover with foil and warm in a 350°F oven for 15-20 minutes, or until the crust is crispy again. I always make a double batch—one for dinner, one for lunches the next week. The crust gets even better the second time around, so don’t hesitate to reheat.
Why You'll Love This Recipe
- One-Pan Magic: I swear by this for lazy nights—just toss everything on a sheet pan, drizzle with butter, and let the oven do the work. No chopping boards to scrub, no pots to wash.
- Crispy-Creamy Perfection: That golden crust on the potatoes? Pure reward. The beef stays juicy, the onions caramelize just enough, and the garlic? It’s the little flavor bomb that makes this dish sing.
- Leftover Hero: Turns Sunday dinner into Monday magic. I’ve made this with beef from Thanksgiving leftovers, holiday roasts, or even a quick seared steak—it’s the ultimate way to stretch a meal without sacrificing taste.
- Budget Breakfast: Honestly, this is my go-to for feeding a crowd without breaking the bank. Potatoes and onions are cheap, beef stretches further, and the butter makes it feel fancy. (Yes, even on a Tuesday night.)
Step-by-step instructions for baked roast beef hash
Transform leftover roast beef into a hearty, crispy hash with golden potato crust and savory meat bites.
Prep and Par-Cook the Potatoes
Preheat your oven to 425°F and grease a large oven-safe skillet with the 1 tablespoon vegetable oil. In a large bowl, toss the 2 lb russet potatoes (cut into ¼-inch slices) with the 1 tablespoon all-purpose flour, 1.5 teaspoons kosher salt, and 0.5 teaspoon ground black pepper until evenly coated. This coating creates the crispy crust we're after.
Spread the potatoes in a single layer in the prepared skillet, leaving no gaps. Bake for 20 minutes until the edges begin to brown and the potatoes soften slightly. Here's the thing—don't overcrowd the pan. If you must use two pans, work in batches to maintain even browning. The goal is to get them partially cooked and starting to crisp before adding the other ingredients.
Build the Hash Layers
Remove the skillet from the oven and reduce heat to 375°F. In a small bowl, mix the 2 cups leftover roast beef (thinly sliced), 0.25 cup fresh thyme leaves, 4 minced garlic cloves, and 0.5 teaspoon black pepper. Spread this mixture evenly over the potatoes in the skillet, pressing down gently to help the meat adhere.
Next, scatter the 1 whole yellow onion (thinly sliced) over the meat. The onions will soften as they bake, adding sweetness to balance the savory meat. Drizzle the 0.5 cup melted unsalted butter evenly over the entire hash. The butter will help create a golden crust on top while keeping the potatoes moist. Return the skillet to the oven.
Bake to Golden Perfection
Bake for 30-35 minutes until the top is deeply golden brown and the potatoes are fork-tender with crispy edges. You'll know it's done when the crust looks almost caramelized and the potatoes pull apart easily at the edges. If the top isn't browning enough, broil for 2-3 minutes at the end, watching closely to avoid burning.
This is where patience pays off. The hash needs time to develop that perfect crust while keeping the potatoes tender inside. If you peek too early, the heat will escape and you'll end up with a soggy top. Let it bake undisturbed until you see that beautiful golden crust forming—it's worth the wait.
Pro Tips For Making Baked Roast Beef Hash
- CHOP POTATOES UNIFORM: Grab a knife and cut those Russets into ½-inch cubes—no smaller, or they’ll turn to mush. I learned this the hard way when my first batch dissolved into gluey sludge by the end. A mandoline helps if you’re impatient, but a steady hand works too.
- SALT THE POTATOES FIRST: Toss the raw potato cubes with 1 teaspoon salt before roasting—yes, even if you’re using unsalted butter. This draws out moisture and guarantees crisp edges later. Skip this, and you’ll end up with soggy chunks no matter how high you crank the oven.
- SHRED BEEF AFTER RESTING: Let the roast beef cool completely, then shred it with two forks—don’t rush it. Cold meat pulls apart cleaner, and you’ll avoid a greasy, uneven hash. I used to cut it warm, and it always turned out clumpy and sad.
- BROWN ONIONS BEFORE BAKING: Sauté the onions in butter until deeply golden—about 10 minutes—before mixing everything. The caramelized flavor cuts through the richness of the beef and butter, and it’s the thing that makes this dish taste like a restaurant version. Trust me, it’s worth the extra time.
Essential equipment for great baked roast beef hash
Oven-Safe Skillet
This is your workhorse tool—look for a 10-12 inch cast iron skillet or stainless steel oven-safe pan with a lid. I swear by my Lodge 12-inch cast iron because it distributes heat evenly and creates that perfect crispy crust. If you don’t have cast iron, a All-Clad stainless steel pan works just as well. The key is choosing a pan with thick, even walls to prevent hot spots. Avoid nonstick pans—they won’t get crispy enough for that satisfying crunch. 🔥
Mandoline Slicer
Thin, even potato slices are non-negotiable for that crispy texture. A mandoline slicer like the OXO Good Grips makes this job effortless and consistent. If you’re slicing by hand, take your time—uneven slices lead to uneven cooking. I also recommend chilling the sliced potatoes for 20 minutes before baking to prevent excess moisture. Pro tip: Use the thin setting (⅛-inch) for maximum crispiness. 🥔
Meat Thermometer
While this recipe uses leftover roast beef, if you’re starting with raw beef, a meat thermometer is essential. I use a Thermoworks Smoke for its accuracy and durability. For hash, you’ll want the beef to reach 165°F internal temperature before slicing. If you’re reheating leftovers, check the temperature before adding them to the hash—cold meat can cool down the potatoes too much. A good thermometer also helps monitor oven temperature consistency. ⏰
Mixing Bowls
You’ll need two mixing bowls: one for tossing the potatoes with flour and seasoning, and another for combining the meat, garlic, and thyme. I prefer stainless steel bowls because they’re durable and easy to clean. A medium-sized (3-quart) bowl works for the potatoes, while a smaller (1-quart) bowl is perfect for the meat mixture. Avoid glass bowls—they can chip if dropped, and plastic may retain odors. 🥣
Tongs for Flipping
Once your hash starts browning, you’ll want heat-resistant tongs like the OXO Good Grips to flip the skillet if needed. These help redistribute heat and prevent burning. I also keep a small offset spatula handy for scraping up any stuck bits. If your hash isn’t browning evenly, a quick flip can save the day. Just be careful—cast iron gets hot! 🍳
Optional: Food Mill
For an extra-smooth hash texture, a food mill (like the OXO Good Grips) can help mash some of the potatoes before baking. This creates a creamy base while keeping the top crispy. I use it sparingly—just enough to add body without losing the rustic appeal. If you skip this, fork-mashing the potatoes after baking works in a pinch. The choice is yours, but the food mill adds a restaurant-quality touch. 💫
Nutrition facts
Frequently asked questions
Can I make this hash with raw beef instead of leftovers?
Yes, but you'll need to cook the beef separately first. Slice a 1.5 lb beef roast into thin strips and sear it in a pan with 1 tablespoon oil until it reaches 165°F (about 8-10 minutes). Let it cool completely before using in the hash. The key is starting with cold meat to prevent steaming the potatoes.
Why does my hash turn out soggy instead of crispy?
Soggy hash usually means one of two things: either the potatoes weren't sliced thin enough or the oven temperature wasn't high enough. Use ¼-inch slices and preheat your oven to 425°F for the initial 20 minutes. Also, avoid opening the oven door too early—this causes heat loss and moisture buildup. For extra crispiness, broil for 2-3 minutes at the end.
What can I add to make this hash more flavorful?
Try adding ½ teaspoon smoked paprika to the meat mixture or sprinkle ¼ cup grated Parmesan on top before baking for extra depth. For a spicy kick, mix in ½ teaspoon cayenne pepper with the thyme. Fresh herbs like rosemary or parsley also work beautifully. The possibilities are endless—just keep the ratio balanced!
How do I reheat leftover baked roast beef hash?
Reheat in a 350°F oven for 15-20 minutes covered with foil, then uncover and broil for 2-3 minutes to restore the crispy crust. For the microwave, cover with a damp paper towel and heat in 30-second bursts until warmed through—this helps prevent drying out. The hash actually tastes better the next day!
Can I substitute sweet potatoes for regular potatoes?
Sweet potatoes work, but they'll be less crispy and more moist. If using them, reduce the baking time by 5 minutes and increase the oven temperature to 450°F for the initial 20 minutes. For best results, stick with russet potatoes—they're starchy enough to create that perfect golden crust.