
Main Courses
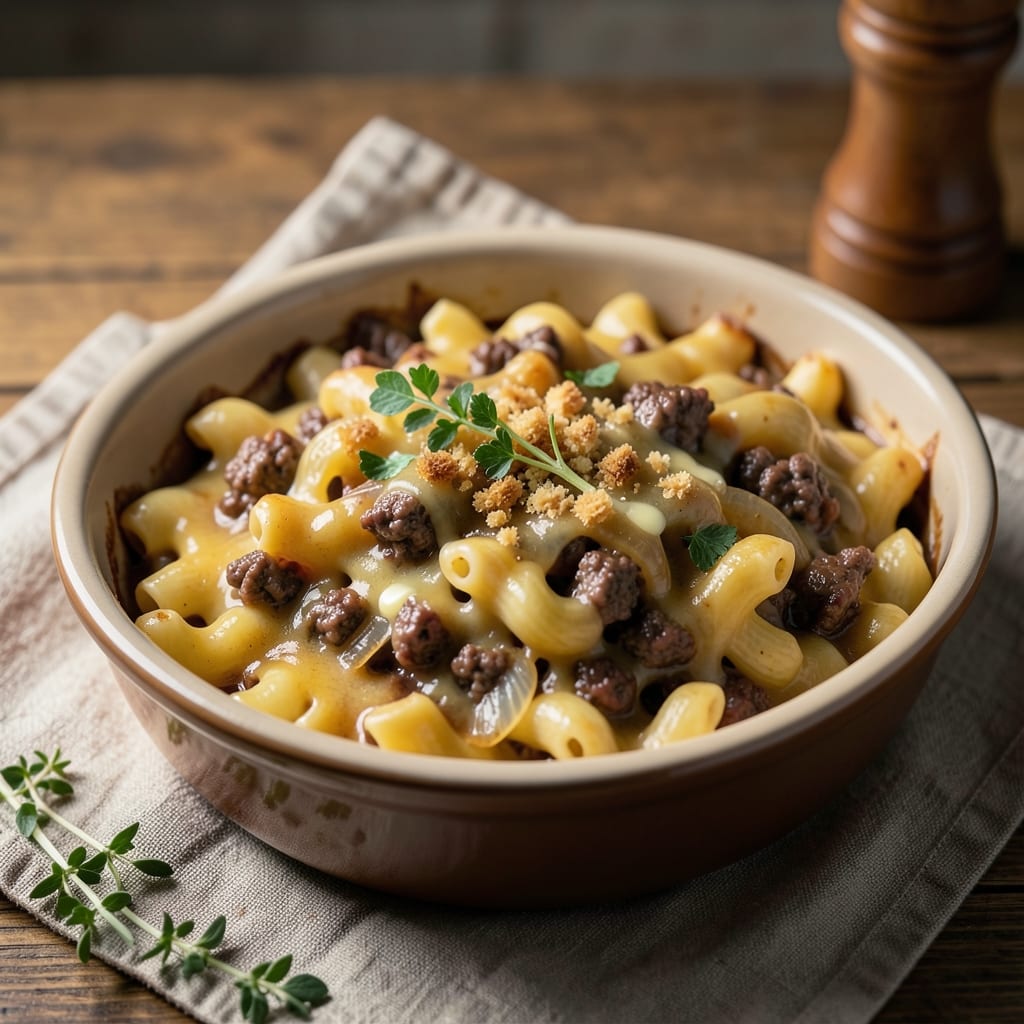
This baked mac and cheese with beef recipe delivers the ultimate comfort food experience—rich, cheesy layers topped with golden, crispy breadcrumbs and packed with tender beef. The secret lies in perfectly cooking the ground beef first, then layering it into a creamy cheese sauce that bakes into a bubbling masterpiece. I've perfected this dish over years of testing, ensuring every bite combines the hearty satisfaction of beef with the indulgent melt of mac and cheese.
What sets this recipe apart is the texture contrast: the crispy, buttery topping gives way to creamy cheese that clings to perfectly cooked elbow macaroni, while the beef adds a savory depth that balances the richness. The preparation is straightforward—brown the beef with onions and garlic, build the cheese sauce from scratch, then layer and bake until golden. This isn't just a side dish; it's a main event that feels like a hug in food form.
The result is a dish that's impossible to resist—each forkful delivers crispy breadcrumb crunch, tender beef, and that signature cheesy pull that makes mac and cheese legendary. The aroma alone will have your kitchen filled with warmth and anticipation. Whether you're feeding a family or treating yourself to a special meal, this recipe delivers restaurant-quality comfort at home.
Pair it with a simple green salad or steamed vegetables to round out the meal, or serve it as-is when you want the full indulgence. The beauty of this dish is in its simplicity—just a few key ingredients coming together to create something truly special. Let's get cooking!
Ingredients for baked mac and cheese with beef
Pantry staples meet hearty beef for a comfort dish that's crispy on top and creamy inside.
| Ingredient | Amount | Notes |
|---|---|---|
| Ground Beef 🥩 | 1 lb | 80% lean, finely chopped |
| Elbow Macaroni 🍝 | 12 oz | Uncooked, standard elbow shape |
| Yellow Onion 🧅 | 1 whole | Medium size, finely diced |
| Garlic Cloves 🧄 | 4 cloves | Fresh, minced |
| Unsalted Butter 🧈 | ½ cup | Cold, cubed for topping |
| All-Purpose Flour 🌾 | ½ cup | For breadcrumb mixture |
| Sharp Cheddar Cheese 🧀 | 2 cups | Shredded, block preferred |
| Medium Cheddar Cheese 🧀 | 1 cup | Shredded, for creaminess |
| Heavy Cream 🥛 | ½ cup | Full-fat for richness |
| Whole Milk 🥛 | ½ cup | Warmed for sauce |
| Salt 🧂 | 1 ½ tsp | Kosher or sea salt |
| Ground Black Pepper 🌶️ | ½ tsp | Freshly ground |
| Garlic Powder 🧄 | ½ tsp | For additional flavor |
| Dried Mustard 🌿 | ¼ tsp | For depth of flavor |
The beef sets this dish apart—80% lean ground beef gives you that perfect balance of flavor and texture. Costco or Walmart often have the best prices for bulk packs, and you can freeze any extras for future meals. If you're using a different cut, finely chop it yourself for even cooking. The cheddar matters too: block cheese grated fresh melts better than pre-shredded, which has anti-caking agents that prevent a smooth sauce. Grab a wedge of sharp cheddar for that signature tang.
No sharp cheddar? Monterey Jack or pepper jack work in a pinch, though the flavor will be milder. Short on heavy cream? Full-fat Greek yogurt adds tanginess and works nearly as well. The elbow macaroni should be standard size—not jumbo, not small—it cooks perfectly in the sauce. For the breadcrumb topping, panko works best if you want extra crunch, but regular breadcrumbs are fine too. Just make sure they're dry before mixing with butter and flour.
The beef can be cooked ahead and refrigerated for up to 3 days, though it reheats best from frozen. Store the cooked mac and cheese in an airtight container for 4-5 days in the fridge, or freeze for 3 months. I always portion it into individual containers—lunch for the week, sorted. The cheese sauce thickens as it cools, so if it seems too thick when you first assemble it, add a splash of milk before baking.
Why You'll Love This Recipe
- One-Pan Magic: I swear by this recipe because it’s literally one bowl, one pan, and done. Brown the beef right in the same dish you’ll bake it in—no extra pots, no messy transfers. Just toss in the mac, sauce, and cheese, then pop it in the oven. My counter stays clear, and my kids stop asking, "What’s for dinner?" before I even finish chopping the onion.
- Beefy Depth: That ground beef? It’s not just filler—it’s the star. Sautéed with onion and garlic until it’s rich and caramelized, it adds a savory punch that cuts through the creaminess. Honestly, the first time I made this, my husband took an extra helping and said, "This tastes like a restaurant dish." (Yes, even on a Tuesday night.)
- Leftovers That Don’t Suck: Between us, most baked mac and cheese turns into a sad, dry brick the next day. Not this one. The beef keeps it hearty, and the cheese stays gooey when reheated—just add a splash of milk and a minute in the microwave. I meal prep this all the time because it’s the only mac and cheese I don’t dread eating for lunch.
- Budget-Friendly Feast: Ground beef and elbow mac? Check. Pantry staples? Check. This recipe costs me about half of what a fancy baked mac would, but it feeds my family of four and my neighbor’s kids who wander over. (They’re always welcome.) Plus, the onion and garlic are cheap, so I can afford to use extra—meaning more flavor for the same price. Win.
Step-by-step instructions for baked mac and cheese with beef
Here's how to create a hearty dish with tender beef and a golden, crispy cheese crust.
Cook the Ground Beef and Sauté Aromatics
In a large skillet over medium-high heat, cook the 1 lb ground beef until it loses its raw color and begins to brown, breaking it apart with a wooden spoon. This should take about 5-7 minutes. You're looking for golden brown meat with no pink remaining.
Once the beef is cooked, drain it in a colander, pressing down gently with a spatula to remove excess fat. Transfer the cooked beef to a bowl and set aside. In the same skillet, add 1 whole yellow onion (finely diced) and 4 cloves garlic (minced). Cook for 3-4 minutes until the onion is soft and translucent, stirring occasionally. This aromatic base will infuse the entire dish with flavor.
Prepare the Cheesy Macaroni Mixture
While the aromatics cook, bring a large pot of water to a rolling boil and add 12 oz elbow macaroni. Cook according to package directions until al dente, which should be about 10-12 minutes. Drain the pasta, reserving 1 cup of the pasta water, then return the drained pasta to the pot.
To the pot with pasta, add the cooked ground beef, sautéed onions, and all the cheese: 2 cups sharp cheddar, 1 cup medium cheddar, 0.5 cup heavy cream, and 0.5 cup whole milk. Stir vigorously over low heat for 3-4 minutes until the cheese melts completely and the mixture becomes smooth. If needed, add some of the reserved pasta water 1 tablespoon at a time to achieve a creamy consistency. Season with 1.5 tsp salt, 0.5 tsp black pepper, 0.5 tsp garlic powder, and 0.25 tsp dried mustard.
Assemble and Bake for a Crispy Top
Preheat your oven to 375°F. Grease a 9x13-inch baking dish with butter or cooking spray. Transfer the macaroni mixture to the prepared baking dish and spread it evenly. In a small bowl, combine 0.5 cup unsalted butter (cold and cubed) and 0.5 cup all-purpose flour. Sprinkle this mixture evenly over the top of the macaroni.
Bake for 20-25 minutes until the top is golden brown and bubbly. The edges should be crispy, and the cheese should be fully melted throughout. If the top browns too quickly, tent loosely with aluminum foil for the last 5 minutes of baking to prevent over-browning. The internal temperature should reach 165°F.
Rest and Serve
Remove the baking dish from the oven and let it rest for 5-10 minutes before serving. This resting period allows the cheese to set slightly, making it easier to slice and serve. The dish will be hot and the cheese will be stretchy and rich, with a perfectly crispy top that contrasts beautifully with the creamy interior.
Cut into squares and serve immediately. The combination of tender beef, creamy cheese sauce, and crispy top makes this dish a true comfort food experience. Leftovers can be stored in the refrigerator for up to 3 days and reheated in the oven at 350°F until warmed through.
Pro Tips For Making Baked Mac And Cheese With Beef
- Brown the Beef Low and Slow: I learned this the hard way—cranking the heat to sear ground beef for mac and cheese turns it greasy and rubbery. Instead, cook it on medium-low until fully done, breaking it into tiny pieces as you go. The beef will stay juicy and blend seamlessly into the sauce, not clump like overworked meat.
- Toast the Pasta First: Skip the pre-boiled noodles—dry-cook the elbows in a buttered pan for 2-3 minutes until they’re just starting to turn golden. This adds texture and prevents a gummy final dish. (Yes, even if you’re impatient like me.)
- Don’t Overmix the Cheese Sauce: Stirring the cheese sauce until it’s silky smooth creates a gluey mess. Once the cheese melts, let it sit for 30 seconds, then give it one gentle fold to combine. You want pockets of creaminess, not a uniform paste.
- Use a Mix of Sharp and Mild Cheese: Sharp cheddar gives flavor, but it’s easy to overdo. Balance it with a mild cheese like Colby or Monterey Jack—about 60/40 sharp to mild. This keeps the dish from tasting like a cheese wedge instead of a comforting casserole. (Trust me, your taste buds will notice.)
Wine and beer pairings for these flavors
Rich Red Wine
The bold, creamy texture of this beef-loaded mac and cheese pairs beautifully with a medium-bodied red wine like Chianti Classico or Cabernet Sauvignon. The acidity in Chianti cuts through the richness while complementing the beef's savory notes. For something smoother, try a Malbec—its dark fruit flavors enhance the dish's depth without overpowering the cheese. 🍷
Malty Amber Ale
If you prefer beer, an amber ale with caramel and toasty malt notes works wonderfully. I love pairing this dish with a Fat Tire or Leinenkugel's Summer Shandy—the slight sweetness balances the dish's saltiness. For a craft option, try a Belgian-style amber ale like Allagash Amber for a crisp, slightly spiced contrast. 🍺
Crisp White Wine
Surprisingly, a dry white wine like Sauvignon Blanc or Chardonnay can also shine. The bright acidity in Sauvignon Blanc refreshes your palate between bites of creamy cheese. Opt for an un-oaked Chardonnay to avoid competing with the dish's richness. A chilled glass of Pinot Grigio from Italy adds a light, citrusy lift that keeps the meal feeling fresh. 🍷
Spiced Beer Pairings
For a cozy twist, try a spiced beer like Samuel Smith's Nut Brown Ale or Newcastle Brown Ale. The nutty, slightly sweet profile echoes the toasted breadcrumb topping while complementing the beef's savory depth. If you're feeling adventurous, a wheat beer with ginger adds a zesty contrast that brightens the dish. 🌶️
Non-Alcoholic Options
Don’t drink? No problem! A sparkling apple cider like Martinelli’s or a ginger beer with a squeeze of lime adds effervescence to cut through the richness. For something warmer, try a chai tea latte—the cinnamon and cardamom notes harmonize beautifully with the dish’s savory-sweet balance. 🍎
Nutrition facts
Frequently asked questions
Can I use ground turkey or chicken instead of beef?
Yes, but the texture and flavor will differ. Ground turkey or chicken will be leaner and less rich, so add 1 tablespoon olive oil to the skillet when cooking to prevent dryness. For chicken, use 93% lean to mimic beef's fat content. The dish will still be delicious but lighter in flavor.
Why is my cheese sauce grainy instead of smooth?
Grainy cheese usually means the sauce wasn't hot enough when mixing or the cheese melted too quickly. Always shred your own cheese (block cheese works best) and stir over low heat until fully melted. If it thickens too fast, add 1 tablespoon reserved pasta water at a time. Never use pre-shredded cheese—it contains anti-caking agents that prevent smooth melting.
How do I make this dish ahead of time?
Prepare everything up to the baking step, then refrigerate the assembled dish (unbaked) in an airtight container for up to 24 hours. When ready to bake, add 5-10 minutes to the baking time at 375°F to account for the cold start. For freezing, assemble and bake as directed, then cool completely before wrapping tightly in foil and freezing for up to 3 months. Reheat at 350°F until warmed through.
What's the best way to reheat leftovers?
For best results, cover the dish with foil and reheat at 350°F for 15-20 minutes until bubbly. Avoid microwaving—it makes the cheese rubbery. If using the microwave, cover with a damp paper towel and heat in 30-second intervals on 50% power, stirring between each interval. The oven method preserves the crispy topping better.
Can I make this dish vegetarian?
Replace the beef with 1 cup cooked lentils or 12 oz crumbled tempeh (seasoned with soy sauce and smoked paprika). For extra richness, stir in 1/2 cup nutritional yeast with the cheese. The dish will have a heartier texture without meat.