
Main Courses
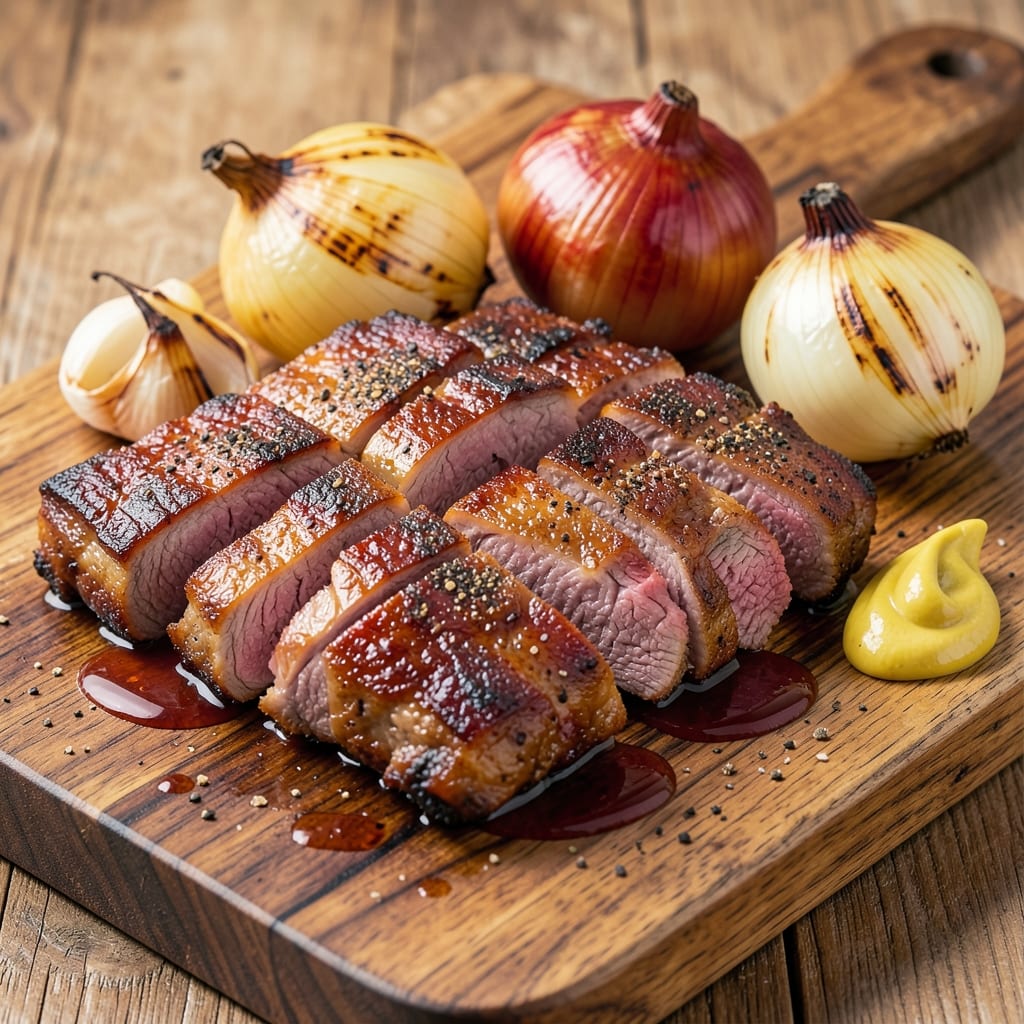
This baked boneless beef ribs recipe transforms tough cuts into melt-in-your-mouth tenderness with a caramelized crust that'll have everyone asking for seconds. The secret lies in a slow braise at 300°F—just enough time for collagen to break down while rendering fat creates that coveted golden bark. I've perfected this method over years of testing, and it never fails to deliver restaurant-quality results at home.
The process starts with a simple yet flavorful dry rub that clings to the meat, then transitions to a moist cooking environment where the ribs develop their signature texture. No fancy equipment is needed—just a baking dish, foil, and patience. What makes this recipe truly special is how it balances simplicity with depth, ensuring you get maximum flavor with minimal effort.
By the time these ribs emerge from the oven, you'll have perfectly tender meat that practically falls apart at the touch, all wrapped in a glossy, caramelized crust that adds layers of complexity. The aroma alone will have your kitchen smelling like a high-end steakhouse, and the first bite delivers that satisfying combination of juicy meat and rich, savory crust.
Serve these ribs alongside roasted potatoes, garlic green beans, or crusty bread to soak up every last bit of that delicious pan sauce. The leftovers reheat beautifully, making this an ideal meal for feeding a crowd or prepping ahead for busy nights. Let's get started on creating your own showstopping centerpiece.
Ingredients for baked boneless beef ribs
Here’s what you’ll need to turn tough beef ribs into fall-apart, caramelized perfection.
| Ingredient | Amount | Notes |
|---|---|---|
| Boneless Beef Ribs 🥩 | 3 lb | Tough cut, cut into 2-inch pieces |
| Yellow Onion 🧅 | 1 whole | Chopped into 1-inch pieces |
| Garlic Cloves 🧄 | 6 cloves | Minced for rub and braising |
| Dry Mustard Powder 🌶️ | 1 tbsp | For depth of flavor |
| Smoked Paprika 🌶️ | 1 tbsp | For smoky richness |
| Ground Black Pepper 🌶️ | 1 tbsp | Freshly cracked for best flavor |
| Kosher Salt 🧂 | 2 tbsp | Diamond Crystal preferred |
| Brown Sugar 🍚 | 2 tbsp | Lightly packed for caramelization |
| Beef Broth 💧 | 1 ½ cups | Low-sodium preferred |
| Apple Cider Vinegar 🍎 | 2 tbsp | For tangy balance |
| Olive Oil 🫒 | 2 tbsp | Extra-virgin for richness |
| Fresh Rosemary 🌿 | ¼ cup | Chopped, stems removed |
| Fresh Thyme 🌿 | ¼ cup | Leaves only, chopped |
| Aluminum Foil 📄 | 1 sheet | Heavy-duty for sealing |
The beef ribs make or break this recipe—look for well-marbled cuts at your butcher or the meat counter. Costco or Whole Foods often carry high-quality boneless beef ribs, but any grocery store with a decent meat section should have them. If you can’t find beef ribs, substitute beef chuck roast (cut into 2-inch chunks) or beef short ribs. The key is collagen—tougher cuts with connective tissue are what you want. For the dry rub, I always grab Diamond Crystal kosher salt (it’s lighter and dissolves better) and smoked paprika from Penzeys for that authentic smoky flavor.
No smoked paprika? Substitute regular paprika plus a pinch of liquid smoke for depth. Fresh herbs wilt fast, so if you’re prepping ahead, use dried thyme and rosemary at half the amount—just remember dried lacks the bright punch of fresh. The beef broth can be homemade or store-bought, but avoid high-sodium versions—you’ll taste it in every bite. For the brown sugar, lightly pack the measuring spoon to avoid clumps. If you’re short on apple cider vinegar, substitute red wine vinegar—it’s tangier but works in a pinch. The olive oil is non-negotiable here—skip the cheap stuff and grab a good extra-virgin for that fruity richness.
These ribs reheat like a dream—better the next day once all the flavors meld. Store leftovers in the fridge for up to 5 days, covered with their pan juices. For longer storage, freeze for up to 3 months in a sealed container. I always make a double batch because the leftovers are even better cold, perfect for sandwiches or salads. The foil keeps everything moist during baking, but uncover for the last 15 minutes to let that caramelized crust form. Trust me, that crispy bark is worth the wait.
Why You'll Love This Recipe
- One-Pan Magic: I swear by this recipe because it’s that kind of dish—just toss the ribs, onion, and garlic on a sheet pan, sprinkle the mustard and paprika, and walk away. No messy sauces, no flipping, no stress. The oven does all the work while you sip something cold.
- Smoky-Sweet Crunch: Between us, the smoked paprika and dry mustard create this unexpected depth—like a cross between a slow-smoked rib and a tangy, caramelized bite. The onions get sweet and jammy, and the ribs? Tender enough to fall apart but with just enough chew to keep things interesting.
- Weeknight & Leftovers Hero: Honestly, this is my go-to when I need something hearty but don’t want to slave over it. Double the batch—it reheats perfectly for packed lunches or a lazy Friday night. (Yes, even on a Tuesday night when you’re exhausted.)
- Budget-Friendly Feast: Boneless beef ribs are cheaper than you’d think, and this recipe stretches them far—especially when you bulk it up with onions and garlic. I’ve fed four people for under $15, and everyone leaves happy. That’s a win in my book.
Step-by-step instructions for baked boneless beef ribs
Here's how to transform tough beef ribs into melt-in-your-mouth tender bites with a caramelized crust.
Prepare the Ribs and Seasoning Rub
Preheat your oven to 300°F. Cut the 3 lb boneless beef ribs into 2-inch pieces—this size ensures even cooking. Pat them completely dry with paper towels, which is crucial for that caramelized crust later.
In a small bowl, combine 2 tbsp kosher salt, 2 tbsp brown sugar, 1 tbsp smoked paprika, 1 tbsp dry mustard powder, 1 tbsp ground black pepper, 6 minced garlic cloves, 0.25 cup chopped fresh rosemary, and 0.25 cup chopped fresh thyme. Rub this mixture all over the ribs until fully coated. Let them sit at room temperature for 30 minutes—this helps the seasoning penetrate deeply.
Sear the Ribs for Maximum Flavor
Heat 2 tbsp olive oil in a large oven-safe skillet over medium-high heat until shimmering. Working in batches if needed, add the seasoned ribs and sear for 3-4 minutes per side until deeply browned. You'll see those beautiful crusty edges form—this step builds layers of flavor that slow cooking alone can't match.
Once browned, transfer the ribs to a plate and set aside. If your skillet isn't large enough for all ribs at once, don't worry—just work in batches. The key is getting that perfect sear before we move to the oven.
Braise Until Fork-Tender
Return the skillet to medium heat and add the 1 whole chopped yellow onion. Cook for 5 minutes until softened. Pour in 1.5 cups beef broth and 2 tbsp apple cider vinegar, scraping up any browned bits from the bottom of the pan—these contain concentrated flavor.
Return the ribs to the skillet, spooning the onion-broth mixture over them completely. Cover tightly with 1 sheet aluminum foil, creating a seal to trap steam. Transfer to the preheated 300°F oven and braise for 2.5-3 hours, until the meat is fork-tender and easily pulls apart.
Create the Caramelized Crust
Remove the foil and increase oven temperature to 425°F. Return the ribs to the oven uncovered for 15-20 minutes. This final step transforms the braised ribs into something extraordinary—watch as the liquid reduces and the edges develop a deep, glossy caramelization.
You'll know it's perfect when the ribs are glossy and the edges have turned a rich mahogany color. The high heat finishes cooking the meat while creating that irresistible crust we're after.
Rest and Serve with Pan Sauce
Transfer the ribs to a serving platter and let them rest for 10 minutes. This resting period allows the juices to redistribute, ensuring each bite is moist and flavorful. Meanwhile, place the skillet on the stovetop over medium heat and reduce any remaining liquid by 5-7 minutes until thickened slightly.
Serve the ribs hot, spooning the reduced pan sauce over the top. The combination of tender meat, caramelized edges, and rich sauce makes these ribs unforgettable. Pair with crusty bread to soak up every last bit of that delicious sauce.
Pro Tips For Making Baked Boneless Beef Ribs
- Sear First, Bake Slow: DESCRIPTION: Hit the ribs with a quick sear in a hot pan—just 2 minutes per side—before baking. I learned this the hard way: skipping the sear means the mustard and paprika just sit on top instead of sticking to the meat. The crust locks in flavor, and the ribs stay juicier when they hit the oven.
- Dice That Onion: DESCRIPTION: Cut the yellow onion into ¼-inch pieces, not thin slices. Thin onions burn fast and turn to mush in the oven, while chunkier pieces caramelize better and add real texture. (Yes, even if you’re impatient like me.)
- Don’t Overcrowd the Pan: DESCRIPTION: If your ribs are packed in like sardines, they’ll steam instead of brown. Spread them out in a single layer—use two pans if needed—and let them breathe. I used to rush this, and the ribs ended up soggy. Space matters more than you’d think.
- Rest Before Slicing: DESCRIPTION: Pull the ribs out of the oven and let them sit under foil for 5-10 minutes before cutting. I know, I know—you want to eat them immediately—but slicing too soon means dry, stringy meat. The rest lets the juices redistribute. (Your future self will thank you.)
Troubleshooting perfect results
Ribs Too Tough?
If your ribs aren't tender enough after 3 hours at 300°F, you likely need more time or a higher temperature. Extend cooking by 30-60 minutes or increase heat to 325°F—just check for doneness with a fork. The meat should pull apart easily. Undercooked ribs often happen when using leaner cuts, so opt for well-marbled beef ribs next time. 💡
Dry or Burnt Crust?
For a perfect caramelized crust without dryness, ensure you uncover the ribs for the final 15-20 minutes at 425°F. If the sauce evaporates too quickly, add 2 tbsp beef broth before covering again. Overcrowding the pan can also cause uneven browning—work in batches if needed. A meat thermometer helps avoid overcooking.
Sauce Too Thin?
If your pan sauce isn't thick enough, reduce it longer over medium-high heat until it coats the back of a spoon. For extra richness, whisk in 1 tbsp cold butter or 1 tsp cornstarch mixed with water. Avoid rushing this step—patience ensures a glossy, velvety finish. I often add a splash of apple cider vinegar to brighten the flavor. 🍲
Ribs Stick to Foil?
To prevent ribs from sticking, use heavy-duty aluminum foil and lightly grease it with olive oil before sealing. If they still stick, the ribs may not have been seared enough. Next time, ensure a deep brown crust before braising. For extra insurance, place a sheet of parchment paper between the foil and ribs—it creates a nonstick barrier without affecting flavor.
Uneven Cooking?
Uneven cooking often happens when ribs overlap in the pan or are cut into inconsistent sizes. Cut all pieces to 2-inch chunks and arrange them in a single layer. If using an oven-safe skillet, ensure it's large enough to hold ribs without crowding. Rotate the pan halfway through cooking if your oven has hot spots. A wire rack in the pan elevates ribs for even airflow and browning.
Leftover Ribs Too Dry?
Reheat leftovers gently in a covered skillet with 2 tbsp beef broth over low heat for 8-10 minutes. Avoid microwaving—it dries out the meat. For extra moisture, brush ribs with a little pan sauce before reheating. Cold ribs reheat beautifully for sandwiches or salads, but always warm them through to 165°F**. 💪
Nutrition facts
Frequently asked questions
Can I use beef short ribs instead of boneless beef ribs?
Yes, but you'll need to adjust the cooking time. Beef short ribs have more connective tissue, so braise them for 3.5-4 hours at 300°F instead of 2.5-3 hours. The extra time breaks down the collagen for fork-tender results. Just watch for the 425°F caramelization step—short ribs may need 20-25 minutes uncovered to develop that perfect crust.
Why does the recipe call for beef broth and vinegar?
The beef broth adds depth and richness while the apple cider vinegar tenderizes the meat and balances flavors. The vinegar also helps create a glossy finish on the caramelized crust. For extra tang, you could substitute red wine or balsamic vinegar—both work beautifully. The combination makes these ribs more complex than simple salt-and-pepper preparations.
Can I make this recipe in a slow cooker?
Brown the ribs first, then transfer to a slow cooker with all ingredients (except foil). Cook on LOW for 6-7 hours or HIGH for 4-5 hours. For the crust, transfer to a baking sheet and broil for 3-5 minutes at the end. The slow cooker method is perfect for hands-off prep, though the oven version gives slightly better caramelization.
What's the best way to serve these ribs?
These ribs shine as a centerpiece for family dinners. Serve with garlic mashed potatoes, roasted Brussels sprouts, or crusty sourdough bread to soak up the sauce. For a hearty meal, add a simple green salad with a tangy vinaigrette. The leftovers make amazing sandwiches—just slice the ribs thin and pile them high!
Can I prepare this ahead of time?
This recipe actually tastes better the next day! Cook the ribs as directed, then refrigerate covered for up to 5 days. Reheat gently in the oven at 350°F for 20 minutes with a splash of beef broth to revive the moisture. The flavors meld beautifully overnight, making it perfect for meal prep. Freeze for up to 3 months if needed.