
Main Courses
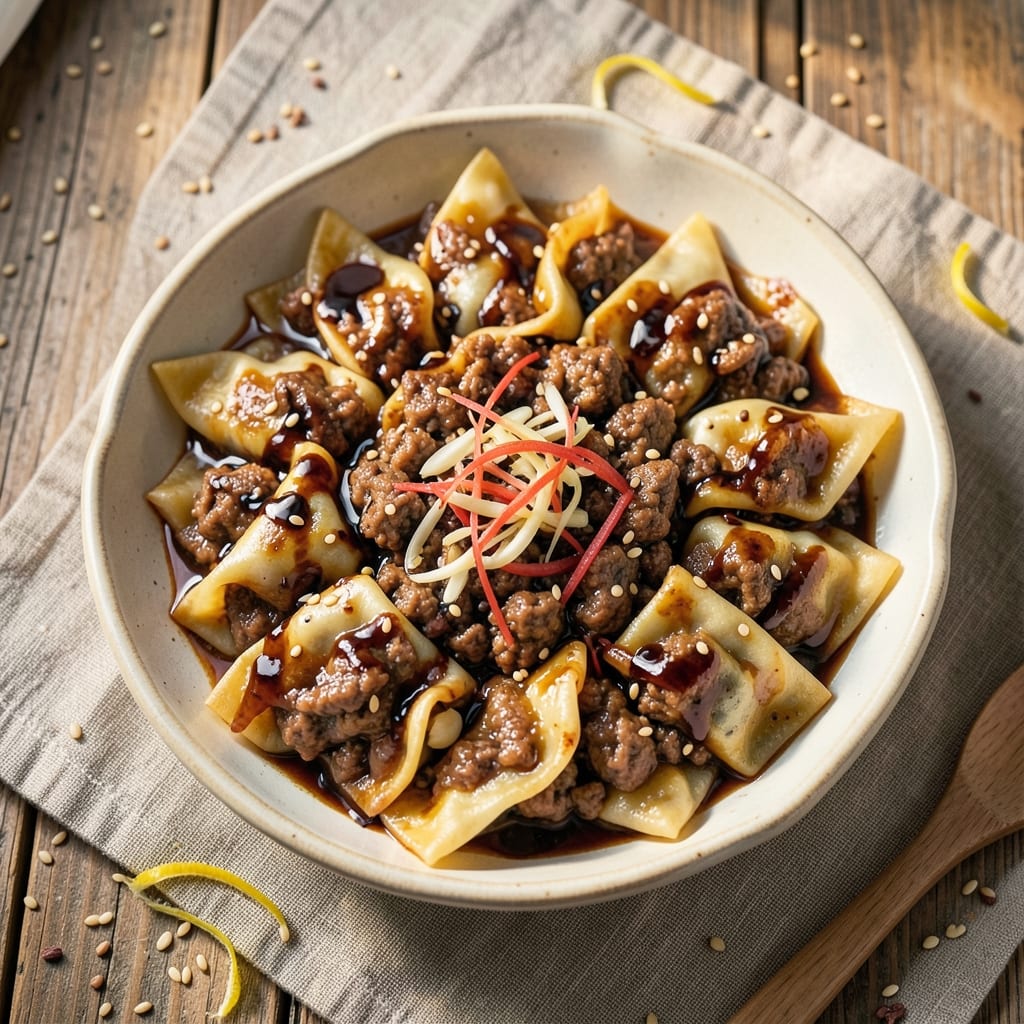
This baked beef wonton recipe delivers the perfect balance of crispy shells and silky filling without deep-frying—a game-changer for weeknight dinners. The secret lies in a tender ground beef mixture infused with ginger, garlic, and soy sauce, wrapped in delicate wonton skins that achieve golden perfection in the oven. I’ve perfected this method to ensure every bite delivers that satisfying contrast between crispy edges and a rich, flavorful center.
The beauty of this recipe is its versatility—traditional wontons rely on frying, but baking creates a lighter, equally satisfying result. Start with a well-seasoned beef filling (never skip the aromatics!), then fold the wontons carefully for even cooking. A quick egg wash before baking guarantees that crispy texture everyone loves, while the oven method keeps things healthier than traditional frying.
What you’ll end up with is a plate of golden-brown wontons that look and taste like they came from a dim sum cart, but with none of the mess. The filling stays juicy and packed with flavor, while the shells achieve that coveted crispiness without sacrificing tenderness. Serve with a side of sweet chili sauce or soy-vinegar dip for the ultimate comfort food experience.
This recipe works equally well for family dinners or appetizer spreads—just adjust the batch size. The filling can be prepped ahead, and the wontons can be frozen before baking, making it the ultimate make-ahead dish. Let’s get started!
Ingredients for baked beef wonton
Here’s everything you need to make crispy, golden wontons with a silky filling—no frying required!
| Ingredient | Amount | Notes |
|---|---|---|
| Ground Beef 🥩 | 1 lb | Lean or 80/20 ratio preferred |
| Wonton Wrappers 🍡 | 24 pieces | Square or round, store-bought |
| Fresh Ginger 🌿 | 1 tbsp | Finely grated, aromatic |
| Garlic Cloves 🧄 | 4 cloves | Minced, fresh preferred |
| Soy Sauce 🍶 | 2 tbsp | Light or dark, salt-free |
| Sesame Oil 🫒 | 1 tsp | Toasted, for aroma |
| Large Eggs 🥚 | 1 whole | Beaten, for egg wash |
| All-Purpose Flour 🌾 | 2 tbsp | For dusting work surface |
| Vegetable Oil 🫒 | 1 tbsp | For brushing wontons |
| Green Onions 🧅 | 2 whole | Thinly sliced, for garnish |
| Salt 🧂 | 1 tsp | Kosher or sea salt |
| Black Pepper 🌶️ | ½ tsp | Freshly ground |
| Cornstarch 🌾 | 1 tbsp | For crispy texture |
The ground beef is where all the magic happens—80/20 ratio gives you that perfect balance of flavor and tenderness. Costco or Trader Joe's usually have the best prices for bulk packages, and look for packages labeled 'lean' if you prefer less fat. Fresh ginger and garlic are non-negotiable here (the frozen stuff just doesn’t cut it), so grab them from the produce section. I always buy extra wonton wrappers—they freeze beautifully for next time. For the egg wash, room-temperature eggs beat straight-from-the-fridge ones every time—they spread more evenly.
No wonton wrappers? Spring roll wrappers work in a pinch, but they’re a bit thicker. Swap sesame oil for a pinch of toasted sesame seeds if you’re out—it’ll still add that nutty aroma. The cornstarch is key for that crispy texture, but if you’re fresh out, all-purpose flour at half the amount will do. For the soy sauce, light soy gives a cleaner flavor, while dark soy adds color (perfect if you’re going for that dim sum look). Pro tip: if your filling seems dry, add a splash of water—it keeps everything juicy.
Wonton wrappers keep 3-4 days in the fridge if sealed tightly, and 6 months in the freezer. The filling can be prepped ahead and stored for 2 days in the fridge. For freezing, lay the assembled wontons on a tray lined with parchment, freeze solid, then transfer to a bag. Bake straight from frozen—just add 5-7 extra minutes. These reheat beautifully in the oven or air fryer, so they’re perfect for meal prep. Garnish with green onions right before serving—they add that fresh pop of color!
Why You'll Love This Recipe
- No-Fuss Assembly: I swear by this recipe because it’s the kind of meal that feels like a hug—no rolling skills required. Just spoon the seasoned beef into wonton wrappers, fold, and bake. The wrappers puff up like magic, and honestly? Even if they look a little lopsided, no one cares when they’re crispy and packed with flavor.
- Ginger-Garlic Magic: That fresh ginger and minced garlic in the beef? It’s what turns this into something special. The heat from the garlic mellows into something rich, while the ginger adds this bright, almost citrusy kick that makes every bite feel like a little celebration. (Yes, even on a Tuesday night.)
- Lunchbox Hero: Between us, these are my go-to for packed lunches or last-minute dinner parties. Bake a big tray, and they reheat beautifully—either straight from the oven or in the microwave. My kids grab them cold for school lunches, and my husband sneaks them from the fridge when he thinks I’m not looking.
- Budget Win: Ground beef and wonton wrappers are my wallet’s best friends. A single batch feeds four, and leftovers? They’re even better the next day—crispier edges, same rich filling. I’ll be real: I’ve made this on grocery-store soy sauce before, and it still tasted solid. That’s the kind of reliable I love.
Step-by-step instructions for crispy baked beef wontons
Turn simple ingredients into golden, crunchy wontons with tender beef filling—this method guarantees restaurant-quality results every time.
Prepare the Silky Beef Filling
In a large bowl, combine the 1 lb ground beef, 2 tbsp soy sauce, 1 tbsp cornstarch, 1 tbsp finely grated fresh ginger, 4 minced garlic cloves, 1 tsp sesame oil, 1 tsp salt, and 0.5 tsp black pepper. Use your hands to mix everything thoroughly—this ensures even distribution of flavors and the cornstarch will help create that perfect texture.
Here's the thing—don't overwork the beef or it'll get tough. Mix just until all the ingredients are evenly combined, about 2 minutes with your hands. The filling should look moist but not sticky. If it feels too dry, add 1 teaspoon of water to help bind it together. Cover the bowl and refrigerate for 15 minutes while you prep the wontons.
Assemble the Wontons
Lightly dust your work surface with 2 tbsp all-purpose flour to prevent sticking. Take one wonton wrapper and place 1 teaspoon of the beef filling in the center. Fold the wrapper diagonally to form a triangle, then fold the sides inward to create a neat little pouch. Press the edges firmly to seal—this prevents filling from leaking during baking.
I like to work in batches to keep things organized. As you assemble each wonton, place them on a parchment-lined baking sheet. Don't stack them or they'll stick together. You should have 24 perfect little wontons ready for the oven. This is where the magic begins—proper assembly makes all the difference in that crispy shell.
Create the Egg Wash for Extra Crispiness
In a small bowl, beat the 1 whole large egg until fully combined. Brush each wonton with the egg wash, coating all sides evenly. This step is crucial for achieving that golden, crispy exterior. Let the wontons sit for 5 minutes while the egg wash sets up slightly—this helps the shells crisp up beautifully in the oven.
While waiting, preheat your oven to 400°F. This high temperature is key to getting that perfect crispy texture. Line a second baking sheet with parchment paper and brush it lightly with 1 tbsp vegetable oil. This prevents sticking and adds to the crispiness. Now your wontons are ready for the oven!
Bake to Golden Perfection
Arrange the wontons on the oiled baking sheet, leaving about ½ inch of space between each one. Bake for 12-15 minutes until they're deep golden brown and crispy. You'll know they're done when you can hear that satisfying crunch as you tap them gently with a spatula.
Don't walk away during this step—ovens vary, and you want to catch them at that perfect moment. If they brown too quickly, tent them loosely with foil for the last 2-3 minutes to prevent burning while they finish cooking inside. The filling should be hot and flavorful, while the shells are crispy enough to stand up on their own.
Garnish and Serve Immediately
Remove the wontons from the oven and let them cool for just 1 minute—this prevents the egg wash from becoming too runny. While still warm, garnish each wonton with thinly sliced green onions. The contrast of fresh green against the golden brown creates a beautiful presentation.
Serve these crispy beauties immediately while they're at their peak texture. The shells should be shatteringly crisp, while the filling remains tender and flavorful. Pair them with a dipping sauce like sweet chili or soy-vinegar for the ultimate experience. Trust me, your taste buds will thank you for the extra effort in assembly and baking!
Pro Tips For Making Baked Beef Wonton
- USE COLD WRAPPERS: Pull wonton wrappers straight from the fridge before shaping—cold dough sticks better and won’t stick to your fingers. I learned this the hard way after wrestling with greasy, slippery wrappers that kept collapsing. Works like a charm, even if your kitchen feels like a sauna.
- PRESS GINGER HARD: When grating fresh ginger, press the knife down firmly—not just a light scrape. You want fine, pasty shreds, not stringy strips. I used to go easy, and my wontons tasted like they were missing something. Trust me, the extra effort pays off in flavor.
- BAKE IN BATCHES: Don’t overload the tray—space them out so they’re not touching. Crowded wontons steam instead of brown, and you’ll end up with sad, soggy bottoms. I now bake two trays at once (yes, even if it’s a pain) and get crispy edges every time.
- SALT THE WRAPPERS: Lightly brush wonton wrappers with a tiny bit of soy sauce or water before baking. The starch helps them crisp up faster and look golden, not pale. I skip this when I’m lazy, but the difference in texture is noticeable—like the gap between "good" and "great."
Storing and reheating your baked beef wonton
Refrigerator Storage
Store your baked beef wontons in an airtight container with parchment paper between layers to prevent sticking. They’ll stay fresh in the fridge for 2-3 days—the shells lose crispness after that, but the filling remains delicious. I like to reheat them in the oven at 350°F for 5-7 minutes to restore that satisfying crunch. 💫
Freezer-Friendly Prep
Freeze unbaked wontons on a parchment-lined tray for 1 hour before transferring to a ziplock bag—this prevents them from sticking together. They’ll keep for up to 3 months. When ready to bake, add 5-7 extra minutes to the oven time (still at 400°F). No need to thaw first!
Oven Reheating
For the best texture, reheat wontons directly from the fridge. Place them on a baking sheet and bake at 375°F for 8-10 minutes until golden and crispy again. A quick brush with egg wash before reheating adds extra shine and crunch. Serve with fresh green onions for that restaurant-quality finish. ✨
Air Fryer Option
If you’re short on time, the air fryer is a game-changer. Preheat to 375°F, spray wontons lightly with oil, then cook in batches for 3-4 minutes until golden. This method keeps them crispy without drying out the filling. Just be careful—they crisp up fast!
Microwave Caution
While possible, microwaving wontons results in soggy shells. If you must, use the microwave-safe dish with a damp paper towel covering them. Heat on medium power for 30 seconds, then check—you’ll likely need to finish in the oven to restore crispness. Not ideal, but better than nothing!
Make-Ahead Tips
Prep the filling and freeze it in 1-tablespoon portions for quick assembly later. Wonton wrappers freeze well too—just thaw them on the counter for 10 minutes before using. This way, you can assemble and bake fresh wontons in 15 minutes on busy nights. Perfect for meal prep! 💡
Nutrition facts
Frequently asked questions
Can I use ground turkey or chicken instead of beef?
Ground turkey or chicken works beautifully—just reduce cooking time by 2-3 minutes since poultry cooks faster. Use 93% lean turkey for best texture, and add 1 extra teaspoon of cornstarch to prevent dryness. The flavor will be lighter but equally delicious with a citrusy marinade or extra soy sauce.
Why are my wonton shells soggy instead of crispy?
Soggy shells usually mean one of three things: insufficient egg wash, overcrowding in the oven, or underbaked time. First, ensure you're brushing the egg wash evenly on all sides and letting it set for 5 minutes before baking. Second, leave ½ inch space between wontons on the tray. Finally, bake until deep golden brown—they should sound crisp when tapped.
How do I make these gluten-free?
Swap regular wonton wrappers for gluten-free rice paper wrappers (like those used for spring rolls). These are naturally crispy when baked. For the filling, ensure your soy sauce is gluten-free certified and check that cornstarch isn't processed in a shared facility with wheat. The texture will be slightly different but still delicious!
Can I bake these in a toaster oven?
Yes, but with adjustments! Preheat your toaster oven to 425°F and bake for 15-18 minutes, checking frequently. The smaller space means hotter temps and longer time. Line the tray with parchment and brush with oil to prevent sticking. Expect slightly more variation in browning—rotate the tray halfway if possible.
What's the best way to serve these as an appetizer?
Arrange them on a platter with toothpicks for easy handling, and serve with two dipping sauces: one sweet chili sauce and one soy-vinegar dip (mix 3 tbsp soy sauce, 1 tbsp rice vinegar, 1 tsp honey, and ½ tsp sesame oil). Garnish with extra green onions and sesame seeds for color. For presentation, create a "wonton nest" by placing one whole wonton in the center of a small plate surrounded by 4-5 smaller ones.