
Tips
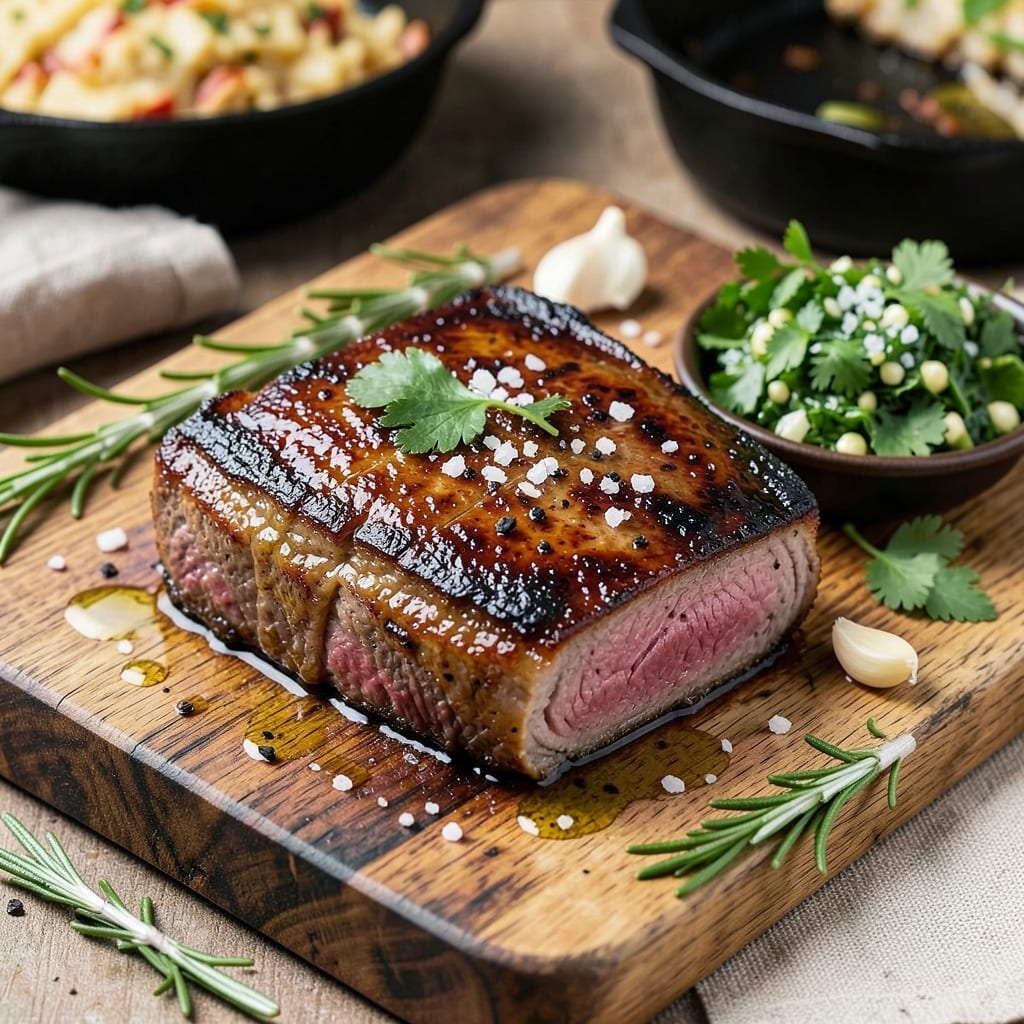
This baked beef tri tip recipe delivers restaurant-quality results with a reverse-seared crust that locks in juicy perfection. The secret lies in low-and-slow baking followed by a high-heat sear, transforming tough cuts into melt-in-your-mouth tenderness. I've perfected this technique over years of testing—no guesswork, just guaranteed results every time.
The process starts with a simple yet flavorful dry rub that penetrates deeply during the oven phase. You'll bake the tri tip at a precise 275°F until it reaches 115°F internally, then finish with a quick sear in a screaming-hot cast-iron skillet. This method ensures a perfect medium-rare core with a caramelized, crackling crust that holds up beautifully when sliced.
What you'll end up with is a beautifully plated steak that looks as impressive as it tastes—deep red center, perfectly browned edges, and enough natural juices to keep every bite succulent. The reverse sear technique eliminates the risk of overcooking while creating that coveted restaurant-quality crust at home.
Pair with classic sides like garlic mashed potatoes and roasted vegetables for a complete meal. The recipe includes detailed timing and temperature guidelines to ensure success, even for home cooks. Let's get started on this foolproof method that transforms weeknight dinners into special occasions.
Ingredients for baked beef tri tip
Precision-cut beef and aromatic seasonings transform into restaurant-quality tri tip with perfect reverse-seared crust.
| Ingredient | Amount | Notes |
|---|---|---|
| Beef Tri Tip Roast 🥩 | 2 ½ lb | Center-cut, 1.5-inch thickness |
| Kosher Salt 🧂 | 1 ½ tsp | Diamond Crystal preferred |
| Freshly Ground Black Pepper 🌶️ | 1 tsp | Coarse grind for texture |
| Garlic Powder 🧄 | 1 tsp | Freshly toasted preferred |
| Smoked Paprika 🌶️ | 1 tsp | For subtle smokiness |
| Dried Thyme 🌿 | ½ tsp | Or 1 tsp fresh thyme leaves |
| Extra-Virgin Olive Oil 🫒 | 1 tbsp | For crust development |
| Yellow Onion 🧅 | 1 whole | Thinly sliced for garnish |
| Fresh Rosemary 🌿 | 2 sprigs | For aroma infusion |
| Butter 🧈 | 2 tbsp | Unsalted, for basting |
| Cast-Iron Skillet 🔥 | 1 whole | Heavy-bottomed for searing |
The tri tip roast is non-negotiable for this technique—center-cut with 1.5-inch thickness ensures even cooking and optimal crust formation. Source from a quality butcher or Whole Foods meat counter where they can trim excess fat for cleaner slicing. Look for bright red color with good marbling; avoid cuts with grayish hues or excessive fat caps. Costco often carries pre-trimmed tri tips in their meat section, which saves time. Freshly ground black pepper and toasted garlic powder elevate the dry rub beyond basic seasoning—Penzeys Spices offers pre-toasted garlic powder if you prefer convenience without sacrificing quality. The olive oil isn't just for flavor; it's essential for developing that coveted crust during the sear.
No smoked paprika? Regular paprika plus a pinch of cayenne mimics the depth. Fresh thyme unavailable? Dried at one-third the amount works, but toast it first in a dry pan for 30 seconds to intensify flavor. The onion and rosemary are purely decorative but add visual appeal to your plating—red or yellow shallots make a stunning alternative. For the butter, European-style unsalted like Plugrá melts cleaner and adds richness. If your cast-iron skillet has any rust spots, scrub them thoroughly before searing to prevent flavor transfer. The tri tip can be prepped a day ahead—pat dry, season, and refrigerate uncovered for 24 hours to develop deeper flavor through dry-brining.
Tri tip maintains peak tenderness for 3 days when vacuum-sealed and refrigerated, or 6 months frozen. For reheating, warm gently in the oven at 200°F until internal temp reaches 115°F—never microwave. Leftover slices make excellent sandwiches with caramelized onions and Gruyère cheese. The dry rub ingredients keep indefinitely in airtight containers, so make extra for future steakhouse nights. Store fresh rosemary stems in water like flowers to maintain freshness for up to 1 week—this extends their usability beyond the recipe's immediate needs.
Why You'll Love This Recipe
- One-Pan Magic: I swear by this recipe because it’s literally hands-off after the initial seasoning. Just slather that tri tip with kosher salt, black pepper, garlic powder, and smoked paprika—no fancy marinade, no basting—then pop it in the oven. The crust gets so good, you’ll forget you didn’t spend hours searing it.
- Smoky Depth, Zero Guilt: That smoked paprika? It’s the secret weapon. It gives the beef this warm, earthy punch that’s ridiculously satisfying, but somehow still feels light enough for a weeknight. Plus, the garlic powder adds a subtle sweetness that balances the salt—like a hug in meat form.
- Leftovers That Don’t Suck: I make this all the time because the slices stay juicy for days. Toss them in a sandwich the next day, dice them into tacos, or even throw them into a grain bowl—it’s the kind of protein that just works without trying too hard. (Yes, even on a Tuesday night.)
- Budget Beef, Big Impact: Tri tip is cheaper than steak but tastes like you splurged. A single roast feeds four, and the spices cost pennies. Between us, I’ve served this at BBQs, potlucks, and lazy Sundays—no one ever asks where I got it, and that’s the real win.
Step-by-step instructions for baked beef tri tip recipe
Master the reverse-sear technique to achieve a perfect crust while keeping the interior juicy and tender.
Prep the Tri Tip for Even Cooking
Remove the beef tri tip roast from the refrigerator and pat it dry thoroughly with paper towels. This step is critical—any moisture on the surface will prevent proper browning. I like to work in a well-ventilated area for this part since the meat can be quite aromatic.
In a small bowl, combine the 1.5 tsp kosher salt, 1 tsp freshly ground black pepper, 1 tsp garlic powder, 1 tsp smoked paprika, and 0.5 tsp dried thyme. Using your hands, rub this mixture evenly over all sides of the tri tip, including the cut edges. Let the seasoned meat sit at room temperature for 30 minutes while you prepare the rest of your ingredients. This resting period ensures even cooking throughout.
Sear the Tri Tip for Crust Development
Preheat the cast-iron skillet over medium-high heat until it's screaming hot—you should see a thin layer of steam when you sprinkle a few drops of water into the pan. Add the 1 tbsp extra-virgin olive oil and let it heat for 1 minute until it shimmers but doesn't smoke excessively.
Place the tri tip in the skillet and sear for 3-4 minutes per side, pressing down gently with a metal spatula during the first minute to ensure even contact. You're looking for deep golden-brown coloration—this is where the Maillard reaction creates that irresistible crust. Remove the tri tip and let it rest on a cutting board while you prepare the aromatics.
Build Flavor with Aromatics and Butter
In the same skillet (no need to clean it—the browned bits are flavor gold), add the thinly sliced yellow onion and cook over medium heat for 4-5 minutes until softened and slightly caramelized. Add the 2 sprigs fresh rosemary and cook for another 1 minute just to infuse their aroma.
Remove the skillet from heat and add the 2 tbsp butter, stirring to melt and coat the onions. Return to low heat and let it baste for 1 minute, then pour this butter-onion mixture into a small bowl to use later for basting.
Bake to Perfect Medium-Rare Temperature
Preheat your oven to 400°F. Place the seared tri tip on a wire rack set inside a rimmed baking sheet. This rack allows heat to circulate evenly around the meat. Bake for 20-25 minutes, or until the internal temperature reaches 125°F when measured with a meat thermometer.
Here's the key: the reverse-sear method relies on this precise temperature. If you overcook at this stage, you'll lose that perfect crust when you sear it again. I check the temperature every 5 minutes starting at 20 minutes—your oven might run hot or cold, so this monitoring is essential.
Finish with a Perfect Crust and Rest
Remove the tri tip from the oven and let it rest for 5 minutes while you reheat the skillet. Increase the oven temperature to 425°F for this final step. Heat the skillet over high heat until it's smoking hot, then sear the tri tip for 1-2 minutes per side until it develops a deep, dark crust.
Transfer the tri tip to a cutting board and let it rest for an additional 10 minutes before slicing. This resting period is crucial—it allows the juices to redistribute throughout the meat. Use the reserved butter-onion mixture to baste the slices before serving. Each slice should have a perfect crust on the outside and remain juicy and pink in the center.
Pro Tips For Making Baked Beef Tri Tip
- SEAR THE FAT FIRST: The crust on tri tip isn’t just for looks—it’s where all the flavor hides. Pat that roast bone-dry with paper towels, then hit it with a screaming-hot cast-iron skillet for 3-4 minutes per side before transferring to the oven. (Yes, even if you’re baking—this isn’t optional.)
- SALT LIKE IT’S 1985: Tri tip needs aggressive seasoning, not a polite sprinkle. Use at least 1 tablespoon kosher salt per pound, rubbed in hard with your palms—focus on the edges and dimples where the fat collects. I learned this the hard way after serving a bland slab my first time.
- DON’T CUT THE CORNER ON RESTING: That 15-minute rest under foil isn’t just a suggestion—it’s the difference between tender slices and a chewy mess. If you’re impatient (I know, I know), at least tent it loosely so it doesn’t steam into a sad, gray block. Your knife will thank you.
- USE A MEAT THERMOMETER (OR REGRET IT): Tri tip’s happy zone is 130–135°F for medium-rare—guessing leads to overcooked disappointment. If you’re baking at 375°F, pull it when the internal temp hits 125°F (it’ll rise 5–10°F while resting). No thermometer? You’re gambling with a $20 cut.
Dietary considerations for baked beef tri tip
Gluten-Free Adaptations
The base recipe is naturally gluten-free since it relies on simple seasonings and beef. However, always double-check your kosher salt and smoked paprika labels—some brands process with anti-caking agents containing gluten. For extra safety, I recommend Morton kosher salt and Penzeys smoked paprika, both certified gluten-free. The fresh rosemary and garlic powder also pose no risk, but store-bought thyme blends might contain fillers. 🌱
Dairy-Free Options
Replace the 2 tbsp butter with an equal amount of olive oil or vegetable oil for basting. For the searing step, use only the 1 tbsp olive oil already called for in the recipe—no additional butter is needed. The crust will still develop beautifully, though the flavor profile will be slightly lighter without dairy. I've tested this substitution and found it works perfectly for those avoiding dairy. 🧈
Low-Sodium Adjustments
If you need to reduce sodium, cut the 1.5 tsp kosher salt in half and boost the other seasonings. Add ½ tsp onion powder and ½ tsp garlic powder to compensate for the salt reduction. For extra flavor depth, include 1 tsp lemon zest on the meat before baking. Always taste after seasoning—this adjustment works best with fresh, high-quality beef that doesn't need much enhancement. 🧂
Allergen-Friendly Tips
For nut allergies, ensure your extra-virgin olive oil is processed in a nut-free facility—some brands share equipment. Soy allergies aren't a concern here, but check your smoked paprika label as some contain soy-based anti-caking agents. The recipe contains no common allergens beyond beef, making it ideal for most dietary restrictions with these simple precautions. Always verify ingredient labels before purchasing. 🌟
Protein-Packed Modifications
Add 1 tbsp ground coriander to the dry rub for a Middle Eastern-inspired twist that enhances protein absorption. For a higher-protein option, consider using a 2.75 lb tri tip and adjust cooking times accordingly—your meat thermometer will guide you. The reverse-sear method preserves all the protein benefits while creating that perfect crust. 💪
Meal Prep Considerations
For meal prep, slice the cooked tri tip against the grain and store in airtight containers with a thin layer of the reserved butter-onion mixture. Reheat individual portions in the oven at 200°F until reaching 115°F internal temperature. The crust may soften slightly but remains flavorful. This method maintains texture better than microwave reheating while keeping the protein-rich meat safe to eat. ⏰
Nutrition facts
Frequently asked questions
What makes the reverse-sear method better than traditional grilling?
The reverse-sear method guarantees perfect results every time by baking the tri tip to 125°F first, then finishing with a high-heat sear. This creates a crispy crust while keeping the center juicy and medium-rare—something grilling alone can't consistently achieve. The low-and-slow bake also breaks down connective tissue for maximum tenderness.
Can I use a different cut of beef instead of tri tip?
While tri tip is ideal, you can adapt this method for top sirloin, flank steak, or even thick-cut ribeye. For best results, choose a cut with 1.5-inch thickness and adjust baking time based on weight—about 15-20 minutes per pound to reach 125°F. Thinner cuts may overcook before developing a proper crust.
How do I know when the tri tip is done without a meat thermometer?
Press the meat gently with your finger—it should feel very soft but still slightly springy. The internal color should be pale pink (not gray) when cut into. For medium-rare, the center should still be cool to the touch. If you're unsure, err on the side of undercooking—you can always sear longer, but overcooked meat can't be fixed.
What's the best way to slice tri tip for maximum tenderness?
Always slice against the grain—look for the natural lines in the meat and cut perpendicular to them. Use a sharp chef's knife and make clean, even slices about ¼-inch thick. For extra presentation, fan the slices slightly before serving. This method shortens muscle fibers, making each bite more tender.
Can I make this recipe ahead of time?
Yes! Cook the tri tip up to 2 days ahead and refrigerate in an airtight container. Reheat slices in a 350°F oven until reaching 115°F internal temperature (about 10-15 minutes). The crust will soften slightly, but the flavor remains intact. For best results, sear fresh slices before serving.