
Main Courses
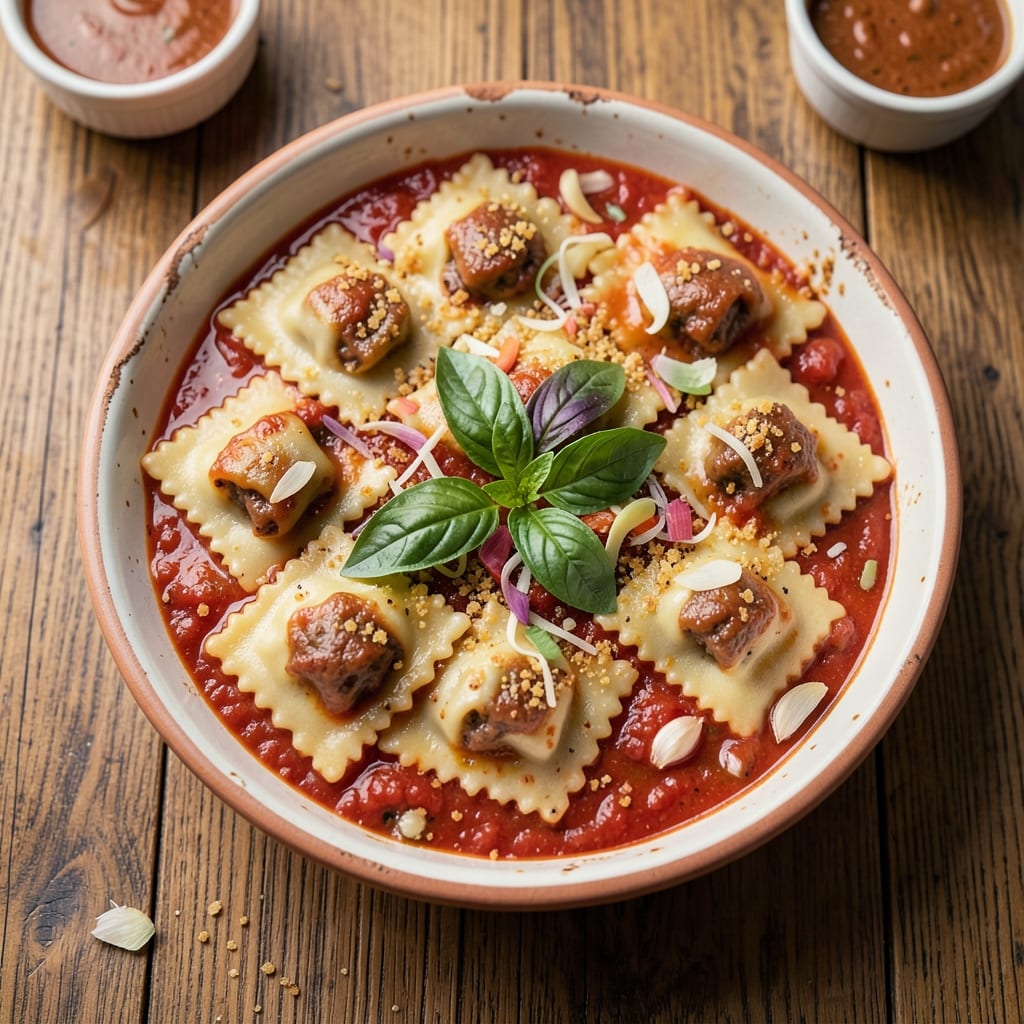
This baked beef ravioli recipe delivers restaurant-quality pasta with a golden crust and cheesy pull-apart magic—no fancy equipment required. The secret lies in a simple dough that yields tender squares and a rich filling of ground beef, Parmesan, and herbs, all baked until bubbly and irresistible. After years of perfecting the technique, I’ve created a version that’s foolproof for beginners but impressive enough for dinner guests.
The process starts with a basic pasta dough that rests while you prepare the filling—ground beef cooked with garlic, onions, and herbs, then mixed with melted butter and cheese for extra richness. Rolling the dough thin and cutting perfect squares is easier than you’d think, and sealing the edges ensures no filling escapes during baking. The real magic happens when the ravioli bakes, developing a crispy, golden crust while staying tender inside.
What you’ll end up with is a dish that’s hearty enough for a main course but elegant enough for a special occasion—think crispy edges, creamy filling, and that pull-apart texture that makes every bite satisfying. The best part? It’s ready in under an hour, with minimal cleanup. Serve with a simple marinara or a fresh salad for a complete meal that feels like a restaurant experience.
Whether you’re making it for a family dinner or a weeknight treat, this recipe delivers on flavor and texture without the fuss. The dough is forgiving, the filling is rich but balanced, and the baking process ensures perfect results every time. Let’s get started on creating your own cheesy, pull-apart masterpiece.
Ingredients for baked beef ravioli
Golden crust, cheesy pull-apart magic—just 15 ingredients for restaurant-quality ravioli at home.
| Ingredient | Amount | Notes |
|---|---|---|
| All-Purpose Flour 🌾 | 2 ½ cups | Sifted for light texture |
| Large Eggs 🥚 | 2 whole | Room temperature preferred |
| Unsalted Butter 🧈 | ¼ cup | Cold, cubed for dough |
| Water 💧 | ½ cup | Cold, for dough |
| Ground Beef 🥩 | 1 lb | 80% lean, finely ground |
| Garlic Cloves 🧄 | 3 cloves | Minced, for filling |
| Yellow Onion 🧅 | ½ cup | Finely diced, for filling |
| Fresh Parsley 🌿 | ¼ cup | Chopped, for filling |
| Fresh Basil 🌿 | ¼ cup | Chopped, for filling |
| Parmesan Cheese 🧀 | 1 cup | Freshly grated, for filling |
| Mozzarella Cheese 🧀 | ½ cup | Fresh, shredded |
| Salt 🧂 | 1 ½ tsp | Kosher or sea salt |
| Black Pepper 🌶️ | ½ tsp | Freshly ground |
| Olive Oil 🫒 | 1 tbsp | For brushing ravioli |
| Marinara Sauce 🍅 | 1 ½ cups | For serving, optional |
The flour is your foundation—King Arthur or Caputo if you want to splurge, but regular all-purpose works fine. Grab a 5-pound bag from Walmart or Kroger to save money, and store the rest in the freezer. The butter needs to be cold for flaky layers, so take it out of the fridge 30 minutes before starting. For the beef filling, 80% lean ground beef gives the right balance of flavor and moisture—Trader Joe's sells it pre-ground, which saves time. If you can't find fresh parsley and basil, dried works in a pinch (use half the amount). The Parmesan? Always grate it fresh—pre-grated tastes like sawdust in comparison.
No fresh herbs? Dried Italian seasoning at half the amount gets you close. Short on mozzarella? Fontina or provolone melts just as beautifully. The marinara can be store-bought (Rao's or Prego are solid), but homemade is worth it if you've got 15 minutes. San Marzano tomatoes make all the difference, but any good canned tomatoes work. For the dough, if you don't have a rolling pin, a wine bottle or heavy pan works too. The key is rolling it as thin as possible—aim for about 1/16-inch thickness. No food processor? Mix the dough by hand with a fork first, then knead it on a floured surface for 8-10 minutes.
The dough keeps for 3 days in the fridge wrapped in plastic, or 3 months in the freezer. The filling can be prepped ahead and stored for 2 days in the fridge. Portion the dough into 1-inch squares before baking for easy serving. These reheat beautifully—350°F for 10-12 minutes until golden and bubbly. Leftovers? Freeze for up to 1 month—just bake straight from frozen, adding 5-7 minutes. Serve with extra marinara, a sprinkle of fresh basil, and a side salad for the full restaurant experience.
Why You'll Love This Recipe
- No-Fuss Dough: I swear, the dough takes less time than debating what to make for dinner. Just flour, eggs, butter, and water—mixed, rolled, filled with seasoned ground beef, and folded. My hands stay clean, my kitchen stays tidy, and somehow, it still looks impressive.
- Rich, Meaty Bite: That ground beef filling? It’s like a hug in every bite—savory, slightly herby, with just enough butter to make it melt-in-your-mouth. The crust stays tender but holds its shape, so you get that perfect contrast of soft dough and hearty filling.
- Weeknight to Party: Honestly, this is my go-to when I need something that feels fancy but doesn’t require a white glove. Bake it for a quick weeknight meal, or serve it at a potluck—no one will guess it’s just flour, eggs, and ground beef doing all the heavy lifting.
- Budget-Friendly Leftovers: Between us, this recipe stretches further than takeout. The leftovers reheat beautifully, and the filling is so flavorful that even my picky kid asks for seconds. Plus, using pantry staples means I’m not breaking the bank for a meal that feels like a treat.
Step-by-step instructions for baked beef ravioli
Ready to make ravioli that's crispy on top and cheesy inside? This method delivers pull-apart perfection every time.
Make the Dough with Cold Ingredients
In a large mixing bowl, combine the 2.5 cups all-purpose flour and 1.5 teaspoons salt. Create a well in the center and add the 2 whole large eggs, 0.25 cup cold unsalted butter (cubed), and 0.5 cup cold water. I like to use my fingers to gently mix everything together until it forms a shaggy dough.
Once it comes together, turn it out onto a lightly floured surface and knead for about 5 minutes until smooth and elastic. The dough should be slightly tacky but not sticky—if it's too dry, add a splash of cold water; if too sticky, sprinkle a little more flour. Wrap tightly in plastic wrap and let it rest at room temperature for 30 minutes. This resting period relaxes the gluten, making it easier to roll out later.
Prepare the Beef Filling
While the dough rests, heat 1 tablespoon olive oil in a large skillet over medium heat. Add the 1 lb ground beef and cook, breaking it apart with a wooden spoon, until it loses its raw color—about 5-6 minutes. Drain any excess fat if needed, then add the 0.5 cup finely diced yellow onion and 3 cloves minced garlic. Cook for another 3-4 minutes until softened.
Remove the skillet from heat and stir in the 0.25 cup chopped fresh parsley, 0.25 cup chopped fresh basil, 1 cup freshly grated parmesan cheese, 0.5 cup shredded mozzarella cheese, 0.5 teaspoon black pepper, and any accumulated juices. Mix well and let the filling cool completely before using—this prevents the ravioli from becoming soggy.
Roll and Cut the Ravioli
Divide the rested dough into 4 equal pieces and roll each piece into a thin rectangle (about 1/8-inch thick) using a rolling pin or pasta machine. If you don't have a pasta machine, roll by hand on a floured surface until it's even. Cut the dough into 2-inch squares using a sharp knife or ravioli cutter.
Place 1 teaspoon of the beef filling in the center of each square. Fold the dough over the filling to create a half-moon shape, pressing the edges firmly with a fork or your fingers to seal. Repeat until all the filling is used. You should have about 16-20 ravioli pieces for 4 servings. Cover with a damp towel to prevent drying while you assemble the baking dish.
Assemble and Bake for Crispy Top
Preheat your oven to 375°F. Lightly grease a 9x13-inch baking dish with olive oil, then arrange the ravioli in a single layer, slightly overlapping if needed. Drizzle 1.5 cups marinara sauce evenly over the top, then sprinkle with additional 0.25 cup grated parmesan cheese for extra flavor and browning.
Bake for 25-30 minutes until the edges are golden brown and the cheese on top is bubbly and slightly crispy. The ravioli should be tender when pierced with a fork. If the top isn't brown enough, broil for 1-2 minutes at the end, watching closely to avoid burning. Let rest for 5 minutes before serving—this helps the filling set and makes cutting easier.
Serve with Extra Sauce
Transfer the baked ravioli to a serving platter and drizzle with any extra marinara sauce from the pan. Garnish with fresh basil leaves and additional grated parmesan if desired. The ravioli should be cheesy, tender, and pull apart easily—each bite should deliver that perfect mix of crispy crust, creamy filling, and tangy sauce.
Serve immediately while still warm. The crispy top will soften slightly as it cools, but the filling stays gooey and delicious. Pair with a simple green salad or garlic bread for a complete meal. Leftovers? Reheat in the oven at 350°F for 10-15 minutes to restore the crispy texture.
Pro Tips For Making Baked Beef Ravioli
- CHILL THE FILLING: After mixing the ground beef with any seasonings, pop it in the fridge for 15–20 minutes before stuffing. I learned this the hard way—skipping it means the filling oozes out when you fold the ravioli, and nobody wants a messy dough disaster. Cold meat holds its shape and seals better when baking.
- SALT THE DOUGH WELL: Toss in an extra ½ teaspoon of salt with the flour and eggs—yes, even if your recipe doesn’t list it. The dough absorbs it better than sprinkling later, and unsalted butter in the filling needs that balance. Trust me, your taste buds will notice the difference, especially after baking.
- SEAL THE EDGES TIGHT: Press the ravioli edges with a fork or your thumb before baking—don’t just fold them. A little extra pressure ensures they stay sealed under the cheese sauce’s weight, so you’re not left with half-empty pockets. (I used to skip this and always ended up with a few sad, understuffed ravioli.)
- BAKE UNTIL GOLDEN: Don’t pull the ravioli out as soon as the cheese bubbles—wait until the edges are deep golden, not just pale. That’s when the crust forms properly and the filling stays warm. If you’re impatient (like me), cover with foil for the last 5 minutes to finish gently, but don’t rush it.
Wine and beer pairings for these flavors
Italian Red Pairings
Start with a classic Chianti Classico—its bright acidity and cherry notes cut through the richness of the beef filling while complementing the crispy, cheesy crust. I love Castello di Volpaia Chianti for its balance of fruit and earthiness. For a lighter option, try Sangiovese from Tuscany, which has a similar profile but with slightly more structure to stand up to the dish's heartiness. 🍷
Bold Whites for Balance
If you prefer white wine, a Barolo-style white like Gavi di Gavi from Piedmont delivers crisp apple and almond flavors that refresh your palate between cheesy bites. For something with a bit more body, Verdicchio from Marche offers mineral notes that pair beautifully with the Parmesan. Both wines are underrated but perfect for this dish.
Craft Beer Options
A Belgian witbier like Hoegaarden brings citrusy notes and a touch of spice that contrast wonderfully with the beef and cheese. For something richer, try an amber ale—Allagash White has a malty sweetness that complements the caramelized crust. Avoid heavy stouts or IPAs, which can overpower the delicate flavors.
Unexpected Pairings
For a fun twist, try a dry sparkling rosé—the bubbles cleanse your palate while the berry flavors echo the tomato sauce. I also enjoy Prosecco with a touch of sweetness to balance the savory richness. These lighter options work especially well if you're serving the ravioli as an appetizer or lighter main course.
Non-Alcoholic Choices
Don't drink alcohol? A sparkling blood orange soda like San Pellegrino Aranciata Rossa mimics the acidity of wine while adding a refreshing citrus note. For something more substantial, try Italian mineral water with a squeeze of lemon—it’s crisp and clean, letting the ravioli shine. These options keep the meal vibrant without the booze. 💫
Nutrition facts
Frequently asked questions
Can I make the dough ahead of time?
Wrap the dough tightly in plastic and refrigerate for up to 3 days or freeze for 3 months. Thaw overnight in the fridge before rolling. The filling can also be prepped 2 days ahead and stored in the fridge—just let it cool completely before using to prevent soggy ravioli.
What if my ravioli filling leaks during baking?
This usually happens if the edges aren't sealed properly or the dough is too thin. Press the edges with a fork or your fingers while shaping, and roll the dough to about 1/16-inch thickness for better containment. If leaks happen, bake at a slightly lower temp (350°F) for 30-35 minutes to let the cheese set more gradually.
Can I use a pasta machine instead of rolling by hand?
Yes! Set your machine to the thinnest setting (usually 1-2) and roll each dough piece 2-3 times for even thickness. Dust with flour between rolls to prevent sticking. This method gives you more consistent results and saves time. Just be sure to seal the edges well after cutting the squares.
How do I reheat leftovers without losing the crispy top?
Transfer to a baking sheet and bake at 350°F for 10-15 minutes until bubbly and golden. Avoid microwaving—it makes the crust soggy. For extra crispiness, broil for 1-2 minutes at the end. Store leftovers in an airtight container for up to 3 days or freeze for 1 month.
What's the best way to make this dish vegetarian?
Swap the beef for a mix of sautéed mushrooms, spinach, and sun-dried tomatoes. Add 1 teaspoon nutritional yeast for umami depth. Use the same cheese amounts and bake as directed. For extra protein, fold in 1/2 cup ricotta into the filling. The texture will be slightly different but still delicious!