
Main Courses
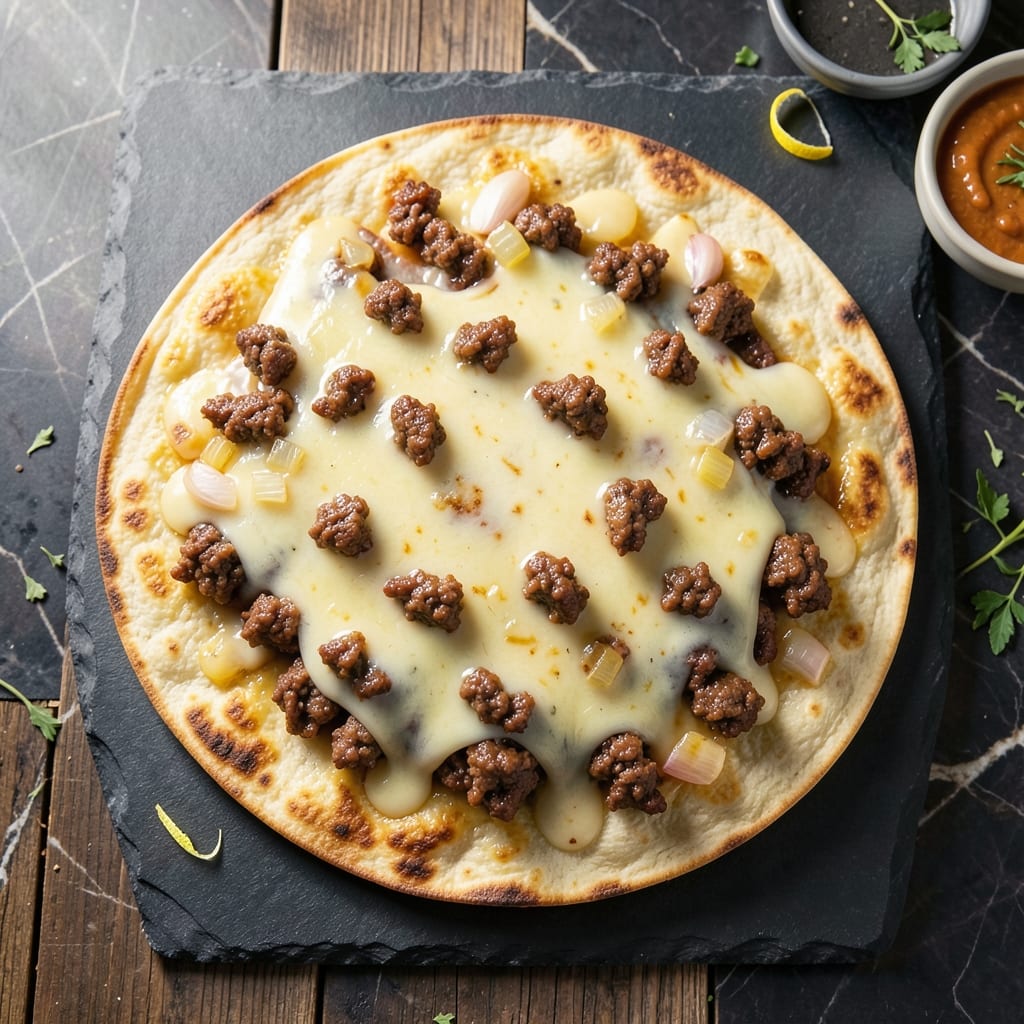
This baked beef quesadilla recipe delivers crispy tortilla shells packed with melted cheese and tender beef—no frying required. The secret lies in layering ingredients just right and baking at the perfect temperature to achieve that golden, crunchy exterior while keeping the cheese gooey inside. I've perfected this method after countless experiments, and it never fails to impress.
What makes these quesadillas special is the balance of flavors and textures: crispy edges from the oven, creamy melted cheese, and savory seasoned beef that ties everything together. The process is simple—just brown the beef, layer it with cheese and tortillas, then bake until golden. No flipping or frying means less mess and more delicious results every time.
By the time you pull them from the oven, you'll have perfectly crispy quesadillas with cheese that stretches in every bite. The aroma alone will have everyone gathering around the table, and the first bite delivers that satisfying crunch followed by melty, cheesy goodness. This is comfort food at its best, elevated with a foolproof technique.
Serve with sour cream, salsa, or guacamole for dipping, or pair with a fresh salad for a complete meal. The beauty of this recipe is its versatility—it works for weeknight dinners or game day gatherings, and leftovers reheat beautifully. Let's get started on creating these crispy, cheesy masterpieces!
Ingredients for baked beef quesadilla
Crispy tortillas, tender beef, and gooey cheese—these ingredients transform into restaurant-quality quesadillas without frying.
| Ingredient | Amount | Notes |
|---|---|---|
| Ground Beef (80/20) 🥩 | 1 lb | Lean-to-fat ratio for tenderness |
| Large Flour Tortillas 🌯 | 4 whole | Burrito-size, high-quality brands |
| Shredded Monterey Jack Cheese 🧀 | 2 cups | Freshly shredded preferred |
| Yellow Onions 🧅 | ½ cup | Diced, medium size pieces |
| Garlic Cloves 🧄 | 2 cloves | Minced for even distribution |
| Taco Seasoning 🌶️ | 1 tbsp | Homemade or quality packet |
| Olive Oil 🫒 | 1 tbsp | Extra-virgin for browning |
| Salt 🧂 | ½ tsp | Diamond Crystal preferred |
| Black Pepper 🌶️ | ¼ tsp | Freshly ground for flavor |
| Cumin 🌿 | ½ tsp | Ground for depth of flavor |
| Paprika 🌶️ | ½ tsp | Smoked variety recommended |
| Sour Cream 🥛 | ¼ cup | For serving, full-fat preferred |
| Salsa 🍅 | ½ cup | Medium or pico de gallo |
The tortillas are the foundation, so Mission or La Tortilla Factory brands deliver the best crispiness. Look for 10-inch flour tortillas—they're sturdy enough to hold up to baking without tearing. The beef's fat content matters here: 80/20 lean-to-fat ratio ensures juiciness that leaner cuts can't match. I always brown my beef in batches to avoid overcrowding the pan, which keeps it tender. For the cheese, freshly shredded Monterey Jack melts more smoothly than pre-shredded varieties, which often contain anti-caking agents that prevent proper melting.
No taco seasoning packet? Mix 1 tsp chili powder, 0.5 tsp cumin, 0.25 tsp garlic powder, and a pinch of oregano—it's just as good. Running low on sour cream? Greek yogurt works beautifully for dipping, though it's slightly tangier. The onions should be sweet yellow varieties—they caramelize better during browning. For extra crispiness, brush the tortillas with a tiny bit of olive oil before baking. And trust me on this: don't skip the garlic. It's the secret to that restaurant-quality depth of flavor that makes these quesadillas special.
Prep ahead by browning the beef and assembling the quesadillas in advance—they'll keep 2 days in the fridge before baking. For serving, warm the quesadillas in a 350°F oven for 5-7 minutes to restore crispiness. The leftovers reheat beautifully in the air fryer at 375°F for 3-4 minutes, making them perfect for quick lunches. Store tortillas in a sealed container with a paper towel to prevent sogginess, and keep the cheese wrapped in parchment paper to maintain freshness for up to 1 week.
Why You'll Love This Recipe
- One-Pan Magic: I swear by this—just brown the beef, toss it with onions and garlic, then layer it all with cheese and tortillas on a single sheet. No flipping, no mess, and honestly, the cleanup is half the battle won.
- Cheese Pulls Hard: That Monterey Jack? It stretches into golden, gooey rivers when baked, while the beef stays juicy. Between us, the first bite makes me pause and think, "Wait, is this too good?"—then I keep eating.
- Weeknight Workhorse: I make these for lazy Mondays, game days, or when my kid’s friends show up unannounced. The leftovers reheat like a dream, and they’re the only thing that’ll stop my picky eaters from complaining.
- Budget Wins: Ground beef and tortillas are cheap staples, and this recipe stretches them far. I’ll be real: I’ve fed six people for under $15 with this, and no one ever asks for takeout again.
Step-by-step instructions for baked beef quesadillas
Here's how to achieve perfectly crispy tortillas with melted cheese magic every time.
Prepare the Seasoned Beef Filling
Heat the 1 tablespoon olive oil in a large skillet over medium-high heat. Add the 1 pound ground beef (80/20) and cook, breaking it apart with a wooden spoon, until it loses its raw color—about 5-6 minutes. The fat should render out, leaving you with nicely browned beef.
Add the ½ cup diced yellow onions and cook for another 3 minutes until softened. Stir in the 2 minced garlic cloves, 1 tablespoon taco seasoning, ½ teaspoon salt, ¼ teaspoon black pepper, ½ teaspoon cumin, and ½ teaspoon paprika. Cook for 1-2 minutes until fragrant. Remove from heat and let cool slightly—this prevents soggy tortillas when baking.
Assemble the Quesadillas
Preheat your oven to 375°F and line two baking sheets with parchment paper. Place 1 large flour tortilla on a clean surface and sprinkle ½ cup shredded Monterey Jack cheese evenly over half of it, leaving a ½-inch border around the edges. Spoon ¼ of the seasoned beef mixture onto the cheesy half, then fold the tortilla over to completely enclose the filling.
Repeat with the remaining tortillas and beef mixture, making a total of 4 quesadillas. The cheese should be evenly distributed—this ensures maximum melt and crispiness. Place the assembled quesadillas on the prepared baking sheets, seam-side down, and lightly brush the tops with any remaining olive oil for extra browning.
Bake for Crispy Perfection
Bake the quesadillas for 12-15 minutes until the edges are deep golden brown and the cheese is fully melted. You'll see the tortillas puff slightly and develop a crispy texture—this is your signal they're ready. If you prefer extra crispiness, you can broil for 1-2 minutes at the end, but watch closely to avoid burning.
Remove from the oven and let rest for 2 minutes before serving. This brief resting period helps the cheese set slightly, making it easier to slice without losing filling. Cut each quesadilla into 4 wedges and serve immediately with ½ cup salsa and ¼ cup sour cream on the side for dipping.
Optional Broiling for Extra Crisp
For restaurant-style crispiness, transfer the baked quesadillas to a broiler-safe pan and broil on high for 1-2 minutes. Watch carefully—they'll darken quickly. The broiler creates a caramelized crust while keeping the cheese perfectly melted inside. This step is optional but recommended for that authentic quesadilla texture.
Serve the quesadillas immediately while the tortillas are still crisp and the cheese remains gooey. The combination of the seasoned beef, melted cheese, and crispy tortilla creates a satisfying bite every time. Enjoy with your favorite toppings or additional salsa for extra flavor.
Pro Tips For Making Baked Beef Quesadilla
- Preheat Pan to Searing Heat: I learned this the hard way—starting with a lukewarm oven or skillet means your beef releases grease instead of browning. Crank the oven to 425°F (or preheat your baking sheet) and let it scream hot before adding the quesadillas. That’s when the crust gets crispy, not soggy.
- Sweat Onions First: Chop your onions fine and cook them in a dry skillet over medium heat for 5 minutes before adding anything else. They’ll soften and release moisture, which means your beef won’t turn into a greasy mess when you mix them together. (Yes, even if you’re impatient like me.)
- Layer Cheese Like a Sandwich: Monterey Jack melts like a dream, but if you pile it all in one spot, you’ll end up with a cheesy volcano and dry edges. Spread the cheese evenly between the tortillas—about ⅓ of the way up, then fold, then another ⅓, then fold again. That way, every bite has that gooey pull.
- Rest the Beef Before Mixing: After browning the beef, push it to one side of the pan and let it sit for 2 minutes. This lets the juices redistribute instead of pooling on the bottom when you add onions and garlic. Stir in those aromatics later—your future self will thank you.
Health benefits of baked beef quesadilla
Protein Powerhouse
These baked beef quesadillas pack a serious protein punch with 1 pound of 80/20 ground beef—that's about 30 grams of protein per quesadilla before adding cheese. The lean-to-fat ratio ensures tenderness while delivering all nine essential amino acids your muscles need for recovery and growth. I always opt for 80/20 because the fat keeps the beef juicy and flavorful, making every bite satisfying. 💪
Cheese Benefits
The 2 cups of Monterey Jack cheese provides 18 grams of protein and 12 grams of calcium per serving, supporting bone health and muscle function. Freshly shredded cheese melts more smoothly than pre-shredded varieties, which often contain anti-caking agents that prevent proper melting. The melted cheese also creates a creamy texture that balances the crispy tortilla perfectly.
Fiber from Whole Grains
Flour tortillas contribute 3 grams of fiber per serving, which aids digestion and helps keep you feeling full longer. I recommend Mission or La Tortilla Factory brands—they're made with whole wheat flour and provide that perfect crispy texture when baked. The fiber content also helps stabilize blood sugar levels, making these quesadillas a great option for balanced meals.
Antioxidant Boost
The spices in the seasoned beef—cumin, paprika, and garlic—are packed with antioxidants that combat inflammation. Cumin contains compounds that may help regulate blood sugar, while garlic provides allicin, which supports heart health. These spices not only add flavor but also boost the nutritional profile of your quesadillas. The onions add extra antioxidants like quercetin, which has been linked to reduced inflammation. 🌿
Balanced Fat Profile
The combination of beef fat and olive oil provides heart-healthy monounsaturated fats that support brain function and reduce bad cholesterol. The 80/20 ground beef contains about 15 grams of fat per serving, but most of it is unsaturated fat from the beef's natural fat content. Using extra-virgin olive oil for browning adds even more beneficial fats while enhancing flavor.
Nutrition facts
Frequently asked questions
Why do my baked quesadillas turn out soggy instead of crispy?
Soggy quesadillas usually happen from two things: overloading with filling or not baking long enough. Use ½ cup cheese per quesadilla and ¼ cup beef mixture—too much filling steams the tortilla. Also, bake at 375°F for 12-15 minutes—the tortillas need time to crisp fully. Try brushing the tortillas with a tiny bit of olive oil before baking for extra crispiness!
Can I make these ahead of time?
Assemble the quesadillas and refrigerate them (unbaked) for up to 2 days. When ready to bake, add 2-3 extra minutes to the baking time at 375°F to restore crispiness. For best results, reheat in a 375°F oven for 5-7 minutes—microwaving makes them rubbery.
What's the best cheese for melting?
For perfect melt, use freshly shredded Monterey Jack or a blend of Monterey Jack and cheddar. Pre-shredded cheese contains anti-caking agents that prevent smooth melting. If you're out of options, Oaxaca or Chihuahua cheese melt beautifully too—just shred them yourself for best results!
How do I make these gluten-free?
Swap the flour tortillas for gluten-free corn tortillas (like Mission GF) and use tamari instead of soy sauce in your seasoning. The beef filling stays the same, but corn tortillas crisp up differently—bake at 375°F for 10-12 minutes and watch closely to prevent burning. The texture will be slightly softer but still delicious!
Can I use leftover beef for this recipe?
Yes! Just make sure it's fully cooled before assembling. If the beef is dry, add 1 tablespoon beef broth to the seasoning mix to restore moisture. For extra flavor, stir in ½ teaspoon smoked paprika** when reheating. The key is keeping the beef warm (not cold) when assembling to prevent soggy tortillas!