
Main Courses
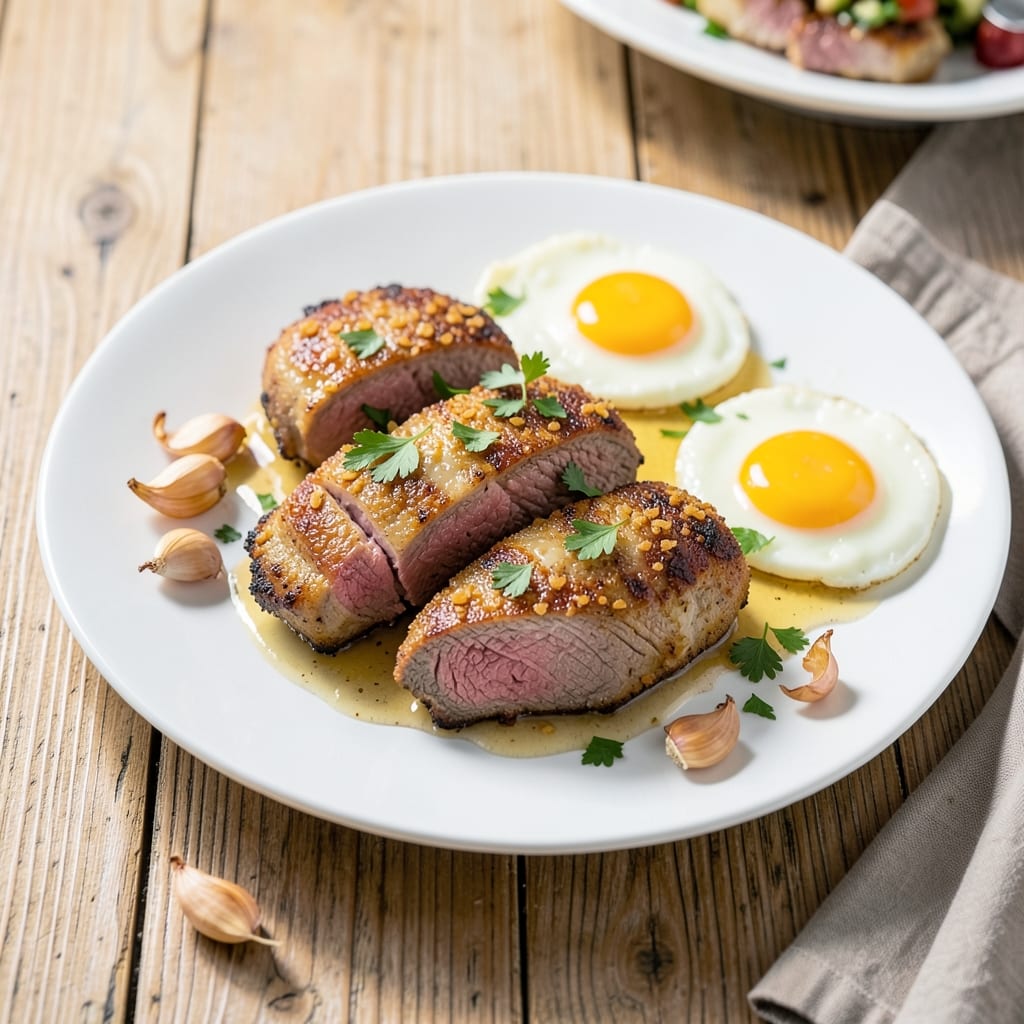
This baked beef cutlet recipe delivers restaurant-quality results with a crispy crust and juicy centers—no breading required. The secret lies in a simple technique that transforms tender beef into golden, flavorful cutlets every time. After years of testing, I've perfected a method that ensures perfect doneness without drying out the meat.
The key is using a thin, even coating of egg wash and crushed cornflakes for that signature crunch, while baking at the right temperature preserves moisture inside. This approach eliminates the mess of breading while delivering the same satisfying texture. You'll need just 15 minutes of prep and 20 minutes in the oven for dinner-ready cutlets.
What you'll end up with is golden-brown cutlets with a crisp exterior and tender, flavorful interior—each bite packed with savory goodness. The method works equally well with sirloin, ribeye, or tenderloin, making it versatile for any meal. Serve with mashed potatoes, roasted vegetables, or a fresh salad for a complete dinner.
This recipe is designed for foolproof results, whether you're cooking for a weeknight family dinner or hosting dinner guests. The technique is simple enough for beginners but delivers professional-quality outcomes. Let's get started on creating cutlets that will impress everyone at the table.
Ingredients for baked beef cutlet
Restaurant-quality cutlets start with these twelve carefully chosen ingredients for perfect texture and flavor.
| Ingredient | Amount | Notes |
|---|---|---|
| Beef Cutlets (Sirloin or Ribeye) 🥩 | 4 whole | Even thickness, 1/2-inch preferred |
| Large Eggs 🥚 | 2 whole | Room temperature for even coating |
| All-Purpose Flour 🌾 | ½ cup | Sifted for smooth texture |
| Crushed Cornflakes 🍞 | 1 cup | Lightly toasted for extra crunch |
| Unsalted Butter 🧈 | ½ cup | Melted, for brushing |
| Garlic Cloves 🧄 | 4 cloves | Minced for seasoning |
| Fresh Parsley 🌿 | ¼ cup | Chopped, for garnish |
| Diamond Crystal Kosher Salt 🧂 | 1 ½ tsp | Adjust to taste |
| Freshly Ground Black Pepper 🌶️ | ½ tsp | Coarse grind preferred |
| Olive Oil 🫒 | 2 tbsp | Extra-virgin for flavor |
| Dried Thyme 🌿 | ½ tsp | Or 1 tsp fresh thyme |
| Lemon Zest 🍋 | 1 tsp | Brightens flavor profile |
The beef selection is critical—sirloin or ribeye with even 1/2-inch thickness delivers consistent results. Most butchers will cut them to size if you ask, or use a meat mallet to pound thicker pieces. For best flavor, source from Whole Foods or your local butcher where they can recommend the freshest cuts. The cornflakes should be lightly toasted in a dry pan for 2-3 minutes before crushing to enhance their crunch. I always buy the plain, unsweetened variety at Costco for bulk savings, but any brand works. Freshness matters most with the parsley—look for vibrant green stems at the grocery store's produce section, as wilted leaves lose their flavor quickly.
No crushed cornflakes? Panko breadcrumbs make an excellent substitute, though they'll be slightly less crispy. Running short on thyme? Dried oregano at half the amount provides a similar earthy note. The olive oil should be extra-virgin with a peppery finish—California Olive Ranch is my go-to for consistent quality. For the egg wash, room temperature eggs coat more evenly than cold ones, so take them out 30 minutes before using. The lemon zest can be substituted with 1 tsp dried lemon peel if fresh isn't available, though the flavor will be more subtle. If you're using pre-minced garlic, reduce to 2 cloves since jarred garlic has more moisture.
Store the beef cutlets in an airtight container with parchment paper between layers for up to 2 days in the fridge. The crushed cornflakes will stay fresh for 1 week in a sealed container, while dried herbs like thyme keep for 6 months in a cool, dark place. For meal prep, assemble the cutlets completely (coated and ready to bake) and refrigerate for 24 hours before baking—this actually improves the crust texture. Leftovers keep for 3 days in the fridge or can be frozen for 3 months when wrapped tightly in plastic wrap and foil. Reheat in a 350°F oven for 10-12 minutes until crispy again.
Why You'll Love This Recipe
- No-Fry Crispy Magic: I swear by this method—no deep fryer, no greasy mess, just that golden crunch from crushed cornflakes and butter. The secret’s in baking until the edges are shatteringly crisp while the inside stays juicy, like a steakhouse cutlet without the fuss.
- Butter-Kissed Comfort: That rich, buttery flavor from the melted butter basting the cutlets? It’s pure satisfaction in every bite. The cornflakes add a toasty crunch that balances the tender beef, making it taste like a restaurant dish—even when I’m too tired to cook.
- Weeknight & Party Star: Between us, this is my go-to for busy nights and when company drops by. Serve it with mashed potatoes for a hearty dinner or slice it thin for sliders at game day—it works everywhere, every time.
- Leftovers That Don’t Suffer: Honestly, I make extra because reheated cutlets are still amazing. The crust stays crispy, and the beef doesn’t dry out, so they’re perfect for lunch the next day. Plus, using affordable sirloin keeps it budget-friendly without sacrificing taste.
Step-by-step instructions for baked beef cutlet recipe
Master the art of achieving a crispy crust and juicy interior without traditional breading.
Prepare the Beef Cutlets for Even Cooking
Begin by ensuring your 4 whole beef cutlets (sirloin or ribeye) are uniformly ½-inch thick. If needed, gently pound thicker sections with a meat mallet until consistent. Pat each cutlet dry with paper towels—this critical step prevents steam from forming between the meat and crust, which would otherwise inhibit browning.
Season both sides generously with 1.5 teaspoons Diamond Crystal kosher salt and 0.5 teaspoon freshly ground black pepper, pressing the seasoning into the meat. Let the seasoned cutlets rest uncovered on a wire rack for 15 minutes at room temperature. This allows the salt to penetrate and the meat to cook more evenly in the oven.
Create the Crispy Cornflake Coating
In a shallow dish, combine 0.5 cup all-purpose flour (sifted for smoothness) and 0.5 teaspoon dried thyme. In another dish, beat the 2 whole large eggs (room temperature) until just combined. In a third dish, place 1 cup crushed cornflakes (lightly toasted in a dry skillet for 2-3 minutes to enhance crunch).
Dip each seasoned cutlet first into the flour mixture, tapping off excess. Then coat in the beaten eggs, allowing any excess to drip off. Finally, press the cutlet into the crushed cornflakes, ensuring full coverage. The cornflakes will create a crispy, breadcrumb-free crust while maintaining a light texture. Work quickly to prevent the coating from becoming soggy.
Preheat and Prepare the Baking Setup
Preheat your oven to 400°F with a rack positioned in the middle position. Line a baking sheet with parchment paper and lightly brush it with 2 tablespoons olive oil to prevent sticking. Melt the 0.5 cup unsalted butter in a small saucepan over low heat, then stir in the 4 minced garlic cloves and 1 teaspoon lemon zest until fragrant. Set aside for brushing later.
Arrange the coated cutlets on the prepared baking sheet, spacing them 1 inch apart to allow for even browning. Brush each cutlet lightly with the garlic butter mixture. This step not only adds flavor but also helps create a golden crust. Let the cutlets rest on the baking sheet for 5 minutes before baking to allow the coating to adhere fully.
Bake to Crispy Perfection
Bake the cutlets for 12-15 minutes until the edges are deep golden brown and the internal temperature reaches 145°F (measured with an instant-read thermometer). The cornflake crust should be crispy, while the meat beneath should remain tender and juicy. Avoid opening the oven door during baking to maintain consistent heat and prevent steam from forming.
Once baked, transfer the cutlets to a wire rack and let them rest for 5 minutes. This resting period allows the juices to redistribute, ensuring each bite is moist and flavorful. Garnish each cutlet with 0.25 cup chopped fresh parsley before serving to add a pop of color and freshness.
Serve Immediately for Maximum Enjoyment
Serve the cutlets immediately while the crust remains crispy and the meat stays juicy. The garlic butter will have infused into the crust, adding a rich, aromatic depth to each bite. Pair with a simple arugula salad dressed with lemon vinaigrette or roasted seasonal vegetables to complement the dish's bold flavors.
This method delivers a restaurant-quality result without the mess of traditional breading. The cornflake crust provides the perfect balance of texture—crispy on the outside, tender on the inside—while the garlic butter ensures every bite is infused with flavor. Enjoy your perfectly baked beef cutlets!
Pro Tips For Making Baked Beef Cutlet
- Pound Thin, Not Flat: I used to smash these cutlets with a rolling pin like I was trying to make paper—big mistake. Instead, use a meat mallet or heavy pan to tap them evenly to about ¼-inch thickness. Too thick, and they’ll stay tough; too thin, and they’ll dry out before the crust forms.
- Dry Cornflakes, Not Damp: Skip the crushed cornflakes straight from the box—they’ll clump and make a soggy crust. Toast them in a dry pan for 2-3 minutes until they’re golden and smell nutty. Let them cool completely before coating, or the butter will steam instead of brown.
- Bake in Batches: Crowd the pan, and you’ll end up with uneven cooking and a sad, greasy mess. Work in two batches max, spacing them ½-inch apart. The first batch will cook faster, so rotate the tray halfway if your oven runs hot.
- Rest Before Baking: I learned this the hard way—skipping the rest means juices pool on the bottom, making the crust soggy. After breading, let the cutlets sit on a wire rack for 10 minutes. The flour will firm up, and the crust will stay crisp instead of turning into a gluey pancake.
Common mistakes when making this dish
Skipping the Resting Step
One of the most common mistakes is skipping the 15-minute room-temperature resting period for the seasoned cutlets. This step allows the salt to penetrate the meat and ensures more even cooking. Without it, the outer edges may overcook while the center stays underdone. I've seen cutlets turn out unevenly when rushed—always let them rest! 🌡️
Uneven Thickness
Using cutlets with inconsistent thickness leads to uneven cooking—some pieces will be overdone while others remain undercooked. Aim for a uniform ½-inch thickness throughout. If your cutlets vary, use a meat mallet to gently pound thicker sections. I recommend measuring with a ruler to ensure precision before seasoning.
Overcrowding the Pan
Placing cutlets too close together on the baking sheet causes steam buildup, which prevents proper browning and creates a soggy crust. Always space them 1 inch apart for even airflow. I once baked four cutlets on a crowded sheet and ended up with pale, limp results—never again!
Using Cold Ingredients
Cold eggs and butter can make the coating stick poorly and create a greasy crust. Always use room-temperature eggs and melted butter. I keep my eggs out for 30 minutes before using them, and I melt the butter gently over low heat to preserve its flavor. Cold ingredients disrupt the perfect texture balance.
Opening the Oven Door
Peeking at your cutlets too often causes temperature fluctuations that extend cooking time and prevent proper browning. Once they're in the oven, resist the urge to check until the 12-15 minutes are up. I've learned this lesson the hard way—patience is key for that perfect golden crust! 🔥
Skipping the Resting After Baking
Transferring cutlets straight from the oven to the plate causes juices to pool at the bottom, making them less tender. Always let them rest on a wire rack for 5 minutes before serving. This simple step redistributes the juices, ensuring every bite is moist and flavorful. I've had guests comment on how "juicy" the cutlets are—this resting time makes all the difference!
Nutrition facts
Frequently asked questions about baked beef cutlets
Can I use this recipe with different beef cuts?
Yes! While sirloin and ribeye work perfectly, you can also use tenderloin or even top round cutlets. The key is selecting cuts with good marbling for flavor and tenderness. For leaner cuts like top round, consider brining for 30 minutes before coating to prevent dryness. Just ensure all pieces are ½-inch thick for even cooking.
How do I prevent the cornflake crust from getting soggy?
Work quickly when coating the cutlets and avoid letting the cornflakes sit in the egg wash. Also, bake immediately after coating rather than refrigerating first. For extra insurance, toast the cornflakes for 2-3 minutes before crushing to remove any moisture. If you need to prep ahead, assemble the cutlets (coated but unbaked) and refrigerate for up to 4 hours before baking.
What's the best way to reheat leftover cutlets?
Reheat in a 350°F oven for 10-12 minutes on a wire rack to restore crispiness. Avoid microwaving as it makes the crust rubbery. For extra crunch, brush with melted butter before reheating. Leftovers keep for 3 days in the fridge when stored in an airtight container with parchment between layers.
Can I make this recipe gluten-free?
Replace the all-purpose flour with ½ cup gluten-free flour blend and use gluten-free cornflakes. For best results, add ½ teaspoon xanthan gum to the flour mixture to improve binding. The cornflake crust will still be crispy, though slightly less sturdy than with traditional flour.
What sides pair best with these cutlets?
Classic options include creamy mashed potatoes, roasted asparagus, or a fresh arugula salad with lemon vinaigrette. For a heartier meal, serve with garlic roasted potatoes and steamed green beans. The crispy cutlets also work wonderfully with a simple tomato-basil sauce for dipping or as a topping for open-faced sandwiches.