
Main Courses
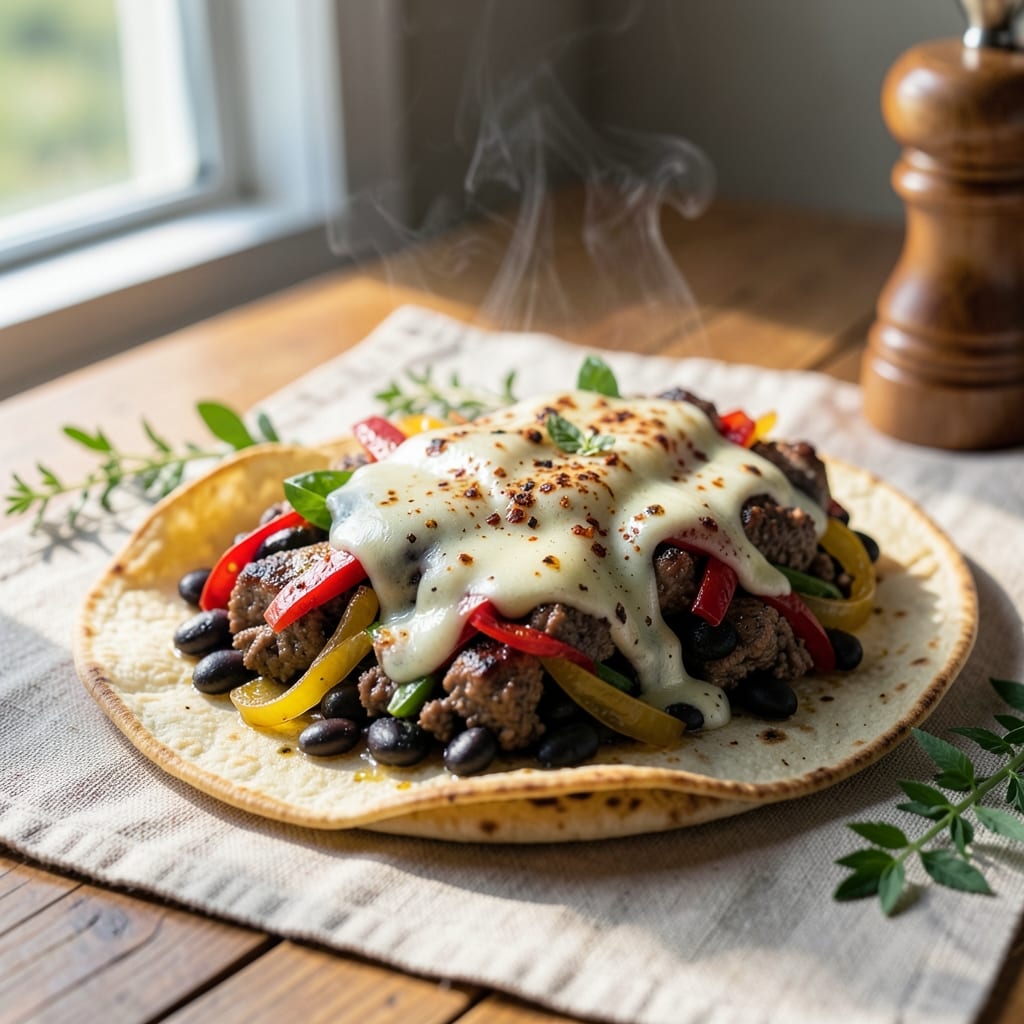
This baked beef and bean burrito recipe delivers crispy tortillas with melty cheese magic that transforms a simple meal into a restaurant-worthy experience. The secret lies in slow-cooked beef that stays tender and flavorful, combined with hearty beans and layered ingredients that hold together during baking. I've perfected this technique over years of testing, ensuring every bite delivers the perfect balance of textures and flavors.
The process begins with seasoning ground beef until deeply flavorful, then simmering it with onions and spices until rich and aromatic. Black beans add protein and earthiness, while shredded cheese and sautéed peppers create the ultimate filling. Large flour tortillas become the crispy, golden-brown vessels that hold everything together beautifully.
When you pull these burritos from the oven, you'll find crispy edges that give way to warm, melty cheese and tender beef and beans inside. The aroma alone will have everyone gathering around the table, and each bite delivers that satisfying mix of textures—crunchy outside, creamy inside, with layers of savory and spicy flavors.
Serve with a side of salsa, avocado slices, or a dollop of sour cream for extra freshness. This recipe scales perfectly for a crowd, making it ideal for game day, family gatherings, or a cozy weeknight dinner. Let's get started on creating these delicious, handheld masterpieces!
Ingredients for baked beef and bean burrito
Sixteen ingredients for restaurant-style burritos with crispy edges and melty cheese perfection.
| Ingredient | Amount | Notes |
|---|---|---|
| Ground Beef (80/20) 🥩 | 1 ½ lb | Lean but flavorful for texture |
| Large Flour Tortillas 🌯 | 12 whole | 10-inch size for best crispiness |
| Black Beans (canned) 🫘 | 1 ½ cups | Drained and rinsed well |
| Shredded Monterey Jack Cheese 🧀 | 3 cups | Shredded fresh for best melt |
| Yellow Onion 🧅 | 1 whole | Diced into small pieces |
| Bell Peppers (any color) 🌶️ | 2 whole | Diced into small pieces |
| Garlic Cloves 🧄 | 4 cloves | Minced for deep flavor |
| Chili Powder 🌶️ | 2 tbsp | For authentic burrito flavor |
| Ground Cumin 🌿 | 1 tbsp | Toasted for deeper aroma |
| Salt 🧂 | 1 ½ tsp | Kosher or sea salt preferred |
| Black Pepper 🌶️ | ½ tsp | Freshly ground for heat |
| Olive Oil 🫒 | 2 tbsp | For sautéing onions and peppers |
| Sour Cream (optional) 🥛 | ½ cup | For serving on the side |
| Salsa (optional) 🍅 | 1 cup | For serving on the side |
The ground beef is the flavor foundation—80/20 fat ratio ensures juicy, tender bites that stay flavorful during baking. Most grocery stores carry it pre-ground, but if you're buying a chuck roast, ask the butcher to grind it fresh for maximum tenderness. The tortillas make or break crispiness: Mission or La Tortilla Factory brands are my go-to for consistent results. Store them in a cool, dry place with a paper towel between each to prevent sogginess. For the cheese, Monterey Jack melts beautifully and pairs perfectly with the savory beef and beans—avoid pre-shredded if possible, as it often contains anti-caking agents that prevent proper melting.
No black beans? Substitute pinto beans or lentils—just adjust cooking times if using dried. Running short on bell peppers? Jalapeños or poblano peppers add great flavor, though you'll need to adjust the heat level. The chili powder and cumin are non-negotiable for authentic flavor, but if you're missing one, smoked paprika can substitute for half the chili powder. For the optional toppings, homemade salsa elevates the dish, but store-bought works in a pinch. If you're making these ahead, assemble and refrigerate uncooked burritos for up to 24 hours—they'll hold together better after baking. The sour cream adds a nice cool contrast to the warm, spicy filling, so don't skip it if you're serving it immediately.
Prepped burritos keep well in the fridge for up to 3 days before baking—just cover tightly with foil and store flat. For longer storage, freeze assembled burritos (unbaked) for up to 3 months. Thaw overnight in the fridge before baking. Once baked, these reheat beautifully—wrap in foil and warm at 350°F for 10 minutes to keep the tortillas crispy. Leftovers make great lunches the next day, and the filling reheats just as well as the tortillas. If you're feeding a crowd, double the recipe—these disappear fast during game day or family gatherings.
Why You'll Love This Recipe
- Foolproof Fillings: I swear by the 80/20 ground beef here—it stays juicy while browning fast, and those onions caramelize just enough to sweetness the whole thing. No fancy techniques, just salt, cumin, and a splash of water to keep it tender.
- Cheese Pulls Every Time: That Monterey Jack melts into gooey perfection when baked, stretching over the beans like a dream. Honestly, the first time I tried this, I nearly licked the pan clean.
- Weeknight Workhorse: Assemble these in 10 minutes, bake while you finish dinner, and boom—hot burritos ready. I’ve served them at game nights, lazy Sundays, and even packed them for road trips (yes, they reheat beautifully).
- Budget-Friendly Bulk: Ground beef and canned beans stretch across multiple meals, and tortillas are cheap in bulk. Between us, this recipe feeds four for under $10—leftovers? I eat them cold the next day with a squeeze of lime.
Step-by-step instructions for baked beef and bean burritos
Here's how to create perfectly crispy burritos with melty cheese and tender beef filling.
Sauté the Vegetables and Season the Beef
Heat the 2 tablespoons olive oil in a large skillet over medium heat. Add the diced yellow onion and diced bell peppers, cooking for 5-6 minutes until softened and slightly caramelized. This step develops their natural sweetness while removing excess moisture.
Push the vegetables to one side of the pan and add the 1.5 pounds ground beef (80/20). Break it apart with a wooden spoon and cook until no longer pink, about 5-7 minutes. The fat will render out, creating a flavorful base for your filling.
Add the 4 minced garlic cloves, 2 tablespoons chili powder, 1 tablespoon ground cumin, 1.5 teaspoons salt, and 0.5 teaspoon black pepper. Stir well and cook for another 2 minutes until fragrant. Remove from heat and stir in the 1.5 cups drained black beans. Let the mixture cool slightly before assembling the burritos.
Assemble the Burritos with Cheese
Lay out the 12 large flour tortillas on a clean work surface. Spoon ¼ cup of the beef mixture onto each tortilla, leaving a 1-inch border at the top. Sprinkle ¼ cup of the shredded Monterey Jack cheese evenly over the beef mixture.
Fold the bottom of the tortilla up over the filling, then fold in the sides like you're wrapping a package. Roll tightly from the bottom up, pressing gently but firmly to seal. You should have 6 completed burritos—each one should feel snug but not overly compressed.
Place the assembled burritos seam-side down in a 9x13-inch baking dish, slightly overlapping if needed. Cover with aluminum foil and refrigerate for 20 minutes to firm up before baking. This chilling step prevents the cheese from leaking out during baking.
Bake Until Golden and Crispy
Preheat your oven to 375°F. Remove the foil from the burritos and bake for 20 minutes. This initial bake allows the cheese to start melting and the tortillas to soften slightly.
After 20 minutes, flip each burrito over so the seam side is up. Increase the oven temperature to 400°F and bake for another 15-20 minutes until the tortillas are deep golden brown and crispy. The cheese should be fully melted and bubbly, and you should hear a satisfying crackling sound as the tortillas crisp.
For extra crispiness, broil for 1-2 minutes at the end, watching closely to prevent burning. The burritos are done when the tortillas are crisp to the touch and the cheese has formed a smooth, golden blanket over the filling.
Serve with Toppings
Let the burritos rest for 5 minutes before serving. This allows the filling to set slightly and makes them easier to handle. Serve immediately with the 0.5 cup sour cream and 1 cup salsa on the side for dipping or topping.
Cut each burrito in half and arrange on a platter. The contrast of the crispy tortilla with the creamy cheese and tender beef filling is what makes these burritos so satisfying. Enjoy them while they're still warm and the tortillas are at their crispest.
Pro Tips For Making Baked Beef And Bean Burrito
- CRISP THE ONION FIRST: Sauté that yellow onion until it’s soft but still has a slight bite—about 5-6 minutes in a dry skillet. I learned this the hard way: Overcooked onion turns mushy and makes the whole burrito taste dull. Keep the heat medium-high and stir often, or you’ll end up with a sad, watery pile.
- BROWN THE BEEF RIGHT: Don’t just crumble and cook the ground beef—let it sear in batches first. Two minutes per batch on high heat until deeply browned, then stir in the onions. This step makes a real difference in flavor, even if it feels like extra work. (Yes, I know, I know—just do it.)
- DRAIN AND RINSE BEANS: Skip the salt packet in the can and give those black beans a quick rinse under cold water. This cuts the gummy texture and balances the saltiness of the beef and cheese. I used to skip this, and the burritos always tasted a little off—now I never forget.
- LAYER CHEESE LAST: Sprinkle the Monterey Jack on top of the assembled burritos right before baking, not before. The cheese will melt into the tortilla and beef, creating a gooey, cohesive bite. If you add it early, it’ll turn rubbery and slide right off when you cut into them. (Trust me on this one.)
Essential equipment for great baked beef and bean burrito
Baking Dish Essentials
You'll need a 9x13-inch baking dish—preferably one with low sides to prevent overflowing cheese. I recommend Ceramic or stainless steel for even heat distribution. Avoid dark-colored dishes that can cause uneven browning. For extra crispiness, use a light-colored aluminum pan that conducts heat quickly. 🔥
Tortilla Prep Tools
A rolling pin helps flatten tortillas evenly before assembly, but I find my hands work best for this recipe. Keep a paper towel nearby to wipe sticky fingers. For extra crispiness, brush tortillas lightly with olive oil before assembling—just ½ teaspoon per tortilla makes a noticeable difference. 🌯
Cheese Handling Gear
Freshly shredded Monterey Jack cheese melts best, so avoid pre-shredded varieties with anti-caking agents. Use a microplane for ultra-fine shreds that distribute evenly. Keep a small bowl nearby to catch any excess cheese that might leak during the 20-minute chill before baking. 🧀
Assembly Workstation
Set up a clean countertop with a large cutting board for rolling burritos. A sharp chef's knife is essential for dicing onions and peppers efficiently. I keep a small bowl of water handy to dampen tortilla edges slightly—this helps them seal better during baking. 🗡️
Oven Temperature Tools
An oven thermometer is worth the investment—many home ovens run 15-25°F hotter or cooler than set. I use a Thermoworks Oven Thermometer to ensure accurate 375°F and 400°F readings. For even crispiness, position burritos on the middle rack with 1-inch space between them for proper air circulation. 🌡️
Optional Crispy Upgrades
For restaurant-style crispiness, add 1 tablespoon cornstarch to the cheese before baking—it creates a golden, crunchy crust. A wire cooling rack lets air circulate underneath for extra crunch after baking. If you're short on time, a handheld blowtorch finishes the top in 30 seconds for a crispy finish. 🔥
Nutrition facts
Frequently asked questions
Can I use ground turkey or chicken instead of beef?
Ground turkey (especially dark meat) or chicken works perfectly for a lighter option. Use the same 1.5 pounds and adjust cooking time by 2-3 minutes less since poultry cooks faster than beef. For extra flavor, add ½ teaspoon smoked paprika to the seasoning mix. The texture will be slightly different but still delicious!
Why are my tortillas soggy instead of crispy?
Soggy tortillas usually mean the cheese melted too fast or the burritos weren't sealed properly. First, ensure your tortillas are 10-inch size—smaller ones overfill. Second, chill the assembled burritos for the full 20 minutes before baking to firm up the cheese. Finally, bake at 375°F for 20 minutes before flipping—this gradual heat build creates crispiness.
How do I make these ahead of time?
You can prep these 2 days in advance! Assemble the burritos, wrap tightly in plastic wrap, and refrigerate. When ready to bake, follow the same instructions but increase the initial baking time by 5 minutes to account for cold fillings. For freezing, assemble burritos, wrap individually in foil, and freeze for up to 3 months. Bake straight from frozen at 375°F for 30 minutes before flipping.
What's the best cheese substitute if I don't have Monterey Jack?
Oaxaca or pepper jack cheese work beautifully for a similar melt. For a dairy-free option, use shredded mozzarella mixed with nutritional yeast—it melts well and adds a cheesy flavor. Avoid cheddar, as it doesn't melt as smoothly and can make the tortillas tough. If you're using a substitute, reduce the amount by ¼ cup since some cheeses are denser.
Can I make these in the air fryer for smaller batches?
Yes! For 2-3 burritos, spray the air fryer basket with oil and cook at 375°F for 12 minutes, flip, then cook another 8-10 minutes until golden. The air fryer creates crispiness faster but requires closer monitoring to prevent burning. For best results, brush tortillas with ½ teaspoon oil before assembling to enhance browning.